Table of Contents
Advertisement
Quick Links
Advertisement
Table of Contents

Summary of Contents for Titan SNWBLW120
- Page 1 3 PT SNOW BLOWERS SNWBLW120, SNWBLW150, SNWBLW180 170311, 170312, 170313 Operator’s Manual Read the Operator’s Manual entirely. When you see this symbol, the subsequent instructions and warnings are serious follow without exception. Your life and the lives of others depend on it!
-
Page 2: Safety Instructions
WARNING Please read the product manual completely before assembly Check against the parts list to make sure all parts are received Wear proper safety goggles or other protective gears while in assembly Missing parts or questions on assembly? Please call: 800-605-7595 or email: info@palletforks.com SAFETY INSTRUCTIONS Remember, YOU are the key to safety. - Page 3 GENERAL SAFETY INSTRUCTIONS Have a first-aid kit available for use and know how to use it. • Have a fire extinguisher available, stored in a highly visible location, and know how to use • Wear appropriate protective gear. This list may include but is not limited to: •...
-
Page 4: Service And Maintenance Safety
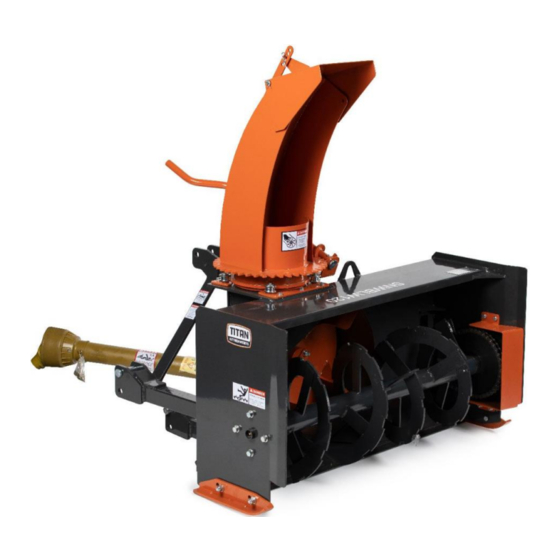
Never have the equipment in operation during transport. • Always travel at a safe speed. • SERVICE AND MAINTENANCE SAFETY Stop engine, set brake, remove ignition key, and wait for all moving parts to stop before • servicing, adjusting, repairing, or unplugging. Support the equipment with blocks or safety stands before working beneath it. - Page 6 PACKAGIN LIST AND ASSEMBLY INSTRUCTIONS 1.1 REMOVE AND CHECK Remove the packing, check goods without defect and omission. FIGURE 1: Your New Snow Blower As It Is Shipped To You FIGURE 2: Packaging frame decomposition...
-
Page 7: Packing List
PACKING RACK LIST: ITEM DESCRIPTION PACKAGE FORM PACKING RACK NONE LOCKNUT M10 CRATE ATTACHMENT REMOVABLE ANGLE STEEL CRATE ATTACHMENT BOLT M10X20 CRATE ATTACHMENT REMOVABLE ANGLE STEEL CRATE ATTACHMENT FIGURE 3: The Snow Blower and Accessory in Package 1.2 PACKING LIST The detailed packing list as the following table 1. - Page 8 The detailed description of Handle& Rear bracket& Screw rod assembly FIGURE 4: Handle& Rear Bracket& Screw Rod Assembly ITEM DESCRIPTION BOLT M8X20 SCREW ROD WELDMENT REAR BRACKET BOLT M6X45 LOCKNUT M6 WASHER 28 FRONT BRACKET PIN SHAFT HANDLE TABLE 2: Handle& Rear bracket& Screw rod assembly List The detailed description of Discharge Chute, Snow Spray Mask, and fittings assembly FIGURE 5: Discharge Chute Assembly&...
-
Page 9: Installation Wizard
ITEM DESCRIPTION DISCHARGE CHUTE WELDMENT RPIN PLAIN WASHER 10 ADJUSTING PLATE HINGE ROD COTTER PIN 2.5X25 SNOW SPRAY MASK WELDMENT TABLE 3: Discharge Chute Assembly, Snow Spray Mask, Fittings Assembly INSTALLATION WIZARD The installation wizard will guide you to finish the final assembly of your new Snow blower. 2.1 TOOL REQUIRED 1/2”... - Page 10 FIGURE 6: Installing Discharge Chute, Snow Spray Mask, and Fittings assembly a. Install the Discharge chute and Snow spray mask with hinge rod. b. Install 2pcs of plain washer 10 and cotter pins onto both side of the hinge rod. c.
- Page 11 STEP 2: Installing Handle, Rear Bracket and Screw Rod assembly a. Locate the front bracket on the position shown in the Figure 8, and then fix it with M10x25 bolt, plain washer 10 and spring washer 10 FIGURE 8: Front bracket installation location b.
- Page 12 d. Insert the handle into the hole at the other end of the Screw rod weldment through the rear bracket hole, adjust the length of the handle, screw in the m8x20 bolt and tighten it. FIGURE 11: Handle installation Note Pay attention to the meshing of welding parts and gear disc.
- Page 13 2.4 Gear Oil Filling Check oil level in gearbox by removing the cap located on the side of the gearbox. Oil should be level with middle side of plug hole. Add oil necessary by removing top cap and side plug. Add oil until it flows from middle side plug hole.
- Page 14 DRIVELINE INSTALLATION AND SHORTENING Included with your snowblower is a 43’’ shear pin PTO driveline. Please follow the below installation instructions. If you find that the driveline is too long, please follow the below shortening instructions to fit the driveline to your tractor. Do not engage tractor PTO while hooking-up and unhooking driveline or stand near a rotating driveline.
-
Page 15: Shorten Driveline Length
SHORTEN DRIVELINE LENGTH 1. Un-hook the driveline from both the tractor PTO shaft and snowblower gearbox. Place driveline aside. 2. Carefully raise the tractor’s three-point arm with attached snowblower until the PTO shaft is level with the snowblower gearbox. - Page 16 3. Pull the outer and inner drivelines apart. 4. Reattach outer driveline to tractor PTO shaft, and inner driveline to the snowblower gearbox. 5. Hold inner and outer drivelines parallel to each other, or as close to parallel as possible: a) Measure 1"...
- Page 17 6. Detach the inner and outer drivelines from the tractor PTO and snowblower gearbox shafts. 7. Measure from end of the inner shield to the mark made in step 5.1 and record as X dimension. 8. Measure from end of the outer shield to the mark made in step 5.2 and note down as Y dimension.
- Page 18 10. Cut off inner shield at the mark made during step 5.1. Cut off the same amount from the end of inner shaft (“X” dimension). 11. Cut off outer shield at the mark made during step 5.2. Cut off the same amount from the end of the outer shaft (“Y”...
- Page 19 14. Reconnect inner and outer drivelines and reattach to tractor and snowblower. The driveline is now able to be extended and retracted smoothly.
-
Page 20: Maintenance And Storage
MAINTENANCE AND STORAGE Regular Maintenance and Lubricate Check/Tighten fasteners after the first • 2 hours of use and every 10 hours. Check and adjust drive chain tension • every 20 hours. Lubricate PTO shaft driveline every 20 • hours. Oil drive chain every 10 hours. •... -
Page 21: Bolt Torque
BOLT TORQUE The tables shown below give correct torque values for various bolts and cap screws. Tighten all bolts to the torques specified unless otherwise noted. Check tightness of bolts periodically, using bolt torque chart as a guide. Replace hardware with the same strength bolt. Torque figures indicated above are valid for non-greased or non-oiled threads and heads otherwise specified. -
Page 22: Troubleshooting
TROUBLESHOOTING PROBLEM SOLUTION • Operate at full throttle (540 PTO rpm), check PTO speed and tractor engine. Not Throwing Snow • Shift transmission to a lower gear. • Discharge chute is plugged. Clear chute. Excessive Vibration • Discharge fan blade is bent or missing. Gearbox Noisy •... - Page 23 SNWBLW SERIES - SNOW BLOWER PARTS LIST...
- Page 24 Lock Nut M10 4300400001 Grease Nipple 7010100032 Bolt M12x45 7030500006 Lock Nut M12 4030400011 Stand 7010300012 Bolt Thin Thread M12x1.5x20 SNWBLW120 7010300011 Bolt Thin Thread M12x1.5x25 SNWBLW150 SNWBLW180 4010000134 Right Snow Plate 4020000137 Bucket Blade 4010000132 Left Snow Plate SSB150.00.00.000-3...
- Page 25 4030400019 Screw Rod Weldment 4010000191 Handle 7040300005 Big Washer 10x30x2.5 7010100044 Bolt M6x45 7030500015 Lock Nut M6 4030400020 Left Skid Plate 4030400021 Right Skid Plate 7010100005 Bolt M12x35 CAUTION: The snow blowers might be slightly different between different production time.
- Page 26 Titan, its insurers, employees, officers, directors, associates, and agents from any and all claims, demands, damages, rights of action, or causes of action, present or future, whether the same be known or unknown, anticipated, or unanticipated, resulting from or arising out of the use of said equipment.
- Page 27 NEED HELP? CONTACT US FIRST. 1-800-605-7595 info@palletworks.com www.palletforks.com © 2021 Titan Brands...
Need help?
Do you have a question about the SNWBLW120 and is the answer not in the manual?
Questions and answers