Table of Contents
Advertisement
Quick Links
Advertisement
Table of Contents

Related Manuals for ICT PRT-IPIC-POE


Summary of Contents for ICT PRT-IPIC-POE
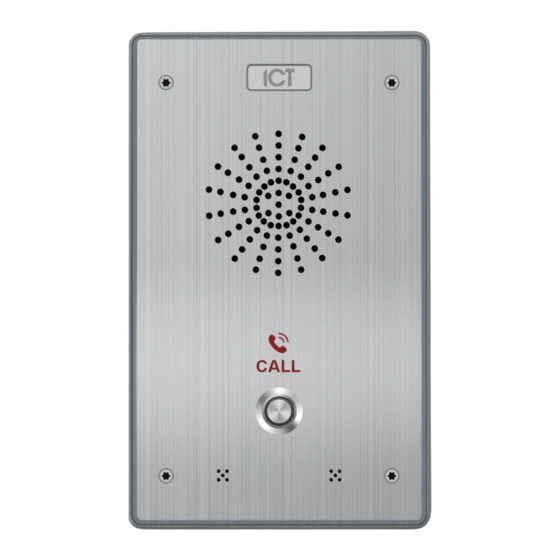
- Page 1 PRT-IPIC-POE Protege Vandal Resistant VoIP Intercom Installation Manual...
- Page 2 Protege® Logo are registered trademarks of Integrated Control Technology Limited. All other brand or product names are trademarks or registered trademarks of their respective holders. Copyright © Integrated Control Technology Limited 2003-2021. All rights reserved. Last Published: 23-Aug-21 10:47 AM PRT-IPIC-POE | Protege Vandal Resistant VoIP Intercom | Installation Manual...
-
Page 3: Table Of Contents
System System | Information System | Account System | Configurations System | Upgrade System | Auto Provision System | FDMS System | Tools Network Network | Basic Network | Advanced PRT-IPIC-POE | Protege Vandal Resistant VoIP Intercom | Installation Manual... - Page 4 Configuring the Onboard Input as a Protege Input Adding the Intercom Setup in Protege GX Adding the Intercom Setup in Protege WX Trigger a Protege Input with Your Phone Mechanical Diagram Wall Mounting Template Technical Specifications PRT-IPIC-POE | Protege Vandal Resistant VoIP Intercom | Installation Manual...
- Page 5 New Zealand and Australia European Standards FCC Compliance Statements Industry Canada Statement Disclaimer and Warranty PRT-IPIC-POE | Protege Vandal Resistant VoIP Intercom | Installation Manual...
-
Page 6: Introduction
⦁ All installations are required to meet local wiring regulations and standards. There are no user serviceable parts. If the intercom requires servicing or repair, return the unit to ICT. PRT-IPIC-POE | Protege Vandal Resistant VoIP Intercom | Installation Manual... -
Page 7: Power Requirements
WAN port on the intercom PCB board. For more information, see Connections (page 9). Internet Mobile Phone (ip SIP Server audio/video calls) Intercom Intercom IP Desk with camera Optional Entry Station (Optional Phone (Optional Controller Poe) Poe) PRT-IPIC-POE | Protege Vandal Resistant VoIP Intercom | Installation Manual... -
Page 8: Supported Protocols
RTP/SRTP ⦁ Audio Encodings: ⦁ G.711U (PCMU) G.711A (PCMA) G.722 G.723.1 G.726-32 G.729AB SIP Servers The intercom supports SIP servers that comply with SIP protocol standards including Asterisk and 3CX. PRT-IPIC-POE | Protege Vandal Resistant VoIP Intercom | Installation Manual... -
Page 9: Connections
The relay outputs can switch to a maximum capacity of 24V DC 1A. Exceeding this will damage the output. Ports WAN Port An RJ45 network port for ethernet (including PoE - Power Over Ethernet connection). PRT-IPIC-POE | Protege Vandal Resistant VoIP Intercom | Installation Manual... -
Page 10: Mounting And Installation
Using the 4 TA5 40mm screws, mount the back panel to the wall. Note: the intercom is equipped with a secondary cable hole at the bottom of the back panel. PRT-IPIC-POE | Protege Vandal Resistant VoIP Intercom | Installation Manual... - Page 11 Completion Attach the front panel carefully into the back panel and replace the 4 screws, ensuring the screws have been tightened correctly and the panels are secure to ensure waterproofing. PRT-IPIC-POE | Protege Vandal Resistant VoIP Intercom | Installation Manual...
-
Page 12: Hardware Configuration
IP address. Connect to the web interface by entering the IP address into the address bar of your web browser. Log in when prompted: User: admin, Password: admin PRT-IPIC-POE | Protege Vandal Resistant VoIP Intercom | Installation Manual... -
Page 13: Defaulting The Intercom
Remember to revert the PC back to its original IP address if changed at Step 2. Defaulting the intercom will reset all settings and set the IP address to the default (192.168.1.128) PRT-IPIC-POE | Protege Vandal Resistant VoIP Intercom | Installation Manual... -
Page 14: Programming The Intercom
Protege system or to be set up for standalone operation. Note: The web interface contains a number of intercom features and configuration settings that are not supported by ICT or the integration, and as such those options are not documented here. Accessing the Web Interface Open a web browser and enter the default IP address of the intercom: 192.168.1.128... -
Page 15: Initial Setup Of The Intercom
In the Number 1 field enter the first number for the intercom to call when the call button is pressed. Select the SIP Line for connection. Set the Subtype to Speed Dial. Click Apply. For additional call button configurations, refer to the Function Key section (see page 31). PRT-IPIC-POE | Protege Vandal Resistant VoIP Intercom | Installation Manual... -
Page 16: System
Privilege: Select the access level for the new user. Administrators have access to all settings. Users have access to all configuration except user management and SIP server addressing. Click Add to complete adding the new user. PRT-IPIC-POE | Protege Vandal Resistant VoIP Intercom | Installation Manual... -
Page 17: System | Configurations
Click Import to upload the configuration settings to the device. This will take some time as the new configuration is uploaded. The device will then perform a Reboot before prompting you to log in. PRT-IPIC-POE | Protege Vandal Resistant VoIP Intercom | Installation Manual... -
Page 18: System | Upgrade
The device will then perform a Reboot before prompting you to log in. Upgrading Earlier Versions It is not possible to upgrade PRT-IPIC-POE from version 2.4.2041.578 or earlier directly to version 2.6.0.6680 or later. This requires a specialized middle firmware and upgrade procedure. Attempting to upgrade an older version directly to a newer version may render the intercom inoperable. -
Page 19: System | Tools
Some configuration modifications require a system reboot to take effect. Click the Reboot button to perform an immediate reboot on the device. Save the configuration before rebooting. For more information, see System | Configurations (page 17). PRT-IPIC-POE | Protege Vandal Resistant VoIP Intercom | Installation Manual... -
Page 20: Network
Set to Manually configure for manual configuration of Primary DNS Server and Secondary DNS Server ⦁ settings. Service Port Settings Service port settings can be customized to enhance security. These should typically be left at the default settings, unless required by your network administrator. PRT-IPIC-POE | Protege Vandal Resistant VoIP Intercom | Installation Manual... -
Page 21: Network | Advanced
Click Delete to remove the currently loaded HTTPS certification file. ⦁ Network | Advanced This feature is not supported. Network | VPN This feature is not supported. Network | Web Filter This feature is not supported. PRT-IPIC-POE | Protege Vandal Resistant VoIP Intercom | Installation Manual... -
Page 22: Line
Blocking Anonymous Call: Blocks any incoming call without a recognized caller ID. ⦁ Use 182 Response for Call waiting: Set the 182 response for call waiting. ⦁ Anonymous Call Standard: Selectable settings for SIP privacy protocol standards. ⦁ PRT-IPIC-POE | Protege Vandal Resistant VoIP Intercom | Installation Manual... - Page 23 Keep Alive Type: Set the line to use a dummy UDP or SIP Option packet to keep the NAT pinhole open. ⦁ Keep Alive Interval: Set the transmitting interval. ⦁ Sync Clock Time: Synchronize the device time with the server. ⦁ PRT-IPIC-POE | Protege Vandal Resistant VoIP Intercom | Installation Manual...
-
Page 24: Line | Basic Settings
SIP Waiting Time: The waiting time for SIP. This will vary depending on the network. Line | SIP Hotspot This feature is not supported. Line | Blacklist This feature is not supported. PRT-IPIC-POE | Protege Vandal Resistant VoIP Intercom | Installation Manual... -
Page 25: Line | Action Plan
Line | Action Plan This feature is not supported. PRT-IPIC-POE | Protege Vandal Resistant VoIP Intercom | Installation Manual... -
Page 26: Intercom Settings
⦁ MIC Input Volume: Configure the microphone volume level for audio when the intercom calls a phone. ⦁ Broadcast Output Volume: The volume level for audio received in phone calls. PRT-IPIC-POE | Protege Vandal Resistant VoIP Intercom | Installation Manual... -
Page 27: Intercom Settings | Video
Secondary Time Server: Set the address of the secondary time server. ⦁ Select the appropriate Time Zone. ⦁ Set the Resync Period (in seconds) for the device to resynchronize time with the server. ⦁ 60 seconds is the recommended setting. PRT-IPIC-POE | Protege Vandal Resistant VoIP Intercom | Installation Manual... -
Page 28: Intercom Settings | Time Plan
This feature is not supported. Intercom Settings | Trusted Certificates This feature is not supported. Intercom Settings | Device Certificates This feature is not supported. This feature is not supported. PRT-IPIC-POE | Protege Vandal Resistant VoIP Intercom | Installation Manual... -
Page 29: Security Settings
Call State Trigger: The output will be triggered when the call state of the intercom matches the selected state. ⦁ The following options can be selected by moving the required state(s) to the Enabled State list. Talking Ringing Calling Calling and Talking PRT-IPIC-POE | Protege Vandal Resistant VoIP Intercom | Installation Manual... - Page 30 Server Address: The IP or Domain of the server to send SIP messages to when the input or tamper alarm is triggered. ⦁ Message: The message to be sent when the input or tamper alarm is triggered. PRT-IPIC-POE | Protege Vandal Resistant VoIP Intercom | Installation Manual...
-
Page 31: Function Key
Hot Key Dial Mode Select: set to Main-Secondary. Click Apply. Day/Night Operation The intercom can be programmed to call a day number or night number, according to the call time settings. PRT-IPIC-POE | Protege Vandal Resistant VoIP Intercom | Installation Manual... - Page 32 Hot Key Dial Mode Select: set to Day-Night and click Apply. Configure the Day Start Time and Day End Time. Number 1 will be called inside these hours and Number 2 will be called outside these hours. Click Apply. PRT-IPIC-POE | Protege Vandal Resistant VoIP Intercom | Installation Manual...
-
Page 33: Standalone Functionality
To play a tone when the door is unlocked by a code, in the Alert Trigger Setting | Ring section, set the Remote DTMF Trigger to Default. Set the Alarm Ring Duration to the desired duration. Click Apply. PRT-IPIC-POE | Protege Vandal Resistant VoIP Intercom | Installation Manual... -
Page 34: Unlock A Door With Rex
Set the Ring Type to Default to play a tone when a tamper is triggered. Click Apply. The alarm can be stopped via the web interface by clicking Reset Alerting Status. PRT-IPIC-POE | Protege Vandal Resistant VoIP Intercom | Installation Manual... -
Page 35: Protege Integration
Low Level Trigger (Close Trigger). If your input device opens the circuit when activated, set the Trigger Mode to High Level Trigger (Disconnect Trigger). Check Alert message send to server. Click Apply. PRT-IPIC-POE | Protege Vandal Resistant VoIP Intercom | Installation Manual... -
Page 36: Adding The Intercom Setup In Protege Gx
Click Save. Intercom keypad records can also be added via the Expanders Wizard, however it will not Auto Detect intercoms so they will need to be added manually as Additional Modules. PRT-IPIC-POE | Protege Vandal Resistant VoIP Intercom | Installation Manual... -
Page 37: Trigger A Protege Input With Your Phone
To play a tone when the input is triggered, in the Alert Trigger Setting | Ring section, set Remote DTMF Trigger to Default. Set the Alarm Ring Duration to the desired duration. Click Apply. PRT-IPIC-POE | Protege Vandal Resistant VoIP Intercom | Installation Manual... -
Page 38: Mechanical Diagram
Mechanical Diagram PRT-IPIC-POE | Protege Vandal Resistant VoIP Intercom | Installation Manual... -
Page 39: Wall Mounting Template
Wall Mounting Template PRT-IPIC-POE | Protege Vandal Resistant VoIP Intercom | Installation Manual... -
Page 40: Technical Specifications
10% to 95% Integrated Control Technology continually strives to increase the performance of its products. As a result these specifications may change without notice. We recommend consulting our website (www.ict.co) for the latest documentation and product information. PRT-IPIC-POE | Protege Vandal Resistant VoIP Intercom | Installation Manual... -
Page 41: New Zealand And Australia
New Zealand and Australia General Product Statement The RCM compliance label indicates that the supplier of the device asserts that it complies with all applicable standards. PRT-IPIC-POE | Protege Vandal Resistant VoIP Intercom | Installation Manual... -
Page 42: European Standards
Tests EMC (operational) according to EN 55032:2015 Radiated disturbance EN 55032:2015 Power frequency magnetic field immunity tests (EN 61000-4-8) EN50131 In order to comply with EN 50131-1 the following points should be noted: PRT-IPIC-POE | Protege Vandal Resistant VoIP Intercom | Installation Manual... - Page 43 To comply with EN 50131-1 the Bell Cut-Off Time should be programmed between 02 and 15 minutes. EN 50131-1 requires that detector activation LEDs shall only be enabled during Walk Test. This is most conveniently achieved by using detectors with a Remote LED Disable input. PRT-IPIC-POE | Protege Vandal Resistant VoIP Intercom | Installation Manual...
-
Page 44: Fcc Compliance Statements
NOTE: THE GRANTEE IS NOT RESPONSIBLE FOR ANY CHANGES OR MODIFICATIONS NOT EXPRESSLY APPROVED BY THE PARTY RESPONSIBLE FOR COMPLIANCE. SUCH MODIFICATIONS COULD VOID THE USER’S AUTHORITY TO OPERATE THE EQUIPMENT. PRT-IPIC-POE | Protege Vandal Resistant VoIP Intercom | Installation Manual... -
Page 45: Industry Canada Statement
Industry Canada Statement ICES-003 This is a Class A digital device that meets all requirements of the Canadian Interference Causing Equipment Regulations. CAN ICES-3 (A)/NMB-3 (A) PRT-IPIC-POE | Protege Vandal Resistant VoIP Intercom | Installation Manual... -
Page 46: Disclaimer And Warranty
Integrated Control Technology Ltd nor its employees shall be liable under any circumstances to any party in respect of decisions or actions they may make as a result of using this information. In accordance with the ICT policy of enhanced development, design and specifications are subject to change without notice. - Page 47 In accordance with the ICT policy of enhanced development, design and specifications are subject to change without notice.
Need help?
Do you have a question about the PRT-IPIC-POE and is the answer not in the manual?
Questions and answers