
Related Manuals for ICARO 2000 Alto

Summary of Contents for ICARO 2000 Alto
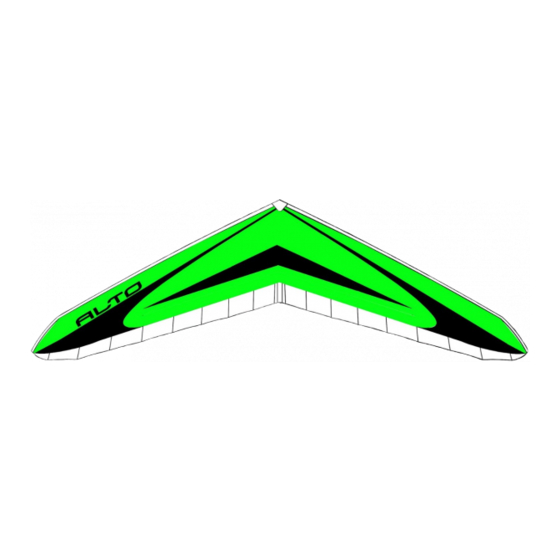
- Page 1 Icaro 2000 Alto – Owner Manual Page 1/ 48 03/03/2022 Alto 2022-1-En Alto Owner Manual...
- Page 2 The Alto will take you smoothly into the air, offering you an unparalleled degree of flying pleasure. Icaro 2000 srl is a company that leads the world in the field of hang gliding construction. The results attained in competition and sales put it in first place amongst hang glider manufacturers.
-
Page 3: Table Of Contents
11. REPAIR AND PERIODIC INSPECTIONS 12. TECHNICAL DATA 13. MAINTENANCE LOG 14. OWNER’S LOG 15. PARTS LIST 16. TRIPTYCH ALTO S 17. ASSEMBLY DRAWINGS ALTO S 18. TRIPTYCH ALTO M 19. ASSEMBLY DRAWINGS ALTO M 20. TRIPTYCH ALTO L 21. ASSEMBLY DRAWINGS ALTO L... -
Page 4: Introduction
Attend a professional school. Fly a glider suited to your skills. In order to fly the Alto you should have an intermediate flight experience and a minimum of 40 flights logged on a beginner hang glider. Fly only when weather conditions are suitable. -
Page 5: Certification And General Restrictions
3. Certification and General Restrictions 3.1 Certification All ICARO 2000 hang gliders have the German certification (DHV). Icaro gliders are rated according to the German DHV as follows: class 1 (beginner pilots) – Piuma, Relax, Mars ... -
Page 6: Transport
Your glider needs to be well protected if it is to be transported by plane. Use a wooden crate, or a stiff cardboard tube. Your dealer or ICARO 2000 can supply these. Always let the airline know the dimensions and weight of your glider, well in advance. -
Page 7: Assembly
5.1.1 Starting Point Important: All the circular-section speed bars manufactured by Icaro 2000 are made with complex curves on several planes. The curves in the horizontal plane create the grips. The curves in the vertical plane are designed in such a way so that when the pilot moves laterally in flight, the distance between pilot and speed bar remains roughly constant. - Page 8 Icaro 2000 Alto – Owner Manual Page # 8/48 03/03/2022 Alto 2022-1-En Note: On our hang gliders there is a small safety cord attached to the shackle on the front wires. This has the effect that if the crossbar is not completely opened, it is impossible to hook the front wires in.
- Page 9 Icaro 2000 Alto – Owner Manual Page # 9/48 03/03/2022 Alto 2022-1-En 5.1.3 Positioning the Aluminum tip (Outer Sprog) Note: In the pictures shown below you will see the battens already inserted in the sail. Remember that it is important – and better – to position the tip before inserting the battens ...
-
Page 10: Flat Assembly
Icaro 2000 Alto – Owner Manual Page # 10/48 03/03/2022 Alto 2022-1-En 5.2 Flat Assembly Position the hang glider on the ground with the nose into the wind. 5.2.1 Starting Point Open the bag, lay down the down tubes and secure the speedbar with the push pins and the small safety plates. -
Page 11: Check List
Icaro 2000 Alto – Owner Manual Page # 11/48 03/03/2022 Alto 2022-1-En 6. Check list Before every flight it is obligatory to perform a systematic check of the glider. 6.1 Assembly Check Start at the nose. Proceed counter-clockwise around the glider checking all listed locations, opening and closing zippers where necessary in order to perform inspections. -
Page 12: Other Equipment Check
Icaro 2000 Alto – Owner Manual Page # 12/48 03/03/2022 Alto 2022-1-En Check that the central zipper is completely closed. A-frame - Lower Corners Speedbar is properly attached. Speedbar pushpins and their safety rings are in place. -
Page 13: Disassembly
Icaro 2000 Alto – Owner Manual Page # 13/48 03/03/2022 Alto 2022-1-En Disassembly The disassembly of the hang glider is carried out in the opposite sequence with respect to assembly; therefore you have to follow the procedure detailed below: 7.1 On the A-Frame In high winds, turn the hang glider so that it is facing a direction about 90°... - Page 14 Icaro 2000 Alto – Owner Manual Page # 14/48 03/03/2022 Alto 2022-1-En Open the wingtip zipper. Grasp the tip-lever by the cord and pull it towards the outside. Unhook the tip lever with the cord and pull it towards the outer side.
- Page 15 Icaro 2000 Alto – Owner Manual Page # 15/48 03/03/2022 Alto 2022-1-En Holding the extremity of the wing in this position, take the sail by the trailing edge and lift it upwards until it is tight and from this position roll in the sail, starting from the trailing edge.
- Page 16 Icaro 2000 Alto – Owner Manual Page # 16/48 03/03/2022 Alto 2022-1-En Unhook the nose wires. To do this you have to pull the nose downwards slightly. Pull the nose ribbon so the nose’s hook safety system will open automatically and you can remove the front wire shackle.
-
Page 17: Hints And Tips
This hang glider was designed for pilots of average experience who wish to begin exploring the potential of hang glider flying, with cross country flights of some distance. The Alto will also be enjoyed by pilots of long experience for whom flying is nothing else but pure pleasure. -
Page 18: Flight
8.4 Landing When flying the Alto, the final flare is easily performed under all conditions and VG configurations. Close to the ground though, you should not have more than ⅓ VG on in order to ensure a fast response time for your glider. - Page 19 Icaro 2000 Alto – Owner Manual Page # 19/48 03/03/2022 Alto 2022-1-En If the glider still has a turn tendency Turn the nylon cap not more than 5 mm at a time (measured on circumference of the tube holding the Nylon cup), so that the end of fibreglass tip lowers.
-
Page 20: Trim Speed
It should never be necessary to have to apply a correction greater than 15 mm rotation. If it should be necessary, contact your dealer or Icaro 2000. To fasten the cam in the new position, screw down the screw on the head of the cam, tightening it well. -
Page 21: Reflex And Dihedral
10. Reflex and Dihedral On your Alto the elements that provide its pitch stability are: the luff lines, the tips, fibreglass tips and the wing profile. If the profile is modified, the wing requires a corresponding twist setting in order to restore the glider’s original stability characteristics. -
Page 22: Repair And Periodic Inspections
Check the reflex and dihedral as described in the previous chapter. Every 2 years: Have a complete check performed by an authorized dealer or directly by Icaro 2000. They should replace your side wires. They should remove the sail and carefully check all parts, taking special care for o Tubes must have not: dents, corrosion or other damage. - Page 23 Spare Parts If you need any spare parts, you may contact your Icaro 2000 dealer or our factory directly. If you should ever place an order (by phone, fax or e-mail), keep the following information in mind so we may enhance the quality of our service (fast and accurate) and to avoid ordering the wrong part: ...
-
Page 24: Technical Data
Icaro 2000 Alto – Owner Manual Page # 24/48 03/03/2022 Alto 2022-1-En 12. Technical Data Recommended pilot + harness weight (Min/Max). This is the range of pilot + harness weights (hook-in weight) ideal for the respective hang glider. DHV certification weight (Min/Max). -
Page 25: Maintenance Log
Icaro 2000 Alto – Owner Manual Page # 25/48 03/03/2022 Alto 2022-1-En 13. Maintenance Log Details of any modifications or repairs made to your glider should be entered here. Date Modification or Repair Notes:... -
Page 26: Owner's Log
Icaro 2000 Alto – Owner Manual Page # 26/48 03/03/2022 Alto 2022-1-En 14. Owner’s Log This log provides a history of the glider's ownership. Please make sure details are correct when you sell the glider. Purchase Name Phone Address Date... -
Page 27: Parts List
Icaro 2000 Alto – Owner Manual Page # 27/48 03/03/2022 Alto 2022-1-En 15. Parts list In the following drawings, it is possible to find the name and the code of the parts that form the glider. ASSEMBLY DRAWINGS Junction point... -
Page 28: Triptych Alto S
Icaro 2000 Alto – Owner Manual Page # 28/48 03/03/2022 Alto 2022-1-En 16. Triptych Alto S... -
Page 29: Assembly Drawings Alto S
Icaro 2000 Alto – Owner Manual Page # 29/48 03/03/2022 Alto 2022-1-En 17. Assembly drawings Alto S... - Page 30 Icaro 2000 Alto – Owner Manual Page # 30/48 03/03/2022 Alto 2022-1-En...
- Page 31 Icaro 2000 Alto – Owner Manual Page # 31/48 03/03/2022 Alto 2022-1-En...
- Page 32 Icaro 2000 Alto – Owner Manual Page # 32/48 03/03/2022 Alto 2022-1-En...
- Page 33 Icaro 2000 Alto – Owner Manual Page # 33/48 03/03/2022 Alto 2022-1-En...
- Page 34 Icaro 2000 Alto – Owner Manual Page # 34/48 03/03/2022 Alto 2022-1-En...
-
Page 35: Triptych Alto M
Icaro 2000 Alto – Owner Manual Page # 35/48 03/03/2022 Alto 2022-1-En 18. Triptych Alto M... -
Page 36: Assembly Drawings Alto M
Icaro 2000 Alto – Owner Manual Page # 36/48 03/03/2022 Alto 2022-1-En 19. Assembly drawings Alto M... - Page 37 Icaro 2000 Alto – Owner Manual Page # 37/48 03/03/2022 Alto 2022-1-En...
- Page 38 Icaro 2000 Alto – Owner Manual Page # 38/48 03/03/2022 Alto 2022-1-En...
- Page 39 Icaro 2000 Alto – Owner Manual Page # 39/48 03/03/2022 Alto 2022-1-En...
- Page 40 Icaro 2000 Alto – Owner Manual Page # 40/48 03/03/2022 Alto 2022-1-En...
- Page 41 Icaro 2000 Alto – Owner Manual Page # 41/48 03/03/2022 Alto 2022-1-En...
-
Page 42: Triptych Alto L
Icaro 2000 Alto – Owner Manual Page # 42/48 03/03/2022 Alto 2022-1-En 20. Triptych Alto L... -
Page 43: Assembly Drawings Alto L
Icaro 2000 Alto – Owner Manual Page # 43/48 03/03/2022 Alto 2022-1-En 21. Assembly drawings Alto L... - Page 44 Icaro 2000 Alto – Owner Manual Page # 44/48 03/03/2022 Alto 2022-1-En...
- Page 45 Icaro 2000 Alto – Owner Manual Page # 45/48 03/03/2022 Alto 2022-1-En...
- Page 46 Icaro 2000 Alto – Owner Manual Page # 46/48 03/03/2022 Alto 2022-1-En...
- Page 47 Icaro 2000 Alto – Owner Manual Page # 47/48 03/03/2022 Alto 2022-1-En...
- Page 48 Icaro 2000 Alto – Owner Manual Page # 48/48 03/03/2022 Alto 2022-1-En...
Need help?
Do you have a question about the Alto and is the answer not in the manual?
Questions and answers