Advertisement
Quick Links
Advertisement

Subscribe to Our Youtube Channel
Related Manuals for Costway EP23889US


Summary of Contents for Costway EP23889US
- Page 1 USER'S MANUAL Cordless vacuum cleaner EP23889US...
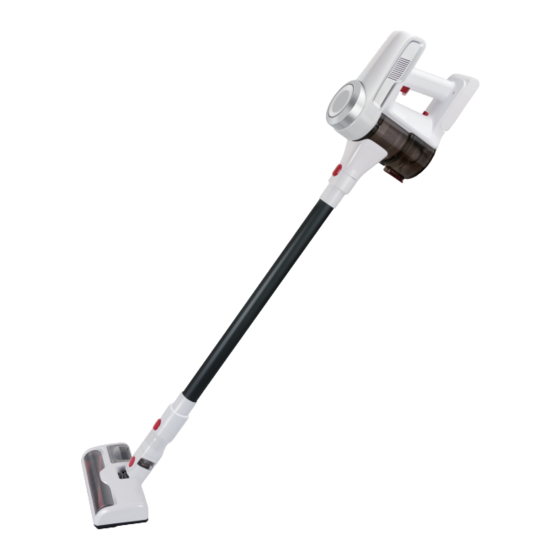
- Page 2 Installation method of handstick vacuum cleaner ※ Vacuum Cleaner Components List Main Unit Metal Rod Long Crevice Tool 2-in-1 Multi Brush Bed Cleaning Nozzle Motorized Floor Head Wall-Mounting Base Adaptor ※ Installation before using 1. Attach the Metal Rod to the Motorized Floor Head as below .
- Page 3 2. Connect the Metal Rod to the Main Unit as below. ※ Instruction of Battery Charging If the blue power indictor keeps flashing, it means battery is short of power.Please connect the Main Unit to the power supply for charging. 1.
- Page 4 △Warning: Please note that DC Jack on the Main Unit can not be wet with water, which will cause the Main Unit damaged. Please do not charge or store the machine at temperatures below 32℉ or above 104℉. Otherwise, which will cause the performance reduced. Plese note that it is normal that the body of the adaptor will be warm during the the process of charging.
- Page 5 ※ Instruction of Use together with Main Unit and Motorized Floor Head 1. The Metal Rod can be flexibly rotated left and right, back and forth during normal use. 2. When cleaning the bottom of the table or other narrow areas, avoid getting stuck in the furniture and damaging the swivel shaft with too much force.
- Page 6 ※ Instruction of Use (Dumping and Cleaning dust bin) 1. Please press the button on the dust bin to release the dust. Max line Press 2. Turn the trim cover counterclockwise to the open position, then vertically take out the filter, the cyclone cover and the cyclone pipe in proper order as below.
- Page 7 4. Please rotate the cyclone cover clockwise and remove it according to the direction as below. Take out Clockwise rotation 5. After the components are washed and dried completely, please assemble them back to the dust bin. Please note that Step 2 to Step 4 do not be required for every use .
- Page 8 ※ Instruction of Use ( Wall-Mounting Base Assembly) 1. Screw the bolt into the wall according to the dimension in the diagram (mm). Furniture Screw Expansion Bolt 50.0 Screw Options: 4*28 Self-tapping screw only for wood wall; 6*30 Expansion Bolt is needed together with 4*28 self-tapping screw for concrete wall.
- Page 9 ※ Instruction of Use (Battery Pack Change) 1. Please press the dust bin release button, then remove the dust cup according to the direction as below. press Take out 2. Twist-off 3 screws on the Main Unit, and then take out the battery Pack . Screw2 Screw3 Local...
-
Page 10: Troubles Shooting
△Warnings: 1.The machine can be only used indoors. Please read the Instruction Manual carefully before using it. 2.The machine can be used on flat hard floor and thin carpet. Please do not use it on uneven floor. 3.The machine can be used for particles or dust less than 10mm of diameter. 4.The machine cannot be used for cleaning liquids, organic solvents, construction wastes or metal wastes. - Page 11 EP23889US Cordless Vacuum Cleaner WARNING: Failure to follow these directions and warnings can result in serious injury and/or product damage. △ This unit is suitable for tile, wood floor and thin carpet, not suitable for thick carpet. △ Please do not charge or store the machine at temperatures below 32℉ or above 104℉...
- Page 12 Great products so far February 24, 2018 Great product so far. Fast delivery, easy setup, and working without any issues. With your inspiring rating, Costway will be more consistent to offer you EASY SHOPPING EXPERIENCE, GOOD PRODUCTS and EFFICIENT SERVICE! US office:Fontana...
Need help?
Do you have a question about the EP23889US and is the answer not in the manual?
Questions and answers
Could you tell me the specs of the battery charger for this unit so I don't use the wrong one and start a fire
The battery charger for the Costway EP23889US has the following specifications:
- Output voltage: 26.2V DC
- Output current: 0.5A (500mA)
- Type: Class 2 Switching Power Supply
- Compatible with: 21.6V 2.0Ah Li-ion rechargeable battery pack
- Power: 110W
- Connector: DC jack (must be kept dry)
This answer is automatically generated