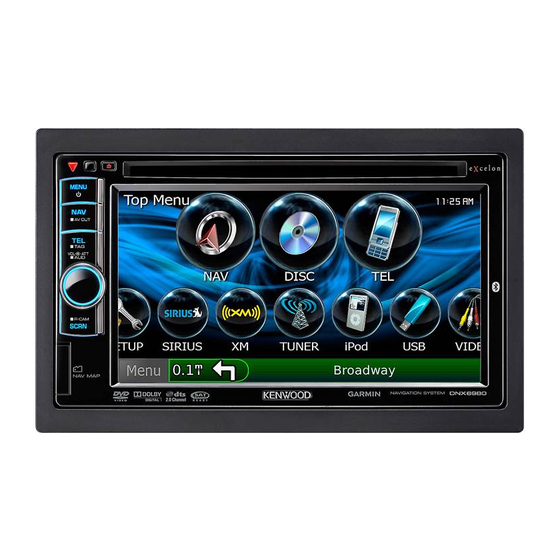
Kenwood DNX6040EX Instruction Manual
Gps navigation system
Hide thumbs
Also See for DNX6040EX:
- Quick start manual (177 pages) ,
- Service manual (122 pages) ,
- Instruction manual (96 pages)
Table of Contents
Advertisement
Before reading this manual, click the button below to check the latest edition and the
modified pages.
Take the time to read through this instruction manual.
Familiarity with installation and operation procedures will help you obtain the best performance from your new
GPS Navigation System.
For your records
Record the serial number, found on the back of the unit, in the spaces designated on the warranty card, and in the space
provided below. Refer to the model and serial numbers whenever you call upon your Kenwood dealer for information or
service on the product.
Model DNX7180/ DNX7480BT/ DNX6980/ DNX6180/ DNX6040EX/ DNX6480BT/ DNX5180 Serial number
US Residence Only
Register your Kenwood product at www.Kenwoodusa.com
© 2010 Kenwood Corporation All Rights Reserved.
DNX7180
DNX7480BT
DNX6980
DNX6180
DNX6040EX
DNX6480BT
DNX5180
GPS NAVIGATION SYSTEM
INSTRUCTION MANUAL
Check the latest edition
Register Online
11DNXMid_IM324_Ref_K_En_00 (K/K2/R)
Advertisement
Table of Contents

Related Manuals for Kenwood DNX6040EX


Summary of Contents for Kenwood DNX6040EX
- Page 1 Record the serial number, found on the back of the unit, in the spaces designated on the warranty card, and in the space provided below. Refer to the model and serial numbers whenever you call upon your Kenwood dealer for information or service on the product.
- Page 2 What Do You Want To Do? Thank you for purchasing the KENWOOD GPS NAVIGATION SYSTEM. In this manual, you will learn various convenient functions of the system. Click the icon of the media you want to play. With one-click, you can jump to the section of each media!
-
Page 3: Table Of Contents
ontents Before Use How To Read This Manual Basic Operations Functions Of The Buttons On The Front Panel __________________ 6 Turning On The Unit _________________ 10 How To Play Media __________________ 13 Operating With The Top Menu Screen ___ 14 Common Operations ________________ 16 Navigation Operation ________________ 18 DVD/Video CD (VCD) - Page 4 Troubleshooting Problems And Solutions ______________ 94 Error Messages _____________________ 95 Resetting The Unit __________________ 97 Appendix Playable Media And Files _____________ 98 Status Bar Indicator Items ____________ 101 Region Codes In The World ___________ 103 DVD Language Codes _______________ 104 Specifications ______________________ 105 About This Unit _____________________ 108...
-
Page 5: Before Use
2 WARNING To prevent injury or fire, take the following precautions: • To prevent a short circuit, never put or leave any metallic objects (such as coins or metal tools) inside the unit. • Do not watch or fix your eyes on the unit’s display when you are driving for any extended period. • If you experience problems during installation, consult your Kenwood dealer. Precautions on using this unit • When you purchase optional accessories, check with your Kenwood dealer to make sure that they work with your model and in your area. • You can select language to display menus, audio file tags, etc. See Language setup (P.72). • The Radio Data System or Radio Broadcast Data System feature won’t work where the service is not supported by any broadcasting station. -
Page 6: How To Read This Manual
ow To Read This Manual Return to the Top page CD, Disc, iPod, USB device Search Operation You can search the music, video, or picture le by some operations. NOTE • If you use a remote controller, you can jump directly to the desired track/ le with entering the track/folder/ le number, play time, etc. -
Page 7: Basic Operations
Return to the Top page Basic Operations asic Operations unctions Of The Buttons On The Front Panel DNX7180/DNX7480BT NOTE • The panels shown in this guide are examples used to provide clear explanations of the operations. For this reason, they may be different from the actual panels. •... - Page 8 Number Name fi (Reset) • If the unit or the connected unit fails to operate properly, the unit returns to factory settings when this button is pressed (P.97). • If the SI function is turned on, this indicator flashes when the vehicle ignition is off (P.72).
- Page 9 • The panels shown in this guide are examples used to provide clear explanations of the operations. For this reason, they may be different from the actual panels. • In this manual, each model name is abbreviated as follows. DNX6980, DNX6180, DNX6040EX, and DNX6480BT: DNX5180: If above icons are showed, read the article applicable to the unit you use.
- Page 10 Number Name fi (Reset) • If the unit or the connected unit fails to operate properly, the unit returns to factory settings when this button is pressed (P.97). • If the SI function is turned on, this indicator flashes when the vehicle ignition is off (P.72).
-
Page 11: Turning On The Unit
Return to the Top page Basic Operations urning On The Unit The method of turning on is different depending on the model. Press the <NAV>, <MENU>, or <TEL> button. The unit is turned on. ● To turn off the unit: ● Press the <MENU> button for 1 second. Press the <MENU> button. The unit is turned on. ● To turn off the unit: ● Press the <MENU> button for 1 second. -
Page 12: Initial Setup
Initial setup Perform this setup when you use this unit first time or when you reset the unit (P.97). Set each item as follows. Language Select the language used for the control screen and setting items. Default is “American English (en)”. 1 Touch [SET]. 2 Touch [2] or [3] to select the desired language. 3 Touch [Enter]. Language setup For detailed operation, see Angle... - Page 13 Return to the Top page Basic Operations Touch [Finish]. NOTE • These settings can be set from the SETUP menu. See Setting Up (P.70).
-
Page 14: How To Play Media
ow To Play Media Music CD and disc media Press the <0> button for 1 second. The panel opens. Insert the disc into the slot. The panel closes automatically. The unit loads the disc and playback starts. ● To eject the disc: ● Press the <0> button when the panel is closed. Insert the disc into the slot. The unit loads the disc and playback starts. -
Page 15: Operating With The Top Menu Screen
Return to the Top page Basic Operations perating With The Top Menu Screen Most functions can be performed from the Top Menu screen. Touch [Menu] on any screen. Top Menu screen appears. From this screen, you can perform the following functions. Function Switch the audio source Enter setup mode Display navigation screen Turn off all audio function Icon etc. etc. NOTE •... - Page 16 Return to the Top page Basic Operations ● Customizing Top Menu screen ● Drag the icon you want to register to the upper line. You can move up to three icons.
-
Page 17: Common Operations
Return to the Top page Basic Operations ommon Operations Introduces the common operations. General There are some functions which can be operated from most screens. List screen There are some common function keys in the list screens of most sources. [Menu] Returns to the Top Menu screen. (RETURN) Returns to previous screen. (common menu key) Touch to display the common menu. The contents of the menu are as follows. Displays the EXT SW Control screen. - Page 18 Return to the Top page Basic Operations Flick scrolling You can scroll the list screen by flicking the screen up/down or right/left.
-
Page 19: Navigation Operation
Return to the Top page Basic Operations avigation Operation For details on the navigation function, please refer to the Navigation Instruction Manual. Display the navigation screen Press the <NAV> button. The navigation screen appears. Control audio from the navigation screen You can control audio sources while the navigation screen is displayed. Also, you can view the navigation information while the source control screen is displayed. Touch the information bar. The navigation screen with audio information appears. - Page 20 Touch [ ] or [ ] in the navigation screen. Touching this area displays the audio screen. : D isplays the navigation and control keys of the current source. ● To return to the full navigation screen: ● Touch [ NOTE • For details on control keys, refer to the instructions in each section. Return to the Top page Basic Operations : D isplays the navigation and current...
-
Page 21: Dvd/Video Cd (Vcd) Operation
Return to the Top page DVD, VCD VD/Video CD (VCD) Operation DVD/VCD Basic Operation Most functions can be controlled from the source control screen and playback screen. NOTE • Set the remote controller mode switch to DVD mode before starting operation, see mode (P.91). • The screen shot below is for DVD. It may be different from the one for VCD. Control screen 1 Information display Displays the following information. - Page 22 5 Sub function menu The following functions can be performed by using keys in this area. • Repeats the current content: Touch [ following sequence; DVD: "title repeat" VCD (PBC On): Does not repeat VCD (PBC Off ): "track repeat" •...
- Page 23 Return to the Top page DVD, VCD Multi function menu The functions of each key are as follows. [4] [¢] Searches the previous/next content. [38] Plays or pauses. ] or [ ] (DVD only) Plays in slow motion forward or backward. Stops playback. When touched twice, the disc is played from the beginning when you play it the next time.
-
Page 24: Dvd Disc Menu Operation
DVD Disc Menu Operation You can set up some items in the DVD-VIDEO disc menu. Touch illustrated area during playback. Menu Control screen appears. Perform desired operation as follows. Displays the top menu Touch [Top].* Displays the menu Touch [Menu].* Displays the previous menu Touch [Return].* Enters selected item Touch [Enter]. -
Page 25: Zoom Control For Dvd And Vcd
Return to the Top page DVD, VCD Touch the key which corresponds to desired setting item. Switches the subtitle language Touch [Subtitle]. Each time you touch this key, language is switched. Switches the audio language Touch [Audio]. Each time you touch this key, language is switched. -
Page 26: Dvd Setup
DVD Setup You can set up the DVD playback functions. NOTE • Each operation in this section can be started from the Top Menu screen. For details, see With The Top Menu Screen (P.14). Touch [ ] in the control screen. Multi function menu appears. Touch [SETUP]. SETUP Menu screen appears. -
Page 27: Language Setup
Return to the Top page DVD, VCD Language setup This setting is for the language used in the menu, subtitle, and voice. You cannot setup these items during DVD playback. Touch [SET] of the desired item; [Menu Language], [Subtitle Language], [Audio Language]. Language Set screen appears. Enter the desired language code and touch [Enter]. Sets the entered language and returns to the DVD SETUP screen. -
Page 28: Disc Setup
Disc setup Performs setup when using disc media. Touch [SET] of [DISC SETUP]. DISC SETUP screen appears. Select an option as follows. CD Read Sets the motion of this unit when a music CD is played. 1 (Default): Automatically recognizes and plays back an audio file disc, a DVD or a music CD. 2: Forcibly plays back a disc as a music CD. -
Page 29: Cd/Audio And Visual Files /Ipod Operation
Return to the Top page CD, Disc, iPod, USB device D/Audio And Visual Files/iPod Operation Music/Video/Picture Basic Operation Most functions can be controlled from the source control screen and playback screen. NOTE • Set the remote controller mode switch to AUD mode before starting operation, see mode (P.91). • To connect iPod to this unit, optional accessory KCA-iP202 is necessary. See the following sections for each source operation. - Page 30 Return to the Top page CD, Disc, iPod, USB device 4 Multi function menu Multi Various functions can be performed by using keys in this area. For details on the menu, see function menu (P.32). 5 Sub function key Touch to display “Sub function menu” (7 in this table). 6 Track information Displays the information of the current track.
- Page 31 Return to the Top page CD, Disc, iPod, USB device USB device and iPod NOTE • The screen shot below is for USB device. It may be different from the one for iPod. Simple Control screen 1 Information display Displays the following information. •...
- Page 32 9 Searching file area (picture/video file only) • Touch to search the next/previous file. • During slide show in USB mode, touching each area searches the next/previous music file. • Scrolling from center of display to left or right performs fast backward or fast forward. To stop fast backward/forward, touch center of the display.
- Page 33 Return to the Top page CD, Disc, iPod, USB device Multi function menu Music CD iPod The following functions can be performed by using keys in this area. ] (Disc media, iPod, USB device only) Searches track/file. For details on search operation, see [4] [¢] Searches the previous/next track/file. [38] Plays or pauses. [7] (music CD and disc media only) Stops playback.
- Page 34 Sub function menu Music CD iPod The following functions can be performed by using keys in this area. Repeats the current track/folder. Each time you touch the key, repeat mode switches in the following sequence; CD, iPod: "track repeat" , "repeat off" Disc media, USB device: "file repeat" ] (USB device and iPod only) Searches track from the album artwork list.
-
Page 35: Search Operation
Return to the Top page CD, Disc, iPod, USB device Search Operation You can search music, video or picture files by the following operations. NOTE • If you use a remote controller, you can jump directly to the desired track/file with entering the track/folder/file number, play time, etc. For details, Direct search mode (P.91). - Page 36 Category search (USB device and iPod only) Touch the desired category from the left part of the screen. The list is sorted by selected category. Touch desired item. Playback starts. NOTE • To narrow the search you can select a letter from the alphabet list in the center of the display.
- Page 37 Return to the Top page CD, Disc, iPod, USB device Folder search (USB device and disc media only) Touch the desired folder. Contents of the folder are displayed in the right area of the screen. Touch desired item from the content list.
- Page 38 Search from album artwork (USB device and iPod only) You can search music files by selecting the album artwork. Touch [ Sub function menu appears. Touch [ Favorite screen appears. Touch desired artwork in the lower line. NOTE • The key in the upper side of the screen functions differently depending on the status.
- Page 39 Return to the Top page CD, Disc, iPod, USB device Favorite list You can create an original playlist of your favorite 10 albums by selecting album artworks. Touch and drag the desired album artwork in the lower line to the upper line. Selected album is registered to the favorite list. NOTE • The added album is placed on the extreme right. •...
-
Page 40: Movie Control
Movie Control You can adjust the movie playback from a disc media. In the playback screen, touch illustrated area. Movie Control screen appears. Perform desired operation as follows. Changes subtitle language Touch [Subtitle]. Changes audio language Touch [Audio]. Exits the menu Touch [Exit]. Return to the Top page CD, Disc, iPod, USB device... -
Page 41: Pandora® Internet Radio Operation
Return to the Top page CD, Disc, iPod, USB device PANDORA® internet radio Operation You can control PANDORA® internet radio on this unit. To enter PANDORA mode, touch [Pandora] icon in the Top Menu screen. NOTE • Install the latest version of the PANDORA® application on your iPhone. (Search for "PANDORA" in the Apple iTunes App Store to find and install the most current version.) Simple Control screen 1 Information display Displays text information of current contents that is being played. - Page 42 Multi function menu The following functions can be performed by using keys in this area. Searches the station. For details on searching, Station list screen (P.41). ] (Thumbs down) Thumbs down to the current song and skip to the next song. [ 38 ] Displays or pauses the content of the current station/channel.
-
Page 43: Usb/Ipod/Divx Setup
Return to the Top page CD, Disc, iPod, USB device USB/iPod/DivX Setup You can perform setup when using USB/ iPod/DivX. NOTE • Each operation in this section can be started from the Top Menu screen. For details, see With The Top Menu Screen (P.14). Touch [ ] in the control screen. -
Page 44: Ipod Setup
iPod setup Set each item as follows. AudioBook Speed Sets the audio book playback speed. Select from [Slow], [Normal] (default), and [Fast]. Wide Screen* Sets Wide Screen. Set [ON] or [OFF] (default). On Screen iPod Sets how to display the information of the iPod. -
Page 45: Radio, Hd Radio™ And Satellite Radio Operation
Return to the Top page Radio, HD Radio, SIRIUS, XM adio, HD Radio™ And Satellite Radio Operation Radio/HD Radio Basic Operation Most functions can be controlled from the source control screen. NOTE • Set the remote controller mode switch to AUD mode before starting operation, see mode (P.91). • Ready to receive HD Radio™ broadcasts when connected to the KTC-HR300/KTC-HR200, sold separately. •... - Page 46 7 Sub function menu The following functions can be performed by using keys in this area. • Switches the band: Touch [AM] or [FM]. • Tunes in a station: Touch [1] [¡]. The method of frequency switching can be changed. See function menu •...
-
Page 47: Sirius/Xm Basic Operation
Return to the Top page Radio, HD Radio, SIRIUS, XM SIRIUS/XM Basic Operation Most functions can be controlled from the source control screen. NOTE • Set the remote controller mode switch to AUD mode before starting operation, see mode (P.91). • To use Satellite radio, the optional accessory is necessary. For SIRIUS tuner, a conversion cable CA-SR20V is necessary. - Page 48 6 Sub function menu The following functions can be performed by using keys in this area. • Switches the band: Touch [BAND]. • Tunes in a station: Touch [4] [¢]. • Tunes in by entering direct number: Touch [ 7 List switching key Touch to switch between the preset list and the information list.
-
Page 49: Memory Operation
Return to the Top page Radio, HD Radio, SIRIUS, XM Memory Operation Auto memory You can store stations with good reception in memory automatically. This function is for tuner only. NOTE • Auto memory terminates when 6 stations are stored or when all stations are tuned in. • The operation ends automatically if you do not operate within 10 seconds. -
Page 50: Search By Program Type
Search by program type (FM tuner only) You can tune to a station with a specific program type when listening to FM. Touch [ ] in the control screen. The multi function menu appears. Touch [PTY] in the multi function menu. TUNER PTY Mode screen appears. Select a program type from the list. Touch [Search]. -
Page 51: Traffic Information (Fm Tuner Only)
Return to the Top page Radio, HD Radio, SIRIUS, XM Category/Channel search (SIRIUS/XM only) You can specify the desired category and select a channel. Touch [ ] in the control screen. The multi function menu appears. Touch [ ] in the multi function menu. List select screen appears. Touch [Preset List] or [Category List]. -
Page 52: Receive Mode (Hd Radio Only)
Receive Mode (HD Radio only) You can set the radio broadcasts receive mode. Touch [ ] in the control screen. The multi function menu appears. Touch [RCV] in the multi function menu. HD RADIO Receive Mode screen appears. Select the receive mode from [Auto], [Digital], and [Analog] using [2] and [3]. -
Page 53: Sirius Setup
Return to the Top page Radio, HD Radio, SIRIUS, XM Checking the memory usage Touch illustrated area. List control screen appears. Touch [ Information list appears. Scroll down the list and confirm “Tagging Information” . NOTE • Up to 50 tags can be registered to this unit. When iPod is connected, the tag information registered to this unit is transferred to the connected iPod. - Page 54 SIRIUS parental code You can set a SIRIUS parental code. Touch [SET] of [Parental Code] in the SIRIUS SETUP screen. Parental Pass 1st screen appears. NOTE • If you have already completed the code registration, [Change] appears instead of [SET]. • If you want to clear the Parental Code, touch [Clear].
- Page 55 Return to the Top page Radio, HD Radio, SIRIUS, XM SIRIUS parental lock You can select the channels to enable SIRIUS Parental Lock function. Touch [ON] of [Parental Lock]. Parental Pass Check screen appears. NOTE SIRIUS parental code (P.53) • You need to complete beforehand. Enter the same code number as you SIRIUS parental code originally input in (P.53)
-
Page 56: Bluetooth Control
AVRCP (Audio/Video Remote Control Profile) NOTE • For the cell-phones verified for compatibility, access the following URL: http://www.kenwood.com/cs/ce/bt/. • The units supporting the Bluetooth function have been certified for conformity with the Bluetooth Standard following the procedure prescribed by Bluetooth SIG. - Page 57 Return to the Top page Bluetooth Operation Registering the Bluetooth Unit Touch [SET] of [Regist New Device]. Searched Device List screen appears. NOTE • A new device cannot be registered if there are 5 registered Bluetooth units. Delete unnecessary Connecting the Bluetooth registration.
-
Page 58: Connecting The Bluetooth Unit
Connecting the Bluetooth unit Touch [SET] of [Paired Device List]. Connection Device List screen appears. Touch the device name you want to connect. Means that the device is a cell-phone. Means that the device is an audio player or cell-phone with audio player. NOTE •... -
Page 59: Playing Bluetooth Audio Device
Return to the Top page Bluetooth Operation Playing Bluetooth Audio Device Bluetooth basic operation Simple Control screen 1 Information display Displays the name of the track information. If the information is not available, device name is displayed. 2 Multi function key Touch to switch the multi function menu. -
Page 60: Using Hands-Free Unit
Using Hands-Free Unit You can use telephone function by connecting the Bluetooth telephone to this unit. Downloading the phonebook If you want to use your phonebook data, it is necessary to download the data from the cell-phone to this unit in advance. Operate the cell-phone to send the phonebook data to this unit. Operate the cell-phone to start the hands-free connection. NOTE • If your cell-phone supports auto-download of phonebook but not downloaded automatically, follow the procedure above to download manually. - Page 61 Return to the Top page Bluetooth Operation Select a dialing method. See the following table for each method. Call by entering a phone number 1 Touch [Direct Number]. 2 Enter a phone number with number keys. 3 Touch [ Call using call records 1 Touch [Incoming Calls], [Outgoing Calls], or [Missed Calls].
-
Page 62: Receiving A Call
Receiving a call Touch [ ] to answer a phone call or ] to reject an incoming call. NOTE • While monitoring the camera view, this screen does not appear even if a call comes in. To display this screen, press the <TEL> button or return the shift knob of car to the driver position. -
Page 63: Bluetooth Setup
Return to the Top page Bluetooth Operation Muting Audio Volume upon Reception of Phone Call (DNX5180 only) When a call is received or you answer a call, the Call Interrupt screen appears and system is paused. The system resumes playing automatically when the call ends and hang up the phone. NOTE • To use the Mute feature, you need to hook up the mute wire to your telephone using a commercial telephone accessory. -
Page 64: Hands-Free Control
Registering Bluetooth unit PIN code You can set the PIN code to the Bluetooth unit. The code is acquired when registering (pairing) from the cell-phone or audio player side. Touch [SET] of [Receiver PIN Code] in the Bluetooth SETUP screen. Receiver PIN Code Set screen appears. Enter a code number and touch [Enter]. NOTE • If you want to cancel the registration, touch [Cancel]. - Page 65 Return to the Top page Bluetooth Operation Setting up the Hands-Free phone Touch [TEL SETUP] in the Hands Free screen. Hands Free SETUP screen appears. Set each item as follows. Auto Response* Sets an automatic response time to pick-up an incoming call.
- Page 66 SMS (Short Message Service) You can use SMS function. Touch [SMS] in the Hands Free screen. SMS Select screen appears. Select desired function from the list. [Create Message] Creates a message. Creating a new message For details, see [Received Message List] Displays the received message list. [Sent Message List] Displays the sent message list.
- Page 67 Return to the Top page Bluetooth Operation Creating a new message Touch [Create Message] in the SMS Select screen. SMS Create Menu screen appears. Touch [ ] or [Direct Number]. Select from the phonebook Touch [ Enter the phone number Touch [Direct Number].
-
Page 68: Phone Number Preset
Using templates You can create a message easily by selecting the desired sentence from the template list. Touch [Create Message] in the SMS Select screen. SMS Create Menu screen appears. Touch [Template]. Template list screen appears. Touch the desired template. Selected template is entered. Phone number preset You can register frequently used phone numbers to this unit. Touch [Preset 1], [Preset 2], or [Preset 3] for 2 seconds in the Hands Free screen. -
Page 69: Voice Registration
Return to the Top page Bluetooth Operation Voice registration You can register your voice for the voice recognition feature which links to the phonebook information. Up to 35 voice memory positions can be registered for each paired cell phone. Touch [Phonebook] in the Hands Free screen. Phonebook screen appears. Select desired name from the list. Touch [Record]. Address Recording screen appears. NOTE • A new voice tag cannot be registered if there are 35 registered voice tags. -
Page 70: Key Word Voice Registration
Key word voice registration You can register your voice for the voice recognition feature which links to the phonebook category information. Touch [SET] of [Key Word] in the Hands Free SETUP screen. Key Word List screen appears. Select desired phone number category from the list and touch [Record]. Key Word Recording screen appears. NOTE •... -
Page 71: Setting Up
Return to the Top page Setting Up etting Up Monitor Screen Setup You can adjust image quality in iPod video, picture file, menu screen, etc. Press the button instructed in each diagram when the desired screen is displayed. Press for 1 second Screen Control screen appears. Adjust each item as follows. Bright/Tint/Color/Contrast/Black/ Sharpness Adjusts each item. -
Page 72: System Setup
System Setup NOTE • Each operation in this section can be started from the multi function menu. Touch [Menu] on any screen. TOP Menu screen appears. Touch [SETUP]. Touch [System]. System Menu screen appears. See the following section for each setting. • Set up the user interface (P.71) • Adjust touch panel... -
Page 73: Touch Panel Adjustment
Return to the Top page Setting Up Language setup Touch [SET] of [Language] in the User Interface screen. Language Setting screen appears. Set each item as follows. Select Mode Selects the mode to select a language. Easy (Default): Selects a language easily. Advanced: Allows you to select languages for respective items.* Language Select... -
Page 74: Ext Sw Setup
EXT SW setup Set up the external switch power mode. Touch [EXT SW] in the System Menu screen. EXT SW screen appears. Set each item as follows. SW1 Name/SW2 Name Sets the name of the external device. Output Pattern Sets the power signal output mode among “Pulse”/“Level”. -
Page 75: Display Setup
Return to the Top page Setting Up Follow the instruction on the screen. Recall Recalls the memorized settings. Memory Memorizes the current settings. Clear Clears the currently memorized settings. Cancel Quits memorization/recalling of settings. Display Setup Touch [Menu] on any screen. Touch [SETUP]. -
Page 76: Panel Color Coordinate
Panel color coordinate You can set the screen and button illumination color. The selectable items differ depending on the unit. Touch [Color] in the Display Menu screen. Color screen appears. Touch [SET] of [Panel Color Coordinate]. Panel Color Coordinate screen appears. NOTE • You can touch [SET] or [Initialize] when [Panel Color Scan] is set to off. •... -
Page 77: Changing Background Image
Return to the Top page Setting Up Changing background image You can load an image from the connected USB device and set it for the background image. Before operating this procedure, it is necessary to connect the device which has the image to load. Touch [Background] in the Display Menu screen. Background screen appears. Touch [STANDBY]. Touch [Memory] of [User Background]. User Background File Select screen appears. Select the image to load. Touch [Enter]. -
Page 78: Navigation Setup
Navigation Setup You can set navigation parameters. Touch [Menu] on any screen. Touch [SETUP]. SETUP Menu screen appears. Touch [Navigation]. Navigation SETUP screen appears. Set each item as follows. Return to the Top page NAV Interrupt Speaker Selects speakers used for voice guidance of the navigation system. -
Page 79: Camera Setup
Return to the Top page Setting Up Camera Setup You can set camera parameters. Touch [Menu] on any screen. Touch [SETUP]. SETUP Menu screen appears. Touch [Camera]. Camera SETUP screen appears. Set each item as follows. Rear Camera* Selects the type of rear camera to use. CMOS-300: When the CMOS-300 with ID 1 set is connected. -
Page 80: Software Information
Software Information Check the software version of this unit. Touch [Menu] on any screen. Touch [SETUP]. SETUP Menu screen appears. Touch [Software]. Software Information screen appears. Confirm the software version. Touch [Update] as necessary. NOTE • For how to update the software, see the relevant update procedure manual which comes with the software. -
Page 81: Av Output Interface Setup
Return to the Top page Setting Up AV Output Interface Setup You can select an AV source to be output at the AV OUTPUT port. Default is “OFF.” Touch [Menu] on any screen. Touch [SETUP]. SETUP Menu screen appears. Touch [AV-OUT]. AV-OUT Interface screen appears. Touch [2] or [3] to set [AV-OUT] to VIDEO, DISC, TV , iPod, or OFF. -
Page 82: Controlling Audio
ontrolling Audio NOTE • Each operation in this section can be started from the multi function menu. You can adjust the various settings such as audio balance or subwoofer level. Touch [Menu] on any screen. Touch [Audio]. Audio screen appears. See the following section for each setting. • Setting audio (P.81) • Controlling audio (P.84) • Controlling equalizer... -
Page 83: Crossover Network Setup
Return to the Top page Audio Setting Up Select a speaker size using [2] and [3]. The speaker size is different depending on the speaker type and the unit. Front OEM, 4 inch, 5 inch, 6-1/2 inch, 6-3/4 inch, 7 inch, 4x6, 5x7, 6x8, 6x9, 7x10 Rear None, OEM, 4 inch, 5 inch, 6-1/2 inch, 6-3/4... - Page 84 Car type (DTA) setup You can setup the car type and speaker network, etc. Touch [Car Type] in the Audio SETUP screen. Car Type screen appears. Select your car type from the list. NOTE • If your car type is selected, the Delay Time Alignment and Equalizer is set automatically (for timing adjustment of sound output for each channel) to have the highest surround effects.
-
Page 85: Controlling General Audio
Return to the Top page Audio Setting Up Car type adjust You can manually set the sound output timing of each channel. In the Car Type screen, touch [Adjust]. Car Type Adjust screen appears. Touch the speaker you wish to adjust and set a delay time using [2] and [3] or slider bar. -
Page 86: Equalizer Control
Set each item as follows. Fader #/Balance # Adjust the volume balance around the touched area. [2] and [3] adjust the right and left volume balance. [5] and [∞] adjust the front and rear volume balance. Volume Offset* Finely adjust the volume of the current source to minimize the difference in volume between different sources. - Page 87 Return to the Top page Audio Setting Up Controlling equalizer manually This setting cannot be performed when you select [iPod] in the Equalizer screen. Touch [EQ] in the Equalizer screen. Touch the screen and set the Graphic Equalizer as desired. Gain level (light green boxed area) Adjust the gain level by touching the each frequency bar.
-
Page 88: Zone Control
Controlling equalizer manually Touch [Tone] in the Equalizer screen. Set each item as follows. FREQ Adjusts the center frequency for each range. Setting values are as follows. Bass: 40Hz/50Hz/60Hz/70Hz/80Hz/100Hz/120 Hz/150Hz (Default is “100Hz. ” ) Middle: 500Hz/1kHz/1.5kHz/2kHz (Default is “1kHz. ” ) Treble: 10kHz/12.5kHz/15kHz/17.5kHz (Default is “12.5kHz. -
Page 89: Space Enhancer
Return to the Top page Audio Setting Up NOTE • When the rear speaker sound is switched, the audio source that is output at the AV OUTPUT terminal is also switched to the same source. • When the dual zone function is set to on, the following functions are not available. - Page 90 Position DTA Control You can fine-adjust your listening position. In Position screen, touch [DTA]. Select the speaker you wish to adjust by touching speaker icon. Set DTA as follows. [2], [3] Adjust the settings of the DTA position. Total DTA The adjusted distance (position and position DTA values), and the total of the distance adjusted by Car type (DTA) setup (P.83) and the adjustment...
-
Page 91: Remote Controller
Controller This unit can be operated using the remote controller. For , DNX6980, and DNX6480BT, the remote controller is supplied with the unit. For DNX6180, DNX6040EX, and DNX5180, the remote controller is the optional accessory (RC- DV331). 2CAUTION • Put the remote controller in a place where it will not move during braking or other operations. A dangerous situation could result, if the remote controller falls down and gets wedged under the pedals while driving. -
Page 92: Functions Of The Remote Controller Buttons
Functions Of The Remote Controller Buttons Switching the operation mode The functions operated from the remote controller differ depending on the position of the mode switch. • • • • AUD mode Switch to this mode when controlling a selected source or tuner source, etc. DVD mode Switch to this mode when playing a disc media including DVD, VCD, and CD. - Page 93 Return to the Top page Remote Controller Operation Location of Name the mode switch − − MENU OUT, IN POSITION AUD, DVD Cursor Key DVD ENTER AUD, DVD ROUTE M Switches to the source to be played. In hands-free mode, hangs up the phone. Switches between the navigation and the source screens.
- Page 94 Location of Name the mode switch VOICE 10 VIEW AUD, DVD 11 MAP DIR AUD, DVD 12 5/∞ AUD, DVD 13 2/3 AUD, DVD 14 Numeric Keypad 15 * + 16 # BS AUD, DVD 17 AUDIO 18 CANCEL 19 SUBTITLE −...
-
Page 95: Troubleshooting
Return to the Top page Troubleshooting roubleshooting Problems And Solutions If any trouble occurs, first check the following table for possible problems. • Some functions of this unit may be disabled by some settings made on this unit. • What might seem to be a malfunction in your unit may just be the result of slight misoperation or miswiring. About settings Problem • Cannot set up the subwoofer. • Cannot set up subwoofer phase. • No output from the subwoofer. • Cannot set up the low pass filter. •... -
Page 96: Error Messages
Use the unit again after reducing the temperature of the unit. Eject the disc and try inserting it again. Contact the Kenwood dealer if this indicator continues blinking or the disc cannot be ejected. Change the disc. Playable Media And Files Clean the disc. - Page 97 Call the displayed number for subscription. Check the connection of the XM Tuner. Check the connection of the antenna. Check the connection of the antenna. Select a different channel. Call your nearest Kenwood dealer. Try another channel. Solution (P.100). (P.100).
-
Page 98: Resetting The Unit
Resetting The Unit If the unit or the connected unit fails to operate properly, reset the unit. Press the <Reset> button. The unit returns to factory settings. NOTE • Disconnect the USB device before pressing the <Reset> button. Pressing the <Reset> button with the USB device connected can damage the data stored in the USB device. For how to disconnect the USB device, see Play Media (P.13). -
Page 99: Appendix
Return to the Top page Appendix ppendix Playable Media And Files You can play various kinds of media and files on this unit. List of playable discs Disc types Standard DVD Video DVD Audio DVD-VR DVD-R* DVD-RW DVD+R DVD+RW DVD-R DL (Dual layer) DVD+R DL (Double layer) DVD-RAM Music CD* CD-ROM CD-R CD-RW DTS-CD... - Page 100 • An online manual about audio files is put on the site, www.kenwood.com/cs/ce/audiofile/. On this online manual, detailed information and notes which are not written in this manual are provided.
- Page 101 Changing the browse item will display a correct title, etc. • When the iPod is connected to this unit, “KENWOOD” or “✓” is displayed on the iPod to indicate that you cannot operate the iPod. Usable USB device You can use a mass-storage-class USB device on this unit.
-
Page 102: Status Bar Indicator Items
Status Bar Indicator Items Shown below is a list of indicators displayed on the status bar in the screen. Current status of this unit is displayed on the bar. ● ■ General The attenuator is active. DUAL The dual zone function is on. Indicates the connection state of the Bluetooth hands-free unit. • White: Connected • Orange: Not connected LOUD The loudness control function is on. ●... - Page 103 Return to the Top page Appendix ● ■ USB FO-REP The folder repeat function is on. VIDEO Identifies the video file. MUSIC Identifies the music file. PICTURE Identifies the picture file. The random function is on. The repeat function is on. PLST The play list mode is selected now.
-
Page 104: Region Codes In The World
Region Codes In The World The DVD players are given a region code according to the country or area it is marketed, as shown in the following map. ● ■ DVD disc marks Indicates a region number. The discs with this mark can be played with any DVD player. Indicates the number of audio languages recorded. Up to 8 languages can be recorded in a movie. You can select a favorite language. -
Page 105: Dvd Language Codes
Return to the Top page Appendix DVD Language Codes Code Language Afar Abkhazian Afrikaans Amharic Arabic Assamese Aymara Azerbaijani Bashkir Byelorussian Bulgarian Bihari Bislama Bengali, Bangla Tibetan Breton Catalan Corsican Czech Welsh Danish German Bhutani Greek English Esperanto Spanish Estonian Basque Persian Finnish... -
Page 106: Specifications
● ■ Monitor section Picture Size DNX7180, DNX7480BT : 6.95 inches (diagonal) wide : 156.6 mm (W) x 81.6 mm (H) DNX6980, DNX6180, DNX6040EX, DNX6480BT, DNX5180 : 6.1 inches (diagonal) wide :136.2 mm (W) x 72 mm (H) Display System... - Page 107 ● ■ FM tuner section Frequency Range DNX7480BT, DNX6480BT : 87.5 MHz – 108.0 MHz (50 kHz) DNX7180, DNX6980, DNX6180, DNX6040EX, DNX5180 : 87.9 MHz – 107.9 MHz (200 kHz) Usable Sensitivity (S/N : 30 dB) : 9.3 dBf (0.8 μV/75 Ω) Quieting Sensitivity (S/N : 50 dB) : 15.2 dBf (1.6 μV/75 Ω)
- Page 108 Acquisition Times Cold : DNX5180: < 38 seconds DNX7180, DNX7480BT, DNX6980, DNX6180, DNX6040EX, DNX6480BT: 38 seconds (typ) (On average for a stationary receiver with a clear view of the sky) Accuracy Position : < 10 meters, typical Velocity : 0.05 m/sec. RMS...
-
Page 109: About This Unit
● ■ Copyrights • The Bluetooth word mark and logos are owned by the Bluetooth SIG, Inc. and any use of such marks by Kenwood Corporation is under license. Other trademarks and trade names are those of their respective owners. -
Page 110: Laser Product
• Consult the dealer or an experienced radio/TV technician for help. DNX7180/DNX6980/DNX6180/DNX6040EX: ● ■ IC (Industry Canada) Notice Operation is subject to the following two conditions: (1)This device may not cause interference, and...
Need help?
Do you have a question about the DNX6040EX and is the answer not in the manual?
Questions and answers