Table of Contents
Advertisement
Quick Links
Advertisement
Table of Contents

Summary of Contents for Fluid BID1000W
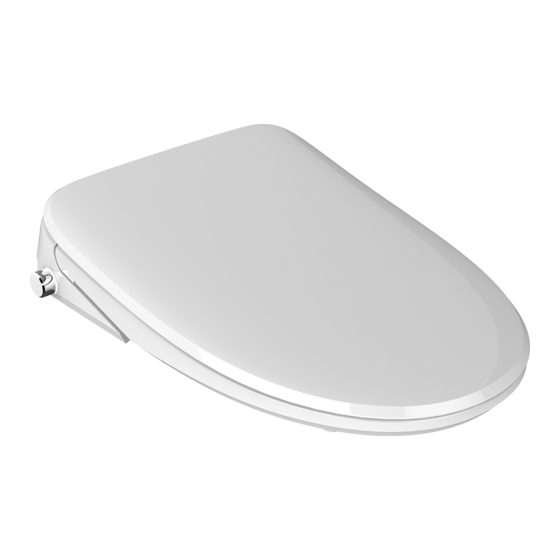
- Page 1 fluid bidet seat Product Handbook & Instructions B I D1000W...
-
Page 2: Table Of Contents
Table of Contents Important Safety Instructions 01-02 Components Main Unit Controller Instructions Technical Specifications What’s in the box? Product Size & Installation Preparation Installation of Main Unit Installation of Main Unit Continued... Preparation for Start-up Cleaning & Maintenance 10-11 Removal and Installation of Clamp Troubleshooting Guide Warranty... -
Page 3: Important Safety Instructions
Important Safety Instructions When using electrical products, especially when children are present, basic safety precautions should always be followed, including the following: 1. The product is not to be used by persons, (including children), with reduced physical, sensory or mental capabilities, or lack of experience and understanding, unless they are given adequate supervision and instruction. - Page 4 Important Safety Instructions Continued... CA U TION – Failure to follow these instructions may cause bodily injury or property damage. 1. Do not install or use the product in wet environments such as steam rooms, wet shower rooms etc. 2. It is recommended that a water-proof electrical outlet be used, and that the outlet should be installed in a location not exposed to spraying water or wetness.
-
Page 5: Components
Components Release button Leakage protection plug Infrared receiver Bumper Power cord Water supply pipe Nozzle baffle Drying Seat baffle Nozzle Rear cleaning Front cleaning Remote control Complete product... -
Page 6: Main Unit Controller Instructions
Main Unit Controller Instructions Back Front 1. While seated, turn the controller forward to start the rear Rear cleaning function. Cleaning 2. During rear cleaning, turn the controller forward or backward incrementally to slightly adjust the nozzle position forward or backward. 1. -
Page 7: Technical Specifications
Technical Specifications Rated voltage 110-120V50/60Hz Rated power 960W Main Unit Water pressure The minimum necessary pressure is 0.08MPa (hydrostatic pressure), range the maximum water pressure is 0.8MPa (hydrostatic pressure) Power Cord Length is about 1.2m Heating power 1400W (120V) Water 6-level water temperature adjustment temperature Water volume... -
Page 8: What's In The Box
What’s in the Box: Remote control 1. Remote control Remote Expansion Remote control 2. Remote screws (2) control holder control holder assembly 3. Expansion screws (2) 1. Base plate Screws Rectangular 2. Screws (2) Fixing Plate Base plate assembly 3. Rectangular Base Plate fixing pieces (2) Expansion nut... -
Page 9: Product Size & Installation Preparation
Product Dimensions and Installation Preparation 130-190mm 403mm 380mm Phillips screwdriver Wrench Tape measure * Important: Please ensure that this seat will fit the toilet bowl before proceeding with installation. Installation of Main Unit * This product has been tested for water flow before leaving the factory. There may be a small amount of residual water in the product upon opening. -
Page 10: Installation Of Main Unit Continued
Installation of Main Unit Continued... Installation of Water inlet pipe and Tee-joint Connect to toilet water supply pipe Current toilet water supply pipe Connect to main unit Tee-Joint Connect to the Water inlet pipe angle supply valve to main unit Angle supply valve ➀... -
Page 11: Preparation For Start-Up
Preparation for Start-Up 1. Turn on the angle supply valve Check the tightness of the threaded connection to ensure that there is no water leakage. Turn the angle supply valve counterclockwise to adjust the opening to the maximum. (Tip: when the valve is opened for the first time, the angle supply valve handle will be tight.) Angle supply valve 2. -
Page 12: Cleaning & Maintenance
Cleaning & Maintenance Cleaning the Main Unit 1. Turn off the power during and cleaning or maintenance of this product. 2. Wipe seat with a soft, damp cloth and mild, non abrasive detergent. 3. After wiping, please turn the power back on. Neutral cleaner Tip: Do not rinse the surface of the product directly with water during maintenance. - Page 13 Filter cleaning for pressure-maintaining valve 1. Turn off water at the angle supply valve. 2. Unplug product to cut off power 3. Remove the seat and unscrew the filter connector with a screwdriver 4. Take out the filter assembly with needle nose pliers. 5.
-
Page 14: Removal And Installation Of Clamp
Removal and Installation of Clamp Removal: Open the clamp cover, Installation: Install the b. Rotate the clamp until the rotate it counterclockwise, and quick-released connector of the opening faces downward. use a flat-head screwdriver to water inlet pipe into the main unit, c. -
Page 15: Troubleshooting Guide
Troubleshooting Guide Issue Cause Solution Water inlet hose is bent, causing Gently straighten out the water a blockage inlet hose. No water from nozzle Inlet valve is turned off Turn on the inlet valve Water supply is cut off Connect water supply Water inlet hose is bent, causing Gently Straighten the water partial blocking... -
Page 16: Warranty
2 Year Warranty April 2022 fluid™ warrants its BID1000W to be free from manufacturing defects in material and workmanship for two years from purchase. This warranty applies only to original installation locations. If a defect is found in normal residential use, fluid™ will, at its election, repair, provide a replacement part or product, or make the appropriate adjustment.


Need help?
Do you have a question about the BID1000W and is the answer not in the manual?
Questions and answers