Table of Contents
Advertisement
Quick Links
Advertisement
Table of Contents

Subscribe to Our Youtube Channel
Related Manuals for Circutor line-EDS-Cloud

Summary of Contents for Circutor line-EDS-Cloud
- Page 1 Access point line-EDS-Cloud INSTRUCTION MANUAL (M231B01-03-22A)
- Page 2 Instruction Manual...
-
Page 3: Safety Precautions
CIRCUTOR, SA reserves the right to make modifications to the device or the unit specifications set out in this instruction manual without prior notice. CIRCUTOR, SA on its web site, supplies its customers with the latest versions of the device specifica- tions and the most updated manuals. -
Page 4: Table Of Contents
5�2�1�- USAGE ENVIRONMENT AND HEALTH ������������������������������������������������������������������������������������������������������������� 18 5�2�2�- Wi-Fi COMMUNICATIONS �������������������������������������������������������������������������������������������������������������������������������� 18 6�- CONFIGURATION WEBSITE ������������������������������������������������������������������������������������������������������������������������������������������� 19 6�1- CONFIGURATION OF THE line-EDS-Cloud DEVICE ������������������������������������������������������������������������������������������������� 20 6�1�1�- COMMUNICATION: DNS/NTP SETTINGS ���������������������������������������������������������������������������������������������������������� 21 6�1�2�- COMMUNICATION: ETHERNET ������������������������������������������������������������������������������������������������������������������������� 21 6�1�3�- COMMUNICATION: 3G �������������������������������������������������������������������������������������������������������������������������������������� 21 6�1�4�- COMMUNICATION: DYNAMIC DNS �������������������������������������������������������������������������������������������������������������������22... -
Page 5: Revision Log
REVISION LOG Table 1: Revision log� Date Revision Description 05/20 M231B01-03-19A First Version Changes in the following sections: 11/20 M231B01-03-20A 6. - 7.- Annex A. Changes in the following sections: 01/21 M231B01-03-21A 7. - Annex A.2. Changes in the following sections:... -
Page 6: 1�- Verification Upon Reception
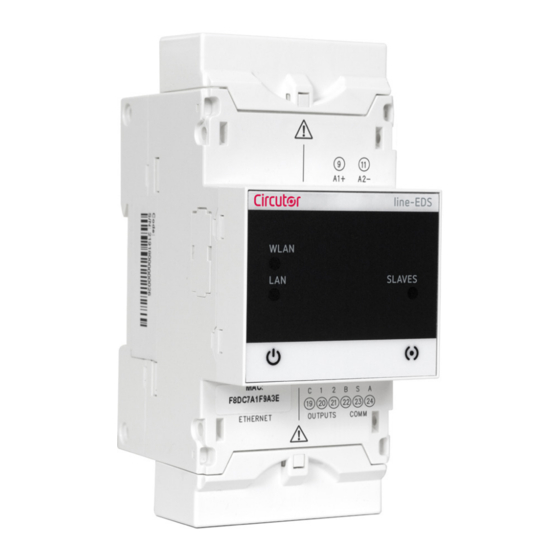
CIRCUTOR’s after-sales service� 2.- PRODUCT DESCRIPTION line-EDS-Cloud is a device that works as connector between field devices with Modbus RTU or Modbus TCP communications and data collection systems in the cloud (Big Data). The line-EDS-Cloud includes a Web page to configure the Modbus devices’ memory profiles or maps and select which variables are to be transferred to the Cloud systems. -
Page 7: 3�- Installation Of The Device
The line-EDS-Cloud device must be installed by authorised, qualified personnel. The power supply plug must be disconnected before handling, altering the connections or replacing the device. -
Page 8: 3�3�- 72 X 72 Mm Panel Adapter
3�3�- 72 x 72 mm PANEL ADAPTER Note: The 72 x 72 mm panel adapter is a separately sold accessory. CIRCUTOR has a panel adapter for the line-EDS-Cloud devices for their installation in 72 x 72 mm panels. illustrates how the panel adapter connects to a line-EDS-Cloud. -
Page 9: 3�4�- Device Terminals
Figure 4: line-EDS-Cloud and line CVM expansion module connection� Expansion module types: line-M-4IO-R, line-M-4IO-T, line-M-4IO-RV and line-M-4IO-A� In installations with line-EDS-Cloud devices, a total of up to seven devices may be connected to their right-hand side. Instruction Manual... -
Page 10: 3�5�1�- Line-M-Ext-Ps Power Adapter
It can supply up to 10 VA, allowing it to power a limited number of devices. The maximum set it can supply is: 1 line-EDS-Cloud + 1 line-CVM + 1 line-M ( Figure 6... -
Page 11: 3�5�2�- Installation
3�5�2�- INSTALLATION Before installing a new device, it must be disconnected from all power supplies. The correct steps to connect the devices are: 1�- Using a flat head screwdriver, remove the expansion connector’s protective covers located on the side of the devices, ( Figure 8 Figure 8: Installation step 1�... - Page 12 Figure 10: Installation step 3� For correct installation of all devices, please refer to the instruction manual for the different models: M237B01-01-xxx: Instruction Manual for line-CVM devices. M239B01-03-xxx: Instruction Manual for line-M expansion modules. Instruction Manual...
-
Page 13: 3�6�- Connection Diagrams
HTML5 With a browser compatible with HTML5 Con navegador Web compatible con HTML5 With a browser compatible with HTML5 INTERNET SERVIDOR / SERVER ROUTER Ethernet Wi-Fi Wi-Fi line-EDS WLAN Ethernet SLAVES RS-485 Figure 11: line-EDS-Cloud connection diagrams� Instruction Manual... -
Page 14: 4�- Operation
4.- OPERATION 4�1�- OPERATING PRINCIPLE Line-EDS-Cloud is a device that works as connector between field devices with Modbus RTU or Modbus TCP communications and data collection systems in the Cloud. Line-EDS-Cloud connects field devices with Modbus via RS-485, Wi-Fi or via a Modbus TCP Ethernet connection and sends data to Cloud platforms. - Page 15 LAN, Ethernet connection Table 6: LAN LED� Description On (green color) Connection to a local network Flashing (green color) Activity in the network WLAN, Wi-Fi connection: Table 7: WLAN LED� Description On (blue color) Connection to a Wi-Fi network...
-
Page 16: 4�3- Digital Outputs
4�3- DIGITAL OUTPUTS The device has 2 digital outputs, optoisolator NPN transistors (terminals 19, 20 and 21 in Figure 3 line-EDS WLAN SLAVES Carga Load Fuente externa External load Salidas de transistor Transistor outputs Figure 13: Digital outputs� Instruction Manual... -
Page 17: 5�- Communications
The RS-485 cable must be wired using twisted pair cable with mesh shield (minimum 3 wires), with a maximum distance of 1200 meters between the line-EDS-Cloud and the slave devices. In this bus we can connect a maximum of 32 slave devices. -
Page 18: 5�2- Wi-Fi Communications
Wi-Fi is one of the most widely-used wireless technologies today, used to connect electronic devices and exchange information between them without a physical connection. The line-EDS-Cloud has Wi-Fi communications over the 2.4 GHz band, in accordance with the IEEE 802.11 ac / a / b / g / n standards. -
Page 19: 6�- Configuration Website
6.- CONFIGURATION WEBSITE The configuration website for the device is accessed via the IP address. The default configuration for line-EDS-Cloud is in DHCP mode; the device can be identified by its MAC address using software such as the Advanced IP Scanner. -
Page 20: 6�1- Configuration Of The Line-Eds-Cloud Device
Configure the system for uploading data to the Cloud platforms. Check the status of the system. 6�1- CONFIGURATION OF THE line-EDS-Cloud DEVICE Configuration, screen allows the configuration of the DNS/NTP parameters, the communica- tions and the Security parameters, Figure 18 Figure 18: Configuration: Ethernet�... -
Page 21: 6�1�1�- Communication: Dns/Ntp Settings
Press to save the configuration and send it to the device. 6�1�3�- COMMUNICATION: 3G This section is displayed when the line-EDS-Cloud is connected to a line-M-3G, a device that adds 3G connectivity to the line-EDS-Cloud device, Figure 19 Figure 19:Configuration: 3G�... -
Page 22: 6�1�4�- Communication: Dynamic Dns
Press to save the configuration and send it to the device. 6�1�4�- COMMUNICATION: DYNAMIC DNS This section is displayed when the line-EDS-Cloud is connected to a line-M-3G, a device that adds 3G connectivity to the line-EDS-Cloud device, Figure 20 Figure 20:Configuration: Dynamic DNS�... -
Page 23: 6�1�5�- Communication: Wi
6�1�5�- COMMUNICATION: Wi-Fi In this section, Wi-Fi communications are enabled on the device, Figure 21 Figure 21:Configuration: Wi-Fi� Select whether to enable Wi-Fi communications or not. Wi-Fi name (SSID): Name of Wi-Fi network. Password: Password of the selected Wi-Fi network. -
Page 24: 6�2- Configuration Of The Data Upload System
Confirm password: repeat the new password. Press to save the configuration and send it to the device. 6�2- CONFIGURATION OF THE DATA UPLOAD SYSTEM This section describes the steps for configuring the system used to upload data to the Cloud platforms. - Page 25 Name: Name of the profile to be created. Manufacturer: Manufacturer’s name. Model: Device model of the new profile: CVM, CEM, EDMk ..Description: Brief description of the profile. When you press , the new profile is saved and a new section is displayed to create the...
- Page 26 Address: Modbus address of the variable; its memory location on the device. Type: Variable type, the different types are shown on Table 12 Note: Variable visible when selecting types in Attributes: HoldingRegister, ImputRegister. Table 12: Type: Variable type...
- Page 27 Figure 27:Add new command� Name: Name of the location groupings. With the ☐ option, Select the variables that will be part of the grouping. Press to save the grouping created. STEP 2: ENTERING INTO THE SYSTEM THE DEVICES THAT HAVE THE DATA PROFILE YOU WANT TO...
- Page 28 Figure 29: Device screen: Commands� STEP 2�1�- Entering a new device Add device, to add a new device, the screen in Press will be shown. Figure 30 Figure 30: Device screen: Add Device� Name: Device name. Description: Brief description of the device.
- Page 29 ●Port: Communication port. ●Timeout: Indicate the communications wait time in seconds. ●Slave ID: Indicate the slave ID or Modbus peripheral. Press to save the new device. STEP 3: DEFINE THE DATA TO BE UPLOADED TO THE CLOUD PLATFORM AND HOW OFTEN...
- Page 30 Frequency: Select how often to upload data to the Cloud platform: Minutes, Hourly, Daily, Weekly, Monthly or Advanced mode. Once the frequency is selected, you have to select Minutes, Hours..based on the option selected. Device: Select the device from which the data will be uploaded.
- Page 31 Format: Select the Cloud platform. The line-EDS-Cloud can connect to the following platforms: MyCircutor, Amazon, Azure, Dexma and Google. Depending on the platform selected, the configuration parameters may vary. When selecting the MyCircuit platform, you have to configure: ●Name: Name of the data upload.
-
Page 32: 6�3- Periodic Readings
Note: “ANNEX A:CONFIGURATION OF CLOUD PLATFORMS”, summarises the basic steps for configuring the relationship between the line-EDS-Cloud device and the platform in the Cloud where you want to export the data you have obtained. Once the configuration steps for the upload system have been completed, the device automatically begins uploading the data to the specified Cloud platform. -
Page 33: 6�4- Rules
Figure 36: Periodic readings: Add periodic reading� Device: Select the device to be read. Command: Command to read. Frequency: Read frequency in seconds. Values: Select the values to read: Instantaneous, Average, Minimum or Maximum. Click to save the new schedule. - Page 34 Figure 38: Rules: Add rule� Name: Name of the new rule. CONDITIONS: This section is used to define the conditions that will trigger the actions. You have to specify: ●Device: select the device that triggers the condition. ●Variable: select the variable that triggers the condition.
-
Page 35: 6�5- Historic
Add action to add different actions to carry out when the conditions are met. Press to save the new rule. 6�5- HISTORIC Historic, screen can be used to graphically display the values of the different devices connect- ed to the line-EDS-Cloud, Figure 40 Figure 40: Historic� Instruction Manual... -
Page 36: 6�6- Checking The Status Of The System
Figure 41: System: Info� 6�6�1�- INFO In this section you can find the line-EDS-Cloud serial number and firmware version, Figure 41 If a name is entered in the Name parameter, all the information on the device can be saved by clicking You can also to update the device firmware: 1�- Download the update file from CIRCUTOR website. -
Page 37: 6�6�3�- Status
6�6�3�- STATUS This section, , shows the device status. Figure 43 Figure 43: System: Status� 6�6�4�- RESTART , the line-EDS-Cloud device can be reset by clicking the button In this section, Figure 44 Figure 44: System: Restart� Instruction Manual... -
Page 38: 7�- Technical Features
7.- TECHNICAL FEATURES AC Power supply Rated voltage 120 ... 264 V 50 ... 60 Hz Frequency 11 ... 28 VA Consumption CAT III 300 V Installation category DC Power supply Rated voltage 190 ... 300 V 2.5 ... 7 W... - Page 39 To comply with the mechanical requirements of EN IEC 62368-1, additional protection against mechanical impacts must be provided by the cabinet on which the device is to be mounted, with a minimum impact resistance of 6�5J� 52.5 WLAN SLAVES Figure 45: line-EDS-Cloud dimensions� Instruction Manual...
-
Page 40: 8�- Maintenance And Technical Service
8.- MAINTENANCE AND TECHNICAL SERVICE In the case of any query in relation to device operation or malfunction, please contact the CIRCUTOR, SA Technical Support Service. Technical Assistance Service Vial Sant Jordi, s/n, 08232 - Viladecavalls (Barcelona) Tel: 902 449 459 ( España) / +34 937 452 919 (outside of Spain) email: sat@circutor.com... -
Page 41: 10�- Ce Certificate
10.- CE CERTIFICATE Instruction Manual... - Page 42 Instruction Manual...
- Page 43 Instruction Manual...
-
Page 44: Annex A: Configuration Of The Cloud Platforms
This annex contains a summary of the basic steps required to configure the relationship between the line-EDS-Cloud device and the Cloud platform where you want to export the data. Currently, line-EDS-Cloud can connect to 5 different platforms: MyCircutor, Amazon Web Services (AWS), Azure IoT Hub, DEXMA and Google Cloud IoT Core. - Page 45 3�- Once in the platform, select Grupos de dispositivos (Groups of devices) → All� And in Agregar Dispositivo (Add Device), add the line-EDS-Cloud, enter a name, the device type and select the Es puerta de entrada (It’s an input gateway) option.
- Page 46 5�- To get the Access token for line-EDS-Cloud, click on the device name to view its features, and click on Gestionar Credenciales (Manage Credentials) in the Detalles (Details) tab. A new screen appears where you can specify the Access token for the device.
-
Page 47: A�2- Amazon Web Services (Aws)
A�2- Amazon Web Services (AWS) To configure data export to the AWS platform, the steps are as follows: 1�- On the configuration website for the device, go to the Exports screen, where the Cloud platform is specified. Add export to select and configure the Cloud platform, the screen shown in... - Page 48 Figure 53: AWS platform: Internet of things� 3�- In the AWS IoT menu, go into Administración (Administration) → Objetos (Objects) and click Crear� Figure 54: AWS platform: Objects� 4�- Several steps are required to create an object: 4�1�- On the screen Creación de objetos de AWS IoT (Creation of AWS IoT objects), click on the option Crear un solo objeto (Create a single object)�...
- Page 49 4�2�- On the screen Añadir su dispositivo al registro de objetos (Add your device to the object registry), assign a Nombre (Name) and click Next. Figure 56: AWS platform: Add your device to the object registry� 4�3�- On the screen Añadir un certificado para el objeto (Add a certificate for the object), click Crear un certificado (Create a certificate) to create the object and the certificates.
- Page 50 5�- It is now necessary to create a policy in AWS IoT: 5�1�- In the AWS IoT menu, go to Seguro (Insurance) → Políticas (Policies) and click Crear� Figure 58: AWS platform: Creating a policy� 5�2�- On the screen Crear una política (Create a policy), asignar un Nombre (Name) and add a security configuration.
- Page 51 Figure 59: AWS platform: Create a policy� 6�- Link the policy to the object created: 6�1�- In the AWS IoT menu, go to Administración (Administration) → Objetos (Objects) and click on the object created previously. Figure 60: AWS platform: Administration - Objects�...
- Page 52 Figure 61: AWS platform: Link policy� 6�4�- Select the previously created policy from the list of possible policies and click Asociar. 6�5�- Finally, click Activar. 7�- Enter the new data on the device configuration website: Figure 62: Export Screen: Add Export�...
- Page 53 8�- Once the data export to the Amazon Web Services (AWS) platform has been configured, the readings of the values from the devices associated with the line-EDS-Cloud are shown on the platform. To do this, in the AWS IoT menu, go to Administración (Administration) → Objetos (Objects) and select the desired object.
- Page 54 Figure 64: AWS platform: Shadow� Instruction Manual...
-
Page 55: A�3- Google Cloud Iot Core
A�3- Google Cloud IoT Core To configure the data export to the Google Cloud IoT Core platform, the steps are as follows: 1�- On the device configuration website, go to the Exports screen where the Cloud platform can be specified. - Page 56 Figure 66: Google screen: Google Cloud Platform� 3�- Create a new project by assigning a name in Nombre del proyecto (Project Name) and an ID in ID del proyecto (Project ID). Make a note of the ID, as it will be used later.
- Page 57 Figure 68: Google screen: New project� 5�- Add a subject name and make a note of it, as it will be used later on. Figure 69: Google screen: Create a subject� 6�- Create certificates. Before creating the device registry, an RS256 key has to be generated with a self-signed X.509 certificate.
- Page 58 The files rsa_cert�pem and rsa_private�pem, are created, which will be used for the line-EDS-Cloud configuration. 7�- Creating a device registration. 7�1�- In the menu Big Data go to IoT Core� Figure 70: Google screen: Google Cloud Platform - IoT Core�...
- Page 59 Figure 72: Google screen: Create a registry� ID de registro: Make a note of this, as it needs to be used in the line-EDS-Cloud configuration. Región: Select the nearest one. Instruction Manual...
- Page 60 Figure 73: Google screen: Devices� 8�2�- To create a new device, fill in the following sections: ID de Dispositivo: Make a note of this, as it needs to be used in the line-EDS-Cloud configuration. Comunicación de Dispositivo: Select Permitir. Autenticación: ●...
- Page 61 9�- Enter all the data obtained from the Google Cloud IoT Core platform into the device configuration website. 10�- Once the data export to the Google Cloud IoT Core platform has been configured, the readings for the values from the devices linked to the line-EDS-Cloud will be shown on the platform. Instruction Manual...
- Page 62 To do this, in the navigation menu, go to Big data → IoT Core and select the registry and the device created. The dates of the last data sets received are displayed on the screen. Figure 75: Google screen: Device�...
- Page 63 Instruction Manual...
- Page 64 CIRCUTOR, SA Vial Sant Jordi, s/n 08232 - Viladecavalls (Barcelona) Tel: (+34) 93 745 29 00 - Fax: (+34) 93 745 29 14 www.circutor.es central@circutor.com...
Need help?
Do you have a question about the line-EDS-Cloud and is the answer not in the manual?
Questions and answers