Table of Contents
Advertisement
Quick Links
Advertisement
Table of Contents

Subscribe to Our Youtube Channel
Related Manuals for Aliaxis Friatec FRIAMAT 7 prime


Summary of Contents for Aliaxis Friatec FRIAMAT 7 prime
- Page 1 Operating instructions FRIAMAT 7 prime FRIAMAT 7 basic...
-
Page 2: Table Of Contents
Table of Content About this document ........................... 8 1.1. Objective and target group of these instructions ............8 1.2. About these operating instructions ..................8 1.3. Symbols used ..........................8 1.4. Representation for the menu navigation ................9 1.5. Applicable relevant documents ..................... 9 1.6. - Page 3 3.3. Function keys ..........................16 3.4. Display ............................17 3.4.1. Display structure ......................17 3.4.2. Function key symbols ....................18 3.4.3. Function status symbols ................... 19 3.5. Rating plate ..........................19 3.6. Reading device ..........................20 3.6.1. Scanner ......................... 20 3.6.2. Reader wand .......................20 3.7.
- Page 4 7.1. Acquire basic settings ......................28 7.2. Activating and registering the device ................29 Menu operation ...........................30 8.1. Operate menu ..........................30 8.1.1. Entering via the virtual keyboard or numeric keypad ........30 8.1.2. Acquiring entries or settings ...................30 8.2. Acquire device settings ......................30 8.2.1.
- Page 5 8.4.3.2. Seam number .................... 34 8.4.3.3. GPS data .....................34 8.5. Manage capture data (FRIAMAT prime) ................34 8.5.1. Transmit data ......................34 8.5.2. Delete data ........................34 8.6. Reading in an operator pass (FRIAMAT prime) ............... 34 Fusion procedure ..........................35 9.1. Read in barcode ........................35 9.1.1.
- Page 6 10.4. Acquire device settings ......................45 10.4.1. Switch on/switch off documentation ..............45 10.4.2. Disable entry for date and time ................45 10.4.3. Managing data backup ..................45 10.4.4. Acquire the settings for the maintenance appointment ......46 10.4.5. Disable emergency entry ..................46 10.4.6.
- Page 7 Disposal ..............................55 Authorised service stations ......................56 Technical Data ............................ 56...
-
Page 8: About This Document
1. About this document 1.1. Objective and target group of these instructions These instructions describe all the necessary work steps, measures and precautions in order to ensure safe and professional handling of the product. These instructions are intended for the following target group: People who will transport, commission and operate the product Operators and/or owners 1.2. -
Page 9: Representation For The Menu Navigation
CAUTION This warning describes a possibly threatening danger. ‣ Failing to heed it can cause slight or minor injuries. HINT This warning describes a danger that can result in damage to property. ‣ Measures for avoiding damage to property are described here. INFORMATION This notice provides information about the following subjects: Usage tips... -
Page 10: Updates To These Instructions
The date of the last revision is specified on the document. Updated instructions are available online at http://www.aliaxis.de/en/services/downloads We would also be pleased to send you a printed version. 2. Safety The device corresponds to the state of the art and is built according to recognised safety standards and equipped with the necessary protective devices. -
Page 11: Non-Permitted Utilisation
Relevant safety provisions All country-specific standards, laws, guidelines and directives 2.2. Non-permitted utilisation Do not utilise the following fusion units or fittings: Damaged fusion units Fusion units whose lead seal has been broken open Fittings without a barcode Generators which do not comply with the EMCG law 2.3. -
Page 12: Obligations Of The Operator
Make these instructions available to the personnel. 2.6. Obligations of the operator The operator is responsible in the area of operation with regard to any third parties. 2.7. Staff training People working with this device require the following knowledge: Contents of these instructions Handling the device (after training) 2.8. -
Page 13: Safety Measures For Operating Modes
2.11. Safety measures for operating modes 2.11.1. Mains supply operation When utilising outdoors: Equip the plug sockets with a residual current protection device (RCPD). Follow the regulations regarding a residual current protection device. 2.11.2. Generator operation Always ensure that the generator is one which is approved for commercial utilisation and applications on construction sites. -
Page 14: Residual Risks
Always disconnect the mains cable before executing any repair work or maintenance work. Always only have any servicing, maintenance and repairs executed by authorised Aliaxis Deutschland GmbH service stations. Only connect the device to the approved operating voltage which is specified on the rating plate. -
Page 15: Device Structure
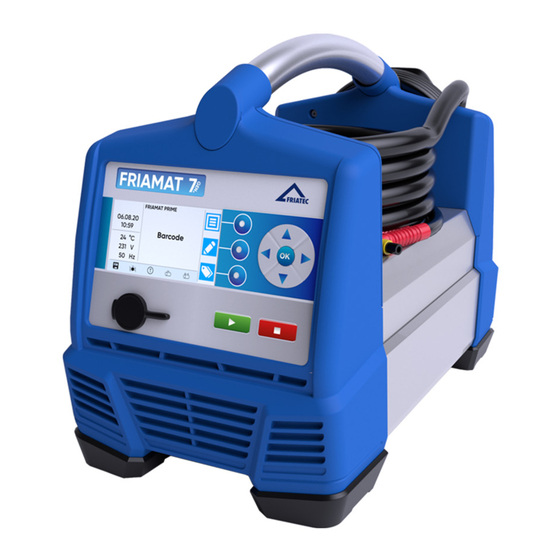
automatically and determines the fusion time, taking into account the ambient temperature. 3.2. Device structure Image 1: Description for components based on a example for FRIAMAT prime Position Designation Main switch Fusion cable with reader wand or barcode scanner Front film with display and function keys Service interface (USB) with protection cap Ventilation slits (air intake) Adapter pouch... -
Page 16: Function Keys
3.3. Function keys Image 2: Description for the operating and control components based on a example for FRIAMAT prime Position Designation Description Function Access to function key symbols which are shown on the keys display Direction Movement of the cursor in the menu in the directions for keys left, right, up, down OK key... -
Page 17: Display
3.4. Display 3.4.1. Display structure Image 3: Description for the display based on a example for FRIAMAT prime Position Designation Description Function status symbols Functions which are available at this point in time Notice for next maintenance Display for environmental Important environmental information information (date, time, ambient temperature, voltage and... -
Page 18: Function Key Symbols
Position Designation Description Function key symbols Symbols for functions which will be activated when the corresponding blue function keys are pressed. The displayed symbols switch over depending on the menu selection, (refer to Chapter 3.4.2. Function symbols, P.18) 3.4.2. Function key symbols Symbol Name Description FRIAMAT basic / FRIAMAT prime... -
Page 19: Function Status Symbols
Symbol Name Description Information data For calling up the information data mask and entering information text Enter information text, comment and subcontractor details / search For calling up detailed information or for search terms (e.g. e.g. country of operation) 3.4.3. Function status symbols Symbol Status FRIAMAT basic / FRIAMAT prime Maintenance appointment: Notice for the next maintenance due (in... -
Page 20: Reading Device
3.6. Reading device 3.6.1. Scanner The mini-scanner reads in 1D barcodes. The 1D/2D scanner (optional) reads in 1D barcodes and 2D barcodes according to ISO 12176-5. 3.6.2. Reader wand The reader wand reads in 1D barcodes. 3.7. USB data interface with protective cap The USB data interface serves as a service interface for software updates and for data transfer (with FRIAMAT prime). The protection cap protects the USB data interface against dirt, soiling and moisture. -
Page 21: Friamat Precheck Function
The fan switches on at the following times: Depending on the device status after it has been switched on During a fusion Between fusions After a fusion Always leave the device switched on after a fusion so that the fan can reduce the temperature of the fusion unit. This applies in particular to series fusions, machining or processing of fittings with high power requirements. -
Page 22: Bluetooth® Interface (Friamat Prime)
After registration of the device in the "FRIAMAT Software Update" module, update notifications and additional, ongoing device-specific information and innovations for the registered FRIAMAT fusion units will be sent by email from Aliaxis Deutschland and... -
Page 23: Data Transfer (Friamat Prime)
its affiliated companies to the email address which are stored in the user account of the customer portal. The user can download software updates and install them on the device themself (refer to Chapter 9.5. Install software update, P.41). 3.15. Data transfer (FRIAMAT prime) 3.15.1. -
Page 24: Menu Tree (Friamat Basic)
4.1. Menu tree (FRIAMAT basic) Menu Level 1 Level 2 Level 3 Reference Main menu Basic settings Date and time 8.2.1. Set the date and time, P.30 *System language* 8.2.2. Select the system language, P. Volume 8.2.3. Set signal tone volume, P.31 Update 9.5. Install software update, P.41 Factory settings 8.2.4. Resetting the device to factory settings, P.31... - Page 25 Menu Level 1 Level 2 Level 3 Reference * System 8.2.2. Select the language * system language, P.31 Protocol 8.2.5. Select language protocol language (FRIAMAT prime), P.31 Volume 8.2.3. Set signal tone volume, P. ® 1) Bluetooth 8.3.2. Switch on/ switch off Bluetooth® (FRIAMAT prime), P.32 Coupled 8.2.7. Manage ® coupled Bluetooth devices ...
- Page 26 Menu Level 1 Level 2 Level 3 Reference Pipe number 8.4.1.1. Pipe number, P.32 Pipe length 8.4.1.2. Pipe length, P.32 Fitting ID 8.4.1.3. Fitting ID, P.33 Information data Information text 8.4.2.1. Information text, P.33 Comment 8.4.2.2. Comment, P.33 Scraper device 8.4.2.3. Scraper device, P.33 Subcontractor 8.4.2.4. Subcontractor, P.33 ID data Sorting and 8.4.3.1. Sorting and picking ...
-
Page 27: Setting Up And Connection
Menu Level 1 Level 2 Level 3 Reference GPS 1-3 ® Only visible when Bluetooth function is permitted in country of operation. Only visible when documentation is switched on and initial data record is saved. 5. Setting up and connection 5.1. Preparatory activities Always ensure the following criteria before every use: Fusion device is undamaged. -
Page 28: Switching The Device On And Off
CAUTION Overheated fusing plug connector due to soiled contacts ‣ Always inspect the fusing plug connector and contact sockets of the fitting for soiling and clean them when necessary before connecting the fusing plug connector and fitting. ‣ Always protect the fusing plug connector against soiling. ‣... -
Page 29: Initial Commissioning
Using the entered personal data The personal email address, which has been entered in the activation dialogue of the device, will be utilised and stored by Aliaxis Deutschland in order to send information about the availability of new software updates and device updates to the owner of the email address easily and quickly. -
Page 30: Menu Operation
Always inform the new owner about the update options and the use of the 'FRIAMAT Software Update' module in the customer portal at www.aliaxis.de Always inform Aliaxis Germany about the change of ownership. Resetting to factory or default settings (refer to Chapter 8.2.4. Resetting the device to factory settings, P.31) and deleting fusion data when... -
Page 31: Acquiring Entries Or Settings
8.1.2. Acquiring entries or settings Save entry / amendment Press confirmation function key. Abort entry / amendment Press abort function key. Delete digit(s) Press function key for back/delete. Exit menu / cancel procedure Press function key for back or STOP key. 8.2. -
Page 32: Manage Coupled Bluetooth® Devices (Friamat Prime)
8.2.7. Manage coupled Bluetooth® devices (FRIAMAT prime) Call up the menu item: ® Main menu > basic setting > coupled Bluetooth devices ® All Bluetooth devices, which were previously coupled with the device, will be shown. ® Delete the Bluetooth devices from the list in order to prevent them from reconnecting with the smartphone. -
Page 33: Manage Data Capture (Friamat Prime)
8.4. Manage data capture (FRIAMAT prime) 8.4.1. Traceability data The query for the traceability data during the fusion process can be defined in the traceability menu item. 8.4.1.1. Pipe number Call up the menu item: Main menu > fusion sequence > traceability > pipe number Switch on or switch off the query for an individual pipe number for the pipe which is to be fused. -
Page 34: Scraper Device
8.4.2.3. Scraper device Call up the menu item: Main menu > fusion sequence > information data > scraper device Switch on or switch off query for data (e.g. device number) for implemented scraper device. 8.4.2.4. Subcontractor Call up the menu item: Main menu > fusion sequence > information data > subcontractor Switch on or switch off the query for the subcontractor. -
Page 35: Delete Data
The data will be written to a subdirectory in the selected output format (refer to Chapter 3.15.2. Designating the transferred data, P.23). If necessary, process the data further with appropriate software (refer to Chapter 3.15.3. Software for additional data processing, P.23). 8.5.2. Delete data Call up the menu item: Main menu > data >... -
Page 36: Utilise The Reader Wand
If the scanner fails: Enter the fusion parameters by using the emergency entry mode (refer to Chapter 9.1.3. Enter barcode digits manually (emergency entry), P.36). 9.1.1.2. Utilise the reader wand HINT Soiling on and/or and damage to the reading wand tip Barcode cannot be read out anymore when the tip of the reader wand is soiled or damaged. -
Page 37: Enter Barcode Digits Manually (Emergency Entry)
Enter barcode digits using the emergency entry mode (refer to Chapter 9.1.3. Enter barcode digits manually (emergency entry), P.36). For more information about utilising the reading devices (reader wand or scanner), refer Chapter 9.1.1. Utilise the reading device, P.35. 9.1.3. Enter barcode digits manually (emergency entry) Press emergency entry function button. -
Page 38: Start Fusion
9.2.2. Start fusion CAUTION Abrupt discharge of hot molten plastic Burns to the skin and eyes ‣ Always retain a distance of one metre from the fusing point during the fusing process. ‣ Ensure that joints are not tensioned. HINT Fusing failure due to insufficient power supply Defective fused joint ‣... -
Page 39: Enter Information Data (Friamat Prime)
Confirm the “pipe processed?” display with the START key or with the CONTINUE key. The fitting data will be displayed. Inspect and confirm the fitting data. When information data query is switch on: Enter information data (refer to Chapter 9.2.3. Enter information data (FRIAMAT prime), P.39). -
Page 40: Enter Traceability Data (Friamat Prime)
9.2.4. Enter Traceability data (FRIAMAT prime) Read in the fusion barcode for the fitting. Read in traceability barcode from Component 1. Enter pipe number. Enter pipe length. Read in traceability barcode from Component 2. Enter pipe number. Enter pipe length. 9.2.5. -
Page 41: Disable The Device Manually
9.3.1. Disable the device manually Read in the current operator pass. The “DISABLE DEVICE?” query will be shown. The following actions are possible: Confirm the query: Press confirmation function key. Abort procedure: Press abort function key. 9.3.2. Enable the device Read in the operator pass. The valid operator pass will be shown in the display. -
Page 42: Install Software Update
(FRIAMAT prime), P.32). 9.5. Install software update INFO When the update cannot be installed on the device, then immediately contact the authorised service station or the local service partner or Aliaxis Deutschland (refer to Chapter 15. Authorised service stations, P.56). Prerequisites A commercially available computer with USB port and Internet access USB stick which is formatted in FAT 32 with up to 256 GB Call up the customer portal via a browser: www.aliaxis.de/portal... -
Page 43: View Device Information
This number is assigned to the respective active sorting and picking number. The sequential number starts with 1 for the 1st fusion. It is automatically incremented by the device. The number cannot be amended. If a sorting and picking number has been utilised, then all fusions will be assigned to the same sequential number, which also counts up. -
Page 44: Call Up The Supervisor Menu
Menu Level Level 2 Reference Data backup 10.4.3. Managing data backup, P.45 Maintenance 10.4.4. Acquire the settings for the appointment maintenance appointment, P.46 Emergency entry 10.4.5. Disable emergency entry, P.46 Factory settings 10.4.6. Disable the "Reset factory settings" function, P.46 ® Bluetooth 10.4.7. Switch on/switch off Bluetooth®, P. Display Mode 10.4.8. Set format and units, P.47 ... -
Page 45: Acquire Device Settings
Amend entry: Press entry function key. Press confirmation function key. The Supervisor menu will be displayed. 10.3. Amend supervisor PIN The factory default supervisor PIN is "0000". Navigate to the PIN menu item in the supervisor menu. Press confirmation function key. Press entry function key. -
Page 46: Disable Entry For Date And Time
10.4.2. Disable entry for date and time Call up the menu item: Basic settings > functions > date and time The following setting is possible: Disabling Disable the date and time menu item in the user menu. The user cannot amend the setting which was implemented by the supervisor. -
Page 47: Disable The "Reset Factory Settings" Function
Utilise the direction key to navigate to the emergency entry menu item. Confirm the selection. A tick will appear before the menu item. The emergency entry menu is disabled for the user. The user cannot enter the barcode manually. 10.4.6. Disable the "Reset factory settings" function Call up the menu item: Basic settings > functions Utilise the direction key to navigate to the factory settings menu item. -
Page 48: Switch On/Switch Off Energy Display
10.4.10. Switch on/switch off energy display Call up the menu item: Basic settings > display > energy display Switch on or switch off the display of the energy input after fusion has been completed successfully. 10.5. Settings for the fusion sequence 10.5.1. Switch on/switch off operator pass Call up the menu item: Fusion sequence >... -
Page 49: Set Query For Information Data
Pipe Switch on or switch off the query for an individual pipe number for number the pipe which is to be fused. On / Off Pipe Switch on or switch off the query for the pipe length for the pipe length which is to be fused. -
Page 50: Switch On/Switch Off Query For Seam Number
Every time the fusion unit is switched on Before every fusion 10.5.4.2. Switch on/switch off query for seam number Call up the menu item: Fusion sequence > ID data > seam number The following settings are possible for querying the seam number: Switch on the query for the seam number. Switch off the query for the seam number. -
Page 51: Error Messages, Fault Messages On The Display
In order to display the plain text description (FRIAMAT prime): Press the upper function key. 11.1. Error messages, fault messages on the display No. Text in display Meaning / causes Assistance Wrong barcode Incorrect / false Utilise new barcode of same barcode batch. - Page 52 No. Text in display Meaning / causes Assistance Fusion stop Fusion aborted by – pressing the STOP button Device Protection function Let the device cool down. overheated which prevents The fans assist in lowering device overheating the device temperature when the device is switched Operating Supply voltage Inspect connection...
-
Page 53: Information And Warning Information On The Display
Inspect the fitting data and FRIAMAT preCHECK function. Voltage ... V; Re-regulate the generator. Frequency ... Hz Acknowledge with the STOP button. Maintenance Have the device maintained (Aliaxis Deutschland GmbH date or authorised service station). exceeded FRIAMAT The FRIAMAT preCheck function has been switched off when... -
Page 54: Care And Maintenance
13. Care and maintenance 13.1. Device maintenance The fusion unit must be maintained at least once a year by Aliaxis Deutschland GmbH or one of the authorised service stations. According to the international valid standard ISO 12176-2 Plastics pipes and fittings - Equipment for fusion jointing polyethylene systems - Part 2: Electrofusion, in this case Clause 7.1, an electrofusion device must only maintain the required operating accuracy... -
Page 55: Maintenance, Testing And Inspection Intervals
13.3. Warranty / FRIAMAT GarantiePLUS The warranty period for the device is 24 months. Aliaxis Deutschland GmbH additionally offers German and Austrian purchasers the FRIAMAT GarantiePLUS (FRIAMAT 3-year guarantee) for new devices. The guarantee conditions and further information can be found at www.aliaxis.de/plus. - Page 56 Directive 2002/96/EC (WEEE - Waste Electrical Devices and Electronic Equipment). Always observe additional country-specific provisions, regulations, standards and directives. Possible locations, bodies for proper disposal: Aliaxis Deutschland GmbH Authorised service stations 15. Authorised service stations Aliaxis Deutschland GmbH Steinzeugstraße 50 68229 Mannheim Tel.: 0621 486-2336...
- Page 57 FRIAMAT basic FRIAMAT prime Code type Barcode 2/5 overlapped Barcode 2/5 overlapped (interleaved) according to (interleaved) according to ANSI HM 10.8 M-1983 and ANSI HM 10.8 M-1983 and ISO CD 13950 ISO CD 13950 2D code (QR; Aztec; Data Barcode 128 a/b/c Matrix) according to according to ISO ...
- Page 58 Aliaxis Deutschland GmbH Infrastructure Steinzeugstraße 50 68229 Mannheim, Germany T +49 621 486-2238 info.de@aliaxis.com www.aliaxis.de...
Need help?
Do you have a question about the Friatec FRIAMAT 7 prime and is the answer not in the manual?
Questions and answers