Table of Contents
Advertisement
Available languages
Available languages
Quick Links
REGISTER YOUR PRODUCT!
www
Thank you for choosing this ARNOVA product. We hope that you will enjoy using it and that it will give you satisfaction for many
years to come. Once you unpack your ARNOVA product, we recommend that you take a few minutes to register it
(
http://arnovatech.com/register
NEED HELP?
?
On our Website: See the Frequently Asked Questions section on
Contact our Technical Support Team: Visit
Europe: please register your product before contacting Technical Support (see Register your Product ).
UserGuide_Arnova7_PN109899_book.indd 1
On the web at http://arnovatech.com/register
). This will allow you to get access to ARNOVA technical support (
http://arnovatech.com/support
As we are often updating and improving our products, your device's software may have
a slightly different appearance or modified functionality than presented in this Quick Start Guide.
http://arnovatech.com/support
http://arnovatech.com/faq
for e-mail support.
).
1
13/06/2011 16:41:31
Advertisement
Table of Contents

Related Manuals for Archos Arnova 7c G2


Summary of Contents for Archos Arnova 7c G2
- Page 1 REGISTER YOUR PRODUCT! On the web at http://arnovatech.com/register Thank you for choosing this ARNOVA product. We hope that you will enjoy using it and that it will give you satisfaction for many years to come. Once you unpack your ARNOVA product, we recommend that you take a few minutes to register it ).
-
Page 2: Description Of The Device
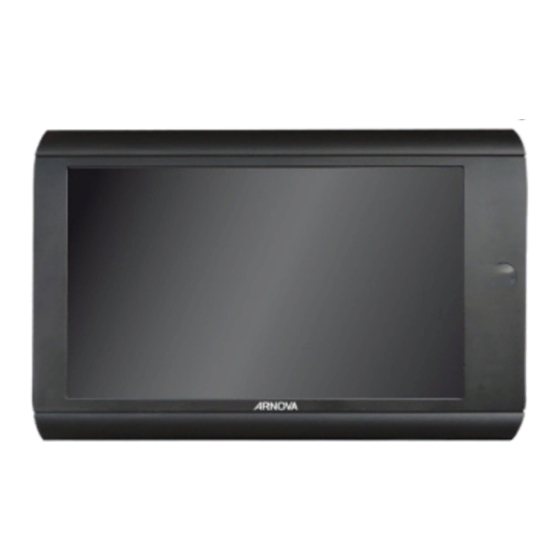
DESCRIPTION OF THE DEVICE Back button: returns to the previous screen Menu button: gives menu options according to the current screen On/Off button: enables to turn on or turn off the device. To put your device in standby (and allow a quick start up), press the Power button once. Hardware Reset In the event that your ARNOVA freezes operation, you can press the “pinhole reset”... - Page 3 STARTING UP completely charge the battery! Charging the Battery Connect the supplied power cable to the ARNOVA Power connector and to a wall outlet. The ARNOVA device will turn on and start charging. The Power indicator light is red while the battery is charging. It will turn yellow when the battery is fully charged.
-
Page 4: Connecting To A Wi-Fi Network
CONNECTING TO A WIFI NETWORK For this procedure to work, you need to be in a WiFi zone that will allow you to connect to it. Every time the ARNOVA is in range of a network that you have already configured once, it will attempt to make a connection. To configure a new WiFi network, go on the Home screen, tap on the Menu icon , then select... - Page 5 THE ARNOVA INTERFACE Your ARNOVA device is equipped with a touchscreen. Most screen areas will react when you tap on them with your finger. Home Screen These are the default Application button Android™ shortcuts ( Tap on this icon to reveal all the An- , etc.).
- Page 6 CUSTOMIZING YOUR PRODUCT The extended Home screen Slide your finger horizontally on the screen to go to the left or right side of the extended Home screen. Customizing the Home screen items - To add a Home screen item (shortcuts, widgets, etc.), hold your finger on the screen at an empty location, then choose from the list.
-
Page 7: Playing Multimedia Files
PLAYING MUL TIMEDIA FILES From the Home screen, tap on the video, audio or photo icon. Tap on an item to start playing it. Only in Video and Photo modes: to display/hide the on-screen controls, tap anywhere on the screen. To pause or resume a video, tap on the icon (bottom of screen). - Page 8 TRANSFERRING MEDIA TO YOUR ARNOVA Connect the supplied USB cable to the ARNOVA and to a running computer. The ARNOVA will turn on. Within a few seconds the ARNOVA will appear as an icon on your computer. You can transfer your media files to the ARNOVA either by copy/pasting them into the respective folders using Win- dows®...
-
Page 9: Enregistrez Votre Produit
ENREGISTREZ VOTRE PRODUIT ! Sur Internet : http://arnovatech.com/register Merci d’avoir choisi ce produit ARNOVA. Nous espérons que vous aurez plaisir à l’utiliser et qu’il vous donnera satisfaction pendant de nombreuses années. Après avoir déballé votre produit ARNOVA, nous vous conseillons de prendre quelques minutes pour l’enregistrer ). -
Page 10: Description De L'appareil
DESCRIPTION DE L’APPAREIL Retour : Retour à l’écran précédent. Menu : vous donne accès aux options de menu disponibles. Bouton On/Off : permet d’allumer ou d’éteindre l’appareil. Pour mettre en veille votre appareil (et permettre un redémarrage plus rapide), appuyez sur le bouton une fois. -
Page 11: Première Utilisation
PREMIÈRE UTILISATION Avant d’utiliser votre ARNOVA pour la première fois, chargez complètement sa batterie ! Charger la batterie Branchez le câble d’alimentation fourni sur le connecteur d’alimentation de l’ARNOVA et sur une prise secteur. Votre ARNOVA s’allume et commence à se charger. Le témoin de charge est rouge lorsque la batterie est en charge. Il est jaune lorsque la batterie est complètement chargée. -
Page 12: Se Connecter À Un Réseau Wifi
SE CONNECTER À UN RÉSEAU WIFI Pour suivre cette procédure, vous devez vous situer dans une zone WiFi vous permettant de vous connecter. Chaque fois que l’ARNOVA détectera un réseau que vous avez déjà configuré, il tentera de s’y connecter. Pour configurer un nouveau réseau WiFi, allez sur l’écran d’accueil, appuyez sur l’icône de Menu , puis sélectionnez... - Page 13 L’INTERFACE DE L’ARNOVA Votre ARNOVA est équipé d’un écran tactile. La plupart des zones de l’écran réagissent lorsque vous appuyez dessus avec votre doigt. Ecran d’accueil Bouton Applications Voici les raccourcis Android™ par défaut ( Navigateur Web Appuyez sur cette icône pour , etc.).
- Page 14 PERSONNALISATION DE L’APPAREIL L’écran d’accueil étendu Faites glisser votre doigt horizon- talement sur l’écran pour aller sur le côté gauche ou droit de l’écran d’accueil étendu. Personnalisation des éléments de l’écran d’accueil - Pour ajouter un élément (raccourci, widget, etc.), maintenez votre doigt appuyé sur un emplacement vide de l’écran, puis choi- sissez parmi la liste d’options.
- Page 15 LECTURE DE FICHIERS MUL TIMÉDIA Sur l’écran d’accueil, appuyez sur l’icône vidéo, audio ou photo. Appuyez sur un élément pour l’ouvrir. Uniquement dans les modes Vidéo et Photo : pour afficher/masquer les options disponibles, appuyez n’importe où sur l’écran. Pour mettre en pause/relancer une vidéo, appuyez sur l’icône (en bas de l’écran).
- Page 16 TRANSFERT DE FICHIERS MUL TIMÉDIA Connectez le câble USB fourni à votre ARNOVA et à un ordinateur allumé. L’ARNOVA s’allume. Après quelques secondes, l’ARNOVA apparaît sous la forme d’une icône sur votre ordinateur. Pour transférer vos fichiers sur l’ARNOVA, vous pouvez les copier/coller directement dans les dossiers respectifs de l’appareil (avec Windows®...
-
Page 17: Registrieren Sie Ihr Produkt
REGISTRIEREN SIE IHR PRODUKT! Im Internet unter http://arnovatech.com/register Vielen Dank, dass Sie sich für dieses Produkt von ARNOVA entschieden haben. Wir hoffen, Sie werden viel Freude daran haben und dass es Ihnen für viele Jahre zuverlässige Dienste leisten wird. Nachdem Sie Ihr ARNOVA-Produkt ausgepackt haben, empfehlen wir Ihnen, sich ein paar Minuten Zeit zu nehmen, und es zu registrieren ( ). - Page 18 BESCHREIBUNG DES ARNOVA Zurück zum vorherigen Bildschirm Menü: bietet Menüoptionen entsprechend des aktuellen Bildschirms. EIN/AUS-Taste: erlaubt das Gerät einzuschalten oder auszuschalten. Wenn Sie den Power-Schalter einmal drücken, wird Ihr Gerät in den Standby-Modus (ermöglicht einen anschließenden Schnellstart) gebracht. Hardware-Reset: Falls Ihr ARNOVA einmal abstürzt, können Sie die Reset-Taste auf der Geräterückseite (Nadellochöffnung) drücken Eingebautes Mikro USB Host-Port: Zur Verwendung einer Tastatur, einer Maus oder ein...
- Page 19 STARTEN Vor der erstmaligen Verwendung des ARNOVA sollte der Akku vollständig aufgeladen werden! Verbinden Sie das mitgelieferte Stromkabel mit dem ARNOVA-Stromanschluss und mit einer Steckdose. Daraufhin schaltet sich der ARNOVA-Player ein und startet den Ladevorgang. Während der Akku aufgeladen wird, leuchtet die Leistungsanzeige rot.
- Page 20 WIFI-NETZWERKVERBINDUNG Dazu müssen Sie sich in Reichweite eines WiFi befinden. Der ARNOVA wir dann jedesmal eine Verbindung mit einem der bereits konfigurierten Netzwerke herstellen. Um ein neues WiFi Netzwerk einzurichten, tippen Sie auf dem Desktop auf das Menü Icon und wählen anschließend Einstellungen Unter wählen Sie...
- Page 21 DIE ARNOVA SCHNITTSTELLE Ihr ARNOVA-Gerät ist mit einem Touchscreen ausgerüstet. Die meisten Bereiche des Bildschirms reagieren, sobald Sie mit Ihrem Finger auf diese tippen. Hauptfenster Dies sind Desktop-Verküpfungen Applikationen Taste von Android™ ( Web-Browser Tippen Sie auf dieses Icon, um alle , usw.).
- Page 22 ANPASSEN IHRES PRODUKTES Der erweiterte Desktop Bewegen Sie Ihren Finger hori- zontal auf dem Touchscreen, um auf die linke oder rechte Seite des Desktops zu gelangen. Insgesamt gibt es 3 Desktops. Passen Sie die Elemente auf dem Desktop an - Um ein Element (Shortcuts, Widgets, usw.) auf Ihren Home-Screen hinzuzufügen, wählen Sie eine leere Position, um dann aus der Liste eine Anwendung auszuwählen.
- Page 23 ABSPIELEN VON MUL TIMEDIADATEIEN Tippen Sie auf der Startseite auf das Video-, Audio- oder Fotoicon. Der ARNOVA zeigt nun eine Liste von Dateien oder Ordern an, je nach gewählter Kategorie. Tippen Sie auf eine Datei, um diese abzuspielen. Nur in den Modi Video und Foto: Um Bildschirmsteuerungen ein- oder auszublenden, tippen Sie auf eine beliebige Stelle im Bildschirm.
- Page 24 ÜBERTRAGEN VON MEDIADATEIEN Verbinden Sie Ihren ARNOVA mit dem Computer, mit Hilfe des mitgeliefertem USB-Kabels. Daraufhin schaltet sich der ARNOVA ein. Innerhalb weniger Sekunden erscheint der ARNOVA als Symbol auf Ihrem Computer. Sie können Ihre Media-Dateien durch Kopieren/Einfügen in die jeweiligen Ordner auf Ihren ARNOVA entweder mit dem Windows®...
-
Page 25: Registre Su Producto
¡REGISTRE SU PRODUCTO! En Internet en http://arnovatech.com/register Gracias por haber elegido este producto ARNOVA. Esperamos que sea de su total agrado y lo pueda disfrutar durante muchos años. Una vez desempaquetado su producto ARNOVA, dedique unos pocos minutos de su tiempo para registrarlo ( http://arnovatech.com/ ). -
Page 26: Descripción Del Arnova
DESCRIPCIÓN DEL ARNOVA Volver a la pantalla anterior Inicio : vuelve a la pantalla de inicio. Botón ON/OFF: manténgalo pulsado para encender/apagar el dispositivo. Para poner el dispositivo en espera (y poder ponerlo en funcionamiento rápidamente), pulse una vez el botón de alimentación (Power). Restablecimiento del equipo: Si su ARNOVA iban a bloquear completamente, puede pulsar el botón de reinicio. -
Page 27: Antes De Empezar
ANTES DE EMPEZAR Antes de utilizar su ARNOVA por primera vez, cargue completamente la batería. Cargado de la batería Conecte el cable de alimentación suministrado al conector de alimentación del ARNOVA y a una toma eléctrica de pared. El ARNOVA se encenderá y empezará a cargarse. El indicador de carga es de color rojo cuando la batería se está cargando. Es de color amarillo cuando la batería está... -
Page 28: Conexión A Una Red Wifi
CONEXIÓN A UNA RED WIFI Para que este procedimiento funcione, debe encontrarse en una zona WiFi que le permita conectarse. Cuando el ARNOVA se encuentre dentro del alcance de una red que ya haya configurado una vez, intentará realizar una conexión. Para configurar una red WiFi nueva, sitúese en la pantalla de inicio, dé... - Page 29 LA INTERFAZ DEL ARNOVA El dispositivo ARNOVA está equipado con una pantalla táctil. La mayoría de zonas de pantalla reaccionan al tocarlas con un dedo. Pantalla principal Estos son los accesos directos Pestaña de aplicaciones Android™ predeterminados ( Dé un toque en este icono para mos- , etc.).
- Page 30 PERSONALIZACIÓN DEL PRODUCTO La pantalla de inicio ampliada Deslice el dedo horizontalmen- te en la pantalla para ir al lado izquierdo o derecho de la pantalla de inicio ampliada. Personalización de los elementos de la pantalla de inicio - Para añadir un elemento a la pantalla de inicio (accesos directos, widgets, etc.), mantenga el dedo en la pantalla en un lugar vacío y, a continuación, elija el elemento en la lista.
-
Page 31: Reproducción De Archivos Mul Timedia
REPRODUCCIÓN DE ARCHIVOS MUL TIMEDIA En la pantalla principal, pulse el icono de vídeo, audio o fotos. El ARNOVA mostrará una lista de archivos o carpetas correspondientes a la categoría seleccionada. Pinche en un elemento para empezar a reproducirlo. Sólo en los modos Foto y Vídeo: para mostrar/ocultar los controles en pantalla, pinche en cualquier lugar de la pantalla. Para pausar o reanudar un vídeo, pinche en el icono (esquina inferior de la pantalla). - Page 32 TRANSFERENCIA DE ARCHIVOS MUL TIMEDIA Conecte el cable USB suministrado al ARNOVA y a un ordenador encendido. El ARNOVA se encenderá. En unos segundos, aparecerá el icono del ARNOVA en su ordenador. Es posible transferir archivos multimedia al dispositivo ARNOVA copiándolos y pegándolos en las carpetas correspon- dientes mediante el Explorador de Windows®...
-
Page 33: Registrazione Del Prodotto
REGISTRAZIONE DEL PRODOTTO Su Internet all’indirizzo http://arnovatech.com/ register Grazie per aver scelto questo prodotto ARNOVA. ARNOVA vi augura di poter sfruttare al massimo le possibilità offerte dal prodotto per molti anni. Dopo aver aperto il vostro prodotto ARNOVA, vi suggeriamo di registrarlo; ci vorranno solo pochi minuti ( http://arnovatech. - Page 34 DESCRIZIONE Consente di tornare alla schermata precedente. Menu: consente di accedere alle opzioni del menu in base alla schermata corrente. Pulsante ON/OFF: tenere premuto per accendere/spegnere. Per posizionare il dispositivo in modalità standby (ed avviare avvio rapido) premere il tasto Power una volta. Rispristino hardware: se il vostro ARNOVA si blocca totalmente potete premere sul bottone reset.
- Page 35 AVVIO Prima di utilizzare il dispositivo ARNOVA per la prima volta, caricare completamente la batteria. Caricamento della batteria Collegare il cavo di alimentazione fornito al connettore di alimentazione del dispositivo ARNOVA e a una presa a muro. Il dispositivo ARNOVA si accende e viene avviata la ricarica. L’indicatore della carica è rosso quando la batteria è in ricarica. Diventa giallo quando la batteria è...
- Page 36 CONNESSIONE A UNA RETE WIRELESS Per procedere è necessario trovarsi in una zona WIFI che permetta la connessione. Ogni qualvolta ARNOVA si trova in un raggio di rete che avete già configurato una volta, cercherà una connessione. Per configurare una nuova rete WIFI, andare allo schermo principale, sfiorare sul Menu l’icona quindi selezionare Impostazioni...
- Page 37 INTERFACCIA Il dispositivo ARNOVA è dotato di uno schermo a sfioramento. La maggior parte delle aree dello schermo è in grado di rilevare il tocco delle dita. Schermata Home [Pagina iniziale] Queste sono le scorciatoie Applicazioni pulsante Android™ ( Web Browser EMail Sfiorare questa icona per mostrare ecc.) - sfiorare un’icona per...
- Page 38 PERSONALIZZA IL PRODOTTO Schermo intero Fare scivolare il dito in senso orizzontale sullo schermo per posizionarsi sulla parte sinistra o destra dello schermo. Personalizza le voci dello schermo - Per aggiungere scorciatoie, congegni e altro al vostro schermo, tenere premuto il dito in una parte libera dello schermo, quindi sceglie- re dall’elenco.
- Page 39 LETTURA DEI FILES MUL TIMEDIA Sulllo schermo tattile, premete sull’icona video, audio o foto. Verrà visualizzato un elenco di fi le o cartelle corrispondenti alla categoria selezionata. Toccare un elemento per riprodurlo. Solo nelle modalità Video e Photo [Foto]: per visualizzare/nascondere i comandi sullo schermo, toccare un’area qualsiasi dello schermo.
- Page 40 TRASFERIMENTO DI CONTENUTI MUL TIMEDIALI Collegare il cavo USB in dotazione ad il ARNOVA e ad un computer funzionante. Il dispositivo ARNOVA si accende. Dopo qualche secondo, verrà visualizzata l'icona ARNOVA sul computer. I file multimediali possono essere trasferiti nel dispositivo ARNOVA copiandoli/incollandoli nelle rispettive cartelle usando Windows®...
-
Page 41: Hulp Nodig
UW PRODUCT REGISTREREN Op het internet op http://arnovatech.com/register Dank u voor het kiezen van dit ARNOVA-product. Wij hopen dat u er nog jarenlang plezier aan zult mogen beleven. Wij raden u aan om uw ARNOVA-product te registreren zodra u het uit de verpakking hebt gehaald ( ). -
Page 42: Beschrijving Arnova
BESCHRIJVING ARNOVA Terugkeren naar het vorige scherm Menu: geeft menuopties in functie van het actieve scherm. AAN/UIT-knop: ingedrukt houden om in/uit te schakelen. Om uw toestel in stand-by te zetten (en hem zo weer snel te kunnen opstarten), drukt u eenmaal op de Power-knop. indien de ARNOVA niet meer reageert, kunt u hem Het toestel resette resetten. - Page 43 OPSTARTEN Laad de batterij volledig op alvorens de ARNOVA voor de eerste maal te gebruiken. Sluit het meegeleverde netsnoer aan op de stroomaansluiting van de ARNOVA en op een stopcontact. Uw ARNOVA zal worden ingeschakeld en starten met laden. Het aan/uit-lampje brandt rood wanneeer de batterij aan het opladen is.
- Page 44 WIFI-NETWERKVERBINDING Hiervoor dient u zich in een WiFi-zone te bevinden, zodat u verbinding kunt maken. Telkens dat uw ARNOVA zich in een zone bevindt met een netwerk dat u al geconfigureerd hebt, zal het proberen om hier verbinding mee te maken. Om een nieuw WiFi-netwerk te configureren, gaat u naar het beginscherm, drukt u op het Menu-pictogram en selecteert u...
- Page 45 DE ARNOVA-INTERFACE Uw ARNOVA-apparaat is uitgerust met een aanraakscherm. De meeste schermoppervlakken zullen reageren wanneer u ze met uw vinger aantikt. Startscherm Tabblad Applicaties Dit zijn de standaard Android™- snelkoppelingen ( Web Browser Druk op dit pictogram om al de , enz.).
- Page 46 PERSONALISEER UW PRODUCT Het uitgebreide beginscherm Schuif met uw vinger horizontaal over het scherm om naar de linker- of de rechterkant van uw uitgebreide beginscherm te gaan. De items op het beginscherm personaliseren - Om een item toe te voegen aan het beginscherm (snelkoppelingen, widgets, enz.) houdt u uw vinger op een lege plek op het scherm en kiest u vervolgens een item uit de lijst.
- Page 47 MUL TIMEDIABESTANDEN Tik in het Beginscherm de video-, audio- of fotopictogram aan. De ARNOVA zal een lijst van bestanden of mappen weergeven die overeenstemmen met de geselecteerde categorie. Tik een item aan om het af te spelen. Alleen in de modus Video en Foto: tik om het even welke plek op het scherm aan om de bedieningsknoppen op het scherm weer te geven of te verbergen.
- Page 48 MEDIA OVERZETTEN NAAR UW ARNOVA Verbind de meegeleverde USB-kabel met de ARNOVA en met een computer die aan staat. De ARNOVA zal worden ingeschakeld. Binnen enkele seconden verschijnt de ARNOVA als een pictogram op uw compu- ter. U kunt uw mediabestanden op de ARNOVA plaatsen door ze ofwel in de betreffende map te kopiëren/met behulp van Windows®...
- Page 49 National restrictions Country Restriction Reason/remark Bulgaria None General authorization required for outdoor use and public service France Outdoor use lim- Military Radiolocation use. Refarming of the ited to 10 mW e.i.r.p. 2.4 GHz band has been ongoing in recent within the band years to allow current relaxed regulation.
Need help?
Do you have a question about the Arnova 7c G2 and is the answer not in the manual?
Questions and answers