Table of Contents
Advertisement
Available languages
Available languages
Advertisement
Table of Contents

Related Manuals for NuWave Primo


Summary of Contents for NuWave Primo
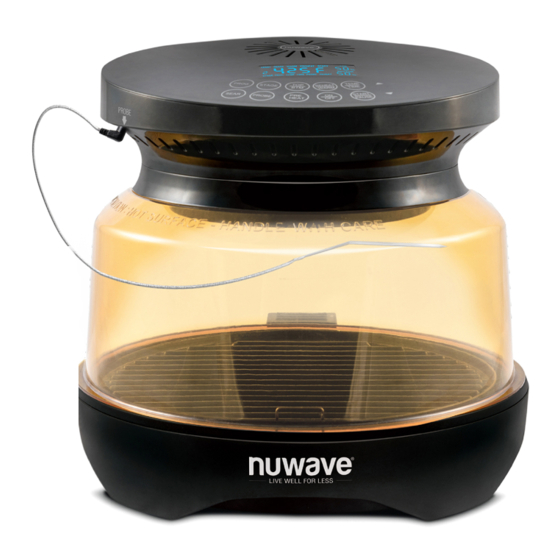
- Page 1 OWNER’S MANUAL ® with Temperature Probe nuwavenow.com...
- Page 2 -month for an additional warranty! As a special thank-you for registering your NuWave DOWNLOAD THE QR CODE Primo, you’ll automatically receive an additional 3 months added to your limited manufacturer’s warranty!* APP TO YOUR MOBILE DEVICE All you have to do is follow these simple steps.
-
Page 3: Table Of Contents
Unplug the Primo from outlet when not in use and before cleaning. Replaceable Parts............54-55 Allow the Primo to cool before cleaning, putting on or taking off parts. Do not operate Primo with a damaged cord or plug or after the appliance malfunctions or has been damaged in any manner. -
Page 4: Important Safeguards
IMPORTANT SAFEGUARDS HOUSEHOLD USE ONLY • READ ALL INSTRUCTIONS BEFORE USE SAVE THESE INSTRUCTIONS 18. It is normal for some smoke to escape the Primo when heating Read and understand the entire manual before using the Primo. for the first time. -
Page 5: Parts & Accessories
If any trouble arises during operation, any service MUST be done by NuWave LLC or authorized by the manufacturer for repairs.* Do not disassemble the Primo or replace any parts without prior written consent from the manufacturer. Children should be supervised to ensure that they do not play with the appliance. -
Page 6: Assembly Guide
Base. Down arrows. To begin, press START/PAUSE. Once it has reached If using Probe, insert plug of the set temperature, the Primo will beep twice and automatically begin Probe into Power Head (jack). to cook. To begin cooking, press START/PAUSE. -
Page 7: Instructions
• When the cooking is finished, End will be displayed and the • To adjust temperature, press Primo will beep three times. the Up or Down arrows. Note: If the Primo Power Head is removed from the Dome, the Primo Adjustable in 5°F increments. will not turn off. To change temperature faster, hold down the Up or Down arrows. - Page 8 INSTRUCTIONS SEAR Function • The Primo will preheat at 450°F and then sear at 400°F for 5 SEAR 1 minutes (SEAR 1), cook at selected temperature and time, sear SEAR 1 will always be BEFORE again at 450°F for 5 minutes (SEAR 2), and then finish cooking the regular cooking stage.
- Page 9 INSTRUCTIONS • The Primo will cook your food at selected temperature and Press TEMP/TIME. Press the Up or Down arrows to adjust cooking time to 00:30. time, sear at 400°F for 10 minutes, and then finish cooking and display End.
- Page 10 You can adjust Press PROG. The display will show 1 and PROG. your Primo to cook from the top or bottom and the amount of power. • Choose the program number (1-150) by pressing the Up or Default - Top 30%, Bottom 70%.
- Page 11 If Probe temperature was not achieved under regular cooking (400˚F, 00:05), Primo will go to SEAR 2. If probe temperature is still not achieved in SEAR 2, Primo will go back to regular cooking temperature 400°F and continue to cook until probe temperature is achieved.
-
Page 12: Cleaning & Maintenance
Error Code Er1 is displayed and the Primo is not cooking. carefully with a damp dishcloth or Turn the Primo off and unplug to cool. If still not working after sponge. Make sure the Primo has cooling and turned on, contact Customer Service. -
Page 13: Limited Warranty
Manufacturer will provide the necessary parts and labor to repair EXECUTED BY THE MANUFACTURER. THE REMEDY OF any part of the Primo at NuWave LLC Service Department. After the REPAIR OR REPLACEMENT AS PROVIDED UNDER THIS expiration of the warranty, the cost of the labor and parts will be the LIMITED WARRANTY IS EXCLUSIVE. - Page 14 NuWave product. For any dispute arising out of your use of NuWave’s website, you have thirty (30) days from the date you provided information to the website to opt out of arbitration.
- Page 15 MANUAL DEL PROPIETARIO Como agradecimiento especial por registrar su Primo, ¡recibirá automáticamente 3 meses adicionales a su garantía limitada del fabricante!* ® Todo lo que tiene que hacer es seguir estos simples pasos. Usando su teléfono inteligente o Combo Parilla y Horno dispositivo inteligente, escanee el código QR ubicado en la parte...
- Page 16 Permita que el Primo se enfríe antes de limpiar, poner o quitar partes. No opere el Primo con un cable o enchufe dañado o despuésde que el aparato no funcione correctamente o se haya dañado de alguna manera. Devuelva el aparato al centro de servicio autorizado más cercano para que lo examinen, reparen o ajusten.
- Page 17 NO USE EL PRIMO PARA NINGÚN OTRO USO QUE EL PROPUESTO. 21. El Primo no está diseñado para ser operado por medio de un temporizador externo o un sistema de control remoto separado. Nota: Coloque el Primo en una superficie que sea horizontal, 22.
- Page 18 Los niños deben ser supervisados para asegurarse de que no jueguen con el aparato. 10. Asegúrese de que el Primo esté siempre limpio antes de cocinar. PROBE 11. No utilice la placa de la parrilla fuera de la base.
- Page 19 PROBE segura en la base. Conecte el sensor en su Primo Primo (Jack). Presione PROBE. Ajuste la temperatura interna objetivo del sensor para los alimentos con las Si usa el sensor, inserte el enchufe del flechas hacia arriba y hacia abajo.
- Page 20 • Cuando la cocción finalice, se mostrará End y el Primo pitará cambiar la temperatura tres veces. más rápido, mantenga Nota: Si la cabeza de potencia del Primo se retira del domo, el Primo presionadas las flechas hacia se apagará. arriba o hacia abajo.
- Page 21 INSTRUCCIONES Función de SEAR • El Primo se precalentará a 425°F y luego se dorará a 400°F SEAR 1 durante 10 minutos (SEAR 1), cocinará a la temperatura SEAR 1 siempre será la etapa y tiempo seleccionados, marcará nuevamente a 400°F ANTES de la etapa de cocción...
- Page 22 INSTRUCCIONES • El Primo cocinará SEAR 1 a la temperatura y el tiempo Ejemplo: Cocine la Etapa 1 a 300°F durante 17 min. » Cocine establecidos, cocinará a 360°F durante 15 minutos la Etapa 2 a 360°F durante 30 min. » Cocine la Etapa 3 a 400°F (predeterminado) y luego cocinará...
- Page 23 La función Warm se usa para mantener calientes los alimentos en programa se pueden elegir entre 101-200. el Primo después de que se haya cocinado hasta que esté listo para servirlos. La configuración predeterminada para Cálido es 140° F Presione PROG nuevamente para guardar su receta en el durante 1 hora.
- Page 24 Si la temperatura del sensor no se alcanzó con la cocción regular • Desenchufe el aparato y asegúrese de que se enfríe (400F, 00:05), el Primo irá a SEAR 2. Si aún no se alcanza completamente. la temperatura del sensor en SEAR 2, el Primo volverá a la •...
- Page 25 Asegúrese de que su Primo esté enchufada. Desconecte el Primo y Servicio al Cliente. vuelva a enchufar su Primo y vea si su Primo alcanza la temperatura correcta. Si su Primo continúa sin calentarse, comuníquese con Aparece el código de error Err4 y su Primo no está cocinando.
- Page 26 EL FABRICANTE GARANTIZA La obligación del fabricante en virtud de esta Garantía Limitada se El NuWave Primo, que incluye, La Cabeza de Potencia, el Domo, la limita, en la medida en que lo permita la ley, a reparar o reemplazar Base y el Sensor, está...
- Page 27 NuWave. Para cualquier disputa que surja de su uso del sitio web de NuWave, tiene treinta (30) días a partir de la fecha en que proporcionó información al sitio web para optar por no participar en el arbitraje.
-
Page 28: Replaceable Parts
Grill Plate Feet 20710 Detachable Silicone Feet keeps Grill Grill Plate Silicone Feet 26708 Plate from sliding in Base. Goes on the bottom of Base in each Base Rubber Feet 26709 corner. Keeps the Primo from sliding. replaceable parts nuwavenow.com nuwavenow.com... - Page 29 For patent information please go to: www.nuwavenow.com/legal/patent Designed & Developed in USA by: NuWave LLC 560 Bunker Ct. Vernon Hills, IL 60061, U.S.A. Customer Service: 1-877-689-2838 • help@nuwavenow.com Item No: BM 20701 Made in China Rev. 18-OG ©2021 NuWave LLC • All Rights Reserved. 1-4-21...
Need help?
Do you have a question about the Primo and is the answer not in the manual?
Questions and answers