
Related Manuals for Digital Aquatics Lifeguard


Summary of Contents for Digital Aquatics Lifeguard
- Page 1 All manuals and user guides at all-guides.com Lifeguard™ User Guide V2.0 Written for Lifeguard™ Firmware 2.0 Updated 4/11/2013...
- Page 2 Information in this document is subject to change without notice. Digital Aquatics reserves the right to change or improve its products and to make changes in the content without obligation to notify any person or organization of such changes.
-
Page 3: Forward
Lifeguard™ features built-in network connectivity which will allow you to access the system remotely. Lifeguard™ enables you to keep an eye on your tank while you are at work, on an errand, or on vacation. Lifeguard™ can be used alone or as a backup to an aquarium controller such as a Digital Aquatics ReefKeeper™... -
Page 4: Table Of Contents
Canceling pH Calibration .................................. 28 If pH Calibration Fails ..................................28 Chapter 6: Setting Up Lifeguard™ for Your Aquarium ........................29 Accessing the Settings Dialog ................................. 29 Changing your Username and Password (General Settings Menu) ................... 30 ... - Page 5 Networks, Routers and Modems ..............................56 Step 1: Connect Lifeguard™ to your Network ..........................57 Step 2: Set Up your Router for Internet Access to Lifeguard™ (Enable Port Forwarding) ........... 57 Step 3: Set up a Domain Name (optional) ........................... 58 ...
-
Page 6: About This Guide
Firefox 1 1.0+ Google C Chrome 19.0+ Safari 5.1 An Interne et connection is s required in or rder to sync the e Lifeguard uni its time to the i internet and us email alert - 5 - Lifeguard™ U ser Guide V2.0... -
Page 7: Disclaimers
The USB port should never be connected to any other type of device or connection. Failure to heed these warnings may result in irreparable damage to the Lifeguard unit and is not covered by the Warranty. -
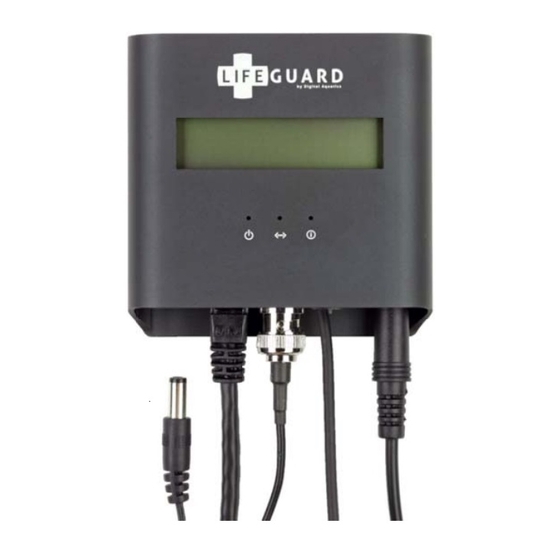
Page 8: Chapter 1: Product Overview
Adapter ' Ethernet Cab Quick Start Guid M Dual Lock L ow Profile™ M Mounting Kit Familia rize yourse elf with Lif feguard™ Front Dis splay Main Display ower Status etwork Status lert Status - 7 - Lifeguard™ U ser Guide V2.0... -
Page 9: Identifying The Accessories
Lifeguard u will not be ab ble to save new w graph data wh hile Lifeguard i is powered off. Identify ying the Ac ccessories The Lifegu uard Monitorin... -
Page 10: Chapter 2: Installation
Lifeguard d’s firmware vi a a USB memo ry device. Do n connect Life eguard to powe er through the USB port or the e Lifeguard un nit may become e damaged. - 9 - Lifeguard™ U ser Guide V2.0... -
Page 11: Mounting Lifeguard
Included with the Lifeguard package is a Dual Lock™ mounting kit. This adhesive Dual Lock™ mounting kit can be attached to the back of Lifeguard and most flat surfaces, as shown below. This allows you to pick up Lifeguard when you want to access the unit directly. - Page 12 Digital Aquatics recommends mounting Lifeguard vertically. It is important that your electronic equipment never be mounted on the ground or in the bottom of a cabinet where water can pool. Lifeguard is best mounted as high above a level surface as conditions will allow.
-
Page 13: Locating Lifeguard
All manuals and user guides at all-guides.com Locating Lifeguard™ Digital Aquatics recommends installing Lifeguard in a location where it can be easily accessed for daily operation. Mounting the Probes Probes should be mounted in your aquarium or sump tank where they are able to acquire reliable readings. For example, placing a temperature probe next to a heater will skew the readings. -
Page 14: Connecting Lifeguard™ To Your Router
Once con nnected and configured d, Lifeguard ca an be accessed d by a standard d web browse r from any dev vice with acces ss to your netw work. -
Page 15: Chapter 3: Powering Up The Lifeguard™ System
Pow wer Adapter Po rt on Lifeguard as shown belo Connecting g Lifeguard to p power When pow wer is applied t to the Lifeguar rd unit, the gre een Power Sta atus LED (left) w will illuminate . -
Page 16: Getting Around
The Date an nd time are auto omatically dete ected by Lifegu uard upon star rtup. Lifeguard d has a real-tim clock to kee ep time in the e vent that Lifeg guard cannot co onnect to the in nternet. -
Page 17: Displaying Alarm Conditions
Display ying Alarm Condition When an a alarm conditio n occurs, Lifeg guard displays the condition n on Lifeguard’ ’s LCD display. . Lifeguard als illuminate s the red Alert t Status LED wh hen an alarm c condition occu urs. -
Page 18: Chapter 4: Initial Lifeguard™ Setup
IP address to acc cess Lifeguard d’s web server. Press the N Navigation but tton on top of f Lifeguard to d display the cur rrent IP addres Note: Yo our IP address m may be differen You can en... -
Page 19: Setting Up Lifeguard™ For The First Time
‘Next’. Note: Be sur re to keep your r username and d password info ormation hand dy in order to lo ogin to the Life eguard web server. - 18 - Lifeguard™ U ser Guide V2.0... - Page 20 Select the 12-hour time format if you w want Lifeguard d to display th he time in “AM /PM” format; oth herwise select the 24-hour fo ormat.
-
Page 21: If You Forget Your Username Or Password
Usernam me or Passw word If you forg et your userna ame or passwo ord, you can re eset Lifeguard to its factory d default setting gs by pressing holding th he recessed Fac ctory Reset bu utton. See “Res setting Lifegua ard”... -
Page 22: Chapter 5: Calibrating The Probes
Chapter 5: Calibrating the Probes Once you have completed initial setup, Digital Aquatics recommends that you calibrate your temperature probe and your pH probe to your Lifeguard unit. Lifeguard is designed to lead you through the Temperature and pH calibration process. -
Page 23: Calibrating The Temperature Probe
Lifeguard w what the know wn temperatur re is. Lifeguard d’s temperatu re probe calib bration proced ure guides you through th hese steps. Open the... - Page 24 Step 2 Place the L Lifeguard temp perature senso or in in your aq quarium’s wat er as close as p possible to the e secondary temperatu ure sensor.
-
Page 25: Canceling Temperature Calibration
L Lifeguard, or if the temperatu ure probe’s rea ading fails to s stabilize within n 10 minutes. Failure of t... -
Page 26: The Ph Calibration Wizard
Wizard The pH Ca libration wizar rd will guide y you through th he steps to cali ibrating your L Lifeguard pH p probe. Step 1 What you will need: pH c calibration req quires two diffe erent calibratio... - Page 27 The pH Calibr ration wizard screen wil l report ‘Stabil izing…’ and d display a barbe er pole indicato or while the ca alibration is in progress. The calibration n process may take several m minutes. - 26 - Lifeguard™ U ser Guide V2.0...
- Page 28 ‘S Stabilizing…’ a and display the e barber pole indicator whil e the calibration n is in progress s. The calibrat tion process m may take severa al minutes. - 27 - Lifeguard™ U ser Guide V2.0...
-
Page 29: Canceling Ph Calibration
Calibration wizard. pH probe not correctly Ensure that the pH probe’s BNC connector is correctly turned connected to Lifeguard and latched onto the BNC jack on the Lifeguard unit. - 28 - Lifeguard™ User Guide V2.0... -
Page 30: Chapter 6: Setting Up Lifeguard™ For Your Aquarium
Up p Lifegua ard™ for r Your Aq quarium You’ll wan t to set up you ur Lifeguard sy ystem to displa ay its readings s and notify yo ou of alarm con nditions accord ding to your pre eferences. -
Page 31: Changing Your Username And Password (General Settings Menu)
Lifegu ard to its facto ry default state e. Without the e correct userna ame and passw word, you will n not be able to acce ss the Lifeguar rd webserver an nd dashboard. - 30 - Lifeguard™ U ser Guide V2.0... -
Page 32: Setting Time And Units (Time And Units Menu)
Daylight t Savings is cu rrently in effec ct in aylight ur area. When “Yes” is select ted, Lifeguard will automatic cally add one h hour to avings e displayed tim me for the selec cted time zone... -
Page 33: Setting Alarm Thresholds (Sensors Menu)
Wh hen the sensor r temperature High h Alarm (Temp) ceeds this valu e, Lifeguard w will illuminate t the Alert Statu us LED, report t rent temperat ture in RED on the Lifeguard d dashboard, a... -
Page 34: Setting Up Email Alerts (Notifications Menu)
Low Alar m (pH) point for the low pH alarm. When the pH value sensed by Lifeguard’s s pH obe falls below w this value, Lif feguard will illu uminate the A Alert Status LED port the curren... - Page 35 587. Example: 587 SMTP Lifeguard will need to log in to the email server that it will use to send alert emails. If you want Lifeguard to send emails from your email address, Lifeguard Username will need to know the username you specify when you log in to your email service.
-
Page 36: Changing Network Settings (Network Menu)
Lifeguard web b server witho ut having to re emember you r Lifeguard’s IP P address. You u can also use th he Network set ttings menu to o change a var... - Page 37 All manuals and user guides at all-guides.com Hostname Specify the hostname for your Lifeguard. You can use the hostname can to access the Lifeguard web server without having to remember your Lifeguard’s IP address. The hostname must be between 1 and 16 alphanumeric (letters and numbers) characters.
-
Page 38: Chapter 7: Using Lifeguard
Temp G Graph temp p probe is un-c alibrated or if the Lifeguard unit has been n powered on f less t han 5 minutes Indica ates ‘Normal’ i f the tempera... -
Page 39: Monitoring Ph Information On The Lifeguard™ Dashboard
G Graphing data is not displaye ed if the pH pr robe is Graph un-ca alibrated or if t the Lifeguard u unit has been powered on fo or less than 5 minu tes. Indica ates ‘Normal’ i... -
Page 40: Monitoring The Switch Input And The Date And Time
Current Switch plays ‘Normal’ ’ if the Advanc ced Switch Cab ble is plugged in to Lifeguard d and if e state of the sw witch input is not in the alar rm state as def fined in the Se nsors Status ... -
Page 41: Alarm (Critical) And Caution Conditions
Note: when a sensor measurement fluctuates about a caution or critical threshold, Lifeguard will send a single alert email when the threshold is initially reached. Lifeguard will wait a minimum of one hour before sending a second alert email if the measurement value continues to fluctuate around the threshold. -
Page 42: Using The Advanced Graphing Features
Spotting trends can help you avoid problems before they do harm to your aquarium. Graphs for temperature and pH are only displayed if the corresponding probe has been calibrated. When Lifeguard has been reset or started for the first time, the graphs may not appear for up to five minutes. - 41 -... -
Page 43: The Short-Term Graph
All manuals and user guides at all-guides.com The Sho ort-term G raph Lifeguard’ s Dashboard fe eatures a shor rt-term graph f for pH and tem mperature read dings. raphing (meas surement) verage measu rement Short-term g graph (temperat ture) -
Page 44: The Extended Graph
All manuals and user guides at all-guides.com The Ext ended Gra Lifeguard’ s extended gra aph can show up to 4,032 m measurements – two weeks o of continuous measurement sampled e every 5 minute es. To display t the extended g... -
Page 45: Accessing Data Logs
Data Lo Lifeguard stores up to 4, ,032 measurem ments each of temperature a and pH data. Lifeguard allo ows you to download its measurem ment data logs f for pH and tem mperature to a a .CVS or sprea... - Page 46 ‘Save’ to sa ave the file. Th he new file wil l be stored on your compute er or device. Lifeguard saves data log gs in .CSV form at, which is a c comma-deline eated text file f format. Files in n the .CSV form...
-
Page 47: Clearing Data Logs
All manuals and user guides at all-guides.com In a text ed ditor (Window ws Notepad in t this example), a Lifeguard te emperature log g file in .CSV fo ormat appears s as follows: Note that t the most recen... -
Page 48: Using Lifeguard™ Without An Internet Connection
All manuals and user guides at all-guides.com Using L Lifeguard™ ™ without a an Internet t Connecti You can us se Lifeguard to o monitor you r aquarium wi thout an Inter rnet connectio on, though this s method of... - Page 49 All manuals and user guides at all-guides.com Lifeguard f firmware is up pdated via the Internet and t the Lifeguard w web server. Fo ollow these ste e ps to update t the firmware. Click on th he Update Icon...
- Page 50 All manuals and user guides at all-guides.com When the update down load is comple ete, Lifeguard t the firmware u update applica ation will reset t Lifeguard: When the restart is comp plete, the upd ate screen wil l show “Lifegu uard is done Up pdating:”...
-
Page 51: Updating Firmware With A Usb Drive
F Factory Reset b button with a p paperclip or o ther mall tool econnect the p power adapte r to Lifeguard while pressing g and holding actory Reset b utton he firmware u pdate process s will begin. Lif... -
Page 52: Chapter 8: Specifications
Smartphone compatible graphs • • pH port: SNTP support for Internet time Precision: 0.01 pH synchronization Accuracy* +/- 0.1 pH Range: 3.00 pH to 11.00 pH • Advanced switch port • • Ethernet • Power adapter - 51 - Lifeguard™ User Guide V2.0... -
Page 53: Chapter 9: Troubleshooting And Support
10,000 members, there is lively conversation and community. You can post questions, comments, or even pictures of your tank on the Digital Aquatics forum. The resident rock-stars on our forum are the members of Team DA. These are members who have demonstrated that they are extremely knowledgeable; Team DA members are generally very helpful in resolving issues. -
Page 54: Appendix A: Troubleshooting
Q. A. The first thing that you should do is turn the power off to Lifeguard. Make sure that any electronic device that gets wet is dry and any connections are clean before connecting it back into the system. Note that damage caused as a result of water exposure is not covered under the warranty. - Page 55 Q. I'd like to be able to connect my Lifeguard to my network wirelessly. How can I do this? The Lifeguard does not have any inherent wireless capability, but can be made A. ...
-
Page 56: Appendix B: Accessing Lifeguard™ From The Internet
All manuals and user guides at all-guides.com Appendix B: Accessing Lifeguard™ from the Internet Getting Started This guide is intended to help you access the monitoring functions of your Lifeguard system from the Internet by following these basic steps: Connect Lifeguard to your network... -
Page 57: Networks, Routers And Modems
Hostname The Hostname is a plain text name used to identify network devices to make it easier for people to remember and access network devices. Your Lifeguard’s default hostname is ‘LIFEGUARD’, it will also have an IP address. DHCP stands for Dynamic Host Configuration Protocol. This is the service that DHCP automatically assigns and manages IP addresses on your network. -
Page 58: Step 1: Connect Lifeguard™ To Your Network
Lif feguard unit to o your network. A A CAT-5 Ethern net cable is pro ovided with ea ach Lifeguard system. Lifegu uard should be e connected to o your DHCP-ena bled router. Li ifeguard can b... -
Page 59: Step 3: Set Up A Domain Name (Optional)
All manuals and user guides at all-guides.com Step 3: Set up a Domain Name (optional) You may want to set up a domain name to make it easy to remember how to access your Lifeguard from a web browser. Here’s an example that uses the free service no-ip.com: 1 ... -
Page 60: Example Router Configurations
Once there, select the Server Address you used such as no-ip.org and then the 2 domain name you created, followed by your username and password. Now just type your domain name in the address box of your browser and the Lifeguard start page should appear. Linksys (Model: E2100L) Single Port Forwarding On most Linksys the first 5 entries are preset, just use the first one that has a blank name. - Page 61 In the Server IP Address field, enter the IP address of your local computer that 6 will provide this service. 7 Click Apply. 8 The service appears in the list in the Port Forwarding/Port Triggering screen. - 60 - Lifeguard™ User Guide V2.0...
- Page 62 Type the user name for your Dynamic DNS account. This is the name that you 5 use to log in to your account, not your host name. 6 Type the password (or key) for your Dynamic DNS account. 7 Click Apply to save your configuration. - 61 - Lifeguard™ User Guide V2.0...
Need help?
Do you have a question about the Lifeguard and is the answer not in the manual?
Questions and answers