Advertisement
Available languages
Available languages
Table of Contents
- 1 Protect Your Hearing
- 2 Installation Applications
- 3 Planning Your Installation
- 4 Product Description
- 5 Typical Installation Sequence
- 6 Power Connections
- 7 Fuse Requirements
- 8 Input Section
- 9 Filter Controls
- 10 Speaker Outputs
- 11 System Configurations
- 12 Appendix D: Troubleshooting
- 13 Planung der Installation
- Download this manual
owner's manual
400W 2/3/4 Channel Amplifier
Thank you for purchasing a JL Audio amplifier for
your automotive sound system.
Your amplifier has been designed and manufactured to exacting
standards in order to ensure years of musical enjoyment in your vehicle.
For maximum performance, we highly recommend that you have
your new amplifier installed by an authorized JL Audio dealer. Your
authorized dealer has the training, expertise and installation equipment
to ensure optimum performance from this product. Should you
decide to install the amplifier yourself, please take the time
to read this manual thoroughly so as to familiarize yourself
with its installation requirements and setup procedures.
If you have any questions regarding the instructions in this
manual or any aspect of your amplifier's operation, please contact your
authorized JL Audio dealer for assistance. If you need further assistance,
please call the JL Audio Technical Support Department
at (954) 443-1100 during business hours.
Advertisement
Table of Contents

Related Manuals for JL Audio XD400/4


Summary of Contents for JL Audio XD400/4
- Page 1 For maximum performance, we highly recommend that you have your new amplifier installed by an authorized JL Audio dealer. Your authorized dealer has the training, expertise and installation equipment to ensure optimum performance from this product.
-
Page 2: Protect Your Hearing
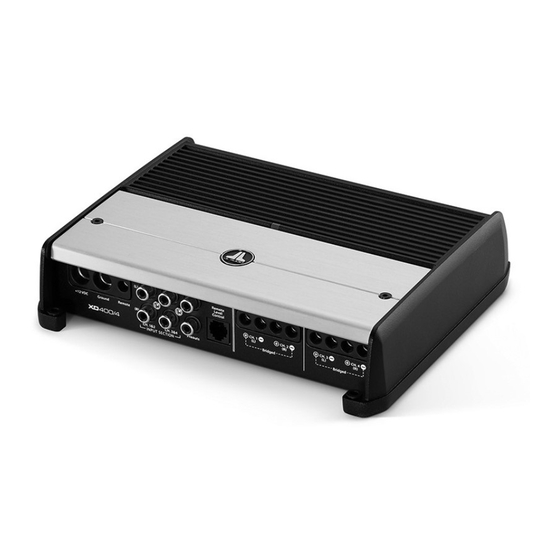
Serial Number: Pre-Out Signal Selection Switch (pg. 9) 2 | JL Audio - XD400/4 Owner’s Manual installation aPPlications This amplifier is designed for operation in vehicles with 12 volt, negative-ground electrical systems. Use of this product in vehicles with positive ground and/or voltages other than 12V may result in damage to the product and will void the warranty. -
Page 3: Planning Your Installation
The outer shell of your JL Audio amplifier is designed to remove heat from the amplifier circuitry. For optimum cooling performance, this outer shell should be exposed to as large a volume of air as possible. -
Page 4: Product Description
JL Audio NexD™ ultra-high speed switching technology to deliver outstanding fidelity and efficiency. The XD400/4 can be operated with a wide variety of source units and system configurations. tYPical installation sequence The following represents the sequence... -
Page 5: Power Connections
If only the XD400/4 is being run from that power wire, we recommend a 40A fuse be used. If fusing the amplifier near its power connections (when more than one amp is being run from the main power wire), use a 40A fuse. -
Page 6: Input Section
Input connections are via up to two pairs of traditional RCA-type jacks. If you wish to send four discrete channels into the XD400/4, simply use all four inputs and set the “Input Mode” switch in the “4 Ch.” position. If you wish to use only two channels of input to deliver signal to all four amplifier channels, set the “Input Mode”... - Page 7 inPut sensitiVitY controls The controls labeled “Input Sens.” located in each channel section can be used to match the source unit’s output voltage to the input stage of each pair of amplifier channels for maximum clean output. Rotating the control clockwise will result in higher sensitivity (louder for a given input voltage).
-
Page 8: Filter Controls
The active filter built into each channel section of the XD400/4 can be used to eliminate potentially harmful and/or undesired frequencies from making their way through the amplifier sections to the speaker(s). This serves to improve tonal balance and to avoid distortion and possible speaker failure. - Page 9 With the addition of the optional Remote Level Control (HD-RLC), you can control the volume of one, or both channel pairs of the XD400/4 from the front of the vehicle. This is useful for subwoofer level control, rear channel level control, center-channel level control or even as a master volume control for the system.
-
Page 10: Speaker Outputs
1) Left Channel Only or Right Channel Only Information: If you wish to send a left-only or right-only signal to a pair of the XD400/4’s channels, use a “Y-Adaptor” to split the single channel signal into both left and right RCA inputs. - Page 11 If your amplifier fails or malfunctions, please return it to your authorized JL Audio dealer so that it may be sent in to JL Audio for service. There are no user serviceable parts or fuses inside the amplifier. The unique nature of the circuitry in the JL Audio amplifiers requires specifically trained service personnel.
-
Page 12: System Configurations
The XD400/4 is a flexible amplifier, well- suited for a multitude of system configurations. In this section, the most likely configurations for a system with a single XD400/4 are explained in detail. Once you have selected your desired configuration, you can use the amplifier panel drawing on pages 18 &... - Page 13 Inp ut Connections: one stereo pair of source unit outputs is connected to the “CH 1 (Left)” and “CH 2 (Right)” inputs of the XD400/4 (select “2 Ch.” on the “Input Mode” switch). The second stereo pair of source unit outputs is connected to the subwoofer amplifier inputs.
- Page 14 6) Verify that you have disconnected the speakers before proceeding. Play a track with an appropriate sine wave (within the frequency range to be amplified by the XD400/4) at 3/4 source unit volume. 7) Connect the AC voltmeter to the speaker output connectors of the amplifier.
- Page 15 39 ......483 Full-clockwise: 483 aPPendiX c: Xd400/4 specifications general specifications: actual Recommended Fuse Value: 40A Freq.
-
Page 16: Appendix D: Troubleshooting
“i get a repetitive ticking or popping sound coming out of the speaker(s).” “my amplifier’s output fluctuates when i tap on it or hit a bump.” 16 | JL Audio - XD400/4 Owner’s Manual Please refer to Appendix A (page 14) to set the input sensitivity for maximum, low-distortion output. - Page 17 “my amplifier turns on, but there is no output.” Check your voltage source and grounding point. The power supply of the XD400/4 will operate with charging system voltages down to 10V. Shutdown problems at higher volume levels can occur when the charging system voltage (or remote turn- on voltage) momentarily drops below 10V.
- Page 18 Use this diagram to document your amplifier’s switch and control positions. 18 | JL Audio - XD400/4 Owner’s Manual...
- Page 20 All warranty returns should be sent to JL AUDIO ’s Amplifier Service Facility freight-prepaid through an authorized JL AUDIO dealer and must be accompanied by proof of purchase (a copy of the original sales receipt). Direct returns from consumers or non-authorized dealers will be refused unless specifically authorized by JL AUDIO with a valid return authorization number.
- Page 21 Installationsanweisungen und Einbauhinweisen vertraut. Falls Sie irgendwelche Fragen bezüglich dieses Benutzerhandbuchs oder zum Betrieb des Verstärkers haben, wenden Sie sich bitte an Ihren JL Audio Fachhändler. Fall Sie weitere Unterstützung zum Produkt benötigen, wenden Sie sich bitte an die Audio Design GmbH Support Hotline (JL Audio Vertrieb Deutschland) während der üblichen Geschäftszeiten:...
- Page 22 Verstärkers und auf der Verpackung. Seriennummer: Vorverstärker- Ausgangs- Schalter (S. 9) 2 | JL Audio - XD400/4 Benutzerhandbuch VerwendungsbereicH Dieser Verstärker ist nur für den Betrieb in Fahrzeugen mit 12 Volt-Bordsystem und negativer Masse vorgesehen. Die Benutzung in Fahrzeugen mit positiver Masse und/ oder anderen Spannungen als ca.
-
Page 23: Planung Der Installation
Einbau des Verstärkers sorgfältig planen. Die folgenden Punkte sollten bei der Planung der Installation beachtet werden. kühlung: Ihr JL Audio Verstärker ist so entworfen, dass der Kühlkörper die enstehende Hitze optzimal absorbiert. Dazu sollte der Kühlkörper ein mög- lichst großes Luftvolumen zur Verfügung haben, um eine optimale Kühlung gewährleisten zu kön-... - Page 24 ProduktbescHreibung Der JL Audio XD400/4 ist ein 4-Kanal- Vollbereichs-Verstärker mit JL Audio NexD™ Ultra-High-Speed-Schaltungstechnologie, welche eine herausragende Tonwiedergabe und Effizienz garantiert. Der XD400/4 Verstärker kann mit vie- len System-Konfigurationen betrieben werden. tYPiscHer installationsablauF Die folgenden Anmerkungen beschreiben den typischen Ablauf einer Verstärkerinstallation, bei der ein Autoradio/Steuergerät (trifft nicht...
- Page 25 Kurzschluss zu schützen. Verlegen Sie dann ein weiteres geeignetes Massekabel von einem geeigneten Masse-Punkt zum Einbauort des XD400/4. Achten Sie darauf, dass diese Verbindung möglichst kurz ist (max. 90 cm). Suchen Sie dafür einen metallischen blan- ken Punkt an der Fahrzeugkarosserie. Verwenden...
- Page 26 Sie die Schraube des Anschlusses vorsich- tig fest und achten Sie auf einen guten Halt des Kabels und darauf, dass Sie die Schrauben nicht überdrehen. 6 | JL Audio - XD400/4 Benutzerhandbuch VerstÄrkereingÄnge Die Signal-Eingänge des XD400/4 erlauben eine Ansteuerung mit zwei oder vier Cinch-Anschlussbuchsen.
- Page 27 Sollte jedoch der Eingangspegel der Lautsprecher dennoch zu hoch für den Verstärker sein und Verzerrungen zu hören sein, sollte ein „Signal- Konverter“ verwendet werden. eingangsemPFindlicHkeit Die Drehregler mit der Bezeichnung “Input Sens.” befinden sich in der jeweili- gen Kanalsektion. Mit diesem Regler kön- nen Sie für jedes Kanalpaar getrennt die Eingangsempfindlichkeit mit dem Steuergerät abstimmen, um ein maximales unverzerrtes...
- Page 28 Einstellung der Filter verbessert substanziell die Langlebigkeit und Tonwiedergabe Ihres Audio Systems. 8 | JL Audio - XD400/4 Benutzerhandbuch 1) “Filter Mode” Schalter: Der XD400/4 bietet einen “12db per Oktaven-Filter” (je einen pro Kanalpaar 1/2 und 3/4). Jeder dieser Filter kann mit dem Schalter “Filter Mode”...
- Page 29 Wird hingegen Kanal 1&2 in diesem Modus “gefadet”, hat dies auch Auswirkungen auf den Pegel des Vorverstärker-Ausgangs. 2) “Sum”: Falls der XD400/4 für ein Front- und Rear Lautsprecher-System benutzt wird, ist diese Schalterstellung bestens geeignet. Der Vorverstärker-Ausgang liefert dann ein “sum- miertes”...
- Page 30 Ausgangskanäle die gleiche Leistung mit umgekehrter Polarität. Die kombinierten Ausgänge verdoppeln dann die Ausgangsleistung für den angeschlossenen Lautsprecher/Subwoofer. Der XD400/4 wurde für das Brücken an einem - 8,0 mm oder beiden Kanalpaaren konzipiert, ohne Eingangsverpolungs-Adapter dafür zu benötigen.
- Page 31 Kanalsignal im gebrückten Monomodus ausgegeben wird, sollten Sie einen “Y-Adapter” verwenden, der das jeweils gewün- schte Audiosignal splittet. Dies ist nützlich, wenn Sie zwei XD400/4 für jeweils ein rechtes und linkes Lautsprechersystem benutzen möchten. 2) Linkes UND rechtes Kanalsignal: Falls Sie Stereo-Signal brücken möchten, wird das...
- Page 32 Benötigt: Ein Steuergerät oder Prozessor mit einem Paar Stereo-Ausgänge. Eingangs-Anschlüsse: Schließen Sie das Stereo- Audiosignalkabel des Steuergeräts an den Kanälen 1/2 des XD400/4 an (Stellen Sie den Schalter „Input Mode“ auf „2Ch.“). Resultat: Die Pegel des Lautsprechersystems und des Subwoofers lassen sich durch den Regler „Input Sens.“...
- Page 33 Ausgängen und einem Subwoofer-Ausgang. Eingangs-Anschlüsse: Schließen Sie jeweils die Front- und Rear-Ausgänge an den Signaleingängen Kanal 1/2 & 3/4 des XD400/4 an (Stellen Sie den Schalter „Input Mode“ auf „4Ch“). Schließen Sie dann den Subwoofer-Ausgang des Steuergeräts an den Signaleingang des Subwoofer-Verstärkers an.
- Page 34 6) Versichern Sie sich nochmals, dass die Laut- sprecherkabel entfernt wurden, bevor Sie fortfahren. Starten Sie dann die Wiedergabe der Sinuskurve die für den XD400/4 geeig- net ist, bei 3/4 der Maximal-Lautstärke des Steuergeräts. 7) Verbinden Sie das Voltmeter mit den Lautsprecherausgängen des Verstärkers.
- Page 35 39 ......483 regler ganz rechts: anHang c: Xd400/4 technische daten allgemeine angaben: aktuelle Empfohlener Sicherungswert: 40A Freq.
- Page 36 Kanal liegt. Sollten Sie zwei Kanäle brücken muss die Lastimpedanz zwischen 4 - 8Ω pro Kanalpaar liegen. Überprüfen Sie das Eingangssignal vom Steuergerät und die Verkabelung am Verstärkereingang auf Beschädigungen und lose Verbindung. Es könnte nützlich sein, einen anderen Satz Kabel und/oder eine andere Signalquelle auszuprobieren. 16 | JL Audio - XD400/4 Benutzerhandbuch...
- Page 37 “Das Audiosignal schwankt während der Fahrt oder wenn man auf den Verstärker klopft” Überprüfen Sie alle Anschlüsse des Verstärkers und achten Sie auf eine feste Verbindung bei jedem der Anschlüsse und auf ausreichend abisolierte Kontaktfläche an den Kabeln im Innern der Anschlüsse. Überprüfen Sie die Verbindungen zum Verstärkereingang und achten Sie darauf, dass alle Kabel und Stecker der Audioverkabelung fest sitzen.
- Page 38 Benutzen Sie dieses Diagramm um die Schalterstellungen und Reglereinstellungen zu vermerken. 18 | JL Audio - XD400/4 Benutzerhandbuch...
- Page 39 Jl audio Vertrieb für deutschland: audio design gmbH Am Breilingsweg 3, D-76709 Kronau Tel. +49(0)7253-9465-0, Fax +49(0)7253-9465-10 www.audiodesign.de/jlaudio Jl audio, inc 10369 North Commerce Pkwy. Miramar, FL 33025, USA www.jlaudio.com (Bitte schicken Sie keine Produkte für Servicezwecke an die obigen Adressen)
- Page 40 . j l a u d i o . c o m Printed in China XD400/4 MAN-02-2010...
Need help?
Do you have a question about the XD400/4 and is the answer not in the manual?
Questions and answers