Electrolux EWT1174M7SA User Manual

Electrolux EWT1174M7SA User Manual

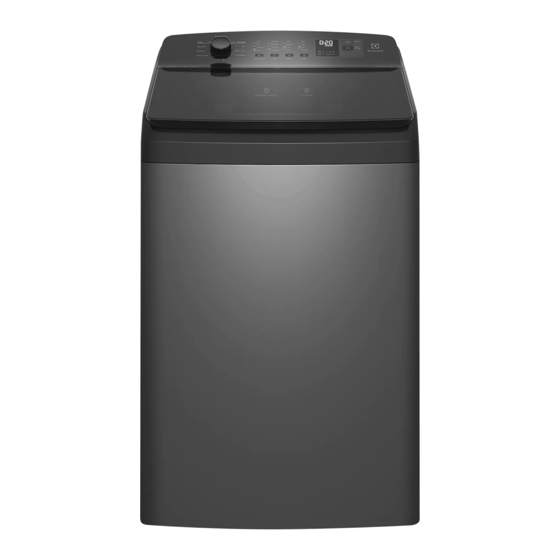
Top-load washing machine

Advertisement

Quick Links

EWT1174M7SA
EWT1274M7SA
EWT1474M7SA
Top-Load Washing Machine
User Manual
2

Advertisement

Table of Contents
loading

Summary of Contents for Electrolux EWT1174M7SA

  • Page 1 EWT1174M7SA EWT1274M7SA EWT1474M7SA Top-Load Washing Machine User Manual...
  • Page 2 Products must be used, installed and operated in accordance with this manual. You may not be able to claim on the Electrolux manufacturer’s warranty in the event that your product fault is due to failure to adhere to this manual.
  • Page 3: Table Of Contents

    CONTENTS SAFETY INFORMATION..4 7. CARE AND CLEANING ....25 1.1 Conditions Of Use ..... 4 7.1 What To Do After You Have 1.2 Child Safety ....... 5 Finished Your Washing.... 25 7.2 Cleaning The Lint Filter ... 25 1.3 General Safety ......6 1.4 Installation .........
  • Page 4: Safety Information

    SAFETY INFORMATION 1.1 Conditions Of Use This appliance is intended to be used in household and similar applications such as: staff kitchen areas in shops, offices and other working environtment; farm houses; by clients in hotels, motels, and other residential type environments;...
  • Page 5: Child Safety

    1.2 Child Safety This appliance is not intended for use by young children or infirm persons without supervision. Young children should be supervised to ensure that they do not play with the appliance. The packaging components (e.g. plastic film, polystyrene) can be dangerous to children - danger of suffocation! Keep them out of children’s reach.
  • Page 6: General Safety

    1.3 General Safety It is dangerous to alter the specifica- tions or attempt to modify this product in any way. Do not use your washing machine to wash articles with whale bones, material without hems or torn material. Always unplug the appliance and turn off the water supply after use, clean and maintenance.
  • Page 7: Use

    Make sure that the drainage is working Never pull the power supply cable to properly. remove the plug from the socket, always take hold of the plug itself. May cause electric shock! if the machine is not connected to an earthed/ground system.
  • Page 8: Product Description

    2. PRODUCT DESCRIPTION 2.1 Parts Control Panel Cabinet Front Feet Levelling Adjustable : Right Water Inlet Hose Old inlet hose should be discharged if any and use the inlet hose provided with machine. Mains Cable Outlet Hose/Drain Hose (See installation instructions sheet to fit &...
  • Page 9 Detergent / Bleach Dispenser (see page Softener Dispenser (see page Bleach Dispenser (option) Lint Filter (see page 25) Low Profile Agitator...
  • Page 10: Product Features

    2.2 Product Features Auto sensing water level Power Failure Recovery Auto sensing is a feature where the When there is power failure while the machine washer fills automatically with water to is washing or rinsing or spinning. The machine just the right level for your clothes load.
  • Page 11: Control Panel

    3. CONTROL PANEL 3.1 Control Panel Description 45 Mins 30 Mins Delicates 15 Mins No Soak Bedding Delay End Energy Saver Soak Program knob Delay End touchpad Water Level touchpad Start/Pause touchpad Soak touchpad Display Rinse touchpad Power touchpad Spin touchpad Child safety lock option (press and hold touchpad about 2 seconds) Press the touch buttons with your finger in the area with the symbol.
  • Page 12: Program Chart

    Clothes Load depends on the Water level selected. For the best washing result, do not exceed the load weight over the suggestion as in the table above. Maximum capacity depended on the model of the Washing Machine. Model : EWT1474M7SA 14 kg EWT1274M7SA 12 kg EWT1174M7SA 11 kg...
  • Page 13: Program Options Compatibility

    3.3 Program Options Compatibility Option Water Level Soak Rinse Spin Delay Program EverydayCare Extended 120 Min. 90 Min. 60 Min. 45 Min. Quick 20 Min. Delicates Bedding Energy Saver Stain Tub Clean Rinse | Spin Spin Remark Default option Available select option...
  • Page 14: Options

    3.4 Options Water Level Touchpad How does Eco Rinse work ? When Eco rinse is used, rinse water is Choose the water level by press sprayed into the washbowl in pulses. “Water Level” touchpad. After each pulse the washbowl will spin...
  • Page 15 If you wish to modify or cancel Delay End Spin Touchpad option after starting the program, follow the steps below: Press this touchpad to select the spin speed or no spin, if you want your set the washing machine to PAUSE by laundry to be spun at a speed different pressing “Start/Pause”...
  • Page 16: Settings

    3.5 Settings Enabling/Disabling End-Of-Wash Child Safety Lock ( ) Option Buzzer Your appliance is provided with CHILD SAFETY LOCK which permits you to leave This setting permits you to either enable the appliance unsupervised with the door or disable the buzzer at the end of the closed without having to worry that children program.
  • Page 17: Daily Use

    4. DAILY USE 4.1 Starting Your Washing 4.3 Add The Detergent/Bleach Machine Powder, Liquid Detergent / Bleach Connect the mains plug to the mains 1. Pull the dispenser drawer forward out socket. from its position. 2. Turn the water tap on. 4.2 Load The Washing Machine When loading the clothes into your...
  • Page 18: Add Fabric Softener

    4.5 Adding Bleach NOTE: When you use the liquid detergent Bleaching of clothes can help to remove Do not use gelatinous or thick liquid stains, heavy soiling and to kill bacteria. detergents. Oxygen Type This is generally a powder type bleach.
  • Page 19: Setting A Program

    4.6 Setting a Program This delay is a drain out period to ensure the bowl is empty of water, which is Press Power ( ) touchpad, turn necessary before spin commences. Even the program selector to the required though you may have only put wet clothes into an empty bowl, the delay before spin program.
  • Page 20: At The End Of The Program

    4.11 At The End Of The Program The appliance stops automatically. NOTE The display will show “ ” and When indicator “ ” appears and blinks flashing with 3 consecutive long after the appropriate number of wash beeps. cycles are finished, this indicator reminds Press Power touchpad to turn off the you to clean the lint filters.
  • Page 21: Washing Hints

    5. WASHING HINTS These Washing Instructions are of a Never wash whites and coloureds general nature and you should get good together. Whites may lose their wash results by following them. “whiteness” in the wash. New coloured items may run in the first However, due to the variables of fabric types, soil levels, detergent types and wash;...
  • Page 22: Pre-Treatment Sprays And Stain Removers

    5.2 Pre-treatment Sprays And Quantity of detergent to be Stain Removers used The type and quantity of detergent will WARNING! depend on the type of fabric, load size, degree of soiling and hardness of the Pre-treatment sprays and stain remover water used.
  • Page 23 Mould stains: treat with bleach, rinse well (whites and fast coloureds only). Grass: soap lightly and treat with bleach (whites and fast coloureds only). Ballpoint pen and glue: moisten with acetone (*), lay the garment on a soft cloth and dab the stain. Lipstick: moisten with acetone (*) as above, then treat stains with methylated spirits.
  • Page 24: International Wash Code Symbols

    ENGLISH 6. INTERNATIONAL WASH CODE SYMBOLS These symbols appear on fabric labels, in order to help you choose the best way to treat your laundry. Energetic Max. wash Max. wash Max. wash Max. wash DO NOT temperature temperature temperature...
  • Page 25: Care And Cleaning

    7. CARE AND CLEANING Your washing machine will give you long Unclip the filter as picture. and trouble-free service, if you follow the instructions in this section. These instructions show you how to care for your washing machine. 7.1 What To Do After You Have Finished Your Washing.
  • Page 26: Cleaning The Drawer Recess

    7.4 Cleaning The Drawer To do this proceed as follows : Recess Remove the dispenser drawer from its places. Having removed the drawer, use a small Pull out the dispenser drawer until it brush to clean the recess, ensuring that...
  • Page 27: Cleaning Your Washing Machine

    Important: Remove the inlet hose behind the appliance. Never use solvents, alcohol, aerosol cleaners, spray pack cleaners, glass cleaners, metal polishes, caustic materials, scourers or general household cleaners on or near the top panel and lid, control panel or other parts of your washing machine.
  • Page 28: Troubleshooting

    ENGLISH 8. TROUBLESHOOTING 8.1 Possible Failures You will have to pay even when your washing machine is under warranty. DO NOT call for service until you have Before you call for service, check the checked the points listed below.
  • Page 29 Problem Display Possible Causes What to do Code Check detergent use and Not enough or no detergent. rewash clothes. Clothes still dirty Remove some clothes and Too many clothes on load. after wash rewash. program. Incorrect wash program. Reselect program and rewash.
  • Page 30: Troubleshooting Fault Displays

    8.2 Troubleshooting Fault Displays When the washing machine detects a problem that requires your attention, you will be alerted. The machine will warn you of this problem by displaying a fault code in the digital display, accompanied by “Beeping”.
  • Page 31 Display Description Possible fault Code Motor system - Motor defective problems - Motor Wiring or Motor Control board defective - Overload condition Heater relay failure - Main board defective Current leakage between heater element and earth Ground current Current leakage between heater element and earth leakage Washing heating...
  • Page 32: Yellowing Or Greying Clothes

    8.3 Yellowing Or Greying Clothes Problem Possible causes What to do Incorrect wash times and ONLY use low sudsing, using insufficient detergent front load washer which can cause redeposit- detergent in this machine, ing of detergent on clothes. such as Cold Power for...
  • Page 33: Technical Data

    Tub Clean No Load Rinse │ Spin Spin Spin speed (Maximum / Minimum) 700 rpm / 550 rpm 1) Maximum capacity depended on the model of the Washing Machine. Model : EWT1474M7SA 14 kg EWT1274M7SA 12 kg EWT1174M7SA 11 kg...
  • Page 34: Installation

    10. INSTALLATION 10.1 Unpacking Use gloves. Cut and remove two cut out straps as shown. Important: The top polystyrene must be removed LAST, for protecting the washing tub from hiting the cabinet when the machine is tilted. 3. Put one of the polystyrene packaging elements on the floor behind the appliance.
  • Page 35: Positioning

    4. Remove the polystyrene base. Open the lid. Remove the polystyrene piece from the top panel and all the items from the washing tub. 5. Insert the Bottom Cover into slot at the bottom of the machine (as shown on picture). 10.2 Positioning It is important that your washing machine stands firm and level on the floor to...
  • Page 36: Water Inlet

    10.3 Water Inlet Connect the water inlet hose to a tap with 3/4” BSP thread. When installing this washing machine, use the hoses supplied. DO NOT USE OLD HOSES. The inlet hoses have the sealing washer fitted. Connect the inlet hose to the water tab.
  • Page 37: Water Drainage

    10.4 Water Drainage Fitting hose former. Please refer to the installation Obtain hose former from inside the instruction sheet, for more washbowl and fit it to the drain hose. information. Pull apart to Hose bend insert hose. Guide hose pull hose Adjust length to suit trough.
  • Page 38: Electrical Connection

    10.5 Electrical Connection This machine is designed to operate on a CAUTION! 230 V, single-phase, 60 Hz supply. Connect the machine to an “An incorrect power supply may void earthed socket outlet. your warranty.” The manufacturer declines any responsibility for damage or...
  • Page 39: Environment Concerns

    11. ENVIRONMENT CONCERNS 11.1 Packaging Materials For more detailed information about recycling of this product, please contact The materials marked with the your local city office, your household symbol are recyclable. waste disposal service or the shop where >PE<=polyethylene you purchased the product. >PS<=polystyrene >PP<=polypropylene 11.3 Ecological Hints...
  • Page 40 www.electrolux.com...

This manual is also suitable for:

Ewt1274m7saEwt1474m7sa

Table of Contents