Table of Contents
Advertisement
Available languages
Available languages
KOBALT and logo design are trademarks or
registered trademarks of LF, LLC. All rights reserved.
ATTACH YOUR RECEIPT HERE
Serial Number
Questions, problems, missing parts? Before returning to your retailer, call our customer
service department at 1-888-3KOBALT (1-800-356-2258), 8 a.m. – 8 p.m., EST,
Monday – Sunday. You could also contact us at partsplus@lowes.com or visit
www.lowespartsplus.com.
AS21210
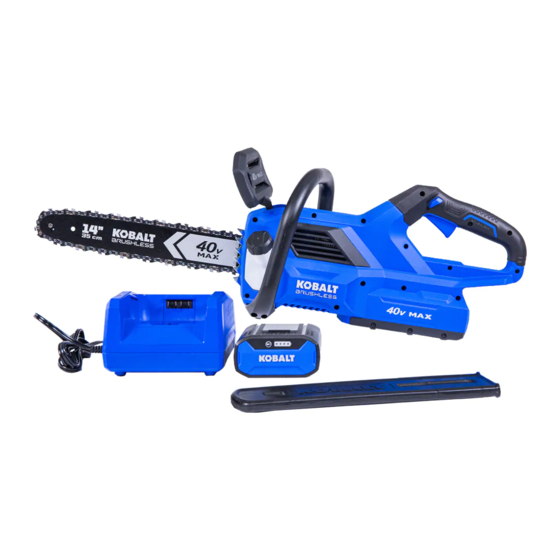
BRUSHLESS CHAINSAW
Purchase Date
ITEM #3809899/4132852
MODEL #KCS 1040B-03
Español p. 31
Advertisement
Chapters
Table of Contents

Related Manuals for Kobalt KCS 1040B-03


Summary of Contents for Kobalt KCS 1040B-03
- Page 1 ITEM #3809899/4132852 BRUSHLESS CHAINSAW MODEL #KCS 1040B-03 KOBALT and logo design are trademarks or Español p. 31 registered trademarks of LF, LLC. All rights reserved. ATTACH YOUR RECEIPT HERE Serial Number Purchase Date Questions, problems, missing parts? Before returning to your retailer, call our customer service department at 1-888-3KOBALT (1-800-356-2258), 8 a.m.
-
Page 2: Table Of Contents
TABLE OF CONTENTS Product Specifications ..................2 Package Contents .................... 3 Safety Information .................... 5 Preparation ..................... 11 Operating Instructions ..................12 Care and Maintenance ................... 21 Troubleshooting....................29 Warranty ......................29 PRODUCT SPECIFICATIONS COMPONENT SPECIFICATIONS Rated voltage 40V d.c . Cut length 14’’... -
Page 3: Package Contents
PACKAGE CONTENTS PART DESCRIPTION PART DESCRIPTION Trigger switch Chain-tensioning knob Rear handle Side cover Lock-off button Guide bar Front handle Saw chain Chain kickback brake paddle Oil-tank cap Side-cover knob Chain sheath Trigger Switch Turns the chainsaw On and Off. Rear Handle The support handle for the right hand, located at the rear of the saw. - Page 4 PACKAGE CONTENTS Chain Kickback Brake Paddle Serves as the lever for chain brake activation. It also provides protection against projecting branches and helps prevent the left hand from touching the saw chain if it slips off the front handle. Side-cover Knob Locks/unlocks the side cover.
-
Page 5: Safety Information
SAFETY INFORMATION Please read and understand this entire manual before attempting to assemble or operate this product. If you have any questions regarding the product, please call customer service at 1-888-3KOBALT (1-800-356-2258), 8 a.m. - 8 p.m., EST, Monday - Sunday. You could also contact us at partsplus@lowes.com or visit www.lowespartsplus.com. - Page 6 SAFETY INFORMATION Some of the following symbols may be used on this tool. Please study them and their meaning. Proper interpretation of these symbols will allow you to operate the tool better and more safely. SYMBOL DEFINITION SYMBOL DEFINITION Volts No-load Speed Direct Current /min...
- Page 7 SAFETY INFORMATION Electrical Safety • Power tool plugs must match the outlet. Never modify the plug in any way. Do not use any adaptor plugs with earthed (grounded) power tools. Unmodified plugs and matching outlets will reduce the risk of electric shock. •...
- Page 8 SAFETY INFORMATION • Disconnect the plug from the power source and/or remove the battery pack, if detachable, from the power tool before making any adjustments, changing accessories, or storing power tools. Such preventive safety measures reduce the risk of starting the power tool accidentally. •...
- Page 9 SAFETY INFORMATION General Chainsaw Safety Warnings • Keep all parts of the body away from the saw chain when the chainsaw is operating. Before you start the chainsaw, make sure the saw chain is not contacting anything. A moment of inattention while operating chainsaws may cause entanglement of your clothing or body with the saw chain.
- Page 10 SAFETY INFORMATION Pinching the saw chain along the top of the guide bar may push the guide bar rapidly back towards Kickback the operator. Either of these reactions may cause danger zone you to lose control of the saw, which could result in serious personal injury.
-
Page 11: Preparation
SAFETY INFORMATION Additional Safety Warnings • Push and Pull (Fig. e) – The reaction force is always opposite to the direction the chain is moving where wood contact is made. Thus, the operator must be ready to control the PULL when cutting on the bottom edge of the bar, and the PUSH when cutting along the top edge. -
Page 12: Operating Instructions
Oil should fill the window. NOTICE: • Use KOBALT® and TriLink® bar and chain oil for best results. It is specifically designed to provide low friction and faster cuts. • Never use oil or other lubricants not specifically designed for use on the bar and chain. This can lead to a clogged oil system, which may cause premature wear of the bar and chain. - Page 13 OPERATING INSTRUCTIONS 2. Kickback Safety Devices on This Chainsaw Chain Brake The chainsaw comes equipped with a chain brake, which stops both the motor and the motion of the chain when kickback occurs. The chain brake can Chain kickback be activated by the forward motion of the chain brake paddle in kickback brake paddle as the saw rotates backward brake position...
- Page 14 OPERATING INSTRUCTIONS To Detach Battery Pack WARNING • Always be aware of the location of your feet, children, or pets when pressing the battery-release button. NEVER remove the battery pack at a high position. Serious injury could result if the battery pack falls. a.
- Page 15 OPERATING INSTRUCTIONS k. Hold the chainsaw with both hands: with the right hand on the rear handle and the left hand on the front handle. Make sure that you have a secure and balanced footing. Watch out for obstacles such as tree stumps, roots, and ditches, which could cause you to trip or stumble.
- Page 16 OPERATING INSTRUCTIONS Never allow any part of your body to be in the chain line while operating a chainsaw (Fig. 6b). Proper Cutting Stance (Fig. 6c) Both feet should be on solid ground, with weight evenly spread between them. The left arm should be straight, with the elbow locked.
- Page 17 OPERATING INSTRUCTIONS 8. Felling A Tree Hazardous Conditions WARNING • When felling a tree, it is important that you heed the following warnings to prevent possible serious injury. • Do not fell trees during periods of high wind or heavy precipitation. Wait until the hazardous weather has ended.
- Page 18 OPERATING INSTRUCTIONS Felling Back Cut a. Make the felling back cut at least 2 inches (51 mm) higher than the horizontal notching cut (Fig. 8b). Keep the felling back cut parallel to 2ʺ/ Felling the horizontal notching cut. Make the felling 50 mm back cut back cut so that enough wood is left to act as...
- Page 19 OPERATING INSTRUCTIONS 10. Bucking A Log Bucking is cutting a log into lengths. It is important to make sure your footing is firm and your weight is evenly distributed on both feet. When possible, the log should be raised and supported by the use of limbs, logs or chocks.
- Page 20 OPERATING INSTRUCTIONS • When the log is supported on only one end, 2nd cut overbuck (2/3 diameter) cut 1/3 the diameter from the underside to meet 1st cut (to avoid (underbucking). Then make the finishing cut by pinching) overbucking to meet the first cut (Fig. 10d). •...
-
Page 21: Care And Maintenance
CARE AND MAINTENANCE WARNING • All maintenance should only be carried out by a qualified service technician. • Before cleaning or performing any maintenance, remove the battery pack. For safe and proper operation, always keep the tool and its ventilation slots clean. •... - Page 22 CARE AND MAINTENANCE NOTICE: This is a good time to inspect the drive sprocket for excessive wear or damage. Chain rotation Cutters Assembling the New Bar and Chain a. Remove the battery, allow the saw to cool, then tighten the oil tank cap. Chain drive links b.
- Page 23 CARE AND MAINTENANCE NOTICE: Small directional arrows are engraved in Cutter Rotation Guide bar direction direction the saw chain. Another directional arrow is molded slot arrow into the housing. When looping the saw chain onto the sprocket, make sure that the direction of the arrows on the saw chain match the direction of the arrow on the housing.
- Page 24 CARE AND MAINTENANCE NOTICE: If chain is too tight, it will not rotate. Loosen the side cover knob slightly and turn the tensioning knob once to the “–” direction. Lift the tip of the guide bar up and retighten the side cover knob securely.
- Page 25 CARE AND MAINTENANCE 13. Chain Maintenance WARNING • Remove the battery pack before performing any maintenance. Failure to heed this warning could result in serious personal injury. • Always wear gloves when handling the saw chain. The chain is sharp and may contain burrs.
- Page 26 CARE AND MAINTENANCE e. Keep a correct sharpening angle of 30° between the file and the saw chain (see Fig. 13b & 13c). Always use a file holder (available separately) when sharpening saw chains by hand. File holders have markings for the sharpening angle.
- Page 27 CARE AND MAINTENANCE Side Plate Angle (Fig. 13f) Side plate angle CORRECT 55° - The optimal angle can be Backward Hook produced automatically if the correct diameter file is Slope used in the file holder. HOOK - “Grabs” and dulls quickly. Increases 55°...
- Page 28 CARE AND MAINTENANCE 14. Guide Bar Maintenance Sprocket in The bar should be cleaned every day of use and guide bar tip checked for wear and damage. Feathering or burring of the bar rails is a normal process of bar wear.
-
Page 29: Troubleshooting
TROUBLESHOOTING WARNING • Turn the switch to the “OFF” position and remove the battery before performing troubleshooting procedures. PROBLEM POSSIBLE CAUSE CORRECTIVE ACTION 1. Low battery capacity. 1. Charge the battery pack. 2. Pull the chain kickback brake 2. Chain brake is engaged. paddle backward toward the front Tool does not work. - Page 31 ARTÍCULO #3809899/4132852 MOTOSIERRA SIN ESCOBILLAS KOBALT y el diseño del logotipo son marcas comerciales o marcas registradas de LF, LLC. MODELO #KCS 1040B-03 Todos los derechos reservados. ADJUNTE SU RECIBO AQUÍ Fecha de compra Número de serie ¿Preguntas, problemas, piezas faltantes? Antes de volver a la tienda, llame a nuestro Departamento de Servicio al Cliente al 1-888-3KOBALT (1-800-356-2258), de lunes a domingo de 8 a.m.
-
Page 32: Especificaciones Del Producto
ÍNDICE Especificaciones del producto ................ 32 Contenido del paquete ................... 33 Información de seguridad ................35 Preparación ....................43 Instrucciones de funcionamiento ..............44 Cuidado y mantenimiento ................54 Solución de problemas ................... 62 Garantía ......................62 ESPECIFICACIONES DEL PRODUCTO COMPONENTE ESPECIFICACIONES Voltaje nominal... -
Page 33: Contenido Del Paquete
CONTENIDO DEL PAQUETE PIEZA DESCRIPCIÓN PIEZA DESCRIPCIÓN Interruptor tipo gatillo Perilla de tensado de la cadena Manija posterior Cubierta lateral Botón de bloqueo Barra guía Manija frontal Cadena de la sierra Paleta del freno de contragolpe Tapa del tanque de aceite de la cadena Perilla de la cubierta lateral Revestimiento de la cadena... - Page 34 CONTENIDO DEL PAQUETE Paleta del freno de contragolpe de la cadena Sirve como palanca para la activación del freno de cadena. También proporciona protección contra ramas que se proyectan y ayuda a evitar que la mano izquierda toque la cadena de la sierra si se resbala de la manija frontal.
-
Page 35: Información De Seguridad
INFORMACIÓN DE SEGURIDAD Lea y comprenda completamente este manual antes de intentar ensamblar u operar este producto. Si tiene preguntas relacionadas con el producto, comuníquese con Servicio al Cliente al 1-888-3KOBALT (1-800-356-2258), de lunes a domingo de 8 a.m. a 8 p.m., hora estándar del Este. - Page 36 INFORMACIÓN DE SEGURIDAD Algunos de los siguientes símbolos pueden aplicarse al uso de esta herramienta. Obsérvelos y aprenda su significado. La interpretación correcta de estos símbolos le permitirá utilizar la herramienta de manera eficaz y segura. SÍMBOLO DEFINICIÓN SÍMBOLO DEFINICIÓN Voltios Velocidad sin carga Revoluciones o pasadas por...
- Page 37 INFORMACIÓN DE SEGURIDAD Seguridad en el área de trabajo • Mantenga el área de trabajo limpia y bien iluminada. Las áreas desordenadas u oscuras aumentan las posibilidades de accidentes. • No opere herramientas eléctricas en ambientes en los que exista riesgo de explosión, como en presencia de líquidos inflamables, gases o polvo.
- Page 38 INFORMACIÓN DE SEGURIDAD • Use ropa adecuada. No use ropa holgada ni joyas. Mantenga el cabello y la ropa alejados de las piezas en movimiento. La ropa holgada, las joyas o el cabello largo pueden quedar atrapados en las piezas en movimiento. •...
- Page 39 INFORMACIÓN DE SEGURIDAD PAQUETE DE BATERÍAS CARGADOR KB 240-03; KB 440-03; KB 640-03 KRC 840-03 • Cuando no se use el paquete de baterías, aléjelo de objetos metálicos, como sujetapapeles, monedas, llaves, clavos, tornillos u otros objetos metálicos pequeños que pudieran crear una conexión entre los terminales. Es posible que una conexión entre los terminales produzca quemaduras o un incendio.
- Page 40 INFORMACIÓN DE SEGURIDAD • Mantenga siempre una postura adecuada y opere la motosierra solo cuando se encuentre en una superficie fija, segura y nivelada. Las superficies resbalosas o inestables, como las escaleras, pueden provocar una pérdida de equilibrio o control de la motosierra.
- Page 41 INFORMACIÓN DE SEGURIDAD Apretar la cadena de la sierra a lo largo de la parte superior de la barra guía puede mover la Zona de peligro barra guía rápidamente hacia atrás, hacia el operador. Cualquiera de estas reacciones puede de contragolpe hacer que pierda el control de la sierra, lo que podría provocar lesiones personales graves.
- Page 42 INFORMACIÓN DE SEGURIDAD Advertencias de seguridad adicionales • Empujón y tirón (Fig. e): la fuerza de reacción es siempre opuesta a la dirección hacia la que se mueve la cadena, donde entra en contacto con la madera. Por lo tanto, el operador debe estar listo para controlar el TIRÓN al cortar con el borde inferior de la barra y el EMPUJÓN al cortar a lo largo del borde superior.
-
Page 43: Preparación
PREPARACIÓN Conozca su motosierra Esta motosierra se puede utilizar para la tala básica, el desrame, la poda de plantas y para cortar madera y árboles. Antes de intentar utilizar la motosierra, familiarícese con todas las características de funcionamiento y los requisitos de seguridad. ADVERTENCIA •... -
Page 44: Instrucciones De Funcionamiento
El aceite debe llenar la ventana. AVISO: • Para obtener mejores resultados, utilice el aceite para barras y cadenas KOBALT® y TriLink®. Está diseñado especialmente para proporcionar menos fricción y cortes más rápidos. - Page 45 INSTRUCCIONES DE FUNCIONAMIENTO • Es normal que se filtre aceite de la sierra cuando esta no se utiliza. Para evitar que haya una filtración, vacíe el tanque de aceite después de cada uso y haga funcionar la motosierra durante un minuto. Cuando almacene la herramienta durante un período prolongado, asegúrese de que la cadena esté...
- Page 46 INSTRUCCIONES DE FUNCIONAMIENTO 3. Para fijar el paquete de baterías a. Alinee las ranuras de montaje del paquete de baterías con las varillas elevadas del puerto de Botón de la batería de la motosierra, como se muestra. liberación de la b.
- Page 47 INSTRUCCIONES DE FUNCIONAMIENTO 5. Antes de usar la motosierra: a. Retire el paquete de baterías. b. Asegúrese de que la cadena esté montada y tensionada correctamente. c. Levante la punta de la barra guía (I) para revisar si hay holgura en la cadena de la motosierra (J).
- Page 48 INSTRUCCIONES DE FUNCIONAMIENTO Agarre adecuado de las manijas Sujete con el pulgar • Use guantes antideslizantes para obtener el debajo de la máximo agarre y protección. Con la sierra manija en una superficie plana y firme, sosténgala firmemente con ambas manos. •...
- Page 49 INSTRUCCIONES DE FUNCIONAMIENTO 7. Corte básico ADVERTENCIA • Siempre cuente con una buena superficie de apoyo y sostenga la motosierra firmemente con ambas manos mientras el motor está en marcha. Practique cortando algunos troncos pequeños con la siguiente técnica para obtener la “sensación” de usar la sierra antes de comenzar a usarla para cortar algo más grande.
- Page 50 INSTRUCCIONES DE FUNCIONAMIENTO 8. Tala de un árbol Dirección de tala Condiciones peligrosas ADVERTENCIA Zona peligrosa • Cuando tale un árbol, es importante que tenga en cuenta las siguientes advertencias para Camino prevenir posibles lesiones graves. Camino de retirada • No tale árboles durante períodos de vientos de retirada segura fuertes o precipitaciones intensas.
- Page 51 INSTRUCCIONES DE FUNCIONAMIENTO Corte de la tala a. Haga que el corte posterior de tala sea al menos 51 mm (2 pulgadas) más alto que el corte de muesca horizontal (Fig. 8b). Mantenga 2ʺ/ Corte de el corte de tala paralelo al corte de muesca 50 mm la tala horizontal.
- Page 52 INSTRUCCIONES DE FUNCIONAMIENTO 10. Trozado de un tronco Trozar es cortar un tronco en fragmentos. Es Corte por la importante asegurarse de que su pisada sea firme parte superior y de que su peso esté distribuido uniformemente en ambos pies. Cuando sea posible, el tronco debe elevarse y apoyarse mediante el uso de ramas, troncos o calzos.
- Page 53 INSTRUCCIONES DE FUNCIONAMIENTO • Cuando el tronco esté apoyado solo en uno de Segundo corte desde la parte superior (2/3 de diámetro) para los extremos, corte 1/3 del diámetro desde la llegar hasta el primer corte parte inferior (corte por la parte inferior). Luego, (para evitar el atrapamiento) realice el corte final mediante un corte superior para unirlo con el primer corte (Fig.
-
Page 54: Cuidado Y Mantenimiento
CUIDADO Y MANTENIMIENTO ADVERTENCIA • Todo el mantenimiento debe estar a cargo solo de un técnico de servicio calificado. • Antes de limpiar o realizar cualquier mantenimiento, retire el paquete de baterías. Para un uso seguro y adecuado, siempre mantenga limpias la herramienta y sus ranuras de ventilación. - Page 55 CUIDADO Y MANTENIMIENTO d. Gire la perilla de la cubierta lateral (F) en Rotación de la dirección contraria a las manecillas del reloj y, cadena luego, retire la cubierta lateral (H). Limpie la Cortadores cubierta lateral con un paño seco (Fig. 11a). e.
- Page 56 CUIDADO Y MANTENIMIENTO AVISO: la cadena de la sierra tiene grabadas Dirección de Flecha de dirección los dientes de pequeñas flechas direccionales. Otra flecha direc- de rotación corte Ranura de la cional está moldeada en la carcasa. Al pasar la ca- barra guía dena de la sierra por la rueda dentada, asegúrese de que la dirección de las flechas en la cadena de...
- Page 57 CUIDADO Y MANTENIMIENTO h. Levante la punta de la barra guía para revisar la holgura (Fig. 11g). Suelte la punta de la barra guía y gire la perilla de tensado de la cadena una vez en dirección a “+”. Repita este proceso hasta que elimine el arqueamiento.
- Page 58 CUIDADO Y MANTENIMIENTO AVISO: • las cadenas nuevas tienden a estirarse; compruebe la tensión de la cadena con frecuencia y ténsela según sea necesario. • una cadena tensionada mientras está caliente puede quedar demasiado apretada al enfriarse. Verifique la tensión en frío antes del próximo uso. 13.
- Page 59 CUIDADO Y MANTENIMIENTO Afilar los cortadores Placa Asegúrese de limar todos los cortadores (Fig. 13a) superior Placa lateral a los ángulos especificados y al mismo largo, ya Medidor de que un corte rápido solo se puede obtener cuando profundidad todos los cortadores son uniformes. a.
- Page 60 CUIDADO Y MANTENIMIENTO Ángulo de limadura de la placa superior Ángulos de limadura de la placa (Fig. 13e) superior Menos de 30° Más de 30° CORRECTO 30°: este ángulo apropiado solo se puede obtener cuando se utilizan las limas indicadas y la configuración adecuada. Los 30°...
- Page 61 CUIDADO Y MANTENIMIENTO 14. Mantenimiento de la barra guía Rueda dentada La barra se debe limpiar todos los días de uso y se en la punta de la debe revisar si hay desgaste o daños. Los bordes barra guía suaves o las rebabas de los rieles de la barra forman parte del proceso normal de desgaste.
-
Page 62: Solución De Problemas
SOLUCIÓN DE PROBLEMAS ADVERTENCIA • Coloque el interruptor en la posición “OFF” (APAGADO) y retire la batería antes de realizar cualquier procedimiento de solución de problemas. PROBLEMA CAUSA POSIBLE ACCIÓN CORRECTIVA 1. La capacidad de la 1. Cargue el paquete de baterías. batería es baja.
Need help?
Do you have a question about the KCS 1040B-03 and is the answer not in the manual?
Questions and answers
Where can I buy replacement parts ?