Table of Contents
Advertisement
Available languages
Available languages
Quick Links
Advertisement
Table of Contents

Related Manuals for Faber MATRIX EG10 X A90 ACTIVE


Summary of Contents for Faber MATRIX EG10 X A90 ACTIVE
- Page 1 Instructions Manual Manual de instrucciones Kullanim Kilavuzu...
-
Page 2: Table Of Contents
INDEX RECOMMENDATIONS AND SUGGESTIONS ........................3 CHARACTERISTICS ................................6 INSTALLATION..................................7 USE ...................................... 10 MAINTENANCE ................................... 11 ............................15 ................................18 ..................................19 ....................................22 ..................................23 ............................27 ................................30 ..................................31 ................................34 ....................................35 INDICE CONSEJOS Y SUGERENCIAS............................39 CARACTERÍSTICAS ................................ -
Page 3: Recommendations And Suggestions
RECOMMENDATIONS AND SUGGESTIONS The Instructions for Use apply to several versions of this appliance. Accordingly, you may find descriptions of individual features that do not apply to your specific appliance. INSTALLATION • The manufacturer will not be held liable for any damages resulting from incorrect or improper installation. - Page 4 • If the instructions for installation for the gas hob specify a greater distance specified above, this has to be taken into account. Regulations concerning the discharge of air have to be fulfilled. • Use only screws and small parts in support of the hood. Warning: Failure to install the screws or fixing device in accordance with these instructions may result in electrical hazards.
- Page 5 • “CAUTION: Accessible parts may become hot when used with cooking appliances.” MAINTENANCE • Switch off or unplug the appliance from the mains supply before carrying out any maintenance work. • Clean and/or replace the Filters after the specified time period (Fire hazard). •...
-
Page 6: Characteristics
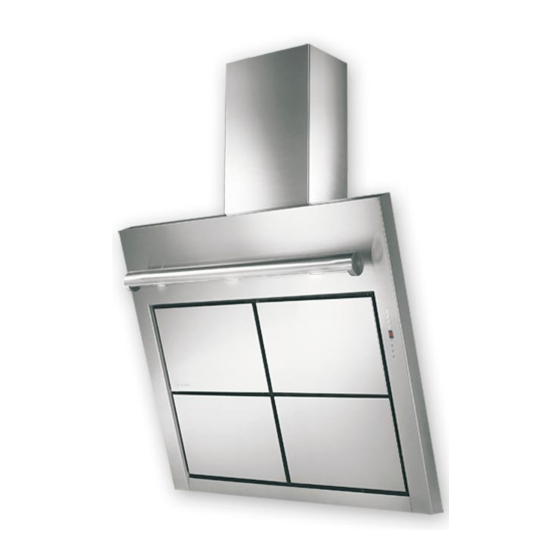
CHARACTERISTICS Dimensions Min. Min. 250mm 250mm 7.2.1 Components Ref. Q.ty Product Components Hood Body, complete with: Controls, Light, Blower, Filters Upper Section Lower Section Directional Air Outlet grille Flange Filter cover Ref. Q.ty Installation Components 7.2.1 Upper Chimney Section Fixing Brackets Wall Plugs Wall Plugs SB 12/10 Screws 4,2 x 44,4... -
Page 7: Installation
INSTALLATION Wall drilling and bracket fixing 7.2.1 200 200 180 180 A=Min 250 Max 400 On the wall, draw • a Vertical line up to the ceiling or upper limit, at the centre of the area in which the Hood is to be fitted;... - Page 8 Mounting the hood body • Open the ducting panels. • Disconnect the panel from the hood canopy by slid- ing the fixing pin lever.(A) • Remove the metal grease filters by turning the han- dles provided. • Adjust the two screws Vr, on brackets 11a, to a mini- mum.(B) •...
- Page 9 7.2.1 Chimney assembly Upper exhaust Chimney • Slightly widen the two sides of the upper chimney and hook them behind the brackets 7.2.1, making sure that they are well seated. • Secure the sides to the brackets using the 4 screws 12c (2,9 x 9,5) supplied.
-
Page 10: Use
Control panel Button Function Display Turns the suction motor on and off at speed Displays the set speed one. Decreases the working speed. Displays the set speed Increases the working speed. Displays the set speed Activate intensive speed from any other speed, Displays HI and the time remaining once very including motor off. -
Page 11: Maintenance
MAINTENANCE REMOTE CONTROL (OPTIONAL) The appliance can be controlled using a remote control powered by a 1.5 V carbon-zinc alkaline batteries of the standard LR03- AAA type (not included). • Do not place the remote control near to heat sources. •... - Page 12 Metal grease filters They can be washed in the dishwasher, and need to be cleaned whenever the FG sign appears on the display or at least once every 2 months use, or more frequently if use is particularly intensive. Resetting the alarm signal •...
- Page 13 Activated Charcoal Filter (Recirculation Version) It cannot be washed or regenerated, and must be changed when the FC symbol on the display appears, or at least once every 4 months. The Alarm signal, if it has been activated, only appears when the Suction motor is turned on. Activating the alarm signal •...
- Page 14 Lighting LIGHT REPLACEMENT 20 W halogen light. • Remove the light cover by unfastening the screws that hold it. • Extract the lamp from the Support. • Replace with another of the same type, making sure that the two pins are properly inserted in the lamp holder socket holes.
- Page 15 • • 650 mm • • 120 mm. • ( . . • 2° ( . . 0,04 mbar •...
- Page 16 • • • 3 mm. • • • • • • •...
- Page 17 • • • • • • •...
- Page 18 Min. Min. 250mm 250mm 7.2.1 µ µ µ µ : µ , µ µ µ µ µ µ 7.2.1 µ µ SB 12/10 4,2 x 44,4 2,9 x 6,5 2,9 x 9,5...
- Page 19 7.2.1 200 200 180 180 A=Min 250 Max 400 • • (710 mm + A) • 200 mm • • 180 mm (112 mm + A) • • 12 mm (1). • 8 mm (2). • • • . 7.2.1 1-2 mm •...
- Page 20 • • • • 11a, . (B) ( B ) • 11a. • ( A ) • • ø 120 ø 150 • • • • 12c (2,9 x 6,5). • 12d (2,9 x 9,5)
- Page 21 7.2.1 • 7.2.1 • 12c (2,9 x 9,5) • • 12c (2,9 x 9,5) • 3 mm. • . “ ”)
- Page 22 )– )– Delay 30’. )– )–...
- Page 23 1,5 V LR03-AAA ( • • • • • •...
- Page 24 • • " "). • Confort Panel • • • • Confort Panel.
- Page 25 • • • • 2 • 1 • • " "). • Confort Panel • • (A). • (B). • • Confort Panel.
- Page 26 20 W. • • • • ILCOS (mm) HSGSB/C/UB-28-220/240-E14 220 – 240 104 x 35 33 x 9 HSG/C/UB-20-12-G4 GU10 51 x 50,7 HAGS-35-230-GU10-51/40 GU10 51 x 50,7 HAGS-35-230-GU10-51/20 40 x 35 HRGS-20-12-GU4-35/30 GU5.3 46 x 51 HRGS-20-12-GU5.3-50/10 720 x 26 FD--16/40/1B-E--G13--26/720 589,8 x 26 FD--18/40/1B--E--G13--26/600...
- Page 27 • • • • • 2° • 0,04 •...
- Page 28 • • • • • • • • • •...
- Page 29 • “ • • • • • " ". •...
- Page 30 Min. Min. 250mm 250mm 7.2.1 7.2.1 SB 12/10 4,2 x 44,4 2,9 x 6,5 2,9 x 9,5...
- Page 31 7.2.1 200 200 180 180 A=Min 250 Max 400 • • (710 + A) • • • (112 + A) • • ø 12 (1). • ø 8 (2). • • • 7.2.1 • • (X = 7.2.1 • • ø...
- Page 32 • • . (A) • • . (B) • 11a. ( B ) • • ( A ) • ø 120 ø 150 • • • • (2,9 x 6,5). • 12d (2,9 x 9,5).
- Page 33 7.2.1 • 7.2.1 • 12c (2,9 x 9,5). • • 12c (2,9 x 9,5). • • “ ”)
- Page 34 ) – ) – Delay 30’. ) – ) –...
- Page 35 LR03-AAA ( • • • • • •...
- Page 36 • 24 , • • • • • •...
- Page 37 • • • • 2 • 1 • 24 , • • • • (A). • (B). • •...
- Page 38 • • • • (MM) ILCOS HSGSB/C/UB-28-220/240-E14 220 – 240 104 x 35 33 x 9 HSG/C/UB-20-12-G4 GU10 51 x 50,7 HAGS-35-230-GU10-51/40 GU10 51 x 50,7 HAGS-35-230-GU10-51/20 40 x 35 HRGS-20-12-GU4-35/30 GU5.3 46 x 51 HRGS-20-12-GU5.3-50/10 720 x 26 FD--16/40/1B-E--G13--26/720 589,8 x 26 FD--18/40/1B--E--G13--26/600 60 (...
-
Page 39: Consejos Y Sugerencias
CONSEJOS Y SUGERENCIAS Las instrucciones de uso se aplican a varios modelos de este aparato. Por lo tanto, usted puede encontrar descripciones de características individuales que no pertenecen a su aparato en concreto. INSTALACIÓN • El fabricante no se hace responsable de los daños provocados por una instalación o uso indebido. - Page 40 • Si las instrucciones de instalación del plano de cocción de gas especifican una distancia mayor de la indicada anteriormente, es necesario tenerlo en cuenta. Se tienen que respetar todas las normativas con respecto a la descarga del aire. • Utilizar sólo los tornillos y accesorios metálicos de un tipo adecuado para la campana.
- Page 41 • ATENCIÓN: las partes accesibles pueden calentarse mucho durante el uso de aparatos de cocción. MANTENIMIENTO • Apague o desconecte el aparato de la red eléctrica antes de cualquier operación de limpieza o mantenimiento. • Limpie y/o reemplace los filtros después del período de tiempo especificado (peligro de incendio).
-
Page 42: Características
CARACTERÍSTICAS Dimensiones Min. Min. 250mm 250mm 7.2.1 Componentes Ref. Cant. Componentes del producto Cuerpo campana dotado con: mandos, luz, grupo de ventilación, filtros. Chimenea Superior Camino Inferior Rejilla de dirección de salida del aire Brida Tapa filtrante Ref. Cant. Componentes de Instalación 7.2.1 Bridas de fijación chimenea superior Tacos... -
Page 43: Instalación
INSTALACIÓN Taladrado pared y fijación de las bridas 7.2.1 200 200 180 180 A=Min 250 Max 400 Marcar en la pared: • Una línea Vertical hasta el techo o límite superior, en el centro de la zona donde se desee colocar la Campana;... - Page 44 Montaje del cuerpo de la campana • Abrir los paneles aspirantes. • Desenganchar el panel del cuerpo de la campana de- slizando la leva del perno de sujeción.(A) • Quitar los Filtros Antigrasa maniobrando en las manillas. • Regular los dos tornillos Vr, de las abrazaderas 11a, sin apretarlos completamente.(B) •...
- Page 45 7.2.1 Montaje de la chimenea Chimenea superior • Ensanchar ligeramente las dos faldas laterales, engancharlas detrás de las bridas 7.2.1 cerrarlas hasta el tope. • Fijar a los lados de las bridas con los 4 tornillos 12c (2,9 x 9,5) en dotación.
-
Page 46: Uso
Tablero de mandos Tecla Función Display Enciende y apaga el motor de aspiración a la primera Visualiza la velocidad implementada. velocidad. Decrementa la velocidad de ejercicio. Visualiza la velocidad implementada. Incrementa la velocidad de ejercicio. Visualiza la velocidad implementada. Activa la velocidad Intensiva desde cualquier velocidad Visualiza alternadamente HI y el tiempo restante incluso desde motor apagado, dicha velocidad está... -
Page 47: Mantenimiento
MANTENIMIENTO MANDO A DISTANCIA (OPCIONAL) El aparato puede comandarse con un mando a distancia que fun- ciona con pilas alcalinas zinkcarbón de 1,5 V del tipo standard LR03-AAA (no incluido). • No dejar el mando a distancia cerca de una fuente de calor. •... - Page 48 Filtros antigrasa metálicos Se pueden lavar también en lavavajillas, y necesitan ser lavados cuando en el display aparece FG o por lo menos cada 2 meses de uso aproximadamente o con mayor frecuencia en caso de uso par- ticularmente intenso. Reset de la señal de alarma .
- Page 49 Filtros antiolor al carbono activo (Versión Filtrante). No se puede lavar ni regenerar, se tiene que sustituir cuando en el display aparece FC o, por lo menos, cada 4 meses. La señalización de alarma, si previamente activada, se verifica sólo cuando está...
- Page 50 Iluminación SUSTITUCIÓN DE LAS LÁMPARAS Lámparas halógenas de 20 W • Quitar el plafón desenroscando los tornillos que la sujetan. • Extraer la lámpara desde el soporte. • Sustituirla con una nueva con las mismas características, poniendo cuidado en insertar correctamente los dos en- chufes en el asiento del soporte.
-
Page 51: Tavsiyeler Ve Öneriler
TAVSIYELER VE ÖNERILER Kullanõm talimatlarõ, bu ev aletinin çe itli modelleri için geçerlidir. Aynõ ekilde, bu ürünle ilgisi olmayan özelliklerin tanõmlarõnõ da görebilirsiniz. MONTAJ • Yanlõ veya hatalõ montajdan do an yaralanma ve hasarlar için imalatçõ yükümlü olmayacaktõr. • Pi iricinin üst kõsmõ ve davlumbaz arasõndaki minimum güvenlik mesafesi 650 mm'dir. - Page 52 • Gaz oca õnõn montaj talimatlarõnda yukarõda belirtilenden daha fazla bir mesafe belirtilmi se, buna dikkat edilmesi gerekir. Hava de arjõ ile ilgili yönetmeliklere uyulmasõ gerekir. • Davlumbazõ desteklemek için sadece vida ve küçük parçalar kullanõn. Uyarõ: bu talimatlar uyarõnca vidalarõ veya sabitleme aletlerini kullanmamak elektrik tehlikelerine yol açabilir.
- Page 53 • “ D KKAT: Pi irme aletleri ile kullanõldõklarõnda temas edilebilir parçalar õsõnabilir.” BAKIM • Herhangi bir bakõm i lemine ba lamadan evvel ev aletini kapatõn veya ana güç kayna õndan fi ini çekin. • Belirlenmi zaman sonunda filtreleri temizleyin ve/veya de i tirin (Yangõn tehlikesi).
-
Page 54: Özellikler
ÖZELLIKLER Boyutlar Min. Min. 250mm 250mm 7.2.1 Komponentler Ref. Miktar Ürün komponentleri Kumandalarõ, õ õk, vantilatör gruplarõ, filtreleri ile birlikte bir davlumbaz gövdesi Üst baca Alt baca stikamet ayarlõ hava çõkõ õzgarasõ Flan Filtre kapak Rif. Miktar Montaj komponentleri 7.2.1 Üst baca tespit unsurlarõ... -
Page 55: Montaj
MONTAJ Duvarõn delinmesi ve kancalarõn vidalanmasõ 7.2.1 200 200 180 180 A=Min 250 Max 400 Duvara unlarõ çizin: • Tavana veya üst sõnõra kadar, Davlumbazõn monte edilmesi öngörülen bölgenin merkezinde bir dikey çizgi çizin; • Pi irme hattõnõn minimum (710 mm + A) üzerinde yatay bir çizgi. •... - Page 56 Davlumbaz gövdesinin montajõ • Emme panellerini açõn. • Tespit aya õnõn ilgili kolunu sürerek paneli davlum- baz gövdesinden ayõrõn (A) • lgili tespit unsurlarõnõ açarak Ya Filtrelerini çõkar- tõn. • Yol ba õnda 11a tespit unsurlarõndaki iki adet Vr vi- dasõnõ...
- Page 57 7.2.1 Bacanõn Montajõ Üst Baca • ki yan kenarõ hafifçe açõnõz, bunlarõ Braketlerin 7.2.1 arkasõna geçiriniz ve tam dayanana kadar tekrar kapatõnõz. • Cihaz donanõmõnda verilen 4 adet vidayla 12c (2,9 x 9,5) yan taraflarõndan Braketlere sabitleyiniz. Alt Baca • Bacanõn iki yan kenarõnõ hafifçe açõnõz, Üst Baca ile duvar ara- sõna geçirip tam dayanana kadar kapatõnõz.
-
Page 58: Kullanim
KULLANIM Kumanda panosu Fonksiyon Gösterge Emme motorunu ilk hõzda çalõ tõrõr. Ayarlanan hõzõ görüntüler Çalõ ma hõzõnõ dü ürür. Ayarlanan hõzõ görüntüler Çalõ ma hõzõnõ yükseltir. Ayarlanan hõzõ görüntüler Motor kapalõyken de herhangi bir hõzdan Yo un HI ve sõrayla kalan zamanõ saniyede bir hõza geçer, bu hõz 6 dakika zaman ayarlõdõr, bu olarak görüntüler. -
Page 59: Bakim
BAKIM TELEKUMANDA (OPS YONEL) Bu cihaza bir telekumanda ile de komut verilebilir; bu kumanda 1,5 Voltluk çinko-karbonlu LR03-AAA tipi standart alkalin pil- lerle çalõ õr (dahil de ildir). • Telekumandayõ õsõ kaynaklarõ yakõnõnda bõrakmaynõz. • Pilleri çevreye atmayõnõz, bunlara ayrõlmõ çöp toplama kapla- rõna atõnõz. - Page 60 Ya lanmaya kar õ metal filtreler Bula õk makinesinde yõkanabilirler, ekranda FG sembolü göründü ünde ya da yakla õk her 2 aylõk kullanõm sonrasõnda veya özellikle yo un kullanõm durumunda daha sõklõkla yõkanmalarõ gerekir. Alarm sinyalinin sõfõrlanmasõ • I õklarõ ve emme Motorunu kapatõn, ayet 24h i levi devredeyse, kapatõn.
- Page 61 Koku Emici Aktif Karbonlu Filtreler (Filtre Edici Sürüm) Yõkanamaz, yeniden kullanõlamaz, ekranda FC görüntülendi inde veya en az 4 ayda bir de i tirilir. Alarm sinyali, e er önceden etkinle tirilmi se, sadece Aspirasyon Motoru çalõ tõrõldõ õ zaman çalõ õr. Alarmõn devreye alõnmasõ...
- Page 62 Aydõnlatma LAMBALARIN DE T R LMES 20 W halojen lambalar. • Birle tiren vidalarõ sökerek tavan lambasõnõ sökün. • Lambayõ destekten çõkartõnõz. • Destek yuvasõndaki iki ucun do ru bir ekilde yerle tirilmesine dikkat ederek Lambayõ aynõ özelliklere sahip ba ka bir lamba ile de i tiriniz. •...
- Page 63 • • • • • • 2° 0,04 •...
- Page 64 • • • • • • • • " " • •...
- Page 65 “ • • • • • " " •...
- Page 66 Min. Min. 250mm 250mm 7.2.1 1.2.7 44.4 × × ×...
- Page 67 7.2.1 200 200 180 180 A=Min 250 Max 400 • • • • • • Ø • Ø • • • 1.2.7 • • 1.2.7 • • Ø • • × 44.4 •...
- Page 68 • • • • • • • ( B ) ( A ) • • • ø 120 ø 150 • • × 12.5 • ×...
- Page 69 7.2.1...
- Page 70 – – 24 H – –...
- Page 71 LR-AAA • × • 12.5 • ×...
- Page 72 • • • • • • •...
- Page 73 • • • • • • • • • • • • •...
- Page 74 • • • • ILCOS HSGSB/C/UB-28-220/240-E14 104 x 35 220 – 240 HSG/C/UB-20-12-G4 33 x 9 HAGS-35-230-GU10-51/40 51 x 50,7 GU10 HAGS-35-230-GU10-51/20 51 x 50,7 GU10 HRGS-20-12-GU4-35/30 40 x 35 HRGS-20-12-GU5.3-50/10 46 x 51 GU5.3 720 x 26 FD--16/40/1B-E--G13--26/720 589,8 x 26 FD--18/40/1B--E--G13--26/600 60 ( FSD-9/27/1B-I-G23...
- Page 76 436005065_ver3...
Need help?
Do you have a question about the MATRIX EG10 X A90 ACTIVE and is the answer not in the manual?
Questions and answers