Table of Contents
Advertisement
Quick Links
Advertisement
Table of Contents

Related Manuals for Faber TENDER Series


Summary of Contents for Faber TENDER Series
- Page 1 Instructions Manual دﻟﻴﻞ اﻟﺘﺮآﻴﺐ...
-
Page 2: Table Of Contents
INDEX SAFETY INFORMATION................................. 3 CHARACTERISTICS ................................6 INSTALLATION..................................7 USE ...................................... 10 CARE AND CLEANING................................. 11 اﻟﻔﻬﺮس 31 ..........................ﻣﻌﻠﻮﻣ ﺎت ﻓﻴﻤ ﺎ ﻳﺨ ﺺ اﻟﺴ ﻼﻣﺔ 61 ................................اﻟﺨﺼ ﺎﺋﺺ ﺐ 71 ................................اﻟﺘﺮآﻴ 02 ................................اﻻﺳ ﺘﺨﺪام ﻴﺎﻧﺔ ﻒ واﻟﺼ 12 ............................. اﻟﺘﻨﻈﻴ... -
Page 3: Safety Information
SAFETY INFORMATION For your safety and correct operation of the appliance, read this manual carefully before installation and use. Always keep these instructions with the appliance even if you move or sell it. Users must fully know the operation and safety features of the appliance. The wire connection has to be done by specialized technician. - Page 4 If the extractor is used in conjunction with non-electrical appliances (e.g. gas burning appliances), a sufficient degree of aeration must be guaranteed in the room in order to prevent the backflow of exhaust gas. When the cooker hood is used in conjunction with appliances supplied with energy other than electric, the negative pressure in the room must not exceed 0,04 mbar to prevent fumes being drawn back into the room by the cooker hood.
- Page 5 The appliance is not to be used by persons (including children) with re- duced physical, sensory or mental capabilities, or lack of experience and knowledge, unless they have been given supervision or instruction. Accessible parts may become hot when used with cooking appliances. ...
-
Page 6: Characteristics
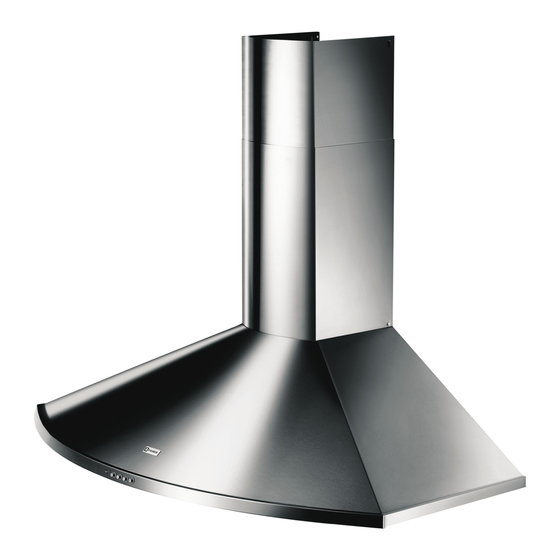
CHARACTERISTICS Dimensions 598 - 898 r. 191 Components Ref. Q.ty Product Components Hood Body, complete with: Controls, Light, Blower, Filters Telescopic Chimney comprising: Upper Section Lower Section Right Air Outlet Grill Left Air Outlet Grill Reducer Flange ø 150-120 mm Air Outlet Connection Flap Ref. -
Page 7: Installation
INSTALLATION Wall drilling and bracket fixing 7.2.1 Wall marking: • Draw a vertical line on the supporting wall up to the ceiling, or as high as practical, at the centre of the area in which the hood will be installed. •... - Page 8 Mounting the hood body 12.d • Screw the two screws 12d supplied onto the brackets 7.1. • Hook the hood body onto the bracket 7.1, centring it around the vertical line. • Use the adjusting screws 12d underneath the hood to level the hood body.
- Page 9 ELECTRICAL CONNECTION • Connect the hood to the mains through a two-pole switch having a contact gap of at least 3 mm. • Remove the grease filters (see paragraph Mainte- nance) being sure that the connector of the feeding cable is correctly inserted in the socket placed on the side of the fan.
-
Page 10: Use
Control panel Light Switches the lighting system Light Switches the lighting system on and off. on and off. Motor Switches the extractor motor Motor running led. on and off. V1 Motor Switches the extractor motor Speed Sets the operating speed of on and off at low speed. -
Page 11: Care And Cleaning
CARE AND CLEANING Grease filters CLEANING METAL SELF- SUPPORTING GREASE FILTERS • The filters must be cleaned every 2 months of operation, or more frequently for particularly heavy usage, and can be washed in a dishwasher. • Remove the filters one at a time by pushing them towards the back of the group and pulling down at the same time. - Page 12 Lighting LIGHT REPLACEMENT • Remove the metal grease filters. • Unscrew the bulbs and replace them with new ones having the same characteristics. • Replace the metal grease filters. Lamp Power (W) Socket Voltage (V) Dimension (mm) ILCOS Code 220-240 107 x 37 DRBB/F-4-220-240-E14-35/100 DRPAR-5/840-220/240-GU10-35/36...
-
Page 13: ﻣﻌﻠﻮﻣﺎت ﻓﻴﻤﺎ ﻳﺨﺺ اﻟﺴﻼﻣﺔ
ﻣﻌﻠﻮﻣﺎت ﻓﻴﻤﺎ ﻳﺨﺺ اﻟﺴﻼﻣﺔ اﻗﺮأ هﺬا اﻟﺪﻟﻴﻞ ﺑﻌﻨﺎﻳﺔ ﻗﺒﻞ اﻟﺘﺮآﻴﺐ واﻻﺳﺘﺨﺪام ﺣﺮ ﺻ ًﺎ ﻋﻠﻰ ﺳﻼﻣﺘﻚ وﻣﻦ أﺟﻞ اﺣﺘﻔﻆ داﺋ ﻤ ًﺎ ﺑﻬﺬﻩ اﻟﺘﻌﻠﻴﻤﺎت ﻣﻊ اﻟﺠﻬﺎز ﺣﺘﻰ ﻋﻨﺪ ﻧﻘﻠﻪ أو اﻟﺘﺸﻐﻴﻞ اﻟﺼﺤﻴﺢ ﻟﻠﺠﻬﺎز ﻳﺠﺐ ﻋﻠﻰ اﻟﻤﺴﺘﺨﺪم أن ﻳﻌﺮف ﺑﺎﻟﻜﺎﻣﻞ ﻣﻤﻴﺰات اﻟﺘﺸﻐﻴﻞ واﻟﺴﻼﻣﺔ ﻟﻬﺬا اﻟﺠﻬﺎز ﻴﻌﻪ... - Page 14 • ، ﻳﺠﺐ ﺿﻤﺎن ﻣﺜﻞ أﺟﻬﺰة اﻟﻐﺎز ﺗﻢ اﺳﺘﺨﺪام اﻟﻤﺪﺧﻨﺔ ﻣﻊ اﻷﺟﻬﺰة ﻏﻴﺮ اﻟﻜﻬﺮﺑﺎﺋﻴﺔ إذا ﻋﻨﺪ اﺳﺘﺨﺪام اﻟﻤﺪﺧﻨﺔ ﻣﻊ درﺟﺔ آﺎﻓﻴﺔ ﻣﻦ اﻟﺘﻬﻮﻳﺔ ﻓﻲ اﻟﻐﺮﻓﺔ ﻟﻤﻨﻊ ﻋﻮدة ﺗﺪﻓﻖ ﻏﺎز اﻟﻌﺎدم اﻷﺟﻬﺰة اﻟﺘﻲ ﺗﻌﻤﻞ ﺑﺎﻟﻄﺎﻗﺔ ﺑﺪ ﻻ ً ﻣﻦ اﻟﻜﻬﺮﺑﺎء، ﻓﺈن اﻟﻀﻐﻂ اﻟﺴﻠﺒﻲ ﻓﻲ اﻟﻤﻜﺎن ﻳﺠﺐ أﻻ 0,04 ر...
- Page 15 • اﻟﺬﻳﻦ ﻟﺪﻳﻬﻢ ﻗﺪرات ﻧﻔﺴﻴﺔ ﺑﻤﺎ ﻓﻲ ذﻟﻚ اﻷﻃﻔﺎل ﻳﺠﺐ أﻻ ﻳﺴﺘﺨﺪم اﻟﺠﻬﺎز اﻷﺷﺨﺎص ﺣ ﺴ ّﻴﺔ ﻣﺨﻔﻀﺔ أو ﻣﻊ ﺧﺒﺮة وﻣﻌﺮﻓﺔ ﻏﻴﺮ آﺎﻓﻴﺔ، ﻣﺎ ﻟﻢ ﻳﺘﻢ اﻹﺷﺮاف ﻋﻠﻴﻬﻢ وإرﺷﺎدهﻢ ﺑﻌﻨﺎﻳﺔ اﻟﻤﻨﺎﻃﻖ اﻟﻤﻜﺸﻮﻓﺔ واﻟﺘﻲ ﻳﻤﻜﻦ اﻟﻮﺻﻮل اﻟﻴﻬﺎ ﻋﻨﺪ اﺳﺘﻌﻤﺎل ﺟﻬﺎز اﻟﻄﺒﺦ ﻗﺪ ﺗﻜﻮن ﺷﺪﻳﺪة اﻟﺤﺮارة...
- Page 16 ﺼﺎﺋﺺ اﻟﺨ اﻻﺑﻌﺎد اﻟﻘﻴﺎﺳﻴﺔ 598 - 898 r. 191 اﻟﻤﻜﻮﻧﺎت ﻣﻜﻮﻧﺎت اﻟﻨﺘﺞ ﻋﺪد اﻟﻮﺣﺪات رﻗﻢ اﻟﻤﺮﺟﻊ اﻟﺘﺤﻜﻢ ﺟﺸﻢ اﻟﺸﻔﺎط ﺑﺎﻟﻜﺎﻣﻞ وﻳﺸﻤﻞ وﺣﺪات اﻟﻔﻼﺗﺮ – اﻟﺮوﺣﺔ اﻻﺿﺎءة ﻣﻜﻮﻧﺎت اﺟﺰاء اﻟﻤﺪﺧﻨﺔ اﻟﺠﺰء اﻟﻌﻠﻮي ﻣﻦ اﻟﻤﺪﺧﻨﺔ اﻟﺠﺰء اﻟﺴﻔﻠﻲ ﻣﻦ اﻟﻤﺪﺧﻨﺔ اء اﻟﻴﻤﻨﻲ ﺷﺒﻜﺔ ﻣﺨﺮج اﻟﻬﻮ ﺷﺒﻜﺔ...
- Page 17 اﻟﺘﺮآﻴﺐ ﺗﺠﻬﻴﺰ اﻟﺤﺎﺋﻂ وﺗﺮآﻴﺐ اﻟﺤﻮاﻣﻞ 7.2.1 ﺗﺠﻬﻴﺰ اﻟﺤﺎﺋﻂ ارﺳﻢ ﺧﻂ راﺳﻲ ﻋﻠﻲ ﺣﺎﺋﻂ ﺗﺮآﻴﺐ اﻟﺸﻔﺎط ﺣﺘﻲ اﻟﺴﻘﻒ او اﻟﻲ اﻋﻠﻲ ارﺗﻔﺎع ﻳﻤﻜﻦ اﻟﻮﺻﻮل اﻟﻴﻪ وذﻟﻚ ﻓﻲ ﻣﻨﺘﺼﻒ ﻣﻨﻄﻘﺔ ﺗﺮآﻴﺐ اﻟﺸﻔﺎط هﻮ ارﺗﻔﺎع ﻓﻮق ﺳﻄﺢ اﻟﺒﻮﺗﺎﺟﺎز ﺑﺪون اﻟﻠﻮﺣﺔ اﻟﺨﻠﻔﻴﺔ او ﻋﻠﻲ ارﺗﻔﺎع ﺳﻢ...
- Page 18 ﺗﻌﻠﻴﻖ ﺟﺴﻢ اﻟﺸﻔﺎط ﻟﺘﺮآﻴﺐ اﻟﺤﻮاﻣﻞ ﻗﻢ ﺑﺮﺑﻂ اﻟﻤﺴﻤﺎرﻳﻦ 12.d ﻣﻊ اﻟﺘﻤﺮآﺰ ﻓﻲ اﻟﻤﻨﺘﺼﻒ ﻋﻠﻲ ﺤﺎﻣﻞ ﺿ ﻊ ﺟ ﺴﻢ اﻟ ﺸﻔﺎط ﻋﻠﻲ اﻟ اﻟﺨﻂ اﻟﺒﻴﺎﻧﻲ اﻟﺮاﺳﻲ اﺳﻔﻞ اﻟﺸﻔﺎط ﻣﺴﺘﻮي اﻟﺸﻔﺎط اﺳﺘﺨﺪم ﻣﺴﺎﻣﻴﺮ اﻟﺘﻌﺪﻳﻞ ﺗﻮﺻﻴﻼت ﻣﺨﺮج اﻟﻬﻮاء ﻃﺮاز اﻟﺸﺎﻓﻂ ﻟﺘﺮآﻴﺐ اﻟﻤﺪﺧﻨﺔ ﻧﺴﺨﺔ اﻟﺸﻔﻂ ﻗﻢ ﺑﺮﺑﻂ اﻟﻤﺪﺧﻨﺔ ﻷﻧﺒﻮب اﻟﻤﺨﺮج ﺑﻮاﺳﻄﺔ أﻧﺒﻮب ﻢ،...
- Page 19 اﻟﺘﻮﺻﻴﻞ اﻟﻜﻬﺮﺑﺎﺋﻲ ﻣﺸﺘﺮك ﺛﻨﺎﺋﻲ ﻗﻢ ﺑﺘﻮﺻﻴﻞ اﻟﺸﻔﺎط ﺑﻤﺼﺪر اﻟﻜﻬﺮﺑﺎء ﻣﻦ ﺧﻼل ﻟﺘﻌﻮﻳﺾ اﻟﻔﺎرق ﻓﻲ اﻟﻔﺘﺤﺎت ﺑﻴﻦ اﻟﺸﻔﺎط و اﻟﻤﺼﺪر اﻟﻘﻄﺒﻴﻦ اﻟﺮﺋﻴﺴﻲ وﺗﺎآﺪ ﻣﻦ ﺗﻮﺻﻴﻞ ﺮة اﻟﺼﻴﺎﻧﺔ اﻧﺰﻇﺮ ﻓﻘ اﻧﺰع ﻓﻼﺗﺮ اﻟﺪهﻮن ﺳﻠﻚ اﻟﻜﻬﺮﺑﺎء ﺑﺎﻟﻮﺿﻊ اﻟﺼﺤﻴﺢ داﺧﻞ اﻟﻔﻴﺸﺔ اﻟﻤﻮﺟﻮدة ﻋﻠﻲ ﺟﺎﻧﺐ اﻟﻤﺮوﺣﺔ 7.2.1 اﺟﺰاء...
-
Page 20: اﻻﺳﺘﺨﺪام
اﻻﺳﺘﺨﺪام ﻟﻮﺣﺔ اﻟﺘﺤﻜﻢ ﺤﻜﻢ ﻓﻲ ﻧﻈﺎم اﻻﺿﺎءة ﻣﻔﺎﺗﻴﺢ اﻟﺘ ﻣﻔﺎﺗﻴﺢ اﻟﺘﺤﻜﻢ ﻓﻲ ﻧﻈﺎم اﻻﺿﺎءة اﻻﺿﺎءة اﻻﺿﺎءة ON/OFF ON/OFF ﻣﻔﺘﺎح ﺗﺸﻐﻴﻞ اﻟﺸﻔﺎط ﻣﻔﺎﺗﻴﺢ اﻟﺘﺤﻜﻢ ﻓﻲ ﻋﻤﻞ اﻟﻤﻮﺗﻮر اﻟﻤﻮﺗﻮر ON/OFF ﻣﻔﺎﺗﻴﺢ اﻟﺘﺤﻜﻢ ﻓﻲ ﺗﺸﻐﻴﻞ ﻣﻮﺗﻮر اﻟﺸﻔﻂ ﺿﺒﻂ ﺳﺮﻋﺔ ﺗﺸﻐﻴﻞ اﻟﻤﻮﺗﻮر وﻳﺴﺘﺨﺪم ﻟﺘﺠﺪﻳﺪ اﻟﻬﻮاء اﺛﻨﺎء وﺟﻮد ﺗﺴﺘﺨﺪم... - Page 21 اﻟﺘﻨﻈﻴﻒ واﻟﺼﻴﺎﻧﺔ ﻓﻼﺗﺮ اﻟﺪهﻮن ﺗﻨﻈﻴﻒ ﻓﻠﺘﺮ اﻟﺪهﻮن ﻳﺠﺐ ﺗﻨﻈﻴﻒ اﻟﻔﻼﺗﺮ آﻞ ﺷﻬﺮﻳﻦ ﻣﻦ اﻻﺳﺘﻌﻤﺎل او ﺑﺸﻜﻞ ﻣﺘﻜﺮر ﻣﻊ اﻻﺳﺘﻌﻤﺎل اﻟﺸﺎق ﻳﻤﻜﻦ ﺗﻨﻈﻴﻔﻪ داﺧﻞ ﻏﺴﺎﻟﺔ اﻻﻃﺒﺎق ﻠﻒ ﻣﻊ ﺳﺤﺒﻬﺎ ﻻﺳﻔﻞ ﻓﻲ ﻳﺘﻮ ﻧﺰع اﻟﻔﻼﺗﺮ ﻣﻦ ﺧﻼل اﻟﻀﻐﻂ ﻋﻠﻴﻬﺎ ﺑﺎﺗﺠﺎﻩ اﻟﺨ ﻧﻔﺲ اﻟﻮﻗﺖ اﻏﺴﻞ...
- Page 22 اﻻﺿﺎءة ﺗﻐﻴﺮ اﻻﺿﺎءة اﻧﺰع ﻓﻠﺘﺮ اﻟﺪهﻮن اﻟﻤﻌﺪﻧﻲ ﻓﻚ اﻟﻠﻤﺒﻮ واﺳﺘﺒﺪاﻟﻬﺎ ﺑﺎﺧﺮي ﺟﺪﻳﺪة ﻣﻦ ﻧﻔﺲ اﻟﻨﻮع وﻧﻔﺲ اﻟﺨﺼﺎﺋﺺ اﻋﺪ ﺗﺮآﻴﺐ ﻓﻠﺘﺮ اﻟﺪهﻮن اﻟﻤﻌﺪﻧﻲ رﻣﺰ اﻟـ ) ﻣم اﻷﺑﻌﺎد واط ﻮﻟﺘﺎج اﻟﻔ اﻟﺘﻮﺻﻴﻠﻪ واط اﻹﺳﺘﻬﻼك اﻟﻤﺼﺒﺎح ILCOS DRBB/F-4-220-240-E14-35/100 107 x 37 220 – 240 DRPAR-5/840-220/240-GU10-35/36 52 x 50 GU10...
- Page 24 991.0602.190_ver1 - 191120 - D00006275_00...
Need help?
Do you have a question about the TENDER Series and is the answer not in the manual?
Questions and answers