Table of Contents
Advertisement
Quick Links
Asian Electron Co., Ltd.
6F-1, No.150,Jian Yi Road, Zhonghe Dist., New Taipei City 235, TAIWAN, R.O.C.
TEL: 886-2-8226-5158
FAX:886-2-82265150
http://www.asian-electron.com
e-mail:
yukae@ms35.hinet.net
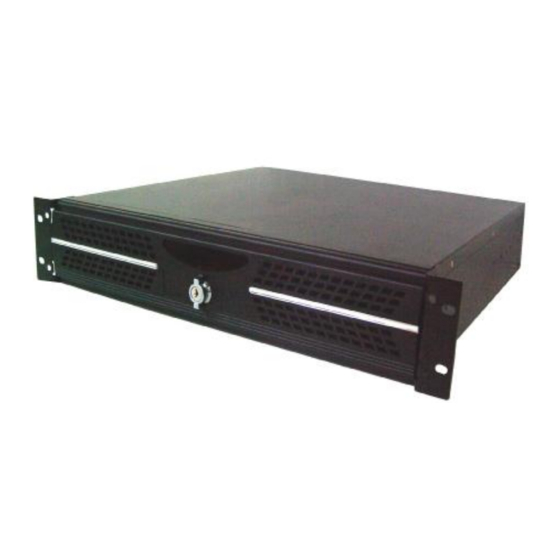
PIC2KVA Series
19" Rack mount
Pure Sine Wave Inverter
with build in Battery Charger
Instruction Manual
Advertisement
Table of Contents

Related Manuals for Asian Electron PIC2KVA Series

Summary of Contents for Asian Electron PIC2KVA Series
- Page 1 Asian Electron Co., Ltd. 6F-1, No.150,Jian Yi Road, Zhonghe Dist., New Taipei City 235, TAIWAN, R.O.C. TEL: 886-2-8226-5158 FAX:886-2-82265150 http://www.asian-electron.com e-mail: yukae@ms35.hinet.net PIC2KVA Series 19” Rack mount Pure Sine Wave Inverter with build in Battery Charger Instruction Manual...
-
Page 2: Table Of Contents
List of Contents 1. Features Application Electrical performance 2. Introduction Front panel operations Rear panel operations Installation Quick hook – up and testing AC safety grounding Making DC wiring connections Inverter operation Cooling fan working code 3. Maintenance 4. Troubleshooting guide 5. -
Page 3: Features
Features Digital display Battery charger inside AC Output frequency: 50/60Hz switch RS – 232 interface / remote control port / wire connection to PC Automatic transfer between inverter power and incoming AC utility power Wired remote control Loading controlled cooling fan Advanced microprocessor Protection : Input low voltage Overload... -
Page 4: Electrical Performance
1-2 Electrical Performance Specification Model Item PIC30122KVA PIC15242KVA PIC08482KVA PIC30122KVAE PIC15242KVAE PIC08482KVAE Continuous Output 2000W Power Surge Rating 4000W Input Voltage 50/60Hz ± 0.05%( Switch Selectable) Frequency Peak Output Current Efficiency (full load) Output Waveform R Load Pure Sine Wave < 3% THD 100/110/115/120V(Switch Selectable)RMS ±2% 200/220/230/240V(Switch Selectable) RMS ±2% Output Voltage ≦1.5W Power Saving Mode... -
Page 5: Introduction
Introduction The inverter with build in battery charger series are the member of the most advanced line of mobile AC power systems available. To get the most out of the unit, it must be installed and used properly. Please read the instructions in this manual before installing and using this model. 2-1 Front Panel Operation 2-1-1 Front view 2-1-2 ON / OFF switch... -
Page 6: Rear Panel Operations
WARNING! Do not connect the AC source to the unit’s AC output terminal; do not connect AC load to the unit’s AC input terminal; do not connect the wrong terminal polarity. 2-2 Rear Panel Operation 2-2-1 Ventilation openings Do not obstruct. Allow at least 3 inch for airflow. 2-2-2 Battery terminals Connect to 12V / 24V / 48V /110V /220V battery or other 12V / 24V / 48V / 110V / 220V power source. - Page 7 WARNING! Any damages caused by using incorrect RS232 cable will be outside of our warranty scope. If you are not sure which one is correct RS232 cable, please purchase the correct RS232 cable from us directly. 2-2-4 Connect chassis ground terminal to earth or to vehicle chassis using # 8 AWG wire.
-
Page 8: Installation
2-3 Installation Where to install: The unit should be installed in a location that meets the following requirements. 2-3-1 Dry – Do not allow water to drip or splash on the unit. 2-3-2 Cool – Ambient air temperature should be between -20°C and 50°C, the cooler the better. - Page 9 WARNING! Make sure all the DC connections are tight (torque to 9-10 ft-lbs, 11.7-13Nm). Loose connections will overheat and could result in a potential hazard. 2-4-3 Before proceeding further, carefully check that cable you have just connected negative terminal of unit to the negative output power source. CAUTION! Reverse polarity connection will blow a fuse in unit and may permanently damage the unit.
-
Page 10: Ac Safety Grounding
2-5 AC Safety Grounding During the AC wiring installation, AC input and output ground wires are connected to the unit. The AC input ground wire must connect to the incoming ground from your AC utility source. The AC output ground wire should go to the grounding point for your loads (for example, a distribution panel of bus chassis). -
Page 11: Making Dc Wiring Connections
2-6 Making DC Wiring Connections Follow this procedure to connect the battery cables to the DC input terminals on the unit. Your cables should be as short as possible (ideally, less than 10 feet / 3 meters) and large enough to handle the required current in accordance with the electrical codes or regulations applicable to your installation. - Page 12 The inverter will indicate high and low DC voltage conditions as follows: DC Input over DC Input under Model DC Input over DC Input under voltage shut-down voltage shut-down voltage alarm voltage alarm YK-PIC30122KVA 16.0VDC 15.5VDC 10.5VDC 10.0VDC YK-PIC30122KVAE YK-PIC15242KVA 32.0VDC 31.0VDC 21.0VDC...
-
Page 13: Cooling Fan Working Code
2-7-8 Over Voltage Protection indicator: (OVP) The over voltage indicator indicates that the power inverter has shut itself down because its input voltage exceeded 12V / 24V / 48VDC version. (Ref. point 2-7-1) 2-7-9 Under Voltage Protection indicator: (UVP) The under voltage indicator indicates that the power inverter has shut itself down because its input voltage fell below 12V / 24V / 48VDC. -
Page 14: Maintenance
Maintenance Very little maintenance is required to keep your unit operating properly. You should clean the exterior of the unit periodically with a dry cloth to prevent accumulation of dust and dirt. At the same time, tighten the screws on the DC input terminals. -
Page 15: Warranty
Warranty We warrant this product against defects in materials and workmanship during warranty period and will repair or replace any defective unit when directly returned (postage paid) to us. This warranty will be considered void if the unit has suffered any obvious damage by natural and man-made factors, or alteration either internal or external and does not cover damage arising from improper use such as plugging the unit into an unsuitable power sources attempts to operate products with excessive power consumption requirement, or... -
Page 16: Precautions When Working With Batteries
6-2 Precautions When Working with Batteries 6-2-1 If battery acid contacts skin or clothing, wash immediately with soap and water. If acid enters eye, immediately flood eye with running cold water for at lease 20 minutes and get medical attention immediately 6-2-2 Never smoke or allow a spark or flame in vicinity of battery or engine.
Need help?
Do you have a question about the PIC2KVA Series and is the answer not in the manual?
Questions and answers