Advertisement
Quick Links
Advertisement

Related Manuals for Vyaire bellavista 1000


Summary of Contents for Vyaire bellavista 1000
- Page 1 Set Up and Start Up Guide bellavista 1000 and bellavista 1000e...
- Page 2 Dual Limb Circuits Gather equipment bellavista iflow sensor Active Humidification: – bellavista iflow sensor 200 S, adult/paediatric or iflow 40 S, neonatal sensor (single patient use) – Dual limb circuit for active humidification – Humidification chamber – Temperature probe and heated wire adapter (specific to the humidifier Dual limb circuit for active humidification...
- Page 3 Gather exhalation valve Dual limb adapter Reusable integrated - For single patient use - + single use exhalation valve cassette dual limb adapter will be exhalation valve in place – need a bellavista single patient use exhalation valve - For reusable - clean reusable integrated exhalation valve cassette (refer to cleaning guide for...
- Page 4 Active Humidification: Dual limb adapter Reusable integrated + single use exhalation valve – Attach bacterial/viral filter exhalation valve to the inspiratory port – Attach the dry side tubing to the filter on the inspiratory port and attach to the humidification chamber –...
- Page 5 Separate tubing on iflow sensor Dual limb adapter Reusable integrated + single use exhalation exhalation valve and attach the blue tubing to valve the blue port and clear tubing to the silver port on bellavista Hook orange calibration adapter onto this tubing – this is required for the circuit and flow sensor test.
- Page 6 Locate the power button on the left-hand side of the ventilator and press it once. Power up takes approximately 90 seconds, during the power-up process, bellavista automatically performs a system test. If any irregularities should arise, the bellavista generates an alarm signal and the power-up process is discontinued.
- Page 7 Once turned on, the ‘Start Screen’ will appear. There are four sections – ‘Profile’, ‘Patient’, ‘Circuit’ and ‘Settings’. Under ‘Profile’, select ‘New Patient’. If the ventilator had been on a patient and was on standby, ‘Last Patient’ can be selected and the previous ventilation settings can be resumed.
- Page 8 Under ‘Circuit’, select Invasive, Invasive Non-Invasive ‘NIV’ or High Flow Oxygen Therapy ‘HFOT’ and nCPAP for neonatal. Invasive mode will display a picture of an endotracheal tube at the top of the screen and a black border. Non-Invasive ‘NIV’ and nCPAP Non-Invasive will display a picture of a mask at the top of the screen and a...
- Page 9 To enable the Automatic Tube Compensation (ATC) - enter the ‘Main Menu’, swipe the screen once or press the second dot in the top right corner of the screen. Select ‘Configuration Assist’. Scroll to find ‘ATC’. Press to enable. Return to ‘Start Screen’. Automatic Tube Compensation (ATC) Press ‘ATC’.
- Page 10 Circuit Test Select the ‘Circuit Test’ button to perform the circuit test. It will appear yellow until the circuit test has been completed. Press ‘Start’ and follow the instructions. With the acoustic signal, insert the blind plug (occluded end of the orange calibration adapter) into the flow sensor until the leak test has been successfully completed with...
- Page 11 When the test is complete, it will display a green tick if passed. If it fails, it will indicate failure in red. The ‘Circuit Test’ tile will now appear black and displays the date and time of the last test. Under ‘Settings’, select the arrow to expand the settings section.
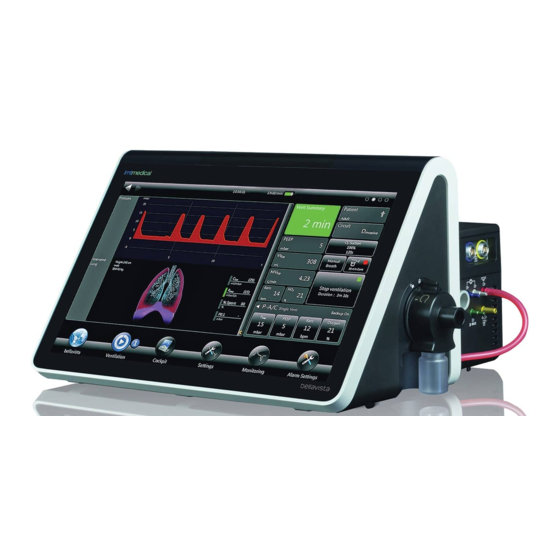
- Page 12 Once ventilation has been commenced, the ‘Cockpit’ screen will appear and provides monitoring waveforms and settings. This screen is customisable, press and hold a parameter to remove or change. 4 dots at the top right of the ‘Cockpit’ screen indicate 4 different screens.
- Page 13 The first screen (option expert ventilation) is the ‘Manoeuvres’ screen. In the first tab, inspiratory and expiratory holds can be performed. The second and third tab is reserved for the ‘Lung Recruitment Tool’ option. The third screen is the ‘Settings Assist’...
- Page 14 AnimatedLung To view the AnimatedLung, press and hold the panel on the left hand until the context menu appears and choose “Change or Add value” and select ‘Animated Lung’. This can be configured on the cockpit or monitoring screen. The AnimatedLung is a visual cue to increase situation awareness and displays resistance and compliance of...
- Page 15 The ‘Alarm Settings’ screen is located in the bottom right corner. When a parameter is outside the set alarm limit, it will be highlighted in red or yellow. The corresponding tile on the ‘Cockpit’ screen will also be highlighted in red or yellow. To change any alarm limits on the alarm limits screen, select the corresponding alarm and...
- Page 16 The second screen in ‘Alarm Settings’ will show any current alarms. The third screen will show an alarm history log with alarm codes. Functions such as’ O Suction’ and ‘Manual Breath’ can be found from the ‘Cockpit’ or by entering the ‘Ventilation’ menu at the bottom of the screen.
- Page 17 To stop ventilation, press stop ventilation and slide across the confirmation window. This will take you back to the ‘Start Screen’. If you press ‘Start Ventilation’ again, it will resume with the last settings. To lock the screen, press and hold the ‘Main Menu’...
- Page 18 To access the in-built user manual: Press and hold any parameter and press ‘Request Help’. This will take you to the ‘User Manual’. Alternatively, press ‘Main Menu’, swipe the screen twice to find ‘Help’. Press ‘User Manual’. Set Up and Start Up Guide - bellavista 1000 and bellavista 1000e 34727-001 Revision A (2021-10)
- Page 19 Non-Invasive Ventilation To change to non-invasive (NIV) mode from the ‘Start Screen’, select ‘NIV’, adjust the mode and settings. Press ‘Start Ventilation’. A blue border will appear around the screen to indicate Non-Invasive ‘NIV’ mode. Initially all patient related alarms are suppressed for 120 seconds to allow fitting of the mask without disturbance.
- Page 20 High Flow Oxygen Therapy To change to high flow oxygen therapy mode, select ‘HFOT’. An alert message will appear to inform that you are exiting Invasive and Non-Invasive modes. It states: - Always use SpO monitoring during HFOT - Use only active humidified circuits - Ventilation alarms are suppressed during HFOT...
- Page 21 How to activate ‘Target Vent’ (PRVC) From any screen, select ‘Main Menu’. Select ‘beMode Assist’ from the first screen of the main menu. Select ‘TargetVent’. This will take you to the ‘Cockpit’ screen. Press ‘Activate TargetVent’. Set Up and Start Up Guide - bellavista 1000 and bellavista 1000e 34727-001 Revision A (2021-10)
- Page 22 To activate TargetVent, press the ‘TargetVent’ button. The ‘TargetVent’ graphic will appear next to the ‘Ventilation’ tile. Once TargetVent light is green, Target Vent mode is enabled. Set Up and Start Up Guide - bellavista 1000 and bellavista 1000e 34727-001 Revision A (2021-10)
- Page 23 To change ‘Target Vent’ ventilation mode, select the 3rd screen on the top right corner and select either P-A/C, PC-SIMV or PSV modes. Adjust the settings for this mode and press apply. Always check the alarm settings accordingly. Return to the ‘Cockpit’ by swiping the screen backwards once or pressing the 2nd screen on the top right.
- Page 24 The 4th screen is a ‘bathtub’ graphic for TargetVent, which depicts the relationship between inspiratory pressure and target volume. If ‘TargetVent Maximum/ Minimum Pressure Alarm’ appears, consider changing the ‘Volume Target’ or ‘PInspMax/PInspMin’ setting. To turn off ‘TargetVent’, press ‘Switch off Target Vent’ and light will turn red.
-
Page 25: Sensor Calibration
Maintenance - O Sensor Calibration To perform ‘O Sensor Calibration’ Press the ‘Main Menu’ button in the bottom left of the screen. Swipe the screen once or press the second dot in the top right corner of the screen. Select ‘Calibration Assist’. Set Up and Start Up Guide - bellavista 1000 and bellavista 1000e... - Page 26 Select ‘O Sensor Calibration’ and press ‘Calibrate’. The calibration can take up to a few minutes to complete. If you must calibrate due to an alarm during ventilation, please note that the FiO will drop to 21% during calibration time. If the condition of the patient does not allow this, consider disabling the oxygen sensor until a calibration can...
- Page 27 To disable the oxygen sensor Press ‘Main Menu’, swipe the screen once and find ‘Calibration Assist’. Scroll to find ‘O Functions’. Press ‘O monitoring’, press to disable and slide across to confirm “Switch off oxygen monitoring”. On the ‘Cockpit’ screen, the FiO parameter will now display ‘Off’...
- Page 28 Maintenance - HEPA Filter and Cooling Filter When bellavista is equipped with a HEPA filter, check that the HEPA filter is correctly in place. Check that both the filter mat and cartilage are in date. As it is a turbine driven ventilator, air is drawn in from the ambient environment through this filter.
- Page 29 The grate at the back of the ventilator houses a cooling filter. Slide the grate upwards to open. This mat needs to be changed every month. Set Up and Start Up Guide - bellavista 1000 and bellavista 1000e 34727-001 Revision A (2021-10)
- Page 30 2113 Australia www.imtmedical.com vyaire.com © 2021 Vyaire. Vyaire, the Vyaire logo and all other trademarks or registered trademarks are property of Vyaire Medical, Inc., or one of its affiliates. Medical devices class IIb according to Medical Devices Directive 93/42/EEC. Please read the complete instructions for use that came with the devices, or follow the instructions on the product labelling.
Need help?
Do you have a question about the bellavista 1000 and is the answer not in the manual?
Questions and answers
Is there a way to check the event history on the ventilator. Not in relation to alarms but when the settings have been changed like AC, pressure support, etc.
To check the event history for settings changes on the Vyaire Bellavista 1000 ventilator, go to the third screen in the "Alarm Settings" menu. This screen shows an alarm history log with alarm codes.
This answer is automatically generated