Table of Contents

Related Manuals for Hunter UH68ODH


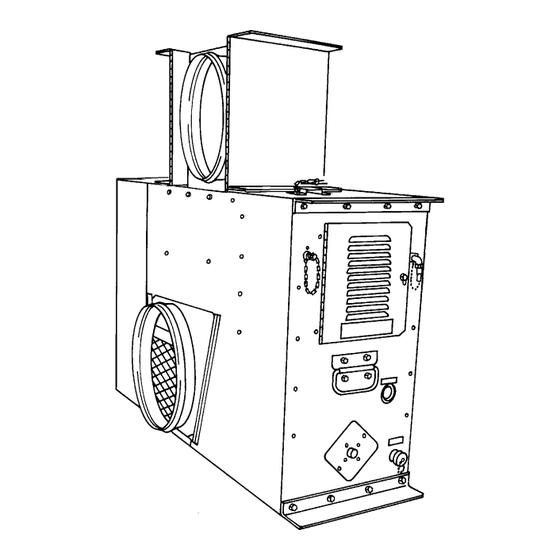
Summary of Contents for Hunter UH68ODH
- Page 1 Heater, Tent Model UH68ODK, UH68ODH Manual for UH68G1 with Hunter Part Number 53100 Outdoor Kit Installed and UH68ODH, Part Number 168325 REV 14MAY02 PN 168324 Hunter Manufacturing Company 30525 Aurora Rd Solon, OH, 44139 www.huntermfgco.com...
- Page 3 Gasoline and JP-4 should NOT be used with the UH68OKD/ODH under any circumstance. Only JP-8 or an approved alternate fuel as detailed in Chapter 1. Failure to observe fuel requirements could cause damage to the heater assembly and injury or death to personnel within or around the tent and the heater assembly.
-
Page 4: Electric Shock
ELECTRIC SHOCK Always disconnect power cable from heater before doing any type of service work or repairs. SEVERE BURNS HOT EXHAUST DO NOT MOVE THE HEATER ASSEMBLY WHILE ANY OF THE ADVISORY LIGHTS ARE LIT. Small, portable, shelter heaters of this type are not designed to be moved during operation or before purge cycles are complete. -
Page 5: Chapter 1 Introduction
• Low voltage opto-isolated controls to eliminate shock hazard. • “Fan only” ventilation. Attempting to use an unmodified UH68 series heater outdoors may result in electrical shock, injury or death Chapter 1 Introduction Operators UH68ODK and UH68ODH, Forced air tent heater, with ducts. WARNING! ELECTRICAL SHOCK... -
Page 6: Specifications
UH68ODK Tent Heater Specifications Manufacturer Model Voltage Cycles Power Heat Output Air Flow **Fuel Dry Weight * Heater is factory set on for DF2, adjustment to the carburetor is necessary for other fuels. ** Gasoline or MOGAS is not recommended for use on the UH68ODK Environmental Temperature Range Elevation... -
Page 7: Chapter 2 Operating Instructions
Operator Controls and Indicators Table 2. Controls and Indicators Control or Indicator Main Switch Room Thermo Main Power LED (green) Standby LED (green) Heat LED (green) Fault LED (red) * Heat output is constant. Raising room thermo setting does not heat shelter faster. Chapter 2 Operating Instructions Function... - Page 8 UH68 ODK/ODH Tent Heater Table 3. Blink Codes Number of Blinks Problem Low voltage at AC input (< 100 VAC) Reverse polarity at AC input High voltage (>130 VAC) Not used PC Board over temp Not used Not used Ignition Fault Lockout Note: Only the Ignition fault lockout will shut down the heater.
- Page 9 Table 5. Description Inlet Adapter Storage compartment Exhaust elbow Stack support Exhaust stack PUDA UH68 ODK/ODH Tent Heater Function Attachment point for return air duct Storage for stack, fuel lines, power cord etc. Exhaust stack rests on top Holds exhaust stack securely Double wall exhaust stack for extra safety Pop Up Duct Adapter, attachment point for supply duct Operators Instructions...
- Page 10 UH68 ODK/ODH Tent Heater Operation Under Usual Conditions Setup Alaska Tent TEMPER Tent Completely setup the Alaska tent, and deploy the duct collars at the end in which you are to setup the heater. Make sure the generator or power supply is on line. Before setting up the tent and heater, some thought should be given to the orientation of the structures as to the prevailing wind direction.
- Page 11 UH68 ODK/ODH Tent Heater Operators Instructions Return Supply...
- Page 12 UH68 ODK/ODH Tent Heater 7. Uncoil remote control (2) inside tent and feed through the collar with the return duct(5). Attach remote control (2) to heater. Make main sure switch is in the off position. 8. Attach power cable (3) to heater then plug in to power supply. The green, main power LED, on the remote panel should illuminate.
- Page 13 MAX DISTANCE UH68 ODK/ODH Tent Heater Operators Instructions...
- Page 14 UH68 ODK/ODH Tent Heater Operating Procedures The UH68 ODK can be operated in either of two modes: a. Heating mode. b. Fan only mode. Heating Mode 1. Set the room thermo (1) to the lowest detent setting. 2. Move main switch (2) to HEAT. The green standby LED (3) should illuminate 3.
- Page 15 Shutdown Never disconnect power to the heater while heat exchanger is hot. Damage to the internal parts may occur. 1. Place main switch in off position. Vent fan will continue to run until heat exchanger has cooled down. The length of time will vary depending on ambient temperature.
- Page 16 UH68 ODK/ODH Tent Heater Operation Under Rainy Conditions 1. The remote control panel is water-resistant. No special instructions for setting up in the rain. 2. Do not remove protective covers from the remote and power receptacles until ready to connect. 3.
- Page 17 UH68 ODK/ODH Tent Heater Operators Instructions 2-11...
- Page 18 UH68 ODK/ODH Tent Heater 4. Remove inlet duct collar (8) and stow in PUDA 5. Disconnect Remote Cable (9) coil up and stow in PUDA 6. Disconnect power cable (10), coil up and stow in PUDA. Close PUDA 7. Remove stack (11) and stow in storage compartment (13). Secure with spring hold down (12).* 8.
- Page 19 UH68 ODK/ODH Tent Heater Operators Instructions 2-13...
-
Page 20: Chapter 3 Maintenance Instructions
Lubrication Instructions Doors, Pop Up Duct Adapter Lubricate all hinges with MIL-A-907 anti-seize compound. Preventative Maintenance Checks and Services (PMCS) Systematic, periodic PMCS are essential to ensure that the heater is ready for operation at all times. B – Before Operation D –... - Page 21 UH68ODK Tent Heater PMCS Procedures 1.1 Fuel Line System - check all fuel lines and fittings for leaks. Make sure vent at top Suction Feed Adapter is clear of ice and snow. 1.2 Exhaust stack - make sure exhaust stack is clear of ice and snow. Check for damage or anything that might obstruct the flow of exhaust gas.
- Page 22 Cleaning, burner head 1. Remove Carb mixer assembly 2. Remove Igniter 3. Clean carbon deposits in this area. Use a small wire brush. 4. Clean these areas using compressed air. CAUTION: Wear appropriate eye protection when performing this operation 5. Finish up with solvent wash commonly used in parts cleaning stations or carb cleaner.
- Page 23 UH68ODK Tent Heater Cleaning, Mixer 1. Remove mixer from carb assembly Caution: The mixer assembly is made of brass and can be scratched or dented very easily. Great care must be taken not damage the mixer nozzle. The performance of your heater depends on this delicate part. 2.
- Page 24 Reassembly The mixer assembly must be seated correctly to insure Figure 1 Figure 2 shows the mixer incorrectly seated. If left in this position combustion air will leak past the mixer and cause poor combustion and hard starting. IMPORTANT that your heater has good combustion. Figure 1 shows the mixer assembly properly seated in the burner head.
- Page 25 UH68ODK Tent Heater 1.10 Igniter – Check igniter for carbon build up and signs of wear. As the igniter wears the gap between 1. and 2. will become wider and oval shaped. Replace when signs of wear are evident. 1.11 Fuel Pump –...
- Page 26 UH68ODK Tent Heater...
-
Page 27: Chapter 4 Troubleshooting
General This section contains information for locating and correcting most operating problems. This manual can not list all that may occur. When performing trouble shooting procedures, follow all warnings and safety procedures. At no time does this manual supercede good common sense. - Page 28 UH68ODK Tent Heater Note on Blink Codes Only the ignition fault will stop heater operation. The other flash codes will be displayed but the heater will continue to operate. Troubleshooting Procedures Electrical Schematic VENT FAN CONN-H2 CARB HTR CONN-H2 IGNITION CONN-H2 COMB BLR CONN-H2...
- Page 29 Troubleshooting Procedures 1.1 Fuel Supply – See PMCS 1.2 Check Flame Switch – the flame switch is a normally open heat sensitive switch. The UH68G has two switches. As used in the 68 outdoor kit, only the normally open switch is active. Normally switch 1, red and brown wires, is used.
Need help?
Do you have a question about the UH68ODH and is the answer not in the manual?
Questions and answers