Advertisement
Quick Links
Installation guide
Installation guide
Material: C03ARM0202
guide
Material: C03ARM0202
202
A
M4 X 12
Bottom Support 1
H
Bottom Support 1
H
H
I
Screw
Screw
8 PCS
I
I
J
Washer
J
Washer
J
K
Butterfly Knob
Butterfly Knob
K
K
L
Bottom Support 2
L
Bottom Support 2
L
M
Knob
M
Knob
M
N
Cable Cover 1
N
Cable Cover 1
N
O
Nylon Ties
O
D
Nylon Ties
E
O
P
Anti-Slip Rubber 1
P
Anti-Slip Rubber 1
P
Q
Anti-Slip Rubber 2
Anti-Slip Rubber 2
Q
M6 X 14
4X4
Q
ort 1
upport 1
port 1
1 PC
1 PC
t 1
1 PC
Anti-Slip Rubber 3
1 PC
R
Anti-Slip Rubber 3
R
R
1 PC
1 PC
1 PC
1 PC
2 PCS
S
16 PCS
Cable Cover 2
S
Cable Cover 2
S
1 PC
1 PC
1 PC
1 PC
M6 Box Wrench
T
T
M6 Box Wrench
T
1 PC
1 PC
1 PC
b
nob
Knob
1 PC
1 PC
1 PC
1 PC
upport 2
rt 2
port 2
1 PC
2
T
T
T
1 PC
1 PC
1 PC
T
1 PC
er 1
over 1
1 PC
1 PC
1 PC
1 PC
es
10 PCS
10 PCS
10 PCS
10 PCS
N
N
N
N
bber 1
Rubber 1
er 1
r 1
1 PC
1 PC
1 PC
1 PC
Q
Rubber 2
er 2
bber 2
4 PCS
4 PCS
4 PCS
r 2
4 PCS
Rubber 3
bber 3
er 3
r 3
1 PC
1 PC
1 PC
1 PC
over 2
r 2
2 PCS
2 PCS
2 PCS
2 PCS
Wrench
ch
ench
1 PC
1 PC
1 PC
1 PC
L
L
L
L
M
STEP
MAKE SURE THERE ARE VESA HOLES
100X100MM OR 75X75MM IN THE
MONITOR. IF NOT, THE MOUNT
CANNOT BE INSTALLED.
REMOVE THE ORIGINAL FIXED BASE
If not, the mount cannot be
If not, the mount cannot be
If not, the mount cannot be
If not, the mount cannot be
OF MONITOR. BE CAREFUL NOT TO
SCRATCH THE SCREEN.
STEP
(CLAMP OPTION)
L
L
C
C
C
L
F
F
F
LifeWorkEtc.com
800-634-9514
Q
Q
Q
Q
Desk
Part # 3330331, Rev. A
Desk
Desk
Tighten
M
M
M
M
hten
Installation guide
Installation guide
Installation guide
Material: C03ARM0202
Material: C03ARM0202
Material: C03ARM0202
B
C
M5 X 12
M6 X 12
1 PC
1 PC
Bottom Support 1
1 PC
1 PC
8 PCS
1 PC
Bottom Support 1
3 PCS
Screw
H
1 PC
1 PC
1 PC
I
1 PC
Screw
1 PC
Washer
1 PC
1 PC
J
1 PC
1 PC
Washer
1 PC
Butterfly Knob
1 PC
1 PC
1 PC
K
Butterfly Knob
1 PC
Bottom Support 2
T
1 PC
T
L
Bottom Support 2
1 PC
1 PC
T
1 PC
Knob
M
1 PC
Knob
1 PC
1 PC
Cable Cover 1
1 PC
10 PCS
N
Cable Cover 1
1 PC
10 PCS
F
G
Nylon Ties
10 PCS
N
N
N
O
Nylon Ties
10 PCS
1 PC
1 PC
Anti-Slip Rubber 1
1 PC
Q
P
Anti-Slip Rubber 1
1 PC
4 PCS
4 PCS
Anti-Slip Rubber 2
4X4
4 PCS
5X5
Anti-Slip Rubber 2
4 PCS
Q
1 PC
Anti-Slip Rubber 3
1 PC
1 PC
Anti-Slip Rubber 3
R
1 PC
2 PCS
1 PC
1 PC
2 PCS
Cable Cover 2
2 PCS
S
Cable Cover 2
2 PCS
1 PC
1 PC
M6 Box Wrench
O
O
O
1 PC
O
M6 Box Wrench
T
1 PC
L
L
L
M
S
S
S
S
01
I
I
I
Q
Q
Q
I
H
H
H
H
R
R
R
R
J
J
J
J
P
P
P
P
K
K
K
K
M
M
M
If not, the mount cannot be
If not, the mount cannot be
If not, the mount cannot be
02
L
Q
Q
L
Q
L
M
M
M
Tighten
D
D
D
D
F
F
F
F
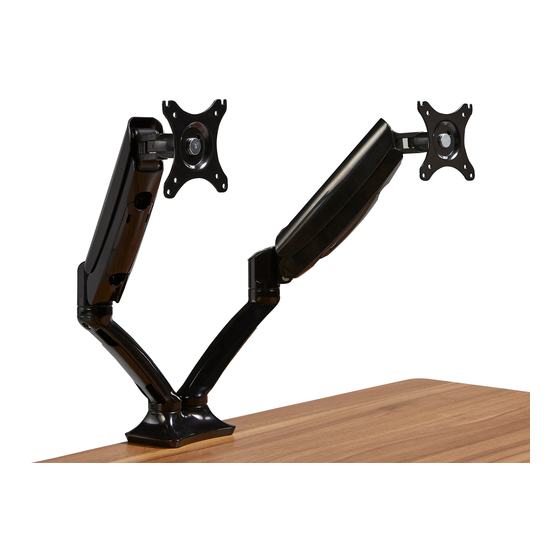
LIZANNE (DUAL) ASSEMBLY
Bottom Support 1
H
Screw
I
Bottom Support 1
H
I
Screw
J
Washer
J
Washer
Butterfly Knob
Butterfly Knob
K
K
L
Bottom Support 2
L
Bottom Support 2
M
Knob
N
Cable Cover 1
M
Knob
O
Nylon Ties
P
O
Anti-Slip Rubber 1
N
O
O
Cable Cover 1
Q
Anti-Slip Rubber 2
O
Anti-Slip Rubber 3
O
Nylon Ties
R
S
Cable Cover 2
T
P
S
Anti-Slip Rubber 1
S
M6 Box Wrench
T
Q
Anti-Slip Rubber 2
N
I
Q
I
Q
I
Q
Anti-Slip Rubber 3
H
H
R
H
R
R
R
S
Cable Cover 2
J
J
P
M6 Box Wrench
T
K
P
K
P
P
M
L
M
M
If not, the mount cannot be
1
C
C
C
L
L
L
F
F
L
F
4
C
Q
Desk
Desk
F
Desk
D
M
D
D
D
Tighten
Tighten
F
F
F
Tighten
Desk
For table thickness: 20-120mm
select right holes according to the thickness of desk
Bottom Support 1
1 PC
H
I
Screw
1 PC
Bottom Support 1
Bottom Support 1
H
H
1 PC
J
Washer
1 PC
I
I
Screw
Screw
1 PC
K
Butterfly Knob
J
J
Washer
Washer
1 PC
1 PC
1 PC
L
Bottom Support 2
Butterfly Knob
Butterfly Knob
K
K
M
1 PC
1 PC
Knob
L
L
Bottom Support 2
Bottom Support 2
1 PC
1 PC
N
Cable Cover 1
M
M
Knob
Knob
1 PC
1 PC
1 PC
O
N
N
Nylon Ties
Cable Cover 1
Cable Cover 1
10 PCS
P
1 PC
O
O
Anti-Slip Rubber 1
Nylon Ties
Nylon Ties
1 PC
1 PC
P
P
T
1 PC
Anti-Slip Rubber 1
Anti-Slip Rubber 1
Q
Anti-Slip Rubber 2
4 PCS
Q
Q
Anti-Slip Rubber 2
Anti-Slip Rubber 2
Anti-Slip Rubber 3
1 PC
R
1 PC
1 PC
Anti-Slip Rubber 3
Anti-Slip Rubber 3
R
R
10 PCS
S
Cable Cover 2
2 PCS
N
S
S
Cable Cover 2
Cable Cover 2
M6 Box Wrench
T
1 PC
1 PC
1 PC
T
T
M6 Box Wrench
M6 Box Wrench
4 PCS
10 PCS
1 PC
2 PCS
1 PC
S
1 PC
S
4 PCS
L
I
1 PC
H
2 PCS
R
J
J
1 PC
K
K
L
If not, the mount cannot be
If not, the mount cannot
2
3
L
L
L
C
L
F
Q
5
M
Desk
F
Tighten
Bottom Support 1
1 PC
1 PC
H
1 PC
1 PC
1 PC
I
Screw
1 PC
O
J
1 PC
1 PC
1 PC
Washer
O
O
1 PC
1 PC
1 PC
K
Butterfly Knob
T
1 PC
1 PC
L
1 PC
Bottom Support 2
T
T
1 PC
1 PC
M
O
1 PC
Knob
O
1 PC
1 PC
N
Cable Cover 1
1 PC
N
10 PCS
10 PCS
O
Nylon Ties
10 PCS
N
N
Q
P
1 PC
1 PC
Anti-Slip Rubber 1
1 PC
Q
Q
4 PCS
4 PCS
Anti-Slip Rubber 2
4 PCS
Q
S
T
1 PC
1 PC
Anti-Slip Rubber 3
R
1 PC
S
2 PCS
2 PCS
Cable Cover 2
2 PCS
Q
I
1 PC
1 PC
M6 Box Wrench
T
1 PC
P
H
L
M
N
L
L
R
M
M
J
Q
P
K
M
If not, the mount cannot be
If not, the mount cannot b
If not, the mount cannot b
M
Q
Q
L
Q
M
M
M
D
F
T
N
I
H
R
K
P
P
L
P
If not, t
Q
D
D
M
F
F
D
F
Advertisement

Related Manuals for ETC LIZANNE DUAL:

Summary of Contents for ETC LIZANNE DUAL:
- Page 1 Installation guide Installation guide Installation guide Installation guide Installation guide RM0202 Material: C03ARM0202 Material: C03ARM0202 Material: C03ARM0202 Material: C03ARM0202 LIZANNE (DUAL) ASSEMBLY guide n guide on guide Material: C03ARM0202 ation guide Bottom Support 1 1 PC Screw 1 PC Bottom Support 1 Bottom Support 1 Bottom Support 1 1 PC...
- Page 2 LIZANNE (DUAL) ASSEMBLY STEP (GROMMET OPTION) Desk Desk Size of the hole: Desk Tighten Tighten Keep the counterbore Desk 8.5-70mm. side down Desk Tighten Adjust the monitor with the supplied STEP 5x5 Allen key (G). Adjust the monitor Adjust the monitor with the supplied with the supplied 5x5 Allen key (G).
- Page 3 LIZANNE (DUAL) ASSEMBLY Adjust the monitor's height after installing. Using the 5x5 Allen key adjust the screw in the "-" Counterclockwise direction to move Down and in the "+" Clockwise direction to move Up. STEP CORD MANAGEMENT Insert the bottom Replace the cable cover part, then lock the to hold the cord in place.