
Subscribe to Our Youtube Channel
Related Manuals for DESKVIEW MOTIS


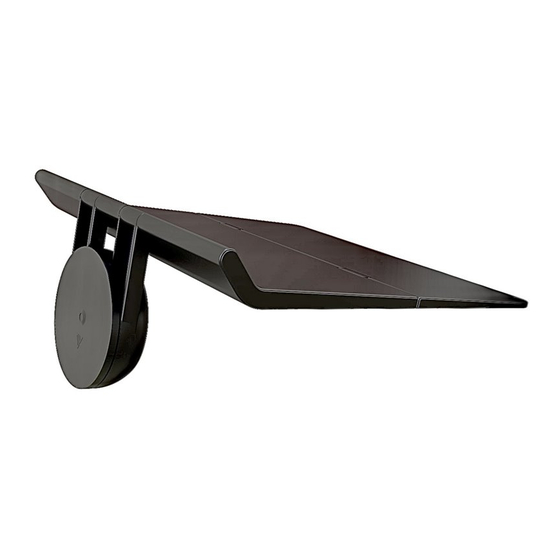
Summary of Contents for DESKVIEW MOTIS
- Page 1 INSTRUCTION MANUAL ADHERES TO DOES NOT ADHERE TO • TEMPERED GLASS • BRICK • CEMENT • DRYWALL • SELECT METAL AND TILE • ANY PAINTED OR TEXTURED SURFACE Scan this Scan this to see Video to see Video Instruction Instruction...
-
Page 2: Installation
Deploy Grip the bracket with one hand. As you depress the button on the right of your Motis with the other hand, gently lift the bracket up, extending around the back of your Motis until it locks into place and the button pops back out. The bracket should now be perpendicular, at a 90-degree angle, to the top surface. - Page 3 Overweighting one side may result in your DeskView dipping or cause the suction disc to twist and lose hold force. Distribute as much load as possible to the back-half of the top surface, as that is where your Motis has the greatest strength. page...
-
Page 4: Seal Check
STEP 10 Deploy Side Tray Depress the button on the underside of your Motis and push outward. Once enough of the side tray is exposed, gently pull the side tray out until the side tray can no longer extend. -
Page 5: Important Notice
WARNING: Ensure the non-glass surface is rated to withstand the weight you will be placing on DeskView. Do not use DeskView on any surface that fails Step B. *DeskView DOES NOT adhere to drywall, cement, and other textured or painted surfaces. - Page 6 REMOVAL INSTRUCTION STEP 1 Remove Items Remove all items on your Motis’ working surface, slide the side tray back into its housing, and fold the front half of the top surface up and back. STEP 2 Grip the bracket so your thumb and fingers are touching the edges of the suction disc and the lever rests against your palm.
-
Page 7: Maintenance
DO NOT remove the top surface or try to replace the rubber suction discs or any other components without first receiving proper replacement instructions from us by contacting components without first receiving proper replacement instructions from us by contacting contact@shopdeskview.com contact@shopdeskview.com *DeskView o ers FREE REPLACEMENT for damaged rubber suction discs. www.DeskView.co page... - Page 8 Contents subject to revision without prior notice. Contents subject to revision without prior notice. DeskView and Motis are registered trademarks of Abvious, LLC (the “Company”). All rights DeskView and Motis are registered trademarks of Abvious, LLC (the “Company”). All rights reserved.
Need help?
Do you have a question about the MOTIS and is the answer not in the manual?
Questions and answers