Table of Contents
Advertisement
Advertisement
Table of Contents

Subscribe to Our Youtube Channel
Related Manuals for BELL+HOWELL WP20 Splash3


Summary of Contents for BELL+HOWELL WP20 Splash3
-
Page 2: Table Of Contents
Content 1. Parts of the Camera ..................4 2. Preparing for Use .....................5 Installing the Battery ................5 Charging the Battery ................6 Inserting the Memory Card ..............7 Formatting the Memory Card ............. 8 Setting the Language ................. 8 Setting the Date and Time ..............9 3. - Page 3 5. Making connections ..................16 Connecting the Digital camera to a PC ..........16 6. Software Installation ..................17 7. Technical Specifications ................20...
- Page 4 Thank you for purchasing this digital camera. Please read these operating instructions carefully in order to use the digital camera correctly. Keep the instructions in a safe place after reading so that you can refer to them later. Precautions Before using the digital camera, please ensure that you read and understand the safety precautions described below.
-
Page 5: Parts Of The Camera
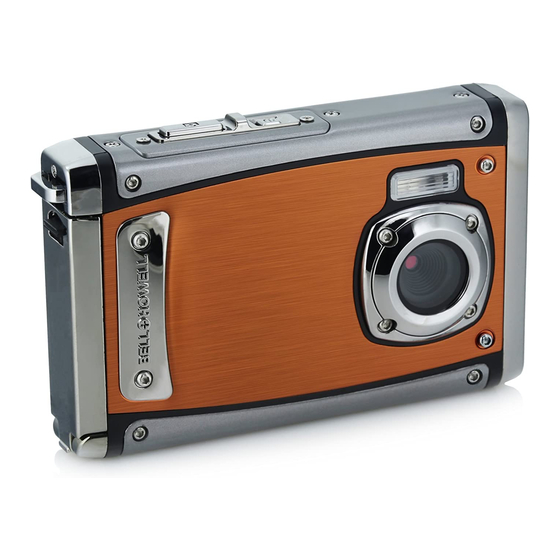
1. Parts of the Camera 1: Strap hook 2: Battery cover 3: Shutter button 4: Power button 5: Lens 6: Flash strobe 7: LCD screen 8: Busy /Power indicator LED 9: T/Zoom in button 10: W/Zoom out button 11: Charger indicator LED 12: Playback button 13: Up/Display button 14 Right/Flash button... -
Page 6: Preparing For Use
2. Preparing for Use Installing the Battery 1: Push the lock button (1) down to open the battery cover. 2: Insert the battery with the positive (+) and negative (-) terminals matching the direction indicated inside the battery compartment. -
Page 7: Charging The Battery
3: After the battery is properly installed, replace the battery cover until an audible click is heard. Charging the Battery Please charge the battery when the indicator shows the icon. 1: Power OFF; connect the AC-adapter to the camera USB-port. 2: Plug the AC-adapter to the electrical outlet. -
Page 8: Inserting The Memory Card
4: Disconnect the camera. Inserting the Memory Card 1: Power off the digital camera. 2: Push the lock button (1) down to open the battery cover to reveal the memory card slot. 3: Insert the memory card into the card slot with the label against the LCD screen. -
Page 9: Formatting The Memory Card
Formatting the Memory Card It is important to format the memory card when it is the first time you use your digital camera. All data will be deleted including protected files om the inserted memory card. Be sure to download important files to your computer before formatting. -
Page 10: Setting The Date And Time
press the OK button to launch the submenu. 3: Press the Up/Display or Down/Mode button to select the desired language and then press the OK button to confirm the setting. Setting the Date and Time 1: Turn the power on, press the MENU button to display the menu. 2: Press the Left or Right button to select [Capture Setting] Menu. -
Page 11: Using The Digital Camera
3. Using this Digital Camera Powering the Digital Camera On and Off 1. Press the POWER button to power the camera on and press it again to power the digital camera off. To save battery power, you can change the power-off time by setting the function [Auto Power Off] in the Setup menu. -
Page 12: Shooting Still Images
Note: You can only switch the digital camera to playback mode by using the PLAYBACK button. Press the PLAYBACK button to set the camera to playback mode and press it again to set it record mode. Shooting Still Images 1: Power on the digital camera and set the digital camera to default capture mode, the icon appears on the LCD screen. -
Page 13: Using The Self-Timer
Using the Self-timer Use the self-timer to set a delay from the time the shutter button is pressed to the time the image is taken. 1: Turn the power on, and set the digital camera to the Capture mode. 2: Press the LEFT/SELF-TIMER button to change the self-timer mode. Each time the LEFT/SELF-TIMER button is pressed the self-timer icon changes. -
Page 14: Recording A Video Clip
modes. The flash will not activate during continuous shooting or movie recording. 1: Set the digital camera to the Capture mode. 2: Press the RIGHT/FLASH button to change the flash mode. Each time the flash button is pressed, the flash icon changes. Auto: Automatically turn on/of Flash on: Force on the flash Flash off: Force off the flash... -
Page 15: Recording Audio
4: Press the SHUTTER again to end the recording. If the memory is full the video camera will stop recording automatically. 5: Press the MENU button to display the menu, including Size, Image Setting. Do not remove the card when video recording. Doing so may corrupt your video and picture files. -
Page 16: Playback Movie Clips
3: Press the UP button to play slide show. 4: Zooming: Press the T or W button to zoom in or zoom out the image. When the picture is enlarged press the UP, DOWN, LEFT, RIGHT button to browse the details of the image. 5: Press the OK button to resume the normal mode. -
Page 17: Making Connections
Viewing Thumbnails (Summary of Media on Memory Card) Press the W button in playback mode to view the file in thumbnails mode. Use the LEFT/RIGHT/ UP/DOWN buttons to select a file. Press the OK button to view the file in full screen. 5. -
Page 18: Software Installation
Connecting the Digital camera to a PC with the USB Cable 1: Connect the supplied USB cable to the computer's USB port and turn on the digital camera. MSDC appears on the screen when connection to the computer has been successfully completed. 2: Open [My Computer] or [Windows Explorer]. - Page 19 the installation menu as below. Install Driver Install MAGIX Video easy SE- Install software for editing video clips. Install MAGIX Photo Manager 10 - Install software for editing pictures. Click the items in the Autorun menu to install the software. If the Autorun menu does not appear automatically, open the CD-ROM in [My Computer] or [Windows Explorer] and then double-click the file named [start.exe] to start the program.
- Page 20 Startup menu, enter "D:\start.exe" (where D is your CD-ROM drive letter) in the text box, and click [OK]. Notes: 1. Open MAGIX Video easy SE or MAGIX Photo Manager 10, you have to register the software at first, then use program without any time limit. 2.
-
Page 21: Technical Specifications
7. Technical Specifications Sensor 8.0 Mega Pixels CMOS Display 2.5" TFT Color LCD Aperture F/2.8,f=5.3mm Shutter Shutter: 1/2~1/1800sec. Resolution Still Image Modes: [20M]/[16M]/[12M]/[10M]/[8M]/[5M]/[3M]/[1.2M] /[VGA] Video Modes: [1920x1080@15fps]/ [1280x720@30fps]/ [720x480@30fps]/ [640x480@30fps]/ [320x240@30fps] Auto Power [Off ]/[1Minute]/[2 Minutes]/[3 Minutes]/ [4 Minutes]/[5 Minutes]/[10 Minutes] Sensitivity ISO Auto/100/200/400 White balance... - Page 22 Exposure control -3EV to +3EV in 1step Continue shot Self-timer 2 / 5 / 10 sec. Storage SD / SDHC up to 32GB, Class 10 Power Supply 3.7v 800mAh BL-5B Lithium Ion Battery Ambient Operating: 0° C to 40° C temperature Storage: -20 to 60°...
Need help?
Do you have a question about the WP20 Splash3 and is the answer not in the manual?
Questions and answers