Table of Contents
Advertisement
Advertisement
Table of Contents

Subscribe to Our Youtube Channel
Related Manuals for BELL+HOWELL DC5


Summary of Contents for BELL+HOWELL DC5
- Page 1 85*120MM,封面128G铜版纸彩色印刷, 内页书写纸黑白印刷 封面+空1+19页+空3=24页...
-
Page 3: Table Of Contents
INDEX Introduction..........................1 Note ............................1 Notice for Use..........................1 Instructions for use of memory card................1 Maintenance and care of camera .................. 2 System Requirements......................3 Accessories ..........................3 Overview...........................4 Key Functions and Indicator Icons..................5 Start Using Camera ....................... 6 Install batteries ........................ -
Page 4: Introduction
Introduction Thank you for purchasing this digital camera. Before you use of this camera, please read this user’s manual carefully and place it in a safe place for future reference. The contents covered in this user’s manual are based on the latest information obtained when this manual was prepared. -
Page 5: Maintenance And Care Of Camera
Before inserting or removing a memory card, please turn off the power of the camera first. After a memory card is used many times, its performance will be degraded. If the memory card’s performance is degraded, a new memory card should be purchased. -
Page 6: System Requirements
System Requirements When operating or using this digital camera, please refer to the minimum system requirements for a computer that uses the camera. However, we strongly recommend that you use a better computer device to operate the camera so as to offer the best efficiency. -
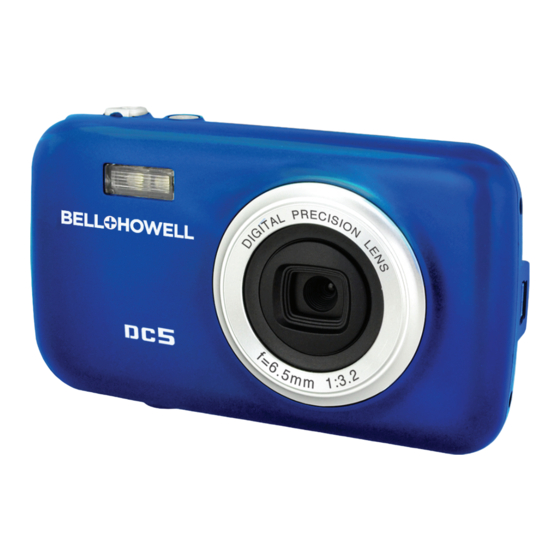
Page 7: Overview
Overview Microphone Screen Power Shutter T Key W Key Mode Delete microSD Slot Tripod Socket Interface LED Light Lens Battery Compartment Cover... -
Page 8: Key Functions And Indicator Icons
Key Functions and Indicator Icons Photographing / Video-recording Playback mode Menu setup mode mode Long press to start up Long press to start up Long press to start up / shut down / shut down / shut down Power key Short press to enter Short press to enter Short press to close... -
Page 9: Start Using Camera
Start Using Camera Install batteries This camera uses 3 AAA batteries. For replacement of batteries, turn off the power of the camera first. Open the battery compartment cover, install batteries according to the prompt marks for positive and negative polarities on the sides of the battery compartment, and then close the battery compartment cover. -
Page 10: Photographing
Photographing In the photographing mode, you can press the shutter key to take a photo. Playback In the playback mode, you can view photos and can also play the recorded videos. View a photo: Use the T key or W key to select a photo. Play a video: Use the T key or W key to select a video you want to play, and press the shutter key once to start playing;... -
Page 11: Advanced Operations
In the setup window, press the mode key to select the option to be adjusted (date, time), and the selected option will be displayed in blue background. Afterwards, press the T/W key to adjust the value; after the adjustment is over, press the shutter key to confirm or press the power key to cancel the setting and to return. - Page 12 The screen displayed information in the photographing mode Icon Name Description Indicates that the photographing mode has Photographing icon been selected Indicates switchover to 10-second Self-timer icon self-timer mode, and Indicates switchover to 2-second self-timer mode White balance Indicates the current white balance setting Metering mode Indicates the current metering mode Indicates the currently set exposure...
- Page 13 Indicates that the camera is currently in Self-Timer Countdown 10-second countdown (self-timer) Zoom indication Indicates the current digital zoom ratio Indicates the current battery status; when the Battery icon is in red, it indicates low battery and the camera will be automatically shut down soon Flash light Indicates that the flash light has been turned on Menu Setup...
- Page 14 Using the mode key to adjust the Exposure exposure compensation For single image shooting 2-second self-timer mode Driver mode 10-second self-timer mode (shooting mode) Continuous Continuous shooting shooting Normal Normal effect Black and white Black and white effect Sepia Old style photo effect Effects Negative Negative effect...
- Page 15 The screen displayed information in the video recording mode Icon Name Description Indicates that the video recording mode has Video recording icon been selected White balance Indicates the current white balance setting Metering mode Indicates the current metering mode Video format Indicates the current video resolution Indicates the remaining recordable time in free Recording time...
- Page 16 Menu Setup Press the menu key to open the main menu for video recording, press the W/T key to select a menu option and then press the shutter key to enter the sub-menu. In the sub-menu, press the shutter key to confirm and to return to the main menu (or directly press the power key to return to the main menu), and press the W/T key to conduct selection.
- Page 17 Setup Menu Whether in video recording mode or in photographing or playback mode, press the menu to open the main menu, and then press the shutter key to enter the main menu of setup menu. Afterwards, press the W/T key to select a menu option and then press the shutter key to enter the sub-menu.
- Page 18 After the video recording mode is selected, press the shutter key to start playing; at this moment, there is a playing timer displayed on the upper right corner of the screen. During playing, you can press the shutter key to stop the playing. The screen displayed information in the video playback mode Icon Name Description...
- Page 19 Options in playback menu: Main Menu Sub-Menu Description Lock / unlock one Lock/ unlock the current file Lock Lock all Lock all files Unlock all Unlock all files Delete the current file Delete Delete all files Start Start to play a slide show Interval 1 sec –...
-
Page 20: Specifications
Specifications Image sensor CMOS image sensor Image resolution 2592x1944, 2048×1536, 1280×960, 640x480 Memory External microSD card (512 MB to 32 GB) File format JPEG, AVI VGA: 640×480 Video resolution QVGA: 320×240 Self-timer 2 sec / 10 sec Digital zoom Automatic / Daylight / Cloudy / Fluorescent / White balance Tungsten Exposure Compensation... -
Page 21: Faq
Low battery; please replace the batteries. The battery packaging is not removed. The camera cannot be started after the batteries A battery or all batteries are installed reversely; are installed please confirm that the batteries are installed correctly. No memory card is inserted; photographing or No photographing and video recording can be conducted only when a video recording can be...
Need help?
Do you have a question about the DC5 and is the answer not in the manual?
Questions and answers
okay so i had this camera for over 7 years and i just remembered i had it and tried turning it on and it did but it says "memory full" but it doesn't have a sd card or anything so