
Related Manuals for KTM 125 EXC EU 2014


Summary of Contents for KTM 125 EXC EU 2014
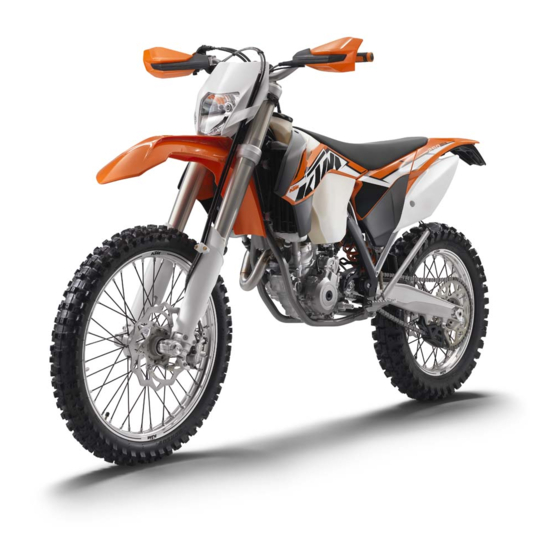
- Page 1 SETUP INSTRUCTIONS 2014 125 EXC EU 125 EXC SIX DAYS EU 200 EXC EU 200 EXC AUS 200 XC‑W USA 250 EXC EU 250 EXC AUS 250 EXC SIX DAYS EU 250 XC‑W USA 300 EXC EU 300 EXC AUS 300 EXC SIX DAYS EU 300 XC‑W USA 300 XC‑W SIX DAYS USA...
- Page 3 KTM accepts no liability for delivery options, deviations from illustrations and descriptions, as well as misprints and other errors.
-
Page 4: Means Of Representation
MEANS OF REPRESENTATION Symbols used The meaning of specific symbols is described below. Indicates an expected reaction (e.g. of a work step or a function). Indicates an unexpected reaction (e.g. of a work step or a function). Indicates a page reference (more information is provided on the specified page). Indicates information with more details or tips. - Page 5 SETUP Unpacking and setting up the vehicle Packaging 2 – Remove the box and the plastic packaging. Info An assistant prevents the motorcycle from falling over. To avoid damaging the motorcycle during the setup, leave the protective film on the vehicle until you have finished. –...
- Page 6 SETUP (250/300 SIX DAYS, 125 EXC SIX DAYS EU) – Position the fork legs and tighten the screws of the triple clamp. Guideline Screw, top triple clamp 17 Nm (12.5 lbf ft) Screw, bottom triple clamp 15 Nm (11.1 lbf ft) Info The rebound damping is located in the right fork leg REB (red adjusting screw).
- Page 7 SETUP – Position the controls on the left half of the handlebar. Info The figure shows how to route the clutch line and wiring harness. B01752-01 (All EXC models) – Remove the fuel tank. ( p. 9) – Position the turn signal wiring harness against the main wiring harness and secure with cable binders.
- Page 8 SETUP (XC-W) – Connect pull switch with the yellow and white cables. B00904-11 (300 XC‑W SIX DAYS USA) – Connect pull switch with the yellow and white cables. – Install the front fender. ( p. 13) – Correctly mount the fuel tank breather. –...
- Page 9 Set the clock. ( p. 18) – Position all controls in their exact positions on the handlebar. Tighten all screws. – Refuel. ( p. 16) – Print out the current PDI form found on KTM DEALER.NET and perform the pre-delivery inspection.
- Page 10 WORK Raising the motorcycle with the lift stand (All 125/200 models) Note Danger of damage The parked vehicle may roll away or fall over. – Always place the vehicle on a firm and even surface. – Raise the motorcycle at the frame underneath the engine. Lift stand (54829055000) The wheels must no longer touch the ground.
- Page 11 WORK Mounting the seat – Hook in the front of the seat at the collar bushing of the fuel tank, lower at the rear and simultaneously push forward. – Make sure that the seat is correctly locked in. 602715-01 – Mount and tighten screw of the seat fixation.
- Page 12 WORK – Pull both spoilers off of the sides of the radiator bracket and lift off the fuel tank. 602721-10 Installing the fuel tank Danger Fire hazard Fuel is highly flammable. – Never refuel the vehicle near open flames or burning cigarettes, and always switch off the engine first. Be careful that no fuel is spilt, especially on hot vehicle components.
- Page 13 WORK Installing the shock absorber Main work (All 125/200 models) – Push splash protector to the side and position the shock absorber. Mount and tighten screw Guideline Screw, top shock 80 Nm Loctite ® 2701™ absorber (59 lbf ft) – Mount and tighten screw Guideline 602768-11...
- Page 14 – Do not discard batteries with the household waste. Dispose of faulty batteries in an environmentally compatible manner. Give the battery to your authorized KTM dealer or dispose of it at a collection point for used batteries. Warning Environmental hazard Hazardous substances cause environmental damage.
- Page 15 WORK Main work – Connect the battery charger to the battery. Switch on the battery charger. Battery charger (58429074000) You can also use the battery charger to test rest potential and start potential of the battery, and to test the alternator. With this device, you cannot overcharge the bat- tery.
-
Page 16: Checking The Headlight Setting
WORK – Mount and tighten screws Guideline Remaining screws, chassis 10 Nm (7.4 lbf ft) 602712-11 Finishing work – Refit the headlight mask with the headlight. ( p. 14) – Check the headlight setting. ( p. 14) 3.12 Refitting the headlight mask with the headlight Main work –... - Page 17 WORK 3.14 Adjusting the headlight range Preparatory work – Check the headlight setting. ( p. 14) Main work – Loosen screw – Adjust the headlight range by swiveling the headlight. Guideline The boundary between light and dark must be exactly on the lower mark for a motorcycle with driver (instructions on how to apply the mark: Checking the headlight setting).
- Page 18 WORK 3.17 Refueling Danger Fire hazard Fuel is highly flammable. – Never refuel the vehicle near open flames or burning cigarettes, and always switch off the engine first. Be careful that no fuel is spilt, especially on hot vehicle components. Clean up spilt fuel immediately. –...
- Page 19 WORK Info If no button is pressed for 20 seconds, or if no impulse comes from the wheel speed sensor, the settings are automatically saved and the Setup menu is closed. 3.18.2 Adjusting the speedometer functions Info When the vehicle is delivered, only the SPEED/H and SPEED/ODO display modes are activated. Condition The motorcycle is stationary.
- Page 20 WORK 3.19 250/300 SIX DAYS, 125 EXC SIX DAYS EU 3.19.1 Setting kilometers or miles Info If you change the unit, the value ODO is retained and converted accordingly. The values TR1, TR2, A1, A2 and S1 are cleared when the unit of measure is changed. Condition The motorcycle is stationary.
- Page 21 WORK – Repeatedly press the button briefly until CLK appears at the bottom right of the display. – Press the button for 2–3 seconds. The hour display flashes. – Set the hour display with the button and/or button – Wait 3–5 seconds The next segment of the display flashes and can be set.
-
Page 22: Technical Data - Tightening Torques For Chassis
TECHNICAL DATA - TIGHTENING TORQUES FOR CHASSIS – Spoke nipple, front wheel M4.5 5… 6 Nm (3.7… 4.4 lbf ft) – Spoke nipple, rear wheel M4.5 5… 6 Nm (3.7… 4.4 lbf ft) – Screw, battery terminal 2.5 Nm (1.84 lbf ft) (All 200/250/300 models) –... - Page 23 TECHNICAL DATA - TIGHTENING TORQUES FOR CHASSIS – Screw, front wheel spindle M24x1.5 45 Nm (33.2 lbf ft)
- Page 24 SUBSTANCES 2-stroke engine oil According to – JASO FC ( p. 24) Guideline – Only use high quality 2-stroke engine oil of a well-known brand. KTM recommends Motorex ® products. Fully synthetic Supplier Motorex ® – Cross Power 2T Super unleaded (ROZ 95/RON 95/PON 91) According to –...
-
Page 25: Auxiliary Substances
AUXILIARY SUBSTANCES Long-life grease Guideline – KTM recommends Motorex ® products. Supplier Motorex ® – Bike Grease 2000... - Page 26 STANDARDS JASO FC JASO FC is a classification for a 2-stroke engine oil that was specifically developed for the extreme demands of racing. Thanks to first rate synthetic esters and specially designed additives, superb combustion is achieved even under extreme operating conditions.
- Page 27 *3213130en* 3213130en 08/2013 KTM-Sportmotorcycle AG 5230 Mattighofen/Austria Photo: Mitterbauer/KTM http://www.ktm.com...
Need help?
Do you have a question about the 125 EXC EU 2014 and is the answer not in the manual?
Questions and answers