Table of Contents
Advertisement
Quick Links
Advertisement
Table of Contents

Related Manuals for SVAGO SV-500


Summary of Contents for SVAGO SV-500
- Page 1 SV-500 Use and Care Manual V 1.0...
-
Page 3: Table Of Contents
Thank you for purchasing this Svago ZG-Recliner. To ensure that you don’t overlook any of your chair’s features, and that you use it safely, read this manual carefully. Then sit back, relax, and enjoy! TABLE OF CONTENTS IMPORTANT SAFETY INSTRUCTIONS ......1-2 CHAIR COMPONENTS . -
Page 4: Important Safety Instructions
When using an electrical appliance, basic precautions should always be followed, including the following: DANGER: To reduce the risk of electrical shock, always unplug Svago from the electrical outlet immediately after using and before cleaning. WARNING: To reduce the risk of burns, electric shock or injury to persons: chair while this product is running. - Page 5 • Do not use this product when standing on a damp floor, or when any part of the body is in contact with plumbing or any similar ground. • Do not use this product if noise above normal sound is heard. •...
-
Page 6: Chair Components
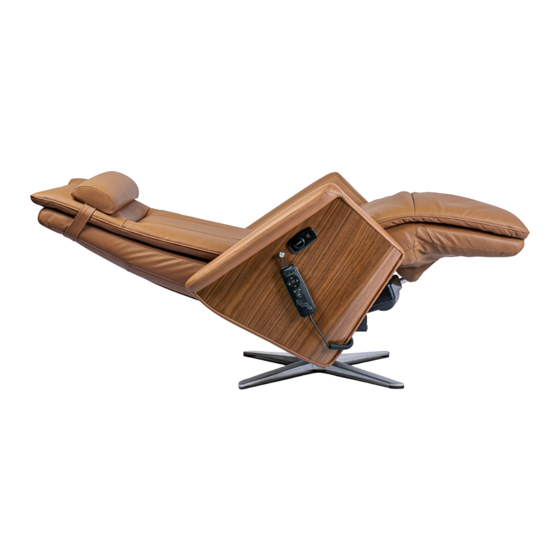
CHAIR COMPONENTS Pillow Back Rest Arm Rest Dial Seat Rest Hand Controller Foot Rest... -
Page 7: Chair Installation
CHAIR INSTALLATION Step 1: Open the box. Take out the chair and accessory box. Put the chair on a blanket to protect the ground. Step 2: Remove the plastic bag from the chair. Take the accessories out. The base Power adaptor & Connecting shaft. - Page 8 Step 3 Step 4: Rise the chair up and hung the remote control on right side board. Locate the remote control Hung the remote on the side board...
- Page 9 Step 5: Connect the power adaptor to the chair, insert the power plug to the electrical socket. Now the chair is ready to go.
-
Page 10: Chair Specifications
CHAIR SPECIFICATIONS Speci cations Description Model No. SV-500 Rated Voltage Input 110-120V Rated Frequency 29V DC 2A Out-put Rated Power Consumption 15 minutes Auto Timer Chair Upright: 35" x 33" x 49" Dimensions (L*W*H) Chair Reclined: 66" x 33" x 25.5"... -
Page 11: Chair Dimensions
CHAIR DIMENSIONS H:49" L:35" L:66" L:33"... -
Page 12: Placing The Chair
PLACING THE CHAIR chair to not to touch the wall when reclined, allow a clearance of 64cm (25") to the front and back of the chair. 25”or more 15”or more Notes • Place the chair on a level surface. • Keep the chair at least 1 meter (3ft) away from AV machines like a TV or radio. •... -
Page 13: Preparations Prior To Use
PREPARATIONS PRIOR TO USE 1. Check the power cord Check that there is neither breakage or damage to the power adaptor. Check that the cords are not caught or placed beneath the chair. 2. How to connect the power source 1) Connect the power adaptor to the chair. -
Page 14: Operation Guide
OPERATION GUIDE Hand Controller... - Page 15 1. Smart Wake Up Timer Press the optional 1 to 3 hour timer button to start smart wake-up mode. will bring the user back to the home position. 2. ZGR On pressing the ZGR button, the back rest, foot rest, and seat will be automatically adjusted to preset reclining angles.
- Page 16 6. Heat Press this button to commence the heating function for the lumbar region. A light will indicate that the heating function is in operation. Press the button again to cease the function. With the heating function in operation, should you wish to change the angle of the back rest or foot rest, the heating function will pause and resume automatically once the back rest or foot rest movement is completed.
-
Page 17: Maintenance Procedures
MAINTENANCE PROCEDURE WARNING Be sure to disconnect the power plug from the outlet prior to maintenance. NOTE ene. Thinner alcohol, alkaline detergent or bleaching agent for cleaning, as this may result in deformation, discoloration or cracking. HEAD REST, BACK PAD, SEAT COVER, ARM REST, FOOT REST, PILLOW Perform daily maintenance by wiping with a soft dry cloth. -
Page 18: Troubleshooting
If the trouble still persists after following the proper countermeasures, stop using the chair to avoid possible accidents. Disconnect the power plug from the outlet and consult the Svago service department. Do not attempt to repair the chair, Countermeasures Check points... -
Page 19: Warranty Information
WARRANTY INFORMATION Svago products have the following warranty: The Svago ZG Recliner provides a one-year in home and a two-year parts servicing warranty. Svago customer service will In case of missing parts or service issues, please contact the Svago service department. - Page 20 • Please visit www.svago.com for the latest terms and pricing for extended warranties. PRODUCT REPAIRS • Many Svago parts may be installed by the consumer in his/her own home with parts and instructions supplied by Svago, such as remote controller replacements that do not require a technician.
- Page 21 • Warranties are non-transferable and shall be in lieu of any other warranty expressed or implied. • Svago’s sole liability and the purchaser’s exclusive remedy shall be for repair, or at Svago’s option, for the replacement of the defective part. Notwithstanding the above, if replacement parts for defective materials are not available, Svago reserves the right to make substitutions in lieu of repair or replacement.
- Page 23 Product Serial No.(Located on product) Purchase Price: Model No: Date Purchased: First Name: Last Name: Address: City: State: Zip Code: Phone: Email: Please mail to: Or Scan to Register Online Svago Manufacturing, Inc. 861 S. Oak Park Road, Covina, CA 91724 Tel:1-877-977-0656 Fax:1-800-521-4712 www.svago.com...
- Page 24 REDEFINING ZG-RECLINER...
Need help?
Do you have a question about the SV-500 and is the answer not in the manual?
Questions and answers