Becker Picchio 2200 Maintenance Manual
Hide thumbs
Also See for Picchio 2200:
- Operating instructions manual (6 pages) ,
- Operating instructions manual (8 pages) ,
- Operating instructions manual (8 pages)
Table of Contents
Advertisement
Advertisement
Table of Contents

Related Manuals for Becker Picchio 2200


Summary of Contents for Becker Picchio 2200
- Page 1 Maintenance Guide for KVT/KDT/DVT...
-
Page 2: Table Of Contents
TABLE OF CONTENTS PREVENTATIVE MAINTENANCE SCHEDULE ...................... 1 PUMP OVERVIEW ............................2 CHANGING FILTERS ............................3 CHANGING FILTERS ............................4 CHANGING FILTERS ............................5 GREASING ................................ 6 GREASING ................................ 7 CHECKING AND CHANGING VANES ........................8 CHECKING AND CHANGING VANES ........................9 CHECKING AND CHANGING VANES ........................ -
Page 4: Preventative Maintenance Schedule
Maintenance: Preventative Maintenance Schedule: Every 40-200 Hours: • o If installed Check and clean air intake filter o Max of 4 blast air filter cleanings A new filter should be installed if clogged A new filter should be installed annually ... -
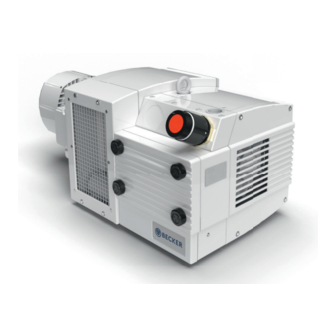
Page 5: Pump Overview
Pump Overview... -
Page 6: Changing Filters
Changing filters Every 40-200 Hours: • o If installed Check and clean air intake filter. o Max of 4 blast air filter cleanings. A new filter should be installed if clogged. A new filter should be installed annually. Remove the 4 hand knobs... -
Page 7: Changing Filters
Changing filters KVT/Picchio KDT / DVT Vacuum side Pressure side o Remove all air filters and check for contamination. o Blowing out the air filter with compressed air is not always enough. You should be able to see light coming through the filter. If not, exchange immediately. ... -
Page 8: Changing Filters
Changing filters When putting the rubber gasket back onto the pump make sure the orientation is correct. Improper installation will result in a vacuum or pressure loss. Incorrect Correct... -
Page 9: Greasing
• o 3.60, 3.80, Picchio – Shut pump down before greasing! o 3.100-3.140 Grease bearings while unit is running. 3.60 – 3.80 + Picchio 2200: (Shut pump down before greasing!) No grease nipples – Hand pack non-drive side bearing. •... -
Page 10: Greasing
Greasing 3.100 – 3.140: (Grease while pump is running.) Grease nipples found behind the air guide cover. • 3.100 = 10 times in each fitting. • 3.140 = 15 times in each fitting. • Pre Filled Grease gun part number = 74330500000... -
Page 11: Checking And Changing Vanes
Checking and Changing Vanes 1. Remove the air guide cover. 2. Remove all of the M10 end-shield bolts. 10mm socket... -
Page 12: Checking And Changing Vanes
Checking and Changing Vanes 3. Use 2 of the removed bolts and thread them into the empty threaded jack holes. 4. Tighten bolts to pull off the end-shield. -
Page 13: Checking And Changing Vanes
Checking and Changing Vanes 1. Remove the vanes. 2. Measure the height and compare the value against the min spec listed on the maintenance sticker. 3. If the value is close or at the min spec replace the vanes. a. If there any signs of improper wear is present, (I.E. Chipping, diagonal wear or cupping,) replace the vanes. -
Page 14: Checking And Changing Vanes
Checking and Changing Vanes 1. Wipe away any grease from the rotor, clean up the end-shield and vane slots. 2. Use Scotch Brite™ to clean surfaces. Do not remove large amounts metal. (No machining.) 3. Brake Cleaner can be used to clean with. 3. -
Page 15: Checking And Changing Vanes
Checking and Changing Vanes... -
Page 16: Checking And Changing Vanes
Checking and Changing Vanes 1. Align the guide pins back up and insert them into the tolerance holes. 2. Take care when installing. If the pins are not inserted correctly, the internal components may contact! Incorrect! 3. Insert all of the End-shield bolts back and fasten the end-shield onto the housing. 4. -
Page 17: Changing Dust Separator
Changing the Dust Separator Vane Inspection and Dust Separator – Every 3,000 Hours: • o Replace dust separation cartridge. 1. Remove the metal filter cover. 2. Take out the dust separator by loosening the 13mm nut. -
Page 18: Changing Dust Separator
Changing the Dust Separator Attention! The filter holder and separator are separate parts. Do not throw away the plastic filter holder! -
Page 19: Spare Parts Overview
KVT/KDT 3.80/Picchio 2200 338032M0000 DVT 3.80 338024M0000 KVT/KDT 3.100 338034M0000 DVT 3.100 338026M0000 KVT/KDT 3.140 338036M0000 DVT 3.140 338028M0000 Included in Kit: o Carbon Vanes o Grease o Filters Click the Becker Logo for Operation instructions and Spare parts lists Visit www.Beckerpumps.com... -
Page 20: Accessories
1. Digital Vacuum Gauge: a. Becker Digital 0-30” Vacuum Gauge. 2. Liquid Fill Vacuum Gauge: a. Becker Liquid Fill 0-30” Vacuum Gauge. 3. External Filter Assembly with Check Valve and Gauge: a. Check Valve Assembly. b. Option 1 = Digital Vacuum Gauge. -
Page 21: Accessories
Input = 230V 1-Phase (Phase Converter.) b. Input = 230V, 460V, 575V 3-Phase. 6. Manual Motor Starter: a. Protects the motor from overload. 7. Zerk Fitting Conversation kit W/ Industrial Grease Gun: Click the Becker Shop Logo below or visit www.Beckerpumps.com/shop...
Need help?
Do you have a question about the Picchio 2200 and is the answer not in the manual?
Questions and answers