Table of Contents
Advertisement
Advertisement
Table of Contents
Troubleshooting

Subscribe to Our Youtube Channel
Related Manuals for Maguire Products WEIGH SCALE BLENDER WSBMB Series


Summary of Contents for Maguire Products WEIGH SCALE BLENDER WSBMB Series
- Page 1 MAGUIRE PRODUCTS INC. Weigh Scale Blender MAGUIRE WEIGH SCALE BLENDER 12-12 Controller 4088 Standard Controller with ”TWELVE” COMPONENT SOFTWARE INSTALLATION • OPERATION • MAINTENANCE Copyright © Maguire Products, Inc. 2021 Original Instructions Manual Revision Date: October 7, 2021...
- Page 2 B L E N D E R W E I G H S C A L E M A G U I R E P R O D U C T S , I N C . Use this space to record information about your Maguire Weigh Scale Blenders: Serial Number Date of Purchase Model Number...
- Page 3 The information contained within this manual including any translations thereof, is the property of Maguire Products Inc. and may not be reproduced, or transmitted in any form or by any means without the express written consent of Maguire Products Inc.
-
Page 4: Table Of Contents
B L E N D E R W E I G H S C A L E M A G U I R E P R O D U C T S , I N C . Maguire Weigh Scale Blender 12 Software Operation &... - Page 5 B L E N D E R W E I G H S C A L E M A G U I R E P R O D U C T S , I N C . Printed Outputs Monitoring System Accuracy _________________________________________________ 96 *54 Diagnostics Report ______________________________________________________ 96 Parameter Printout __________________________________________________________ 96...
-
Page 6: Ec Declaration Of Conformity
B L E N D E R W E I G H S C A L E M A G U I R E P R O D U C T S , I N C . EC Declaration of Conformity... -
Page 7: Getting Started - Read This Page
B L E N D E R W E I G H S C A L E M A G U I R E P R O D U C T S , I N C . SECTION 1 – BLENDER STARTUP Getting Started –... -
Page 8: Safety Notifications And Safety Hazards
B L E N D E R W E I G H S C A L E M A G U I R E P R O D U C T S , I N C . Safety Notifications Electrical Lockout/Tagout Points Disconnect electric before opening or servicing. - Page 9 B L E N D E R W E I G H S C A L E M A G U I R E P R O D U C T S , I N C . Safety Hazards See Blender Parts Key for Safety Hazard Locations HAZARD - ROTATING MIX BLADE Mix Blades are driven with substantial torque.
- Page 10 B L E N D E R W E I G H S C A L E M A G U I R E P R O D U C T S , I N C . Blender Parts Identification...
-
Page 11: Blender Parts Key
B L E N D E R W E I G H S C A L E M A G U I R E P R O D U C T S , I N C . Blender Parts Identification 1. -
Page 12: Controller Parts Key
B L E N D E R W E I G H S C A L E M A G U I R E P R O D U C T S , I N C . 12-12 Controller Parts Identification The 12-12 controller can be identified by a black metal enclosure. - Page 13 B L E N D E R W E I G H S C A L E M A G U I R E P R O D U C T S , I N C . 12-12 Controller Parts Identification 1.
-
Page 14: 4088 Standard Controller Parts Key
B L E N D E R W E I G H S C A L E M A G U I R E P R O D U C T S , I N C . 4088 Standard Controller Parts Identification The 4088 Standard controller can be identified by a silver metal enclosure. - Page 15 B L E N D E R W E I G H S C A L E M A G U I R E P R O D U C T S , I N C . 12-12 Controller Parts Identification 1.
-
Page 16: Setup And Installation
B L E N D E R W E I G H S C A L E M A G U I R E P R O D U C T S , I N C . Setup and Installation Operating Conditions Operating Temperature Range: 5°C - 90°C (41°F - 194°F) Maximum Allowable Humidity: 80% @ 50°C (122°F) - Page 17 B L E N D E R W E I G H S C A L E M A G U I R E P R O D U C T S , I N C .
- Page 18 B L E N D E R W E I G H S C A L E M A G U I R E P R O D U C T S , I N C . Stand Mounted: If you are mounting the blender on a stand, your unit will bolt directly to the stand.
- Page 19 B L E N D E R W E I G H S C A L E M A G U I R E P R O D U C T S , I N C . Plug the CONTROLLER into the receptacle located under the controller tray. IMPORTANT: Do NOT plug the controller into a separate power source.
- Page 20 B L E N D E R W E I G H S C A L E M A G U I R E P R O D U C T S , I N C .
-
Page 21: Wiring Considerations
B L E N D E R W E I G H S C A L E M A G U I R E P R O D U C T S , I N C . Wiring Considerations The wiring of your blender is very important to its proper operation. - Page 22 B L E N D E R W E I G H S C A L E M A G U I R E P R O D U C T S , I N C . Model Selection Controllers are programmed to control all sizes of Weigh Scale Blenders.
-
Page 23: Selecting The Correct Model
If a FLOW CONTROL VALVE is installed, check it. TURN POWER ON Display should say: MAGUIRE PRODUCTS INC SELF TEST Followed by: FIRMWARE OK Checksum = xxxxxxxx Followed by: TWELVE COMPONENT Followed by the software version V=xxxxxT... - Page 24 B L E N D E R W E I G H S C A L E M A G U I R E P R O D U C T S , I N C . Display will show COMPONENT 1: ON Press "1"...
- Page 25 B L E N D E R W E I G H S C A L E M A G U I R E P R O D U C T S , I N C . Check Out Procedure Diagnostics If display fails to come on at all: Check for power at outlet.
-
Page 26: Loadcell Zero And Full Weight Calibration
B L E N D E R W E I G H S C A L E M A G U I R E P R O D U C T S , I N C . Load Cell Zero and Full Weight Calibration The WSB has a set of load cells for weighing the weigh bin. - Page 27 B L E N D E R W E I G H S C A L E M A G U I R E P R O D U C T S , I N C . FULL WEIGHT CALIBRATION The full weight calibration must be performed immediately after a zero calibration.
-
Page 28: Enable Components And Set Material Types
B L E N D E R W E I G H S C A L E M A G U I R E P R O D U C T S , I N C . Enable Components and Set Material Types Press Display will say: ENTER PASSWORD Press... -
Page 29: Examples Of Configuring The Settings
B L E N D E R W E I G H S C A L E M A G U I R E P R O D U C T S , I N C . Examples of Configuring the Settings Below are listed 4 different examples for possible settings users can configure with the Maguire blender. - Page 30 B L E N D E R W E I G H S C A L E M A G U I R E P R O D U C T S , I N C . ON THE OTHER HAND: If you prefer to think of your mix as a RATIO OF WEIGHTS, for example, components 1, 2, 3, 4, and 5 are to be mixed at 100, 50, 5, 20 and 7 pounds respectively, then you may wish to specify ALL components as NATURALS.
- Page 31 B L E N D E R W E I G H S C A L E M A G U I R E P R O D U C T S , I N C . Color Application: Natural (or un-colored regrind) is used without any Color and therefore both naturals require color.
- Page 32 B L E N D E R W E I G H S C A L E M A G U I R E P R O D U C T S , I N C . Natural 30 (Ratio to hopper 2 natural 50% 30%, 272.7 grams) Color Additive •...
-
Page 33: Entering Material Settings
B L E N D E R W E I G H S C A L E M A G U I R E P R O D U C T S , I N C . Entering Material Settings Material Settings Keypad Sequence: Press: Display will say... -
Page 34: Material Flow Rate Calibration
B L E N D E R W E I G H S C A L E M A G U I R E P R O D U C T S , I N C . Material Flow Rate Calibration If material is changed or hardware is changed (example: 1/2"... -
Page 35: Micro Pulse Instructions
B L E N D E R W E I G H S C A L E M A G U I R E P R O D U C T S , I N C . Micro Pulse Instructions MICRO PULSE Micro Pulse valves are available on models: WSB MB... -
Page 36: Instructions For Normal Operation
B L E N D E R W E I G H S C A L E M A G U I R E P R O D U C T S , I N C . Normal Operation and Saving the Configuration Fill HOPPERS. -
Page 37: Special Features - Tag, Recipe Database, Fast, Batch
B L E N D E R W E I G H S C A L E M A G U I R E P R O D U C T S , I N C . Normal Operating Sequence - Each Cycle When the sensor is uncovered, the cycle begins. - Page 38 B L E N D E R W E I G H S C A L E M A G U I R E P R O D U C T S , I N C . KEYSTROKE SEQUENCE for these or other SPECIAL FEATURES Making Changes to Parameters - Keypad Sequence: Switch the STOP END OF CYCLE switch DOWN: Turn POWER ON.
-
Page 39: Wsb Controller Description Of Controls And Outputs
B L E N D E R W E I G H S C A L E M A G U I R E P R O D U C T S , I N C . WSB Controller – Description of Controls and Outputs There are two version of this controller, the 12-12 (identified by the black enclosure) and the 4088 Standard (Silver enclosure). - Page 40 B L E N D E R W E I G H S C A L E M A G U I R E P R O D U C T S , I N C . DISPENSING: This is displayed while material is being dispensed. The display will also show the accumulated total in grams per batch (upper right), the material Type (REG=REGRIND, NAT=NATURAL, ADD=ADDITIVE, COL=COLOR), and the...
- Page 41 B L E N D E R W E I G H S C A L E M A G U I R E P R O D U C T S , I N C . Controller – Left Side •...
- Page 42 B L E N D E R W E I G H S C A L E M A G U I R E P R O D U C T S , I N C . USB PRINTER PORT This is a USB port.
- Page 43 B L E N D E R W E I G H S C A L E M A G U I R E P R O D U C T S , I N C . Controller - Right Side •...
- Page 44 B L E N D E R W E I G H S C A L E M A G U I R E P R O D U C T S , I N C . 12-12 Controller (black enclosure) Front Panel •...
- Page 45 B L E N D E R W E I G H S C A L E M A G U I R E P R O D U C T S , I N C . DISPENSING: This is displayed while material is being dispensed. The display will also show the accumulated total in grams per batch (upper right), the material Type (REG=REGRIND, NAT=NATURAL, ADD=ADDITIVE, COL=COLOR), and the...
- Page 46 B L E N D E R W E I G H S C A L E M A G U I R E P R O D U C T S , I N C . FEEDER POWER OUTPUTS (receptacles on panel front) Each outlet puts out 120 volts (240 outside USA) through internal plug-in solid-state relays rated and fused at 3 amps.
- Page 47 B L E N D E R W E I G H S C A L E M A G U I R E P R O D U C T S , I N C . Controller – Left Side •...
- Page 48 B L E N D E R W E I G H S C A L E M A G U I R E P R O D U C T S , I N C . USB PRINTER PORT This is a USB port.
- Page 49 B L E N D E R W E I G H S C A L E M A G U I R E P R O D U C T S , I N C . Controller - Right Side •...
-
Page 50: Controller Keypad - Summary Description
B L E N D E R W E I G H S C A L E M A G U I R E P R O D U C T S , I N C . Controller Keypad – Summary Description Detailed explanations are given on the pages that follow. -
Page 51: Controller Keypad -Description Of Functions
B L E N D E R W E I G H S C A L E M A G U I R E P R O D U C T S , I N C . Controller Keypad – Description of Functions Three (3) operation Modes are available;... - Page 52 B L E N D E R W E I G H S C A L E M A G U I R E P R O D U C T S , I N C . the recipe location. BATCH - This key allows you to blend a PRE-SELECTED WEIGHT of material, and then STOP running and sound the ALARM.
- Page 53 B L E N D E R W E I G H S C A L E M A G U I R E P R O D U C T S , I N C . FAST CYCLES - This key will allow you to exceed the normal blending rate of your unit. Once your system has learned proper flow rates of each material, the timing of each component dispense is very consistent cycle to cycle.
- Page 54 B L E N D E R W E I G H S C A L E M A G U I R E P R O D U C T S , I N C . recipe number is entered and the TAG or EXIT key is pressed, the controller will display: Waiting for Recipe…...
- Page 55 B L E N D E R W E I G H S C A L E M A G U I R E P R O D U C T S , I N C . Zero Weight Calibration If you are collecting totals from the blender with software, a Zero Weight and Full Weight calibration should be done periodically, approx every 6 months, to assure accurate data in your totals reports.
- Page 56 B L E N D E R W E I G H S C A L E M A G U I R E P R O D U C T S , I N C . KEYPAD - PROGRAM MODE In this mode, you may perform ALL of the functions available in MANUAL mode, plus additional functions that alter the logic with which the controller operates.
-
Page 57: Star Functions - What They Relate To
B L E N D E R W E I G H S C A L E M A G U I R E P R O D U C T S , I N C . Star Functions - What they relate to: Extrusion and Yield Control Four digit (xx.xx) settings Simulate FOUR software... -
Page 58: Star Functions
B L E N D E R W E I G H S C A L E M A G U I R E P R O D U C T S , I N C . Star Functions Star Functions are available in PROGRAM mode: CLEAR ALL DATA Press (*,0,0) to CLEAR ALL DATA fields. - Page 59 B L E N D E R W E I G H S C A L E M A G U I R E P R O D U C T S , I N C . USA will cause all dates to be displayed MONTH/DAY/YEAR. EUROPE will cause all dates to display DAY/MONTH/YEAR.
- Page 60 B L E N D E R W E I G H S C A L E M A G U I R E P R O D U C T S , I N C . When proper selection is displayed, move on to NEXT component by pressing the * key. REPEAT the "* CE"...
- Page 61 B L E N D E R W E I G H S C A L E M A G U I R E P R O D U C T S , I N C . mode. The system is supplied with the number "11111" as the password number. If you wish to restrict use of this mode to only yourself, you may make up your own number and enter it here.
- Page 62 B L E N D E R W E I G H S C A L E M A G U I R E P R O D U C T S , I N C . Press the CE key to toggle between DHCP and static IP Address. Note: If you plan to use DHCP be aware that software connecting to the Maguire Controller typically requires a known IP address that does not change, therefore your DHCP server will most likely need to maintain the same IP for the controller.
- Page 63 PASSWORD Select (0-9): 00000. Enter 00000 through 00009 to select one of ten backdoor passwords. Backdoor passwords are not published, and you must contact Maguire Products for the actual number. Blenders are pre-programmed with two default passwords; (22222) is the default password for the PROGRAM mode, and (11111) is the default password for the MANUAL mode.
- Page 64 Update Complete! Then turn off the controller and turn it back on again. The update should take only a few minutes. Updated software is available from Maguire Products free of charge and can be obtained by calling our office or visiting us on the web www.maguire.com.
- Page 65 P R O D U C T S , I N C . Updated software is available from Maguire Products free of charge and can be obtained by calling our office or visiting us on the web www.maguire.com. SELECT COMM. SPEED (Set Baud Rate) Press (*,9,5) to set the baud rate of the COM port.
-
Page 66: Parameters - What They Relate To
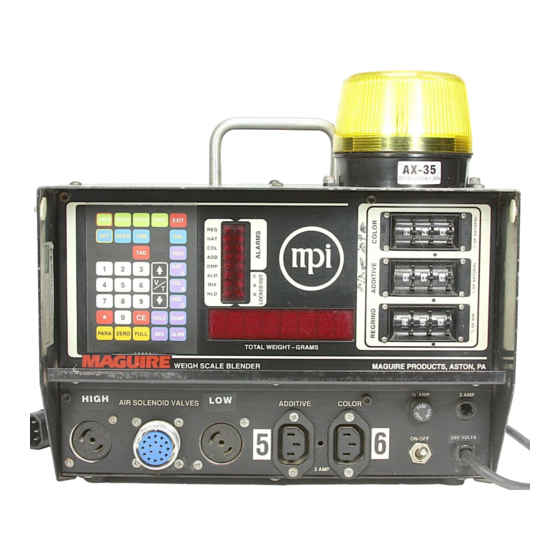
HOLD DUMP STOP COMPUTER END OF CYCLE PARA ZERO FULL ALRM TOTAL WEIGHT-GRAMS CONTINUE WEIGH SCALE BLENDER MAGUIRE PRODUCTS, ASTON, PA PRINTER IMMEDIATE PAUSE LOAD CELLS AIR SOLENOID VALVES ADDITIVE COLOR FUSE FUSE EXTRUSION CONTROL XCV XRC TCV TRC XTP XAL XUL... -
Page 67: Parameters Introduction
B L E N D E R W E I G H S C A L E M A G U I R E P R O D U C T S , I N C . Parameters Introduction All WEIGH SCALE BLENDER controllers operate according to certain internal PARAMETERS. -
Page 68: General Parameters
B L E N D E R W E I G H S C A L E M A G U I R E P R O D U C T S , I N C . Parameter List - Explanations General Parameters (20 parameters) (900 series settings shown as example settings) FLG 00000... - Page 69 B L E N D E R W E I G H S C A L E M A G U I R E P R O D U C T S , I N C . This parameter will cause your system to PRINT MATERIAL TOTALS automatically. A printer must be connected.
-
Page 70: Component Parameters
B L E N D E R W E I G H S C A L E M A G U I R E P R O D U C T S , I N C . Component Parameters - 12 Groups of 15 parameters each The first digit is the component number. - Page 71 B L E N D E R W E I G H S C A L E M A G U I R E P R O D U C T S , I N C . Parameter List – Full Explanations GENERAL PARAMETERS Change this to enable the RECIPE, BATCH, FAST, and TAG keys FLG is a SET of flags for turning on the RECIPE, BATCH, FAST and TAG keys.
- Page 72 B L E N D E R W E I G H S C A L E M A G U I R E P R O D U C T S , I N C . jogs will occur. The last two digits (xxx30) indicate the frequency (or interval) in seconds. The default setting of (03030) produces a jog every 1/2 minute for up to 30 jogs.
- Page 73 B L E N D E R W E I G H S C A L E M A G U I R E P R O D U C T S , I N C . Typically No change required - Change only if you have an extreme vibration problem KDF and WDF are the maximum acceptable variation in GRAMS between two consecutive weight readings.
- Page 74 B L E N D E R W E I G H S C A L E M A G U I R E P R O D U C T S , I N C . Regrind dispense = 600 grams, Natural portions = 1400 grams. At 4 percent, if ROC=00000, Color would be 56 grams.
- Page 75 B L E N D E R W E I G H S C A L E M A G U I R E P R O D U C T S , I N C . If the last digit of ROV = 1 to 9 (ROV x0001) to (ROV x0009), then RHL indicates upper and lower regrind usage limits only, and regrind usage will be adjusted slowly, to these limits, based on the ROV number.
- Page 76 B L E N D E R W E I G H S C A L E M A G U I R E P R O D U C T S , I N C . IF ROV equals 1 to 9 (ROV 10001 to ROV 10009): All the same rules given above apply, except that the thumbwheel switch regrind setting does not jump in one step to a new setting, but, instead, moves slowly to the new setting which acts as a limit.
- Page 77 B L E N D E R W E I G H S C A L E M A G U I R E P R O D U C T S , I N C . in order to maintain proper requested ratios. A recalculated target is not allowed to exceed the value held in the MAX parameter.
- Page 78 B L E N D E R W E I G H S C A L E M A G U I R E P R O D U C T S , I N C . No change required PRC is the maximum allowable PERCENT rate change per cycle.
- Page 79 B L E N D E R W E I G H S C A L E M A G U I R E P R O D U C T S , I N C . Extrusion Control Voltage (For Extrusion Control Systems only) XCV - "Extruder speed Control Voltage"...
- Page 80 B L E N D E R W E I G H S C A L E M A G U I R E P R O D U C T S , I N C . causes hunting. Larger is safer since you do not want "false" adjustments to occur. This parameter starts at XTP 50030, 30 percent of full batch weight accumulated error and 5 cycles required without adjustment before your operator can switch to the Throughput mode.
- Page 81 B L E N D E R W E I G H S C A L E M A G U I R E P R O D U C T S , I N C . before switching to a new container. Switching early requires the transfer of the unused portion to the next container.
- Page 82 B L E N D E R W E I G H S C A L E M A G U I R E P R O D U C T S , I N C . right away; no need to wait several cycles. XMO is adjusted and corrected frequently by the software to match your process.
- Page 83 B L E N D E R W E I G H S C A L E M A G U I R E P R O D U C T S , I N C . flashes (LOADER 1) or (LOADER 2), depending on which one has the problem. The LT1 and LT2 parameters specify this delay time before alarm.
- Page 84 B L E N D E R W E I G H S C A L E M A G U I R E P R O D U C T S , I N C . However, we recommend that you specify materials this way: REGRIND;...
- Page 85 B L E N D E R W E I G H S C A L E M A G U I R E P R O D U C T S , I N C . 00001 to 00009 = sound alarm after specified number of retries and continue retries until successful.
- Page 86 B L E N D E R W E I G H S C A L E M A G U I R E P R O D U C T S , I N C . Use to lock out high settings or limit access _SE is the upper SETTING limits for this component.
- Page 87 B L E N D E R W E I G H S C A L E M A G U I R E P R O D U C T S , I N C . Set AUTOMATICALLY by the CALIBRATE routine and also reset 10 cycles after every power up _MI numbers are set to 80 percent of the amount of material, in grams, that can feed in one second based on normal valid dispense rates.
- Page 88 B L E N D E R W E I G H S C A L E M A G U I R E P R O D U C T S , I N C . For augers and micro pulse devices only The _PT parameters will cause the first try dispense to be a percentage of the full target weight.
- Page 89 B L E N D E R W E I G H S C A L E M A G U I R E P R O D U C T S , I N C . Remember that EITHER ONE of the two parameters listed here will cause retries to occur.
- Page 90 B L E N D E R W E I G H S C A L E M A G U I R E P R O D U C T S , I N C . Pulsed Output may also assist in dispensing regrind and some powders when these materials tend to bridge.
- Page 91 B L E N D E R W E I G H S C A L E M A G U I R E P R O D U C T S , I N C . PARAMETER DEFAULT SETTINGS - TWELVE SOFTWARE Here is a complete list of the "default"...
- Page 92 B L E N D E R W E I G H S C A L E M A G U I R E P R O D U C T S , I N C . Component lists: Component 1 is the base list for all components.
-
Page 93: Changing Parameter Settings
B L E N D E R W E I G H S C A L E M A G U I R E P R O D U C T S , I N C . Changing Parameter Settings To change a PARAMETER, the sequence of keystrokes is as follows: Making Changes to Parameters - Keypad Sequence: Switch the STOP END OF CYCLE switch DOWN:... -
Page 94: Saving Parameter Settings In User Backup
B L E N D E R W E I G H S C A L E M A G U I R E P R O D U C T S , I N C . Saving Parameters in the User Backup Settings If the changes you have made are PERMANENT, SAVE them in the “User Backup Settings”. -
Page 95: Communications
B L E N D E R W E I G H S C A L E M A G U I R E P R O D U C T S , I N C . Communications The WSB 4088 Standard and WSB 1212 controllers communicates data and commands over two protocols, Modbus TCP and MLAN TCP. -
Page 96: Printed Outputs
B L E N D E R W E I G H S C A L E M A G U I R E P R O D U C T S , I N C . SECTION 3 - PRINTED OUTPUTS Monitoring System Accuracy *54 Diagnostic Cycle Report The *54 diagnostic cycle report is used to analyze individual cycles and the blender’s overall performance. -
Page 97: Interpreting The Cycle Printout
B L E N D E R W E I G H S C A L E M A G U I R E P R O D U C T S , I N C . Interpreting the *54 Cycle Printout 10 or 20 cycles of data can tell a lot about the performance of your blender. -
Page 98: Troubleshooting With The Cycle Printout
B L E N D E R W E I G H S C A L E M A G U I R E P R O D U C T S , I N C . The last number (22) is the CYCLE count, a convenient way to keep pages of data in order, like page numbers. Optional "BAILOUT"... - Page 99 B L E N D E R W E I G H S C A L E M A G U I R E P R O D U C T S , I N C . Material Dispense Device: Approx.
-
Page 100: Load Cell Calibration - Printout Verification
B L E N D E R W E I G H S C A L E M A G U I R E P R O D U C T S , I N C . When looking at errors of percentage of color or additive dispensed, look further. First, look for indications of "retries". -
Page 101: Special Tests - Printout Verification
B L E N D E R W E I G H S C A L E M A G U I R E P R O D U C T S , I N C . Special Tests - Printout Verification Using the *54 flag the following tests can be made: If you are running these special tests in the MANUAL or PROGRAM mode, a printout will automatically occur after each test provided the PRINT flag (*54) is turned on. - Page 102 B L E N D E R W E I G H S C A L E M A G U I R E P R O D U C T S , I N C . A line is printed for each active component. Each line shows component number, type, setting, grand and current totals.
-
Page 103: Troubleshooting - What To Do
B L E N D E R W E I G H S C A L E M A G U I R E P R O D U C T S , I N C . SECTION 4: TROUBLESHOOTING TROUBLESHOOTING - What To Do This section is for troubleshooting problems. -
Page 104: Typical Problems
B L E N D E R W E I G H S C A L E M A G U I R E P R O D U C T S , I N C . Typical Problems These problems are based on phone calls that we have received from Weigh Scale Blender users. - Page 105 B L E N D E R W E I G H S C A L E M A G U I R E P R O D U C T S , I N C . The THUMBWHEEL SWITCHES do not seem to be controlling output. •...
-
Page 106: Alarms - Cause And Solution
B L E N D E R W E I G H S C A L E M A G U I R E P R O D U C T S , I N C . Alarms - Cause and Solution Typically, problems are indicated by an alarm condition on the Blender controller’s display with an audible alarm and a flashing strobe light. - Page 107 B L E N D E R W E I G H S C A L E M A G U I R E P R O D U C T S , I N C . ZERO TARE ALARM Problem: Load Cells outside of acceptable (former: DUMP ALARM) Calibration.
- Page 108 B L E N D E R W E I G H S C A L E M A G U I R E P R O D U C T S , I N C . MCT PARAMETER ALARM Problem: Cycle time exceeds previous cycle time by value set in MCT parameter.
- Page 109 B L E N D E R W E I G H S C A L E M A G U I R E P R O D U C T S , I N C . REGRIND LESS THAN 100% Problem: All Regrind Recipe or Percent of Total Recipe settings add up to less than 100%.
-
Page 110: Mix Problems
B L E N D E R W E I G H S C A L E M A G U I R E P R O D U C T S , I N C . Mix Problems Customers with mix problems have several options available. -
Page 111: Normal Operating Sequence
B L E N D E R W E I G H S C A L E M A G U I R E P R O D U C T S , I N C . Increase the FUL parameter. This sets the batch size. Larger batches increase throughput. Depending on the bulk density of your material, you may be able to increase batch size by 20 to 40 percent. - Page 112 B L E N D E R W E I G H S C A L E M A G U I R E P R O D U C T S , I N C . ADDITIVES third: The ADDITIVE dispenses occur last in the sequence.
-
Page 113: Verifying Load Cell Function
B L E N D E R W E I G H S C A L E M A G U I R E P R O D U C T S , I N C . VERIFYING LOAD CELL FUNCTION Most Problems are related to LOAD CELL function. -
Page 114: Backup, Restore, Factory Reset
B L E N D E R W E I G H S C A L E M A G U I R E P R O D U C T S , I N C . To observe this number continuously, use the *98 function in the PROGRAM mode. Press Display will say: ENTER PASSWORD Press... -
Page 115: Clear Routine
B L E N D E R W E I G H S C A L E M A G U I R E P R O D U C T S , I N C . Clear Routine The “CLEAR”... -
Page 116: Clear All
B L E N D E R W E I G H S C A L E M A G U I R E P R O D U C T S , I N C . Clear All The "CLEAR ALL"... -
Page 117: Updating Controller Firmware
Method 1: USB Drive Update 1. This method uses a standard USB drive. There are 3 files that are required to perform a software update to the 12-12 Controller. These files may be requested from Maguire Products and are labeled: UPDATER.BIN... -
Page 118: Loto, Cleaning, Maintenance
B L E N D E R W E I G H S C A L E M A G U I R E P R O D U C T S , I N C . LOTO, Cleaning, Maintenance Pneumatic and Electrical LOTO The blender should be pneumatically and electrically locked out prior to any Cleaning/Maintenance/Repair of the blender. - Page 119 B L E N D E R W E I G H S C A L E M A G U I R E P R O D U C T S , I N C . Manual Operations – Manual Operations in the touchscreen controller provides manual operation of the valves, augers, weigh bin an mix motor/blades for manual cleanout and testing procedures.
-
Page 120: Maintenance And Preventative Maintenance
B L E N D E R W E I G H S C A L E M A G U I R E P R O D U C T S , I N C . Maintenance and Preventative Maintenance Air Pressure Recommendations: Approximately 5.5 bar (80 psi) is recommended for most models. - Page 121 B L E N D E R W E I G H S C A L E M A G U I R E P R O D U C T S , I N C . Weigh Bin Clearances – Free Movement of Weigh Bin Carefully examine all the parts of the weigh bin and the bin hanging bracket to be sure that the weigh bin or weigh bin hanging bracket does not come in contact with windows or guards.
-
Page 122: 17 Pin Amphenol Connector Pin Assignments
B L E N D E R W E I G H S C A L E M A G U I R E P R O D U C T S , I N C . 17 pin Amphenol connector Pin assignments This table describes the pin assignment to device of the 17 pin Amphenol connector with factory wire color assignment. -
Page 123: Technical Drawings, Electrical Diagrams, Pneumatic Diagrams
B L E N D E R W E I G H S C A L E M A G U I R E P R O D U C T S , I N C . Technical Drawings... - Page 124 B L E N D E R W E I G H S C A L E M A G U I R E P R O D U C T S , I N C .
- Page 125 B L E N D E R W E I G H S C A L E M A G U I R E P R O D U C T S , I N C .
- Page 126 B L E N D E R W E I G H S C A L E M A G U I R E P R O D U C T S , I N C .
- Page 127 B L E N D E R W E I G H S C A L E M A G U I R E P R O D U C T S , I N C .
- Page 128 B L E N D E R W E I G H S C A L E M A G U I R E P R O D U C T S , I N C .
- Page 129 B L E N D E R W E I G H S C A L E M A G U I R E P R O D U C T S , I N C .
- Page 130 B L E N D E R W E I G H S C A L E M A G U I R E P R O D U C T S , I N C .
- Page 131 B L E N D E R W E I G H S C A L E M A G U I R E P R O D U C T S , I N C .
- Page 132 B L E N D E R W E I G H S C A L E M A G U I R E P R O D U C T S , I N C .
- Page 133 B L E N D E R W E I G H S C A L E M A G U I R E P R O D U C T S , I N C .
- Page 134 B L E N D E R W E I G H S C A L E M A G U I R E P R O D U C T S , I N C .
- Page 135 B L E N D E R W E I G H S C A L E M A G U I R E P R O D U C T S , I N C . FCA INSTALLATION DIAGRAM...
- Page 136 B L E N D E R W E I G H S C A L E M A G U I R E P R O D U C T S , I N C . D-WSB-E0001 - Electrical Diagram, WSB Export, Single Phase...
- Page 137 B L E N D E R W E I G H S C A L E M A G U I R E P R O D U C T S , I N C . D-WSB-E0002 - Electrical Diagram, WSB Export, 3-Phase...
- Page 138 B L E N D E R W E I G H S C A L E M A G U I R E P R O D U C T S , I N C . D-WSB-E0003 - Electrical Diagram, WSB Export, 1800 3-Phase...
- Page 139 B L E N D E R W E I G H S C A L E M A G U I R E P R O D U C T S , I N C . D-WSB-E0004 - Electrical Diagram, WSB Export, Maxibatch...
- Page 140 B L E N D E R W E I G H S C A L E M A G U I R E P R O D U C T S , I N C . WSB Single Phase Motor Safety Circuit WSB 3-Phase Motor Safety Circuit WSB-18 3-Phase Motor Safety Circuit...
- Page 141 B L E N D E R W E I G H S C A L E M A G U I R E P R O D U C T S , I N C . D-WSB-P0001 - Pneumatic Diagram, WSB, with Non-Removable Hoppers...
- Page 142 B L E N D E R W E I G H S C A L E M A G U I R E P R O D U C T S , I N C . D-WSB-P0002 - Pneumatic Diagram, WSB, with Removable Hoppers...
- Page 143 B L E N D E R W E I G H S C A L E M A G U I R E P R O D U C T S , I N C .
- Page 144 B L E N D E R W E I G H S C A L E M A G U I R E P R O D U C T S , I N C . FCA INSTALLATION DIAGRAM...
-
Page 145: Dimensions And Weight By Model
B L E N D E R W E I G H S C A L E M A G U I R E P R O D U C T S , I N C . WSB Model Dimensions and Weight Model Overall Dimensions Overall Weight... -
Page 146: Decommissioning And Disposal
B L E N D E R W E I G H S C A L E M A G U I R E P R O D U C T S , I N C . Decommissioning and Disposal Decommissioning the unit: Disconnect the unit from the power supply. -
Page 147: Warranty
MAGUIRE PRODUCTS neither assumes nor authorizes any other persons to assume for it any other liability in connection with the sale of its Weigh Scale Blenders. -
Page 148: Technical Support And Contact Information
Tamworth Staffordshire B775DY Tel: + 44 1827 265 850 Fax: + 44 1827 265 855 Email: info@maguire-europe.com Maguire Products Asia PTE LTD Main Office 15 Changi North Street 1 #01-15, I-Lofts Singapore 498765 Tel: 65 6848-7117 Fax: 65 6542-8577 E-mail:...
Need help?
Do you have a question about the WEIGH SCALE BLENDER WSBMB Series and is the answer not in the manual?
Questions and answers