Table of Contents
Advertisement
Available languages
Available languages
Quick Links
INSTALLATION AND CARE GUIDE
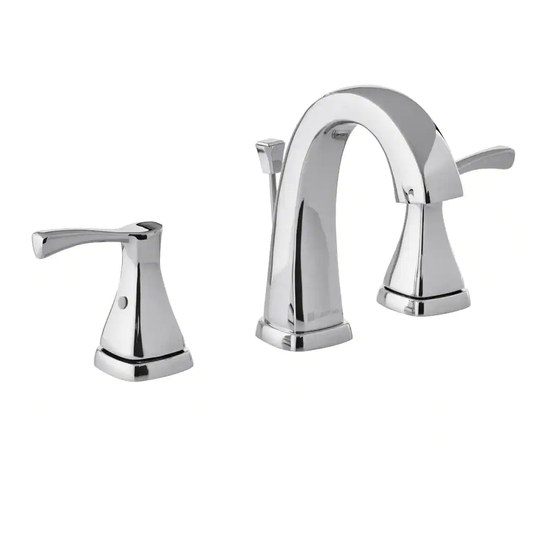
WIDESPREAD LAVATORY FAUCET
We appreciate the trust and confidence you have placed in Glacier Bay through the purchase of this lavatory
faucet. We strive to continually create quality products designed to enhance your home. Visit us online to see
our full line of products available for your home improvement needs. Thank you for choosing Glacier Bay!
THD
Questions, problems, missing parts?
Before returning to the store, call Glacier Bay Customer Service
8 a.m. - 7 p.m., EST, Monday - Friday
9 a.m. - 6 p.m., EST, Saturday
1-855-HD-GLACIER (1-855-434-5224)
HOMEDEPOT.COM/GLACIERBAY
FW6AC012CP
FW6AC012BNV
FW6AC012BL
THANK YOU
Model#
SKU#
304774945
304774954
304774956
09/2017 REV.02
Advertisement
Chapters
Table of Contents

Related Manuals for Glacier bay FW6AC012CP


Summary of Contents for Glacier bay FW6AC012CP
- Page 1 HOMEDEPOT.COM/GLACIERBAY THANK YOU We appreciate the trust and confidence you have placed in Glacier Bay through the purchase of this lavatory faucet. We strive to continually create quality products designed to enhance your home. Visit us online to see our full line of products available for your home improvement needs. Thank you for choosing Glacier Bay!
-
Page 2: Table Of Contents
Glacier Bay products are manufactured with superior quality standards and workmanship and are backed by our limited lifetime warranty. Glacier Bay products are warranted to the original consumer purchaser to be free of defects in materials or workmanship. We will replace FREE OF CHARGE any product or parts that proves defective. -
Page 3: Package Contents
Pre-Installation (continued) PACKAGE CONTENTS Faucet Assembly Drain Assembly NOTE: *Items come pre-assembled. Part Description Quantity Part Description Quantity Pop up stopper Faucet body Drain flange Handle assembly - Hot Rubber washer Rubber washer Lock nut Metal washer Drain body Guide washer Joint Aerator Horizontal rod... -
Page 4: Installation
Installation Installing the faucet assembly Installing the faucet handles □ Remove the preassembled guide washers (E), CAUTION: Always turn off the water supply before metal washers (D) and rubber washers (C) from removing an existing faucet or replacing any part of a the hot and cold faucet handles (B and K). - Page 5 Installation (continued) Preparing the pop-up assembly Installing the drain body □ □ Remove the pop up stopper (L) and drain flange Apply silicone sealant (not included) under the (M) from the drain body (P). drain flange (M) and place the drain flange (M) over the drain hole in the sink.
- Page 6 Installation (continued) Installing the stopper and horizontal rod □ Before installation, unscrew the protective cap (1) from the horizontal rod (R). □ Insert the stopper (L) into the drain hole in the sink. □ Insert the horizontal rod (R) into the drain body (P) and through the hole of the stopper (L).
- Page 7 (S) that is necessary for your installation, you may cut off the bottom portion of the lift rod strap (S). NOTE: If a shorter lift rod (U) is required for your installation, you may call Glacier Bay Customer Service for assistance.
-
Page 8: Operation
Installation (continued) Attaching the quick connecting Connecting the supply lines hose □ □ Remove the cap from the quick connect hose. Use 1/2 in. I.P.S. faucet connections (1), or a 3/8 in. O.D. ball-nose riser (2) with supply □ Attach the quick connecting hose (I) line coupling nuts (3) (not included). -
Page 9: Care And Cleaning
Operation (continued) Removing the quick connecting hose CAUTION: Use caution when removing the quick connecting hose connections in order to prevent cutting your hands. □ If it is necessary to remove the quick connector, push the quick connecting hose (I) up, hold the housing together and pull down. -
Page 10: Service Parts
Service Parts DO NOT REMOVE DATE CODE: 1-888-328-2383 Faucet ID Tags can be found on the hot supply line Part Description Part No. Part Description Part No. Handle mounting hardware Handle A069455* A663951 assembly Index button & set screw A075210 Spout assembly A666442W* Handle extension (C) - Page 11 Questions, problems, missing parts? Before returning to the store, call Glacier Bay Customer Service 8 a.m. - 7 p.m., EST, Monday - Friday 9 a.m. - 6 p.m., EST, Saturday 1-855-HD-GLACIER (1-855-434-5224) HOMEDEPOT.COM/GLACIERBAY Retain this manual for future use.
- Page 12 HOMEDEPOT.COM/GLACIERBAY GRACIAS Apreciamos la confianza que ha depositado en Glacier Bay por la compra de este para lavabo. Nos esforzamos por crear continuamente productos de calidad diseñados para mejorar su hogar. Visítenos en internet para ver nuestra ínea completa de productos disponibles para sus necesidades de mejorar su hogar. ¡Gracias por elegir a Glacier Bay!
- Page 13 GARANTÍA DE POR VIDA LIMITADA Los productos de Glacier Bay están fabricados con normas y mano de obra de calidad superior y están respaldados por nuestra garantía de por vida limitada. Los productos de Glacier Bay están garantizados al comprador consumidor original de estar libres de defectos en materiales o mano de obra.
-
Page 14: Pre-Instalación
Pre-instalación (continuación) CONTENIDO DEL PAQUETE Faucet Assembly Drain Assembly NOTA: *Las piezas vienen preensambladas. Pieza Descripción Cantidad Part Description Quantity Tapón levadizo Ensamblaje de manija - caliente Reborde del desagüe Aireador Arandela de goma Arandela de goma Contratuerca Arandela de metal Cuerpo del desagüe Arandela guía Junta... -
Page 15: Instalación
Instalación Instalación del conjunto del Instalación del manijas grifo □ Retire las arandelas guía (E), las arandelas CUIDADO: Cierre siempre el suministro de agua antes metalicas (D) y las arandelas de goma (C) de retirar el grifo viejo o sustituir cualquier pieza de un preensambladas de las manijas de agua caliente grifo. - Page 16 Instalación (continuación) Preparación del conjunto Instalación del desagüe levadizo □ □ Retire el tapón levadizo (P) y el reborde del Ponga sellante de silicona (no incluido) debajo desagüe (L) del cuerpo del desagüe (O). del reborde del desagüe (L) y colóquelo sobre el orificio del desagüe (L) del lavabo.
- Page 17 Instalación (continuación) Instalación del tapón y de la varilla horizontal □ Antes de la instalación, desenrosque el capuchón protector (1) en la varilla horizontal (R). □ Introduzca el tapón (L) en el orificio de desagüe del lavabo. □ Introduzca la varilla horizontal (R) en el cuerpo del desagüe (P) y a través del orificio del tapón (L).
- Page 18 (S) que va a usar para la instalación, puede cortar la parte sobrante de la varilla levadiza (S). NOTE: If a shorter lift rod (U) is required for your installation, you may call Glacier Bay Customer Service for assistance.
-
Page 19: Operación
Instalación (continuación) Sujeción de la manguera de Conexión de las líneas de conexión rápida suministro de agua Quita la tapa del tubo de conexión rápida. Use conexiones para grifos I.P.S. de ½ pulgada (1) o un tubo ascendente de punta esférica con diámetro Sujete las conexiones de la manguera de conexión exterior de 3/8 de pulgada (2) con las tuercas de rápida (I) a la conexión de la manija de agua... -
Page 20: Cuidado Y Limpieza
Operación (continuación) Desmontaje de la manguera de conexión rápida CUIDADO: Tenga cuidado al retirar el extremo del conector rápido de la manguera para no sufrir cortes en las manos. Si es necesario retirar el conector rápido, empuje el manguera de conexión rápida (I) hacia arriba, sujete el receptáculo al mismo tiempo y jale hacia abajo. -
Page 21: Piezas De Repuesto
Piezas de Repuesto DO NOT REMOVE DATE CODE: 1-888-328-2383 Las etiquetas de identificación del grifo se encontrarán en la tubería de alimentación de agua caliente. Pieza Descripción Pieza No. Pieza Descripción Pieza No. Conjunto de piezas de Manija A069455* A663951 montaje de la manija Botón índice y tornillo de A075210... - Page 22 ¿Tiene preguntas, problemas, o faltan piezas? Antes de regresar a la tienda, llame a Servicio al Cliente de Glacier Bay de lunes a viernes de 8 a.m. a 7 p.m., hora local del Este de lunes a viernes de 9 a.m. a 6 p.m., sábado 1-855-HD-GLACIER (1-855-434-5224) HOMEDEPOT.COM/GLACIERBAY...
Need help?
Do you have a question about the FW6AC012CP and is the answer not in the manual?
Questions and answers