Table of Contents
Advertisement
Available languages
Available languages
Quick Links
Infant Restraint/Carrier
Owner's Manual Model 8474
READ THIS MANUAL
KEEP INSTRUCTIONS FOR FUTURE USE
Do not install or use this infant restraint until you
read and understand the instructions in this manual.
FAILURE TO PROPERLY USE THIS INFANT RESTRAINT
INCREASES THE RISK OF SERIOUS INJURY OR DEATH IN
A SUDDEN STOP OR CRASH.
© 2001 Graco 428-9-01
1
Advertisement
Chapters
Table of Contents

Related Manuals for Graco 8474


Summary of Contents for Graco 8474
- Page 1 Infant Restraint/Carrier Owner’s Manual Model 8474 READ THIS MANUAL KEEP INSTRUCTIONS FOR FUTURE USE Do not install or use this infant restraint until you read and understand the instructions in this manual. FAILURE TO PROPERLY USE THIS INFANT RESTRAINT INCREASES THE RISK OF SERIOUS INJURY OR DEATH IN A SUDDEN STOP OR CRASH.
-
Page 2: Table Of Contents
1.0 Registration Information ......4-5 1.1 Register Your Infant Restraint ..... .4 1.2 Recall Information . - Page 3 5.0 Using Infant Restraint .......21-30 5.1 Positioning Harness Straps ..... . .21 5.2 Securing Child in Infant Restraint .
-
Page 4: Registration Information
Graco Children’s Products Inc. P.O. Box 100 Elverson, PA 19520-9974 or call 1-888-224-6549 1.2 Recall Information • Call the U.S. Government’s Auto Safety Hotline at 1-800-424-9393 (202-366-0123 in D.C. area) • www.nhtsa.dot.gov • Graco: 1-888-224-6549 or www.gracobaby.com... -
Page 5: If You Need Help
1.3 If You Need Help In the U.S.A. or Canada, please contact our Customer Service Department with any questions you may have concerning parts, use, or maintenance. When you contact us, please have your product’s model and serial numbers ready so that we may help you efficiently. -
Page 6: Features And Components
2.0 Features and Components FRONT VIEW Handle Harness slots Harness Handle clip adjustment button Harness buckle Vehicle belt hook Harness buckle tongues Vehicle belt path Base... - Page 7 Harness tightener Mounting notch Level indicator* Owner’s manual pocket *Level Indicator **Locking Clip REAR VIEW The level indicator is attached to the side of the infant restraint, and indicates whether or not the infant restraint is properly reclined. The locking clip is stored on the bottom of the infant restraint.
-
Page 8: Removing And Attaching Base
2.1 Removing and Attaching Base To remove infant restraint, squeeze release handle at back of seat and lift infant restraint from base as shown To put infant restraint in base, push infant restraint down until it clicks into base. Pull up on infant restraint to be sure it is latched firmly into base. -
Page 9: Attaching Canopy
2.3 Attaching Canopy 1. Infant restraint comes with two identical canopy support parts. Thread one canopy support completely through sewn tunnel 2. Slide straight end of a second support into the straight end of the first support 3. The canopy should appear as shown 4. -
Page 10: Head Support (On Certain Models)
2.4 Head Support (on certain models) Some infants may need extra support to keep their head and body in a comfortable position. Unsnap the sides and resnap them with the harness straps threaded through the slots in the cushion If your model does not include a head support, you may want to use a rolled towel or a blanket for support... -
Page 11: Important Information
3.0 Important Information 3.1 Warnings for Use as Infant Restraint • DO NOT INSTALL OR USE THIS INFANT RESTRAINT AND BASE UNTIL YOU READ AND UNDERSTAND THE INSTRUCTIONS IN THIS MANUAL AND IN YOUR VEHICLE OWNER’S MANUAL. DO NOT let others install or use the infant restraint unless they understand how to use it. - Page 12 • SOME SPECIAL NEEDS CHILDREN, such as pre-term babies or those who have tested positive for positional apnea, may be at increased risk of suffering breathing or other difficulties in an infant restraint. If your child has special needs, we recommend that you have your physician or hospital staff evaluate your child and recommend the proper infant restraint or car bed before using this product.
-
Page 13: Warning For Use With A Stroller
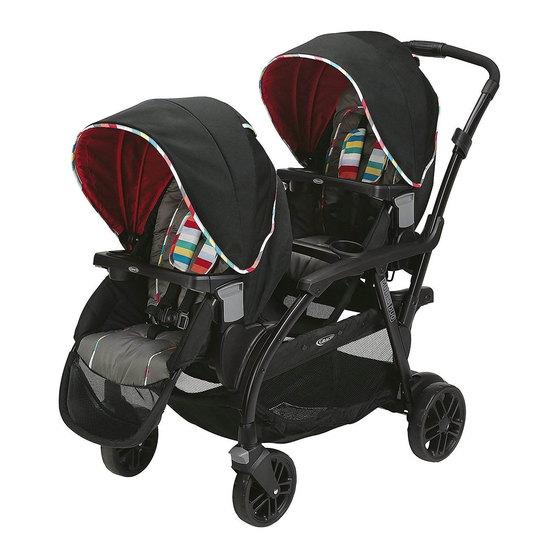
3.2 Warning for Use With a Stroller • USE ONLY WITH STROLLERS THAT ARE PART OF THE GRACO TRAVEL SYSTEM. Refer to stroller instruction sheet for details about how to attach the infant restraint to your stroller. If you do not have an instruction sheet, please call toll-free, 1-888-224-6549 to obtain one, or visit our website, www.gracobaby.com. -
Page 14: Additional Warnings For Use As Carrier
3.3 Additional Warnings for Use as Carrier • FALL HAZARD: Child’s movements can slide carrier. NEVER place carrier near edges of countertops, tables or other high surfaces. Always stay within arms reach whenever carrier is not on floor/ground. BE SURE handle locks into position before lifting carrier. NEVER place carrier in the top of a shopping cart. -
Page 15: Height And Weight Limits
3.4 Height and Weight Limits FAILURE TO USE INFANT RESTRAINT IN A MANNER APPROPRIATE FOR YOUR CHILD’S SIZE MAY INCREASE THE RISK OF SERIOUS INJURY OR DEATH. Your child MUST meet all requirements: • WEIGHT: 20 lbs. (9 kg) or less •... -
Page 16: Infant Restraint Location
If you are not sure where to place the infant restraint in your vehicle, consult your vehicle owner’s manual or Graco Children's Products Inc., 1-888-224-6549. • Whenever possible, secure the infant restraint in the center position of the... -
Page 17: Vehicle Seat Belt Requirements
Pay careful attention to these systems; some of the seat belts that are not safe to use look very much like seat belts that are safe to use. If you are unsure, consult your vehicle owner’s manual or Graco Children's Products Inc., 1-888-224-6549. -
Page 18: Unsafe Vehicle Belt Systems
4.2.1 UNSAFE DO NOT use any of the following systems to secure the infant restraint. • Lap Belts with Emergency Locking Retractor (ELR) This lap belt stays loose and can move until it locks in a crash or sudden stop. •... -
Page 19: Safe Vehicle Belt Systems
4.2.2 SAFE Vehicle Belt Systems THE FOLLOWING BELT SYSTEMS CAN BE USED WITH YOUR INFANT RESTRAINT, IF the seat location meets all other require- ments of these instructions and those in your vehicle owner's manual. • Lap Belts - Manually Adjusted When buckled, the belt is tightened manually by pulling on the excess belt while pushing... - Page 20 • Combination Lap/Shoulder Belt with Sliding Latch Plate This belt has a latchplate that slides freely along the belt. This belt MUST be converted to prevent movement of the lap portion of the belt. You must use the locking clip provided with the infant restraint, unless your vehicle's seat belt can be converted in another way as described in your vehicle owner's manual.
-
Page 21: Using Infant Restraint
5.0 Using Infant Restraint 5.1 Positioning Harness Straps FAILURE TO PROPERLY ADJUST THE HARNESS STRAPS FOR YOUR CHILD INCREASES THE RISK OF SERIOUS INJURY OR DEATH IN THE EVENT OF A SHARP TURN, SUDDEN STOP OR CRASH. The harness straps must be properly adjusted to fit your child according to the following instructions. - Page 22 5. From back, remove harness straps from harness tighteners. From front pull strap from slot 6. Reinsert strap in the appropriate slot 7. Thread straps through tighteners exactly as shown 8. SAFETY CHECK: a) CHECK that straps are not twisted; b) CHECK that straps are secure: pull on harness straps from front.
-
Page 23: Securing Child In Infant Restraint
4. Insert the two buckle tongues into the harness buckle on the crotch strap. Make sure that you hear each tongue click into the buckle. DO NOT use the infant restraint if the harness does not latch in place. Call Graco at 1-888-224-6549. , not... - Page 24 5. From the back, pull strap through harness tightener to tighten the straps as shown . The remaining straps should be about equal in length. CHECK that both straps are flat and tight on child’s shoulders. To loosen the straps, hold the harness tightener up and pull the strap from the front of the seat 6.
-
Page 25: Installing The Infant Restraint/Base
5.3 Installing the Infant Restraint/Base You must carefully follow the instructions provided by your vehicle manufacturer, in addition to the information in this manual. Before proceeding, be sure you have read and understood section 4, “Infant Restraint Location” on p. 16-20. Also: Make sure vehicle is on level ground so that the level indicator, which is attached to the... - Page 26 3. Thread the seat belt: Base and infant restraint Belt MUST go under tongue 4. Buckle the seat belt. Make sure the buckle goes into the correct buckle belt should not be twisted or turned. 5. Tighten the vehicle seat belt. Refer to your vehicle owners manual and the instructions in “4.2.2 SAFE Vehicle Belt Systems”, p.
- Page 27 6. Push the infant restraint down into the base and make sure that you hear a “click” Pull up on the infant restraint to be sure it is latched securely into the base. If the infant restraint does not securely latch into the base, the infant restraint provides NO protection for your child.
-
Page 28: Reclining Infant Restraint/Base
5.4 Reclining Infant Restraint/Base For your child’s safety, it is important that your infant restraint/base be properly reclined. Attached to the side of your infant restraint is a level indicator to help properly recline the infant restraint/base on the vehicle seat. Failure to properly recline the infant restraint on the vehicle seat increases the risk of serious injury or death. - Page 29 When using the base: To lower the foot; pull down on the bottom of the foot to the desired setting to adjust the recline . To raise the foot; set the base on a flat surface, push in on the fingers on the base and push down on the base to adjust the recline .
- Page 30 Final Safety Check: Every time you drive with your child, PUSH DOWN on the top of the infant restraint slowly but firmly to make sure the vehicle belt does not lengthen at all and that the vehicle belt is fastened very tightly around the infant restraint/base Holding the infant restraint near the vehicle belt path, TWIST AND PULL the seat forward and to...
-
Page 31: Additional Information
6.0 Additional Information 6.1 Airplane Use Install in an airplane the same way as in an automobile. Notify the airline ahead of time that you intend to bring the seat on board. Use only in forward-facing aircraft seat. Follow the flight attendant’s instructions about infant restraint placement. -
Page 32: Replacement Parts
Your model number can be found on a sticker on the underside of your infant restraint. Payment must accompany your order. Parts may also be ordered from Graco’s web site at www.gracoba- by.com. Parts List: Seat pad ... - Page 33 * $15.00 outside the continental U.S. **CA 6%, IL 6.25%, IN 5%, NY 8.25%, OH 5.75%, PA 6%, SC 5% Check or money order enclosed (payable to Graco Children’s Products Inc.) Charge to credit card Visa MasterCard Account # Expiration date Signature $5.00...
- Page 34 Asiento de seguridad infantil/ portabebés Manual del propietario Modelo 8474 LEA ESTE MANUAL GUARDE LAS INSTRUCCIONES PARA SU USO EN EL FUTURO. No instale ni use este asiento de seguridad infantil hasta que lea y entienda las instrucciones en este manual.
- Page 35 1.0 Información de inscripción ......4-5 1.1 Inscriba su asiento de seguridad infantil ....4 1.2 Información de retirada .
- Page 36 5.0 Usar el asiento de seguridad infantil ....21-30 5.1 Posición de las correas ......21 5.2 Sujetar al niño en un asiento de seguridad infantil .
-
Page 37: Información De Inscripción
Elverson, PA, 19520-9974 O llame al 1-888-224-6549 1.2 Información de retirada • Llame a la línea de información sobre seguridad de autos del gobierno de EE.UU. al 1-800-424-9393 (202-366-0123 en el área de Washington D.C.) • www.nhtsa.dot.gov • Graco: 1-888-224-6549 o www.gracobaby.com... -
Page 38: Si Necesita Ayuda
1.3 Si necesita ayuda En los EE.UU. o Canadá, póngase en contacto con nuestro departamento de servicio al cliente con cualquier pregunta que tenga sobre piezas, uso o mantenimiento. Cuando nos llame, tenga a mano los números de modelo y serie de su producto para que le podamos atender de manera eficaz. -
Page 39: Características Y Componentes
2.0 Características y componentes VISTA DELANTERA Ranuras para las correas Clip de Botón para correas ajustar el Hebilla Gancho para el cinturón del auto Lengüetas de correas para la hebilla Colocación del cinturón del auto Base... - Page 40 Ajuste de correas Agujero de montaje Indicador de nivel* Bolsillo para el manual del propietario *Indicador de nivel **Clip de cierre VISTA TRASERA El indicador de nivel se encuentra en el lado del asiento de seguridad infantil e indica si el asiento de seguridad infantil está...
-
Page 41: Quitar Y Sujetar La Base
2.1 Quitar y sujetar la base Para quitar el asiento de seguridad infantil, apriete el mango detrás del asiento y levante el asiento de seguridad infantil de la base como se muestra Para colocar el asiento de seguridad infantil en la base, empuje el asiento hacia abajo hasta que se enganche en la base. -
Page 42: Sujetar La Capota
2.3 Sujetar la capota 1. El asiento de seguridad infantil viene con dos piezas de soporte idénticas para la capota. Pase un soporte de capota completamente por una de las costuras 2. Deslice el extremo recto del segundo soporte en el extremo recto del primer soporte 3. -
Page 43: Soporte De La Cabeza (En Ciertos Modelos)
2.4 Soporte de la cabeza (en ciertos modelos) Algunos niños pueden necesitar soporte adicional para mantener su cabeza y cuerpo en una posición cómoda. Desabroche los lados y vuelva a abrocharlos en las correas pasándolas por las ranuras en la almohadilla Si su modelo no cuenta con un soporte para la cabeza, quizá... -
Page 44: Información Importante
3.0 Información importante 3.1 Advertencias para su uso como asiento de seguridad infantil • NO INSTALE NI USE ESTE ASIENTO DE SEGURIDAD INFANTIL NI SU BASE HASTA QUE HAYA LEIDO Y ENTENDIDO LAS INSTRUCCIONES EN ESTE MANUAL Y EN EL MANUAL DEL PROPIETARIO DE SU VEHÍCULO. NO deje a otros instalar o usar el asiento de seguridad infantil a menos que sepan usarlo. - Page 45 • ALGUNOS NIÑOS CON NECESIDADES ESPECIALES, tales como bebés prematuros o aquellos que han sido diagnosticados con apnea posicional, pueden correr un riesgo aumentado de sufrir trastornos respiratorios y otros trastornos en un asiento de seguridad infantil. Si su niño tiene necesidades especiales, recomendamos que pida a su médico o al personal del hospital una evaluación de su niño y que le recomienden el asiento o cama de seguridad infantil apropiado antes de usar este producto.
-
Page 46: Advertencia Para Su Uso Con Un Cochecito
3.2 Advertencia para su uso con un cochecito • USE SOLAMENTE CON COCHECITOS QUE FORMAN PARTE DEL SISTEMA DE TRANSPORTE GRACO. Refiérase a la hoja de instrucciones para el cochecito para detalles sobre cómo suje- tar el asiento de seguridad infantil a su cochecito. Si no tiene una hoja de instrucciones, llame gratuitamente al 1-888-224-6549 para obtener una, o visite nuestro sitio Web en www.gracobaby.com. -
Page 47: Advertencias Adicionales Para Su Uso Como Portabebés
3.3 Advertencias adicionales para su uso como portabebés • PELIGRO DE CAÍDA: Los movimientos del niño pueden hacer que el portabebés se deslice. NUNCA coloque el portabebés cerca de los bordes de encimeras, mesas u otras superficies altas. Siempre manténgase al alcance de la mano cuando el portabebés no está... -
Page 48: Límites De Altura Y De Peso
Si no está seguro dónde colocar el asiento de seguridad infantil en su vehículo, consulte el manual del propietario de su vehículo o con Graco Children's Products Inc. al 1-888-224-6549. - Page 49 • Cuando sea posible, sujete el asiento de seguridad infantil en la posición central del asiento directamente detrás de los asientos delanteros Un adulto debe ir en el asiento trasero para controlar al niño. Si el conductor es el único adulto presente, un niño podrá necesitar ir en el asiento delantero, PERO SOLAMENTE si no hay una bolsa de aire en el lado del pasajero y se cumplan todos los demás req- uisitos para el asiento y los cinturones de...
-
Page 50: Requisitos Para Los Cinturones De Seguridad Del Auto
Es importante prestar atención a estos sistemas; muchos de los cinturones de seguridad que no son seguros son muy parecidos a los que sí son seguros. Si no está seguro, consulte el manual del propietario de su vehículo o con Graco Children's Products Inc. al 1-888-224-6549. -
Page 51: Sistemas De Cinturones De Autos Inseguros
4.2.1 Sistemas de cinturones de autos NO use ninguno de los siguientes sistemas para sujetar el asiento de seguridad infantil. • Cinturones de regazo con retractor de cierre en caso de emergencia (ELR) Este cinturón de seguridad se mantiene suelto y puede moverse hasta que se cierra en un accidente o una parada repentina. -
Page 52: Sistemas De Cinturones De Autos Seguros
4.2.2 Sistemas de cinturones de autos SEGUROS LOS SIGUIENTES SISTEMAS DE CINTURONES SE PUEDEN USAR CON SU ASIENTO DE SEGURIDAD INFANTIL, SI la ubicación del asiento cumple con todos los demás requisitos de estas instrucciones y las del manual del propietario de su vehículo. •... - Page 53 • Cinturones combinados de regazo/hombro con placa de cierre deslizable Este cinturón cuenta con una placa de cierre que se desliza libremente a lo largo del cinturón. Este cinturón DEBE convertirse para prevenir el movimiento de la parte del regazo del cinturón. Debe usar el clip de cierre proporcionado con el asiento de seguridad infantil, a menos que el cinturón de seguridad de su vehículo se pueda...
-
Page 54: Usar El Asiento De Seguridad Infantil
5.0 Usar el asiento de seguridad infantil 5.1 Posición de las correas NO AJUSTAR LAS CORREAS DE MANERA APROPIADA EN SU NIÑO AUMENTA EL RIESGO DE LESIONES GRAVES O LA MUERTE EN EL CASO DE UN GIRO BRUSCO, UNA PARADA REPENTINA O UN ACCIDENTE. - Page 55 5. Desde la parte trasera, quite las correas de los tensores. Si es necesario, desde la parte delantera, use la correa para jalarla de la ranura . 6. Vuelva a insertar la correa en la ranura apropiada 7. 7. Pase las correas por los tensores exactamente como se muestra 8.
-
Page 56: Sujetar Al Niño En Un Asiento De Seguridad Infantil
Asegúrese de que oiga el "clic" de cada lengüeta en la hebilla. NO use el asiento de seguridad infantil si la correa no se cierra en su sitio. Llame a Graco al 1-888-224-6549. , no... - Page 57 5. Desde la parte trasera, jale la correa por el tensor para ajustar las correas como se muestra correas deben tener aproximadamente la misma longitud. VERIFIQUE que ambas correas queden planas y a justadas en los hombros del niño. Para soltar las correas, sujete el tensor hacia arriba y jale la correa desde la parte delantera del asiento 6.
-
Page 58: Instalar El Asiento De Seguridad Infantil Y La Base
5.3 Instalar el asiento de seguridad infantil y la base Debe seguir cuidadosamente las instrucciones proporcionadas por el fabricante de su vehículo, además de la información en este manual. Asegúrese de que haya leído y entendido las sección 4, "Ubicación del asiento de seguridad infantil"... - Page 59 3. Pase el cinturón de seguridad: La base y asiento de seguridad infantil El cinturón DEBE ir debajo de la lengüeta 4. Abroche el cinturón de seguridad. Asegúrese de que la lengüeta de la hebilla se coloca en la hebilla correcta El cinturón de seguridad no debe estar doblado ni torcido.
- Page 60 Para una instalación bien ajustada, empuje hacia abajo fuerte con su rodilla o con una mano libre en el centro del asiento de seguridad infantil o su base y jale y ajuste el cinturón del vehículo. 6. Empuje el asiento de seguridad infantil hacia abajo en la base y asegúrese de que oiga un "clic"...
-
Page 61: Reclinar El Asiento De Seguridad Infantil Y La Base
5.4 Reclinar el asiento de seguridad infantil y la base Para la seguridad de su niño, es importante que su asiento de seguridad infantil / base se recline correctamente. Adjunto al lado de su asiento de seguridad infantil se encuentra un indicador de nivel para ayudar a reclinar el asiento de seguridad infantil/base correctamente en el asiento del vehículo. - Page 62 Al usar la base: Para bajar el pie; jale del fondo del pie hasta el nivel deseado para ajustar el reclinado . Para levantar el pie; coloque la base en una superficie plana, empuje hacia dentro en las lengüetas de la base para ajustar el reclinado .
- Page 63 Control de seguridad final: Cada vez que maneje con su niño, EMPUJE HACIA ABAJO la parte superior del asiento de seguridad infantil despacio pero firmemente con el fin de asegurar que el cinturón del vehículo no se alargue y que el cinturón del vehículo esté...
-
Page 64: Información Adicional
6.0 Información adicional 6.1 Uso en aviones Instálelo en un avión de la misma manera que en un automóvil. Notifique a la compañía aérea por adelantado que va a usar el asiento abordo. Úselo solamente en un asiento del aeronave orientado hacia delante. Siga las instrucciones del personal de vuelo sobre la colocación del asiento de seguridad infantil. - Page 65 Su número de modelo se puede encontrar en una etiqueta debajo de su asiento de seguridad infantil. El pago debe acompañar al pedido. Las piezas también se pueden pedir del sitio Web de Graco en www.gracobaby.com. Lista de piezas: Almohadilla del asiento ...
- Page 66 OH 5.75%, PA 6%, SC 5% Serial No. • N° de serie Check or money order enclosed (payable to Graco Children’s Products Inc.) Cheque o giro adjunto (a nombre de Graco $5.00 Children’s Products, Inc.) Charge to credit card Cargar a la tarjets de crédito Visa Account # •...
Need help?
Do you have a question about the 8474 and is the answer not in the manual?
Questions and answers