Table of Contents
Advertisement
Quick Links
Model
Max Tongue Weight (lb)
94-00-0600
600
94-00-0800
800
94-00-1000
1,000
94-00-1061
1,000 w/installed hitch ball 10,000
Hitch ball not included.
Your model # can be found on the stickers on either spring bar. Make a
note of it here for future reference.
fastwaytrailer.com
owner's manual
Max Trailer Weight (lb)
6,000
8,000
10,000
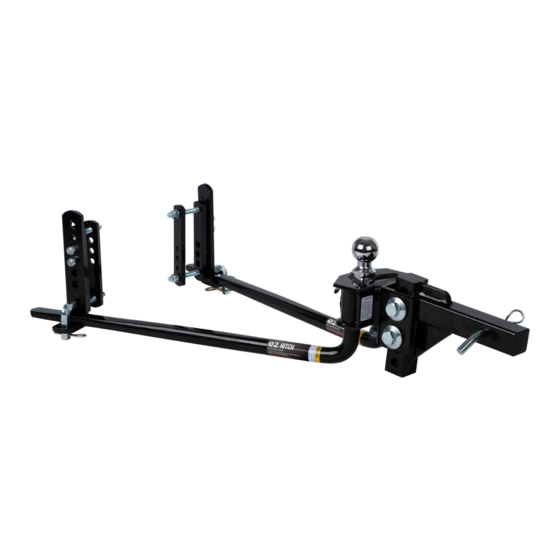
Fastway e2 Hitch - Faster, Easier.
™
A Product of Progress Mfg. Inc.
1
Advertisement
Table of Contents

Related Manuals for Progress FASTWAY e2 94-00-0600


Summary of Contents for Progress FASTWAY e2 94-00-0600
- Page 1 Hitch ball not included. Your model # can be found on the stickers on either spring bar. Make a note of it here for future reference. Fastway e2 Hitch - Faster, Easier. ™ fastwaytrailer.com A Product of Progress Mfg. Inc.
-
Page 3: Table Of Contents
Table of Contents Parts Breakdown Safety Information Installation Step 1 – Ready the Tow Vehicle and Trailer Step 2 – Install the Hitch Ball Step 3 – Attach the Hitch Head to the Shank Step 4 – Assemble the Sway Brackets Step 5 –... -
Page 4: Parts Breakdown
Parts Breakdown... -
Page 6: Safety Information
Safety Information ÁWARNING Failure to follow all safety warnings may result in severe injury or death. • Always adjust equipment and driving habits to match towing conditions. The driver is responsible for their own safety and the safety of their passengers. •... -
Page 7: Installation
Installation Step 1 – Ready the Tow Vehicle and Trailer Park the trailer and tow vehicle on flat, level ground and in line with each other. Chock the trailer. For accurate installation the tow vehicle and trailer should be loaded just as they will be while traveling. -
Page 8: Step 3 - Attach The Hitch Head To The Shank
Step 3 – Attach the Hitch Head to the Shank Tools Needed: • Torque wrench capable of 250 ft-lbs • 1 1/8” Socket with ratchet (Shank bolts) • 1 1/16” Socket with ratchet (Shank nuts) • 15/16” Socket or box-end wrench (Angle set bolt) Level the Trailer (Parallel to the Ground) Measure to the ground at the front and back of the trailer frame and Figure 1... -
Page 9: Step 4 - Assemble The Sway Brackets
Step 4 – Assemble the Sway Brackets 24” min / 27” max Tools Needed: • 3/4” Box-end or socket wrench (Link plates and L-brackets) • Measuring tape Sway Bracket Location 1. Install the bracket assemblies between 24” — 27” from the center of the coupler. - Page 10 3. Insert the bolt head into the slot and add a ½” lock washer and thread a ½” nut onto the end of the bolt. Inverted or Upside-Down Installation – Bottom-mounted Couplers, V-nose Trailers Install the assembly upside-down if you have a trailer with a bottom- mount coupler, V-shaped nose, or any other obstacle that prevents them from being installed right-side up.
-
Page 11: Step 5 - Install Spring Arms
Step 5 – Install Spring Arms ÁWARNING Never tow with loose socket bolts. Tighten socket bolts to a minimum of 60 ft-lb before you tow. ÁNOTICE Do not pound directly on the sockets to move them. Spring bar Pounding may cause the sockets to crack or chip. Use retaining pin only the lever force of the spring arm to rotate tight sockets. - Page 12 Weight Distribution Setup Table Front Fender Height Example A Uncoupled from trailer 30” B Trailer coupled and on hitch ball 31” without weight distribution C Fully hitched up with weight 30 ¼” distribution engaged Calculated weight distribution: 100*(B-C)/(B-A) Target Between 50-100% A –...
-
Page 13: Step 7 - Adjust Weight Distribution
Retract the jack until the full weight of the trailer tongue is on the hitch. Verify that there is a minimum of 3” from the end of the spring arms to the center of the L-bracket. (Figure 24) If there is less than 3” the brackets must be moved forward. -
Page 14: Step 8 - Adjust Trailer Pitch
To correct over distribution, remove spacer washers from the hitch head or lower the L-brackets. Make Weight Distribution Adjustments 1. Use the tongue jack to raise both vehicle and trailer. 2. Unload and remove the spring arms. 3. Unhitch the trailer, then change the number of spacer washers and/or the position of the L-brackets. -
Page 15: Maintenance And Care
Torque Specifications ft-lb (2) ¾” Shank Bolts (4) ½”x 4” Link plate bolts (4) ½” L-bracket nuts Angle set bolt Set against shank + 1/2 turn You are now ready to tow the trailer. Remember to connect the breakaway cable, safety chains, and electrical cable. -
Page 16: How To Hitch
How to Hitch 1. With the Fastway hitch head installed, position the hitch ball Figure 27 directly under the trailer coupler. (Figure 27) 2. Lower the trailer coupler until it is resting on the hitch ball. If the trailer coupler won’t sit properly, adjust the position of your tow vehicle. -
Page 17: Appendix - Using A Weight Distribution Hitch With Auto-Leveling Suspensions
Appendix – Using a Weight Distribution Hitch with Auto-Leveling Suspensions Always refer to and follow your tow vehicle owner’s manual or air bag instructions for their requirements for use while towing. Auto Leveling will greatly affect your towing situation. Step 1 - Ready the Tow Vehicle and Trailer Turn off or disable air bag suspension or auto-leveling systems for the hitch setup process. -
Page 18: Warranty
In no event shall Progress Mfg. Inc. be liable for any damages other than the replacement or repair of the affected part. Authorization and warranty procedure may be obtained by calling Progress Mfg.
Need help?
Do you have a question about the FASTWAY e2 94-00-0600 and is the answer not in the manual?
Questions and answers