
Subscribe to Our Youtube Channel
Related Manuals for Trace2O HydroCheck HC1000

Summary of Contents for Trace2O HydroCheck HC1000
- Page 1 HydroCheck® HC1000 Multi-Parameter Electrochemical Water Tester Instruction Manual...
-
Page 2: Table Of Contents
Contents 1.1 Introduction ......................4 1.2 Unpacking the Meter ................... 4 1.3 List of Accessories ....................4 2.1 Display ........................ 5 2.2 Keypad ........................ 6 2.3 Connectors ......................7 2.4 Connecting the Sensors..................7 2.5 Inserting/Replacing the Batteries ................ 9 2.6 Refilling Electrolyte Solution for DO Probe ............ - Page 3 7.1 Conductivity Calibration ..................28 7.2 Single Point Calibration:..................28 7.3 Multi-Point Calibration: ..................29 7.4 Manual Calibration: ................... 30 7.5 Conductivity Calibration Report ................ 31 8.1 DO Calibration in % Saturation Mode ............... 32 8.2 100% saturation calibration: ................32 8.3 2 Point Calibration: ...................
-
Page 4: Introduction
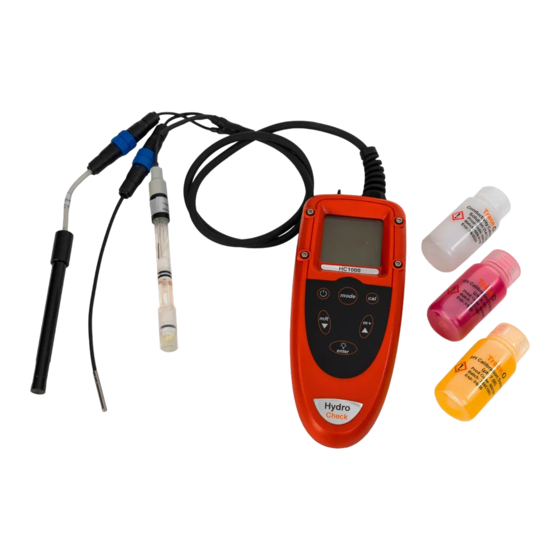
1.1 Introduction Thank you for selecting the Trace2o® HydroCheck HC1000 portable multiparameter water quality meter. This manual provides instructions to guide the user in normal operation, diagnostics and maintenance of the instrument. Please read the instructions carefully before use. 1.2 Unpacking the Meter Before unpacking, ensure that the current work environment meet following conditions. -
Page 5: Display
2.1 Display The Trace2o® HydroCheck® HC1000 is equipped with a backlit LCD display that shows measured values, as well as mode and status indicator graphics. INDEX: Measurement mode Battery indicator Calibration mode Stable indicator Setup mode Hold indicator Memory mode... -
Page 6: Keypad
2.2 Keypad The Trace2o® HydroCheck® HC1000 has a tactile membrane keypad. Words and symbols describe functions of each key. The direction keys are multi-function left/right and up/down keys. INDEX: DESCRIPTION ● Power the meter ON/OFF. ● Holds the current measured value; press the key again to resume measuring. -
Page 7: Connectors
2.3 Connectors The Trace2o® HydroCheck® HC1000 has three connectors for connecting the various types of sensors. CONNECTOR FUNCTION Waterproof BNC pH electrode (or optional ORP or Ion Selective Electrodes) Connector Waterproof 6-pin Dissolved oxygen electrode connector Waterproof 3-pin Conductivity electrode connector 2.4 Connecting the Sensors... - Page 8 CONDUCTIVITY ELECTRODE ● Insert the 3-pin connector on the conductivity electrode into the corresponding connector on the instrument, ensuring that the lugs are aligned. Once pushed firmly into place, tighten the waterproof locking collar. DISSOLVED OXYGEN ELECTRODE ● Insert the 6-pin connector on the temperature probe into the corresponding connector on the instrument, ensuring that the lugs are aligned.
-
Page 9: Inserting/Replacing The Batteries
2.5 Inserting/Replacing the Batteries The HC1000 is supplied pre-installed with the requisite battery. The HC1000 requires 1 x 9V (PP3) battery. To replace the battery, follow the below procedure: 1. Remove the battery cover from the rear of the meter. 2. -
Page 10: Refilling Electrolyte Solution For Do Probe
2.6 Refilling Electrolyte Solution for DO Probe The Dissolved Oxygen electrode requires an electrolyte solution which must be kept topped up during normal use. To refill, follow the below procedure: 1. Unscrew the membrane cap from the bottom of the dissolved oxygen probe. 2. -
Page 11: Power On/Off
3.1 Power On/Off ● To turn the meter on, press the ON/OFF key. ● To turn the meter off, press and hold the ON/OFF key for 3 seconds, ● The meter will turn off automatically if there are no key presses within a specified time period. -
Page 12: Conductivity/Tds/Resistivity Measurement
3.4 Conductivity/TDS/Resistivity Measurement 1. Press the MODE key until the display shows the (Conductivity) or (TDS) or (Resistivity) indicator. 2. Rinse the conductivity electrode thoroughly with distilled water. 3. Immerse the electrode in the sample solution, and stir the solution gently. 4. - Page 13 1. Press MODE key until the meter shows indicator. 2. Connecting the dissolved oxygen probe to meter, wait for 15 minutes to polarise the sensor. 3. If necessary, to set the atmospheric pressure and salinity coefficient in the setup menu (Refer to “SETUP MENU”...
-
Page 14: Hold Function
3.6 Hold Function The meter contains two data hold modes. When the Auto-Hold function is enabled, the meter will automatically sense a stable endpoint reading and hold. The ‘Hold’ indicator appears on the display. If the Auto-Hold function is disabled, press the ON/OFF key, the meter will immediately hold currently displayed value. -
Page 15: Setup Menu
4.1 Setup Menu When in setup mode, the HC1000 displays an integrated setup menu that allows you customise to the operation of the meter to meet your measurement requirements. In the different modes, the meter will show the corresponding options. For general options, the change will be applied to all modes. - Page 16 CONDUCTIVITY/TDS/SALINITY/RESISTIVITY MODES: DISPLAY DESCRIPTION OPTIONS DESCRIPTION DEFAULT K=0.1 Select the cell ● constant of conductivity K=10 electrode. User-Defined Select the Setting Range: 0.0 temperature 2.10 coefficient of to 10.0%/ sample. ● 1 point Select the number of 2 points calibration points to use when calibrating 3 points the meter...
- Page 17 DISSOLVED OXYGEN MODE: DISPLAY DESCRIPTION OPTIONS DESCRIPTION DEFAULT ● 1 point Select the number of calibration points. 2 points Select the default Setting Range: 450 atmospheric to 850mmHg pressure coefficient. Select the salinity Setting Range: 0.0 coefficient of sample to 50.0ppt solution.
- Page 18 GENERAL OPTIONS: DISPLAY DESCRIPTION OPTIONS DESCRIPTION DEFAULT Sets the stability criteria for ● measurement. When the “LO” option is enabled, measuring value will stabilize quickly, but reading is less accurate. When the “HI” option High is enabled, measuring value will stabilize slowly, but improves accuracy.
- Page 19 When the calibration … 1 to 31 days due reminder is enabled, if you do not recalibrate meter within a specified time period, ● Disable the meter will automatically show indicator. Sets the date and time of the meter. Enable Clear all stored data.
-
Page 20: Adjusting The Settings
4.2 Adjusting the settings: 1. If necessary, press MODE key until the display shows corresponding mode indicator (e.g., pH mode). 2. Press and hold the CAL key for 3 seconds, the meter enters setup mode, the display shows adjustable setting, and parameter number. …………Setting …………Parameter number 3. -
Page 21: Setting The Date And Time
4.4 Setting the Date and Time The HC1000 has a real time clock that is used to time-stamp stored measurement values and calibration data. The below instructions describe initial setup of the date and time values: 1. Press and hold the CAL key for 3 seconds to enter setup mode. 2. -
Page 22: Temperature Compensation
4.5 Temperature Compensation For accurate results, either manual or automatic temperature compensation must be enabled before measurement or calibration. 4.6 Automatic Temperature Compensation: ● Insert the 6-pin connector on the temperature probe into the corresponding connector on the instrument, ensuring that the lugs are aligned. Once pushed firmly into place, tighten the waterproof locking collar. -
Page 23: Ph Calibration
5.1 pH Calibration The HC1000 allows up to a 5 point calibration in the pH mode. We recommend performing at least a 2 point calibration for more accurate measurement. The meter will automatically recognise and calibrate to following standard buffer values. USA Standard Buffer Options pH 1.68, 4.01, 7.00, 10.01, 12.45 NIST Standard Buffer Options... -
Page 24: Multi-Point Calibration
5.3 Multi-Point Calibration: 5.3.1 Make sure that you have selected between 2 and to 5 point calibration in the setup menu. 5.3.2 Repeat steps 5.2.2 to 5.2.5 above. When the first calibration point is completed, the display will show “CAL2”. The meter prompts to continue with second calibration point. 5.3.3 Rinse the pH electrode with distilled water. -
Page 25: Ph Calibration Report
5.4.6 Press ▲ or ▼ key to increase or decrease displayed value according to the value of the custom buffer, and press ENTER key to confirm. “Calibration” indicator begins flashing. 5.4.7 Wait for the measured value to stabilise, the display shows “END”. Once calibration is complete, the meter returns to measurement mode automatically. -
Page 26: Orp Calibration
6.1 ORP Calibration The HC1000 allows single point calibration in the relative mV mode, but calibration is not necessary unless and exact readout agreement with a work standard, and at a specific ORP value is needed. 1. Press the MODE key until the meter shows indicator. - Page 27 4. Press ▼ key, the meter shows “OFS” (Offset Potential). 5. Press the ON/OFF key to return to measurement mode...
-
Page 28: Conductivity Calibration
7.1 Conductivity Calibration The HC1000 is capable of using conductivity electrodes with different cell constants. Before use, ensure that the correct cell constant is selected (0.1, 1 or 10) in the setup menu. If the current option is “USER”, the automatic calibration function will be disabled (Refer to Setup Menu section). -
Page 29: Multi-Point Calibration
7.2.5 Press ENTER key to confirm, “Calibration” indicator begins flashing. Enter 7.2.6 Wait for the measured value to stabilise, the display shows “END”. Once calibration is complete, the meter returns to measurement mode automatically. 7.3 Multi-Point Calibration: 7.3.1 Make sure that you have selected 2 to 5 points calibration in setup menu. 7.3.2 Repeat steps 1.2 to 1.5 above;... -
Page 30: Manual Calibration
7.4 Manual Calibration: The HC1000 offers a quick manual calibration mode, allowing the user to easily calibrate the meter. 7.4.1 Record the cell constant value, which is clearly marked on a label attached to the electrode (e.g., K=1.08). 7.4.2 Ensure the Cal indicator is showing, and press and hold the CAL key for 3 seconds to enter setup menu, the display shows “CELL”... -
Page 31: Conductivity Calibration Report
● To exit calibration, press ON/OFF key; the meter will return to measurement mode immediately. ● Performing the conductivity calibration will simultaneously calibrate the corresponding TDS, salinity and resistivity value. 7.5 Conductivity Calibration Report The meter allows checking of the calibration factor of the conductivity electrode for diagnostic purposes. -
Page 32: Do Calibration In % Saturation Mode
8.1 DO Calibration in % Saturation Mode The HC1000 dissolved oxygen probe can be calibrated quickly in air. In the percentage saturation mode, the meter is able to perform either 1 or 2 points calibration. For single point calibration, it is recommended to perform 100% saturation calibration in air. For the 2 point calibration, the second point should be saturated anhydrous sodium sulfite solution (zero oxygen solution). - Page 33 8.3.5 Press ENTER key to confirm, “Calibration” indicator begins flashing. Enter 8.3.6 Wait for the measured value to stabilise, the display shows “100/CAL2”. The meter prompts you to continue with second point calibration. 8.3.7 Immerse the dissolved oxygen probe in air-saturated water for 3 to 5 minutes, press ENTER key to confirm.
-
Page 34: Do Calibration In Mg/L Or Ppm Mode
9.1 DO Calibration in mg/L or ppm Mode indicator and measurement unit “mg/L” 9.1.1 Press MODE key until the meter shows or “ppm”. 9.1.2 Ensure that 1 point calibration is selected in the setup menu. 9.1.3 If necessary, set the salinity and atmospheric pressure coefficient in the setup menu (Refer to Setup Menu section). - Page 35 9.2.5 Press ENTER key to confirm, “Calibration” indicator begins flashing. Enter 9.2.6 Wait for the measured value to stabilise; the display shows “8.25/CAL2”. The meter prompts you to continue with second point calibration. 9.2.7 Immerse the dissolved oxygen probe in air-saturated water for 3 to 5 minutes, press ENTER key to confirm.
-
Page 36: Temperature Calibration
10.1 Temperature Calibration When automatic temperature compensation is enabled, the meter will need to be calibrated if the temperature reading displayed differs from that of an accurate thermometer. 10.1.1. Press and hold the MODE key for 3 seconds to enter temperature calibration mode, the display shows current temperature reading. -
Page 37: Ph Electrode Care And Maintenance
11.1 pH Electrode Care and Maintenance The pH electrode is especially susceptible to dirt and contamination. Regular cleaning is necessary depending on the extent and condition of use. AFTER MEASURING: Rinse the pH electrode in distilled water, and store the electrode in a suitable electrode storage solution. -
Page 38: Orp Electrode Care And Maintenance
11.2 ORP Electrode Care and Maintenance ● Ensure that the ORP electrode is thoroughly washed with distilled water after each use. ● In aggressive chemicals, dirty or viscous solutions, and solutions with heavy metals or proteins, take readings quickly and rinse electrode immediately after. ●... -
Page 39: Conductivity Electrode Care And Maintenance
11.3 Conductivity Electrode Care and Maintenance ● Ensure that the conductivity electrode is thoroughly washed with distilled water after each use. ● If there is a build-up of solids inside the measurement area of the cell, these should be removed very carefully with a cotton bud soaked in solvent, taking care not to touch the metal parts of the inner cell. -
Page 40: Troubleshooting
12.1Troubleshooting LCD DISPLAY CAUSE CORRECTIVE ACTION Soak the pH electrode in 3M KCL solution for 15 minutes Electrode dried out Soak the conductivity electrode in tap water for a few minutes Check the electrode whether clogged, Measured value is out of range dirty or broken Using the fresh calibration solutions for Incorrect calibration solutions... -
Page 41: Appendix 1: How To Calculate The Temperature Coefficient
13.1 Appendix 1: How to calculate the temperature coefficient To determine the temperature coefficient of sample solution, use the following formula: ×100% -25)-C -25) Where: =Temperature coefficient =Conductivity at Temperature A =Conductivity at Temperature B =Temperature A =Temperature B 1. Press and hold the MODE key for 3 seconds to enter temperature setting mode. 2. -
Page 42: Appendix 2: How To Calculate The Tds Conversion Factor
13.2 Appendix 2: How to calculate the TDS conversion factor To determine the TDS conversion factor, use the following formula: Actual TDS Factor= Actual Conductivity @ 25ºC Where: Actual TDS: value of a precisely weighed quantity of anhydrous NaCl or KCl dissolved in high purity water. -
Page 43: Appendix 3: Pressure Vs Altitude Table
13.3 Appendix 3: Pressure vs Altitude Table ALTITUDE (m) mmHg 101.3 100.1 98.8 97.6 96.4 95.2 94.0 92.8 91.7 90.5 1000 89.4 1100 88.3 1200 87.2 1300 86.1 1400 85.0 1500 84.0 1600 82.9 1700 81.9 1800 80.9 1900 79.9 2000 78.9... -
Page 44: Warranty
Trace2o hopes that the HydroCheck HC1000 will give many years of trouble-free operation, but in the event of a technical problem occurring the instrument is covered by the Trace2o Ltd standard warranty terms and conditions available via email or via download from www.trace2o.com. - Page 45 NOTES...
- Page 46 Trace2o® Limited The Technology Centre Wagtech Court Station Road Thatcham, Berkshire, RG19 4HZ Tel.: +44 (0)1635 566772 Fax: +44 (0)1635 873509 sales@Trace2o.com www.Trace2o.com...
- Page 47 Switch the unit on using the power key. Select the Ammonia method by depressing the cursor keys until ‘Ammonia T ’ is displayed or use the shortcut by pressing & holding shift followed by 60 Release shift and press enter. Trace2o Ltd Rev1.0...
- Page 48 After the reaction period, the measurement starts and the result is displayed in mg/l Ammonia as N. Depress the cursor keys to cycle between N, NH and NH LOD/Tolerance The Lower LOD is 0.02 mg/l (20ppb), upper LOD is 1 mg/l (1000ppb). Tolerance: ± 0.005mg/l. Trace2o Ltd Rev1.0...
- Page 49 The temperature is critical for full sample development. Below 20°C, increase reaction time to 15 minutes. The tablets are unsuitable for determination of ammonia in sea water or brackish water due to precipitation of salts. A solution is available if necessary. Trace2o Ltd Rev1.0...
- Page 50 Trace2o Ltd Rev1.0...
- Page 51 Select the Chlorine method by depressing the cursor keys until ‘Chlorine T ’ is displayed or use the shortcut by pressing & holding shift followed by 100 Release shift and press enter. Depress the cursor keys until the double arrow (>>) is adjacent to the required test (diff/free/total) and press enter. Trace2o Ltd Rev1.0...
- Page 52 Add one DPD No.1 tablet and one DPD No. 3 tablet straight from the foil to the water sample. Crush the tablets using a clean stirring rod, until no large pieces are visible. Close the vial tightly with the cap and swirl several times until the tablet is dissolved. Trace2o Ltd Rev1.0...
- Page 53 After the reaction period, the measurement starts and the result is displayed in: mg/l free Chlorine mg/l combined Chlorine mg/l total Chlorine LOD/Tolerance The Lower LOD is 0.01 mg/l (10ppb), upper LOD is 6 mg/l (6000ppb). Tolerance: ± 0.005mg/l. Trace2o Ltd Rev1.0...
- Page 54 High Calcium ion content and/or high conductivity can lead to turbidity of the sample and therefore incorrect measurements – a solution is available if necessary. Interferences can occur from oxidising agents such as Bromine and Ozone. Trace2o Ltd Rev1.0...
- Page 55 Switch the unit on using the power key. Select the Nitrate method by depressing the cursor keys until ‘Nitrate T ’ is displayed or use the shortcut by pressing & holding shift followed by 260 Release shift and press enter. Trace2o Ltd Rev1.0...
- Page 56 Wait for a reaction period of 10 minutes After the reaction period, the measurement starts and the result is displayed in mg/l Nitrate LOD/Tolerance The Lower LOD is 0.08 mg/l (80ppb), upper LOD is 1 mg/l (1000ppb). Tolerance: ± 0.005mg/l. Trace2o Ltd Rev1.0...
- Page 57 Nitrate concentrations above 1 mg/L can be diluted up to 100x, with the result multiplied up to compensate. Interferences may occur from presence of the following ions: Antimony (III), Iron (III), Lead, Mercury (I), Silver, Chloroplatinate, Metavanadate, Bismuth. Copper (II) ions may artificially lower test results. Trace2o Ltd Rev1.0...
- Page 58 Trace2o Ltd Rev1.0...
- Page 59 Switch the unit on using the power key. Select the Nitrite method by depressing the cursor keys until ‘Nitrite T ’ is displayed or use the shortcut by pressing & holding shift followed by 270 Release shift and press enter. Trace2o Ltd Rev1.0...
- Page 60 Wait for a reaction period of 10 minutes After the reaction period, the measurement starts and the result is displayed in mg/l Nitrite. LOD/Tolerance The Lower LOD is 0.01 mg/l (10ppb), upper LOD is 0.5 mg/l (500ppb). Tolerance: ± 0.005mg/l. Trace2o Ltd Rev1.0...
- Page 61 The tablets should be added direct from the foil avoiding contact with hands or surfaces. Interferences may occur from presence of the following ions: Antimony (III), Iron (III), Lead, Mercury (I), Silver, Chloroplatinate, Metavanadate, Bismuth. Copper (II) ions may artificially lower test results. Trace2o Ltd Rev1.0...
- Page 62 Trace2o Ltd Rev1.0...
Need help?
Do you have a question about the HydroCheck HC1000 and is the answer not in the manual?
Questions and answers