Table of Contents
Advertisement
Available languages
Available languages
Quick Links
Please give us a chance to make it right and do better !
Contact our friendly customer service department for help first.
Replacements for missing or damaged parts will be shipped ASAP !
US office: Fontana
UK office: Ipswich
Contact Us !
Do NOT return this item.
AU office: Truganina
US:cs.us@costway.com
UK:cs.uk@costway.com
AU:cs.au@costway.com
EN
DE
FR
ES
IT
PL
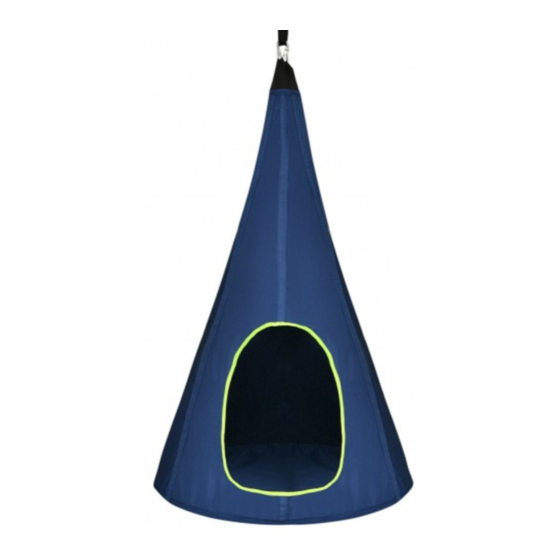
Kids Swing Hammock
THIS INSTRUCTION BOOKLET CONTAINS IMPORTANT SAFETY INFORMATION. PLEASE READ AND KEEP FOR FUTURE REFERENCE.
USER'S MANUAL
OP70649
Advertisement
Table of Contents

Related Manuals for Costway OP70649


Summary of Contents for Costway OP70649
- Page 1 US office: Fontana UK office: Ipswich AU office: Truganina USER’S MANUAL Contact Us ! Kids Swing Hammock OP70649 Do NOT return this item. US:cs.us@costway.com UK:cs.uk@costway.com AU:cs.au@costway.com THIS INSTRUCTION BOOKLET CONTAINS IMPORTANT SAFETY INFORMATION. PLEASE READ AND KEEP FOR FUTURE REFERENCE.
-
Page 2: Before You Start
PARTS LIST Before You Start Expansion Tent Cover Steel Tube Screw 1 PC 5 PCS 4 PCS Please read all instructions carefully and keep it for future reference. Warnings: Attention: For home use only. Attention: The product is not suitable for the children under 3 years Danger: Keep all small parts and packaging materials for this product away from babies and children, otherwise they may pose a choking hazard. -
Page 3: Installation Process
Hanging on the Roof Installation process 1.Use a pencil to mark Concrete Wall the locations that need to be punched. (Cannot be installed to the ceiling, hollow wall) 2.Use a 12MM drill bit and use an Impact drill to make holes. The depth of the hole is not less than the length of the expansion screw. - Page 4 Hanging on the Tree Accessories Required for Installation Connecting Rope Spring Hook 1 PC 2 PCS Note: You should choose branches with a diameter greater than 10” (25cm) to hang the swing hammock. To ensure safety, please make sure that the adjustment rope is installed correctly after hanging, and then an adult must test its firmness by pulling down the swing hammock.
-
Page 5: Kontaktieren Sie Uns
Deutsches Büro: FDS GmbH, Neuer Höltigbaum 36, 22143 Hamburg, Deutschland HANDBUCH Kontaktieren Sie uns ! Zelt für Nestschaukel OP70649 Schicken Sie diesen Artikel NICHT zurück, DE:cs.de@costway.com bitte wenden Sie sich an unseren Kundenservice. DIESE ANLEITUNG ENTHÄLT WICHTIGE SICHERHEITSINFORMATIONEN. BITTE SORGFÄLTIG LESEN UND ZUM SPÄTEREN NACHSCHLAGEN AUFBEWAHREN. -
Page 6: Bevor Sie Beginnen
Teileliste Bevor Sie beginnen Zeltabdeckung Stahlrohr Dehnschraube 1 PC 5 PCS 4 PCS Bitte sorgfältig lesen und zum späteren Nachschlagen aufbewahren. Warnung! Achtung! Nur für den Hausgebrauch. Warnung: Der Artikel ist nicht für Kinder unter 3 Jahren geeignet. Warnung: Halten Sie alle Kleinteile und Verpackungsmaterialien, die verschluckt werden können, von Babys und Kindern fern. - Page 7 Aufhängung auf dem Dach Montagevorgang 1. Markieren Sie mit einem Bleistift die Betonwand Stellen, die durchgestanzt werden müssen. (Kann nicht an der Decke oder einer hohlen Wand installiert werden) 2. Verwenden Sie einen 12-mm-Bohrer und eine Schlagbohrmaschine, um Löcher zu bohren. Die Tiefe des Lochs ist nicht geringer als die Länge der Dehnschraube.
- Page 8 Aufhängen am Baum Erforderliches Zubehör für die Installation Verbindungsseil Karabinerhaken 1 PC 2 PCS Hinweis: Sie sollten Äste mit einem Durchmesser von mehr als 25 cm wählen, um die Hängematte aufzuhängen. Um die Sicherheit zu gewährleisten, vergewissern Sie sich bitte, dass das Verstellseil nach dem Aufhängen korrekt angebracht ist.
-
Page 9: Manuel De L'utilisateur
Siège Suspendu OP70649 Ne retournez pas cet article. FR : cs.fr@costway.com Contactez notre service à la clientèle pour obtenir de l’aide. CE MANUEL CONTIENT DES INFORMATIONS IMPORTANTES SUR LA SÉCURITÉ. VEUILLEZ LE LIRE ET LE CONSERVER POUR TOUTE RÉFÉRENCE FUTURE. -
Page 10: Avant De Commencer
Liste des pièces Avant de Commencer Couverture Tube en acier Cheville murale Veuillez lire attentivement toutes les instructions et les conserver pour la référence ultérieure. Avertissements : Attention : Pour l’usage domestique seulement. Attention : Le produit ne convient pas aux enfants de moins de 3 ans Danger : Gardez toutes les petites pièces et les matériaux d’emballage de ce produit Disque à... -
Page 11: Étapes D'installation
Suspendu sur le toit Étapes d’installation 1. Utilisez un crayon pour marquer les Mur en béton emplacements qui doivent être perforés. (Ce produit ne peut pas être installé au plafond ou sur un mur creux). 2. Utilisez une perceuse à percussion avec une mèche de 12 MM pour percer les trous. - Page 12 Suspendu à l’arbre Accessoires nécessaires pour l’installation Corde Crochet Remarque: Vous devez choisir des branches d'un diamètre supérieur à 25 cm pour suspendre le siège. Pour garantir la sécurité, la corde de réglage doit être correctement installée après l’accrochage, puis un adulte doit tester sa fermeté en tirant sur le siège.
-
Page 13: Manual Del Usuario
Hamaca para Niños OP70649 NO devuelva este artículo. ES : cs.es@costway.com Primero póngase en contacto con nuestro amable departamento de servicio al cliente para obtener ayuda. ESTE MANUAL DE INSTRUCCIONES CONTIENE IMPORTANTES INFORMACIONES DE SEGURIDAD, POR FAVOR, LÉALO Y GUÁRDELO PARA FUTURAS CONSULTAS. -
Page 14: Antes De Empezar
LISTA DE PIEZAS Antes de Empezar Cobertura Tubo de acero Taco de pared Lea todas las instrucciones detenidamente y guárdelas para futuras referencias. Advertencias: Atención: Solo para uso doméstico. Atención: El producto no es adecuado para los niños menores de 3 años. Peligro: Mantenga todas las piezas pequeñas y los materiales de embalaje de este producto fuera del alcance de los bebés y los niños, ya que, de lo contrario, pueden Cuerda de... - Page 15 Colgar en la pared Pasos de Instalación 1. Utilice un lápiz para marcar las posiciones Pared de hormigón que deben ser perforadas. (No se puede instalar en el techo ni en la pared hueca). 2. Utilice una broca de 12MM y un taladro de impacto para hacer los agujeros.
- Page 16 Colgar en el árbol Accesorios Necesarios para la Instalación Cuerda de conexión Gancho Nota: Debe elegir ramas con un diámetro superior a 25 cm para colgar la hamaca colgante. Para garantizar la seguridad, asegúrese de que la cuerda de ajuste esté instalada correctamente después de colgarla, y luego un adulto debe comprobar su firmeza tirando de la hamaca colgante hacia abajo.
-
Page 17: Manuale Utente
Le parti di ricambio per le parti mancanti o danneggiate verranno spedite al più presto! MANUALE UTENTE Contattaci ! Altalena Sospesa per Bambini OP70649 NON restituire questo articolo. IT: cs.it@costway.com Si prega di contattare prima il nostro servizio clienti per assistenza. -
Page 18: Lista Delle Parti
Lista delle Parti Prima di iniziare Copertura della tenda Tubo di acciaio Tassello Si prega di leggere attentamente tutte le istruzioni e conservarle per riferimento futuro. Avvertenza: Attenzione: solo per uso domestico. Attenzione: Il prodotto non è adatto ai bambini sotto i 3 anni. Pericolo: Tenere tutte le piccole parti e i materiali di imballaggio di questo prodotto lontano da neonati e bambini, altrimenti potrebbero rappresentare un rischio di Accessorio per il... -
Page 19: Istruzioni Di Montaggio
Appendere sul tetto Istruzioni di Montaggio 1. Usare una matita per segnare le posizioni Parete di cemento che devono essere perforate. (Non installabile a soffitto, parete cava) 2. Utilizzare una punta da trapano da 12 mm e utilizzare un trapano a percussione per praticare i fori. - Page 20 Appendere all'albero Accessori necessari per il montaggio Fune di collegamento Gancio Note: Scegliere i tronchi con diametro maggiore di 25 cm per appendere il prodotto. Per garantire la sicurezza, si prega di assicurarsi che la fune di regolazione sia installata correttamente dopo l'appensione, e poi un adulto deve testare la sua fermezza tirando giù...
-
Page 21: Instrukcja Obsługi
PL office: Gdańsk INSTRUKCJA OBSŁUGI Skontaktuj się z nami ! Fotel wiszący dla dzieci OP70649 Nie zwracaj tego produktu. PL: sklep@costway.com Skontaktuj się z naszym działem obsługi klienta, aby uzyskać pomoc. NINIEJSZA INSTRUKCJA ZAWIERA ISTOTNE INFORMACJE DOTYCZĄCE BEZPIECZEŃSTWA. PROSIMY O ZAPOZNANIE SIĘ Z NIĄ I ZACHOWANIE JEJ DO WGLĄDU W PRZYSZŁOŚCI. -
Page 22: Zanim Zaczniesz
LISTA CZĘŚCI Zanim Zaczniesz Śruba rozporowa Tkanina Stalowa rura Przeczytaj uważnie wszystkie instrukcje i zachowaj je na przyszłość. Uwaga! Uwaga: Produkt wyłącznie do użytku domowego Uwaga: Produkt nie jest odpowiedni dla dzieci poniżej 3 lat Niebezpieczeństwo: Trzymaj wszystkie małe części i opakowania tego produktu z dala od niemowląt i dzieci - w przeciwnym razie mogą... - Page 23 Mocowanie na suficie Proces montażu 1. Za pomocą ołówka zaznacz miejsca, w Betonowa ściana których będziesz wiercić otwory. (Nie wolno montować produktu na sufitach posiadających pustą przestrzeń). 2. Użyj wiertła 12 mm i wiertarki udarowej, aby wywiercić otwory. Głębokość otworu musi odpowiadać...
- Page 24 Mocowanie na gałęzi drzewa Części potrzebne do montażu Lina przedłużająca Hak sprężynowy Uwaga: Do zawieszenia fotela wybierz gałąź o średnicy co najmniej 25 cm. W celu zapewnienia maksymalnego bezpieczeństwa, sprawdź, czy lina jest zamocowana prawidłowo. Pociągając fotel w dół sprawdź sprężystość liny. Odpowiednia odległość...
Need help?
Do you have a question about the OP70649 and is the answer not in the manual?
Questions and answers