Advertisement
Quick Links
USER'S GUIDE
V:1008-0414-09
C389B
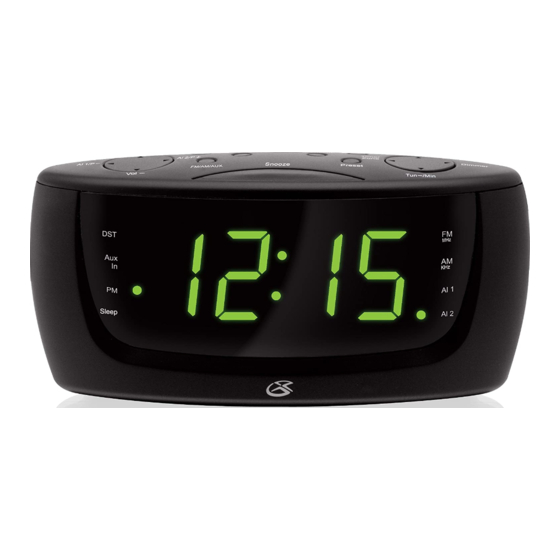
Dual Alarm Clock Radio with Intelli Set™
For the most up-to-date version of this
User's Guide, go to www.gpx.com
POWERING THE UNIT
█ AC/DC ADAPTER
Connect the included AC/DC Adpater to
the DC Power Input on the unit and an
AC power source to power the unit.
█ BATTERY BACKUP
Requires a CR2032 battery, pre-
installed.
Use a small, Phillips-head screwdriver
to open the backup battery
compartment.
CR2032
Only replace with same or equivalent
type battery.
GENERAL PRODUCT INFORMATION
█ IN THE BOX
C389B
AC/DC adapter
Pre-installed Backup Battery (CR2032)
Documentation
WARNINGS AND PRECATIONS
• CAUTION: TO PREVENT ELECTRIC SHOCK, MATCH
WIDE BLADE OF PLUG TO WIDE SLOT, FULLY INSERT.
• WARNING: To prevent fire or shock hazards, do not expose this
unit to rain or moisture.
• CAUTION: Use of controls or adjustments or performance of
procedures other than those specified may result in hazardous
radiation exposure.
• WARNING: Changes or modifications to this unit not expressly
approved by the party responsible for compliance could void the
user's authority to operate the equipment.
• WARNING: Do not place the unit on top of any soft, porous, or
sensitive surfaces to avoid damaging the surface. Use a protec-
tive barrier between the unit and surface to protect the surface.
• CAUTION: Danger of explosion if battery is incorrectly re-
placed. Replace only with the same or equivalent type.
• PRÉCAUTION: Danger d'explosion si les piles sont remplacées
de façon incorrect. Remplacer les piles seulement par le même
type de pile ou l'équivalent.
Do not mix old and new batteries.
Do not mix alkaline, standard (carbon-zinc), or
rechargeable (ni-cad, ni-mh, etc) batteries.
OPERATIONS
█ SETTING THE TIME USING INTELLI SET™
When the unit is first powered on, the time will automatically be set to Eastern
Standard Time.
1. Plug the unit into a power source.
2. Press and hold the Clock Button.
3. While holding the Clock Button, press the Time Zone Button repeatedly to cycle
through the available time zones.
Refer to the Time Zone Chart below to find your specific time zone.
Abbr.
1
AST
2
EST
3
CST
4
MST
5
PST
6
AKST
7
HAST
4. Release the Clock Button to finish setting the time.
If you are experiencing issues when attempting to use the Intelli Set™ feature, you can
set the clock manually by following the directions on the next page.
█ SETTING THE TIME MANUALLY
1. Plug the unit into a power source.
2. Press and hold the Clock Button.
3. While holding the Clock Button, press
the Tun+/Hr Button and Tun-/Min
Button to adjust the hour and minute.
4. Release the Clock Button to set the
adjusted time.
No mezcle baterías viejas y nuevas.
No mezcle baterías alcalinas, estándar (carbono-
zinc) o recargables (ni-cad, ni-mh, etc.).
Full Name
Atlantic Standard Time
Estern Standard Time
Central Standard Time
Mountain Standard Time
Pacific Standard Time
Alaska Standard Time
Hawaii-Aleutian Standard Time
█ SETTING THE ALARMS
1. With the unit powered off, press and
hold the AL 1/P- Button (Alarm 1) or
AL 2/P+ Button (Alarm 2).
2. While holding the AL 1/P- Button or
AL 2/P+ Button, press the Tun+/Hr
Button and Tun-/Min Button to adjust
the hour and minute.
3. While holding the AL 1/P- Button or
AL 2/P+ Button, press the AM/FM/
AUX Button to set the alarm to wake to
the buzzer or the AM/FM radio.
If set to AM/FM radio, the alarm will
sound to the current radio settings.
4. Release the AL 1/P- Button or AL 2/P+
Button to set the adjusted alarm time.
FCC Warnings
NOTE: This equipment has been tested and found to
comply with the limits for a Class B digital device,
pursuant to Part 15 of the FCC Rules. These limits
are designed to provide reasonable protection against
harmful interference in a residential installation. This
equipment generates, uses, and can radiate radio
frequency energy and, if not installed and used in
accordance with the instructions, may cause harmful
interference to radio communications. However, there
is no guarantee that interference will not occur in a
particular installation. If this equipment does cause
harmful interference to radio or television reception,
which can be determined by turning the equipment off
and on, the user is encouraged to try to correct the in-
terference by one or more of the following measures:
• Reorient or relocate the receiving antenna.
• Increase the separation between the equipment and
receiver.
• Connect the equipment into an outlet on a circuit dif-
ferent from that to which the receiver is connected.
• Consult the dealer or an experienced radio/TV techni-
cian for help.
Time Zone
UTC - 4 hours
UTC - 5 hours
UTC - 6 hours
UTC - 7 hours
UTC - 8 hours
UTC - 9 hours
UTC - 10 hours
Advertisement

Related Manuals for GPX C389B


Summary of Contents for GPX C389B
- Page 1 USER’S GUIDE V:1008-0414-09 C389B Dual Alarm Clock Radio with Intelli Set™ For the most up-to-date version of this User’s Guide, go to www.gpx.com POWERING THE UNIT █ AC/DC ADAPTER Connect the included AC/DC Adpater to the DC Power Input on the unit and an AC power source to power the unit.
- Page 2 Tun +/Hr & Tun -/Min Buttons Press the Tune Buttons to adjust the AM or FM radio station. Press the Hour and Minute Buttons to set the hour and minute on the clock or alarm time. █ BACK OF UNIT • DST Button Adjust the DST Button to on when your current time zone is in Daylight Savings Time. Adjust the DST Button to off at all other times of the year. COMPANY INFORMATION █ INTERNATIONAL SUPPORT To download this User’s Guide in English, Spanish, or French, visit the support section at www.gpx.com. Para transferir esta guía de usuario en inglés, español, o francés, visite la sección de la ayuda en www.gpx.com. Pour télécharger ce guide de l’utilisateur en anglais, espagnol, ou français, visitez la section de soutien chez www.gpx. com. █ SERVICE INFORMATION Address: 2116 Carr Street, St. Louis MO, 63106 Phone: 1-314-621-2881 Fax: 1-314-588-1805 Email: prodinfo@gpx.com Parts Email: partsinfo@dpi-global.com Website: www.gpx.com © 2009 Digital Products International (DPI, Inc.) | All other trademarks appearing herein are the property of their respective owners. Specifications are subject to...
Need help?
Do you have a question about the C389B and is the answer not in the manual?
Questions and answers