Table of Contents
Advertisement
Quick Links
Advertisement
Table of Contents

Related Manuals for SNAPCYCLE R1

Summary of Contents for SNAPCYCLE R1
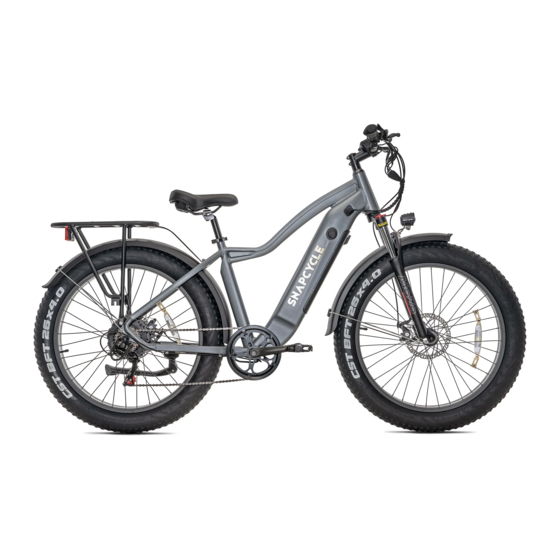
- Page 1 ELECTRIC BICYCLE Snapcycle R1/R1 Step-Thru User’ s Manual...
- Page 2 ENGLISH MANUAL Snapcycle Inc. 5318 E. 2nd St Long Beach, CA 90803 www.snapcycle.com...
-
Page 3: Table Of Contents
Contents Preface ............................3 Welcome ..........................3 About this manual ........................3 Symbols used in the manual ....................3 Service & technical support ....................3 Safety .............................. 4 2.1 Safe Use of the E-bike ........................4 2.2 Battery and Charger Safety ......................5 2.3 Changing Components or Adding Accessories ................ -
Page 5: Preface
1.4 Service & technical support If you have questions after reading this manual, please contact the Snapcycle Help Center. We are always here to support you. Snapcycle Help Center: support.snapcycle.com Email: support@snapcycle.com... -
Page 6: Safety
2. Safety 2.1 Safe Use of the E-bike 1) You need to check the traffic rules and regulations in your area, including but not limited to regulations about bicycle lighting, licensing of e-bikes, riding on sidewalks, laws regulating bike path and trail use, helmet laws, child carrier laws, special e-bike traffic laws. It is your responsibility to know and obey the laws. -
Page 7: Battery And Charger Safety
2.3 Changing Components or Adding Accessories • Changing the components on your e-bike with non-genuine replacement parts may compromise the safety of your e-bike and may void the warranty. Check with Snapcycle customer service before changing the components on your bike •... -
Page 8: Unboxing & Assembly
3. Unboxing & Assembly You need to follow the unboxing and assembly instruction video that was sent to you by Snapcycle Customer Care team via email upon your purchase of the bike. If you do not receive the video link, you can request it from Snapcycle Customer Care care via email at support@snapcycle.com... -
Page 9: Cockpit
3.2 Cockpit Brake Lever LCD Display Shimano Power Button (with brake sensor) Shifter Display Horn Handle Half-Twist Control Throttle 4. Operations 4.1 Product Specifications 48V 14AH Samsung Lithium US Standard 3.0A smart Battery Charger Battery charger, UL Certified Range 30 ~ 45 Miles Controller 48V / 25A Electric Bike... -
Page 10: Mechanical Checklist
4.2 Mechanical Checklist Before each ride and after every 30-50 miles of riding, we recommend the following safety checks tabulated in the below tables. Fasteners Check that all fasteners and components are securely tightened Brakes Check and Test to ensure front and rear brakes work properly Check and ensure the brake pads are not over-worn and are correctly positioned. -
Page 11: First Ride
4.3 First Ride For your first ride, 1. You need to fully charge your battery before use. 2. Ensure the battery key is in LOCKED position 3. Press and hold the power button on the display control pad located on the left handlebar until the display turns on 4. - Page 12 • Speed Mode: Average Speed (AVG SPEED), Maximum Speed (MAX SPEED), Real- time Speed (RT SPEED). • Speed Display: It shows the speed value in KM/H or MPH • Power Indicator: It shows the power level of the battery. The corresponding voltage for each level can be adjusted by the user.
- Page 13 Speed mode & Mileage mode Short press MENU button to change the speed mode and mileage mode: AVG SPEED->MAX SPEED-> SPEED->Trip->ODO->Time Note: If there is no operation for 5 seconds, display will return to SPEED automatically. Headlight On/Off Press and hold UP button for 2 seconds can turn on/off the headlight, and the screen will switch to the corresponding mode.
- Page 14 Double press MENU button (pressing interval should less than 0.3 second) to get into the settings menu. Short press UP/DOWN buttons to change the parameter settings. Short Press MENU button to confirm the parameter setting and navigate to the next parameter.
- Page 15 Clear (Cr): Press the UP/DOWN buttons to switch between n/y (no/yes). Selecting “y” will allow you to reset temporary data such as average speed / maximum speed / trip meter / elapsed time, which ordinarily cannot be erased by simply powering off the bike. (Do note that the factory default for this parameter is “n”;...
- Page 16 Wheel Diameter are 16/18/20/22/24/26/27/28/700C/29 inches (Factory Default: 29). We do not recommend modifying this setting if you are using the original Snapcycle wheels. _______________________________________________________________________________ Battery Voltage (bUO): Press the UP/DOWN buttons to change the battery voltage setting.
-
Page 17: Battery And Charging
4.5 Battery and Charging 4.5.1 Charging To charge the battery, • You need to charge it at room temperature , preferably around 68 °F. Charging below 32 °F or above 104 °F may significantly shorten the lifespan of the battery •... -
Page 18: Transportation & Storage
5. Transportation & Storage 5.1 Transportation CAUTION: Batteries are not designed to be on the bike during transportation by car. Batteries must be taken off the bike(s) and transported inside the car. 5.2 Storage Store the bike in a location where it is protected from snow, rain, sun etc. Snow and rain can cause the bike to corrode. -
Page 19: Error Code And Troubleshooting
• Snapcycle controllers for R1, R1 Step-Thru and S1 models are all rated 48V /12A for its continuous current, 48V / 25A for the maximum current. When the transient current exceeds the maximum current, or the continuous current exceeds the rated current of 12A, this error message will show up and it basically means that the transient current is over 25A or the continuous current is over 12A. -
Page 20: Error Code 0X22
Most likely, you would need to get your throttle replaced. 6.3 Error Code 0x23 Definition: All Snapcycle motors are 3-phase brushless geared DC motor, as shown in the schematic below. If any of the three phase wirings (øA, øB, øC) from the rear hub motor to the controller is damaged , broken or disconnected, you will have this error message shown on the LCD screen. -
Page 21: Error Code 0X24
6.5 Error Code 0x25 Definition: Snapcycle brake levers all come with a motor cut-off switch, which is simply a dry-contact switch like our light switches at home. When any of the motor cut-off switches at the brake levers is activated, power supply to the motor will be cut off. -
Page 22: Error Code 0X30
LCD screen to see if the error persists. Check if the cable between the LCD and the controller has visible damage If the problem persists, you can contact Snapcycle Customer Support team via email support@snapcycle.com... -
Page 23: Maintenance
7. Maintenance 7.1 Inspection and Safety Check Before every ride and after every 50 miles of ride, the e-bike should be checked regularly following the checklist as described in Section 4.2. Regular inspections and tuning are crucial to ensure that your ebike remains safe and fully functional. - Page 24 Derailleurs every six months Put one drop of oil on each pivot point of the derailleur. Wipe off all excess oil with a clean soft cloth. Brake and Brake every six months Apply two / three drops of oil into both ends of the Cables cable.
-
Page 25: Product Warranty
LCD display, battery, and electrical sensors. BATTERY WARRANTY Snapcycle batteries are covered by one (1) year pro-rated warranty. If a battery is found defective or its capacity falls below 60% of its rated value within the warranty period, it will be repaired free of charge for the customers. - Page 26 Shipping charges are to be borne by the customers. It is at the full discretion of Snapcycle to determine if a defective component is covered by this limited warranty.
- Page 27 Email: support@snapcycle.com Snapcycle service team may request additional information such as video and photography to assist with processing of the warranty claims. Snapcycle e-bikes or parts returned without prior authorization and proper documentation may get lost, and may cause delay to the entire process.
Need help?
Do you have a question about the R1 and is the answer not in the manual?
Questions and answers