Table of Contents
Advertisement
Quick Links
Advertisement
Table of Contents

Related Manuals for True RESIDENTIAL


Summary of Contents for True RESIDENTIAL
- Page 1 T R U E R E S I D E N T I A L ® 3 6 I N C H B U I L T - I N B O T T O M F R E E Z E R I N S T A L L G U I D E A N D U S E R ' S M A N U A L P R E S E R V E T H E M O M E N T ®...
- Page 2 Is the unit operating correctly? If not, is the unit plugged in? Is the control turned on? * To be completed by either an installer with the customer or an authorized True dealer upon completion of installation. Stainless steel doors, handles, and shelves are covered by a limited 30-day warranty for cosmetic defects.
-
Page 3: Table Of Contents
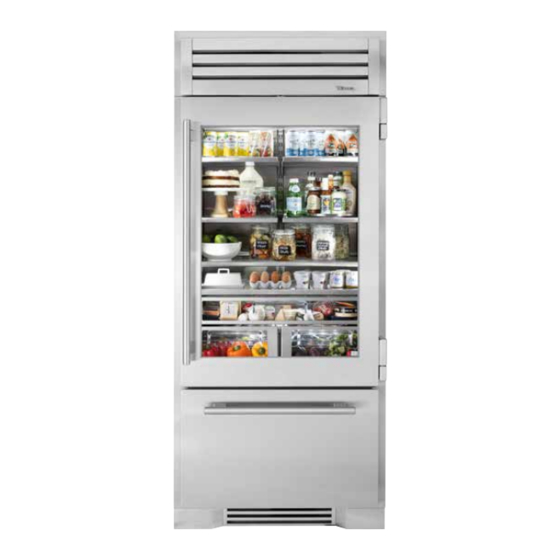
T A B L E O F C O N T E N T S S A FE T Y I N FO R M AT I O N A N D OW N E R S H I P S A FE T Y WA RNIN G S &... - Page 4 T H E T R U E 3 6 R B F 36 IN CH BU ILT-IN 36 IN CH BU ILT-IN BOT TOM FREE ZER BOT TOM FREE ZER STAINLESS SOLID D O OR STAINLESS GL ASS D O OR Commercial refrigeration refined for the home, envied in the industry, and crafted –gorgeously–...
-
Page 5: S A Fe T Y I N Fo R M At I O N A N D Ow N E R S H I P
S A F E T Y I N F O R M A T I O N A N D O W N E R S H I P S A F E T Y W A R N I N G S & P R E C A U T I O N S C O R R E C T D I S P O S A L O F O L D R E F R I G E R A T O R O W N E R S H I P S E R I A L L A B E L L O C A T I O N... - Page 6 S A F E T Y I N F O R M A T I O N A N D O W N E R S H I P HOW TO M AINTAIN YOUR TRUE REFRIG ER ATOR TO RECEIVE THE MOS T...
- Page 7 S A F E T Y I N F O R M A T I O N A N D O W N E R S H I P C ABINE T DISP OSAL WARNING DANGER! RISK OF CHILD ENTR APMENT PROPER DISP OSAL OF THE C ABINE T Child entrapment and suffocation are not problems of the past.
-
Page 8: Ownership
See fig. 1. recommend a trained refrigeration mechanic and This label contains important information such as electrician install your True equipment. The cost of a your model name and serial number. Please have this professional installation is money well spent. - Page 9 S I T E P R E P A R A T I O N R O U G H O P E N I N G S & P L A N V I E W S A N T I - S W E A T F O A M E N D P A N E L S E L E C T R I C A L S A F E T Y &...
-
Page 10: Site Prepar Ation
S I T E P R E P A R A T I O N ELECTRICAL AREA SITE PREPAR ATION Due to the weight of this unit, True recommends consulting a flooring expert prior to installation. The flooring beneath the unit should be rated to support ≥150 lbs/ft... - Page 11 S I T E P R E P A R A T I O N ROUG H OPENINGS & PL AN VIEWS TR-36RBF / TR-36RBF Flush installation: The front face of the unit is flush with the surrounding cabinets Proud (standard) Installation: The front face of the unit extends beyond the surrounding cabinets Rough Opening Dimensions Flush Install...
-
Page 12: Anti-Swe At Foa M End Panel S
ANTI-SWE AT FOA M END PANEL S When installing two or more True units side-by-side, be sure to leave at least a 5/8” (15.88 mm) gap between the cabinets, or install foam pads between the cabinets and on any side with 0” clearance, to prevent moisture from developing on applications. - Page 13 • NEVER USE AN ADAPTER PLUG! An adapter plug alters the original equipment manufacturer (OEM) plug configuration when connecting it to a power source. True will not warranty any refrigerator/freezer that has been connected to an adapter plug. • NEVER USE AN EXTENSION CORD! An...
- Page 14 S I T E P R E P A R A T I O N POWER CORD INSTALLATION Fully seat the power cord into the cabinet receptacle until it locks in position. See fig. 1. REMOVAL Depress the red button. See fig. 2. FIG.
-
Page 15: Water Supply Requirement S
S I T E P R E P A R A T I O N WATER SUPPLY REQUIREMENT S The unit comes with 20” (508 mm) of polyethylene tubing with a 1/4” O.D. push connector for customer attachment. Before installing your unit, prepare the water supply line. - Page 16 I N S T A L L A T I O N A N T I -T I P B R A C K E T I N S T A L L A T I O N L E V E L I N G W A T E R F I L T E R I N S T A L L A T I O N &...
-
Page 17: Anti-Tip Br Acke T Ins Tall Ation
987036 I N S T A L L A T I O N WARNING – To avoid a hazard from ANTI-TIP BR ACKE T INS TALL ATION 5.19.17 AL appliance instability, install the anti- KIT INCLUDES tip bracket in accordance with the instructions below. -
Page 18: Le Veling
I N S T A L L A T I O N LE VELING It is important that your unit is level. This ensures the doors align and seal correctly and drain pans do not spill over. 1. Place a level on the interior floor on the unit. Check the level back-to-front and side-to-side. -
Page 19: Water Filter Ins Tall Ation & Perform Ance Data
I N S T A L L A T I O N WATER FILTER INS TALL ATION & PERFORM ANCE DATA The water filter filters sediment and removes unpleasant taste and odor. Install the provided water filter before using the icemaker. The unit will not make ice until the water filter is installed. - Page 20 I N S T A L L A T I O N Filter Specifications A-1, G-1, G-2, G-3, G-4, L-1, L-2, L-3, L-4, L-5, Flow Rate 0.5 gpm / 1.89 lpm M-1, M-2, S-1, S-2, S-4, W-2, W-3, W-4 Operating 33-100°F (0.6-38°C) Temperature Performance Data Sheet...
-
Page 21: Kickpl Ate Ins Tall Ation
I N S T A L L A T I O N KICKPL ATE INS TALL ATION The kickplate (see fig. 1) is shipped unattached to the unit to allow easy access for leveling the unit. The kickplate attaches to the unit with magnets (see fig. -
Page 22: C A B I N E T S E T U
C A B I N E T S E T U P D O O R I N S T A L L A T I O N & R E M O V A L R E F R I G E R A T O R S T O R A G E F R E E Z E R S T O R A G E I C E M A K E R P R E S E R V E T H E M O M E N T... -
Page 23: D O Or Ins Tall Ation & Removal
C A B I N E T S E T U P D O OR INS TALL ATION & REMOVAL INSTALLATION 1. Hold the door perpendicular (90°) to the opening. 2. Align the hinge posts with the hinges. 3. Carefully lower the door into place. REMOVAL If door removal is necessary, see instructions below. -
Page 24: Refri Ger Ato R Sto R Age
C A B I N E T S E T U P REFRIG ER ATOR S TOR AG E The refrigerator section of the cabinet is divided into shelving and produce / crisper bins. SHELVING The shelving comes installed on the unit. See figs. 1 and 2. -
Page 25: Free Zer Sto R Age
C A B I N E T S E T U P FREE ZER S TOR AG E The freezer drawer of the cabinet is divided into two sections. The top section holds the ice bin (see fig. 1). NOTE: IT IS NOT RECOMMENDED TO REMOVE THE ICE BIN, EVEN IF THE ICEMAKER IS NOT IN USE. -
Page 26: Icem Ak
C A B I N E T S E T U P ICEM AKER The icemaker (see fig. 1) is in the rear upper left of the freezer section. For water supply requirements, please see “Water Supply Requirements” (page 15). To turn the icemaker on, please see “Ice Menu Navigation”... - Page 27 Bad taste • Place coffee grounds or charcoal briquettes in the freezer to absorb odor Clean the condenser coil. Contact True Residential Customer Service if Hollow cubes the issue is unresolved. T R- 3 6 R B F I N S TA L L GU I D E TEC_TM_151 | REV.
-
Page 28: E L Ec T Ro N I C Co N T Ro L O P E R At I O N
E L E C T R O N I C C O N T R O L O P E R A T I O N U S E R I N T E R F A C E S E T P O I N T M E N U I C E M E N U M O D E M E N U S E R V I C E R E P O R T... -
Page 29: User Interface 2
E L E C T R O N I C C O N T R O L O P E R A T I O N USER INTERFACE All units are shipped in ON mode. During the initial startup, the unit runs a short power up diagnostic followed by a single audible beep. -
Page 30: Se T P Oint Menu 3
E L E C T R O N I C C O N T R O L O P E R A T I O N SE T P OINT MENU To adjust set points, please see the information and diagram below. •... -
Page 31: Ice Menu
E L E C T R O N I C C O N T R O L O P E R A T I O N ICE MENU The Ice Menu contains three operations. • Ice Maker: Toggles the icemaker between on/off. •... -
Page 32: M O D E Me
E L E C T R O N I C C O N T R O L O P E R A T I O N MODE MENU The MODE menu contains four operations. • Holiday Mode: Star-K compliant. Cannot change set points or initiate manual defrost. HOLIDAY MODE ACTIVE shows on the display when the door is closed. -
Page 33: Serv Ice Rep O
E L E C T R O N I C C O N T R O L O P E R A T I O N SERVICE REP ORT The service report is for the end user. T R- 3 6 R B F I N S TA L L GU I D E TEC_TM_151 | REV. -
Page 34: L Ight Me
E L E C T R O N I C C O N T R O L O P E R A T I O N LIG HT MENU All models are equipped with an accent lighting system in the refrigerator and/or freezer compartment(s). To energize the accent lighting system, press LIGHT and navigate to the corresponding compartment (see diagram below). -
Page 35: D O O R A Jar Al Arm 3
E L E C T R O N I C C O N T R O L O P E R A T I O N D O OR A JAR AL ARM The cabinet will alert whenever the door is left ajar. 38º... - Page 36 E L E C T R O N I C C O N T R O L O P E R A T I O N SHOWRO OM MODE Showroom mode (found in the Service Menu) enables all cabinet functions except for refrigeration. 38º...
-
Page 37: Sh Ow Ro O M M O D
E L E C T R O N I C C O N T R O L O P E R A T I O N S YS TEM NOTIFIC ATIONS • The display may show the notifications in the table below if the appliance requires attention. •... -
Page 38: G E N E R A L M A I N T E N A N Ce , C A R E & Cl E A N I N G
G E N E R A L M A I N T E N A N C E , C A R E & C L E A N I N G S T A I N L E S S S T E E L C A R E A N D C L E A N I N G W A T E R F I L T E R R E P L A C E M E N T C O N D E N S E R C O I L C L E A N I N G C O N D E N S A T I O N... - Page 39 G E N E R A L M A I N T E N A N C E , C A R E & C L E A N I N G S TAINLE SS S TEEL EQUIPMENT C ARE AND CLE ANING CAUTION - Do not use any steel wool, •...
- Page 40 G E N E R A L M A I N T E N A N C E , C A R E & C L E A N I N G S TAINLE SS S TEEL EQUIPMENT C ARE AND CLE ANING 8 TIPS TO HELP PREVENT RUST ON STAINLESS STEEL •...
-
Page 41: Water Filter Repl Acement
G E N E R A L M A I N T E N A N C E , C A R E & C L E A N I N G WATER FILTER REPL ACEMENT The water filter has a life expectancy of 300 gal (1,136 L) or six months. -
Page 42: Condenser Coil Cle Aning
G E N E R A L M A I N T E N A N C E , C A R E & C L E A N I N G CONDENSER COIL CLE ANING Keeping the condenser coil clean minimizes required servicing and lowers electrical cost. -
Page 43: Seria L L Abel Lo C Atio
The serial label is located on the upper right wall of the freezer drawer. See fig. 1. This label contains important information such as your model name and serial number. Please have this information on hand when contacting True so we can better assist you with your service- or parts-related inquiries. - Page 44 N O T E S T RU E R E S I D E N T I A L Page 44 of 48 07/28/2021 TEC_TM_151 | REV. A | EN ®...
- Page 45 N O T E S T R- 3 6 R B F I N S TA L L GU I D E TEC_TM_151 | REV. A | EN 07/28/2021 Page 45 of 48...
-
Page 46: Wa R R A N T Y S Tat E M E N T
W A R R A N T Y S T A T E M E N T W A R R A N T Y P R E S E R V E T H E M O M E N T ®... - Page 47 DISPLAY PRODUCTS True Residential Products on showroom display that are sold more than 3 years (36 months) from the invoice date to the dealer would carry a 1 year parts and labor warranty, along with an additional 4 year sealed system, parts only warranty.
- Page 48 CONTACT US w w w.true -residential.com toll free ( 8 8 8 ) 616 - 878 3 *829102* 829102 T RU E RE S I D E N T I A L 07/28/2021 TEC_TM_151 | REV. A | EN ®...
Need help?
Do you have a question about the RESIDENTIAL and is the answer not in the manual?
Questions and answers