Table of Contents
Advertisement
CONTENTS
SAFETY CONSIDERATIONS . . . . . . . . . . . . . . . . . . . . . . . . .1
INSTALLATION . . . . . . . . . . . . . . . . . . . . . . . . . . . . . . . . . . . 1-43
Step 1- Provide Unit Support . . . . . . . . . . . . . . . . . . . . . . .1
• ROOF CURB
Step 2 - Field Fabricate Ductwork . . . . . . . . . . . . . . . . . .3
Step 4 - Rig and Place Unit . . . . . . . . . . . . . . . . . . . . . . . . .3
• POSITIONING
Step 5 - Make Electrical Connections . . . . . . . . . . . . . .7
• HEAT ANTICIPATOR SETTINGS
Step 6 - Adjust Factory-Installed Options . . . . . . . . .12
Step 7 - Adjust Indoor-Fan Speed . . . . . . . . . . . . . . . . .25
PRE-START-UP . . . . . . . . . . . . . . . . . . . . . . . . . . . . . . . . . . . . .44
START-UP . . . . . . . . . . . . . . . . . . . . . . . . . . . . . . . . . . . . . . . 44-47
SERVICE . . . . . . . . . . . . . . . . . . . . . . . . . . . . . . . . . . . . . . . . 47-49
TROUBLESHOOTING . . . . . . . . . . . . . . . . . . . . . . . . . . . . 49-53
INDEX . . . . . . . . . . . . . . . . . . . . . . . . . . . . . . . . . . . . . . . . . . . . . .54
START-UP CHECKLIST . . . . . . . . . . . . . . . . . . . . . . . . . . CL-1
SAFETY CONSIDERATIONS
Installation and servicing of air-conditioning equipment can
be hazardous due to system pressure and electrical compo-
nents. Only trained and qualified service personnel should
install, repair, or service air-conditioning equipment.
Untrained personnel can perform basic maintenance func-
tions of cleaning coils and filters and replacing filters. All other
operations should be performed by trained service personnel.
When working on air-conditioning equipment, observe precau-
tions in the literature, tags and labels attached to the unit, and
other safety precautions that may apply.
Manufacturer reserves the right to discontinue, or change at any time, specifications or designs without notice and without incurring obligations.
Catalog No. 04-53500019-01
Book 1
4
Tab
5a 5a
Installation, Start-Up and
Service Instructions
Page
Printed in U.S.A.
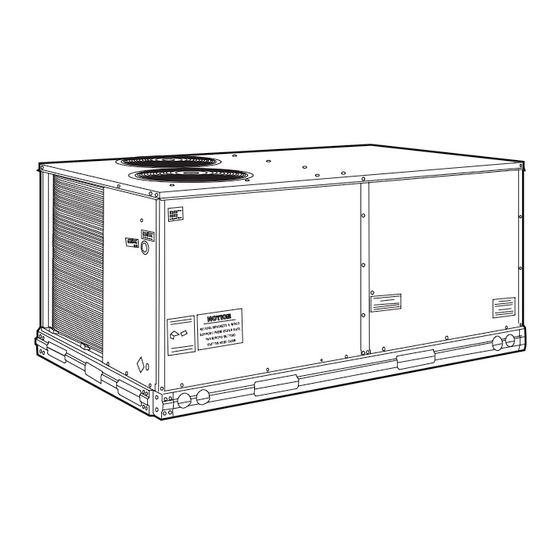
Single-Package Rooftop
Heat Pump Units
Follow all safety codes. Wear safety glasses and work
gloves. Use quenching cloth for unbrazing operations. Have
fire extinguisher available for all brazing operations.
Before performing service or maintenance operations on
unit, turn off main power switch to unit and install lockout
tag. Ensure voltage listed on unit data plate agrees with
electrical supply provided for the unit. Electrical shock
could cause personal injury.
INSTALLATION
Unit is shipped in the vertical configuration. To convert to
horizontal configuration, remove side duct opening covers. Us-
ing the same screws, install covers on vertical duct openings
with the insulation-side down. Seals around duct openings
must be tight.
Step 1 - Provide Unit Support
ROOF CURB - Assemble and install the accessory roof curb
in accordance with instructions shipped with the curb. See
Fig. 1. Install insulation, cant strips, roofing felt, and counter
flashing as shown. Ductwork must be attached to curb. If
electric or control power will be routed through the basepan,
use the proper accessory kit listed in Fig. 1, available from your
local distributor. Attach the accessory thru-the-bottom service
connections to the basepan in accordance with the accessory
installation instructions. Connections must be installed before
the unit is set on the roof curb.
IMPORTANT: The gasketing of the unit to the roof curb is
critical for a water-tight seal. Install gasket supplied with
the roof curb as shown in Fig. 1. Improperly applied gasket
can also result in air leaks and poor unit performance.
The roof curb should be level. Unit leveling tolerances are
shown in Fig. 2. This is necessary for the unit drain to function
properly. Refer to Accessory Roof Curb Installation Instruc-
tions for additional information as required.
Form 50TFQ-9SI
Pg 1
50TFQ008-012
9-05
Replaces: 50TFQ-7SI
Advertisement
Table of Contents

Related Manuals for Carrier 50TFQ008-012


Summary of Contents for Carrier 50TFQ008-012
-
Page 1: Table Of Contents
Fig. 2. This is necessary for the unit drain to function properly. Refer to Accessory Roof Curb Installation Instruc- tions for additional information as required. Printed in U.S.A. Form 50TFQ-9SI 50TFQ008-012 Heat Pump Units INSTALLATION Pg 1 9-05... - Page 2 Fig. 1 — Roof Curb Details...
-
Page 3: Slab Mount
MAXIMUM ALLOWABLE DIFFERENCE (in.) Fig. 2 — Unit Leveling Tolerances SLAB MOUNT (Horizontal Units Only) — Provide a level concrete slab that extends a minimum of 6 in. beyond the unit cabinet on all sides. Install a gravel apron in front of the outdoor coil air inlet to prevent grass and foliage from obstruct- ing airflow. - Page 4 NOTES: 1. Dimension in ( ) is in millimeters. 2. Hook rigging shackles through holes in base rail, as shown in detail “A.” Holes in base rails are centered around the unit center of gravity. Use wooden top skid when rigging to prevent rigging straps from damaging unit.
- Page 5 UNIT SIZE 50TFQ NOMINAL CAPACITY (tons) OPERATING WEIGHT (lb) Unit Economizer EconoMi$er IV Roof Curb* COMPRESSOR (Hermetic) Quantity Oil (oz) REFRIGERANT TYPE Operating Charge (lb-oz) Circuit 1 Circuit 2 OUTDOOR COIL Rows...Fins/in. Total Face Area (sq ft) OUTDOOR FAN Nominal Cfm Quantity...Diameter (in.) Motor Hp...Rpm Watts Input (Total)
-
Page 7: Field Power Supply
Operation on improper line voltage or excessive phase imbalance constitutes abuse -in. male spade and may cause damage to electrical components. Such opera- tion would invalidate any applicable Carrier warranty. LEGEND — Contactor COMP — Compressor —... - Page 8 50TFQ UNIT VOLTAGE UNIT SIZE (60 Hz) 208/230/240 (3 phase) 008, 009 460/480 (3 phase) (3 phase) 208/230/240 (3 phase) 460/480 (3 phase) (3 phase) *Two heater packages required to provide kW indicated. †Use CRSINGLE008A00 for units with an electrical convenience outlet. NOTES: 1.
- Page 9 Table 3A — Electrical Data (Units Without Electrical Convenience Outlet) (cont) VOLTAGE RANGE 50TFQ NOMINAL UNIT SIZE V-PH-Hz TYPE 208/230-3-60 HIGH-STATIC Tons) 460-3-60 HIGH-STATIC 575-3-60 HIGH-STATIC 208/230-3-60 HIGH-STATIC (10 Tons) 460-3-60 HIGH-STATIC 575-3-60 HIGH-STATIC NOTE: Legend and Notes for Electrical Data are on page 11. COMPRESSOR ELECTRIC HEAT* (each)
- Page 10 Table 3B — Electrical Data (Units With Electrical Convenience Outlet) VOLTAGE RANGE 50TFQ NOMINAL UNIT SIZE V-PH-Hz TYPE Min Max 208/230-3-60 HIGH-STATIC 187 Tons) 460-3-60 HIGH-STATIC 414 575-3-60 HIGH-STATIC 518 208/230-3-60 HIGH-STATIC 187 Tons) 460-3-60 HIGH-STATIC 414 575-3-60 HIGH-STATIC 518 NOTE: Legend and Notes for Electrical Data are on page 11.
- Page 11 Table 3B — Electrical Data (Units With Electrical Convenience Outlet) (cont) VOLTAGE RANGE 50TFQ NOMINAL UNIT SIZE V-PH-Hz TYPE 208/230-3-60 HIGH-STATIC (10 Tons) 460-3-60 HIGH-STATIC 575-3-60 HIGH-STATIC LEGEND — Full Load Amps HACR — Heating, Air Conditioning and Refrigeration — Indoor Fan Motor —...
-
Page 12: Field Control Wiring
NOTE: If using a Carrier electronic thermostat, set the thermo- stat configuration for “non-heat pump operation.” This family of products does not require an O terminal to energize the reversing valve. -
Page 13: Novar Controls
208/230 UNIT Configuration Heater 2-Stage 1-Stage Stage 1 10.4, 16.0 50TFQ 24.8, 32.0 42.4, 50.0 *kW is based on 240, 480, or 575 v. CONVENIENCE OUTLET — An optional convenience out- let provides power for rooftop use. For maintenance personnel safety, the convenience outlet power is off when the unit dis- connect is off. - Page 14 This control is designed to allow users the access and ability to change factory-defined settings, thus expanding the function of the standard unit control board. Carrier’s diag- nostic standard tier display tools such as Navigator™ module or Scrolling Marquee can be used with the PremierLink controller.
- Page 15 OUTDOOR AIR APPLICATION TEMPERATURE SENSOR Dry Bulb Temperature with PremierLink™* Included — (PremierLink HH79NZ017 requires 4-20 mA Actuator) Differential Dry Bulb Temperature with PremierLink* Included — (PremierLink HH79NZ017 requires 4-20 mA Actuator) Single Enthalpy with PremierLink* Included — (PremierLink Not Used requires 4-20 mA Actuator) Differential Enthalpy...
-
Page 16: Premierlink Control
PREMIERLINK CONTROL HINGED DOOR PANEL PREMIERLINK COVER Fig. 15B — PremierLink™ Controller (Installed) Space Temp./ Set Point Adjustment Indoor Air Quality Sensor Outdoor Air Quality Sensor Power Exhaust/Energy Recycler RMTOCC CMPSAFE GRAY GRAY OUTDOOR AIR ENTHALPY SENSOR Comm. Economi$er2 4 - 20mA RETURN AIR ENTHALPY SENSOR... -
Page 17: Mounting Plate
Connect the GRAY/RED wire to J4-1 on Premier- Link controller and to terminal (2) on enthalpy sensor. NOTE: If installing in a Carrier rooftop, use the two gray wires provided from the control section to the economizer to connect PremierLink controller to terminals 2 and 3 on enthalpy sensor. -
Page 18: Optional Economi$Er Iv And Economi$Er2
OPTIONAL ECONOMI$ER IV AND ECONOMI$ER2 — See Fig. 19 for EconoMi$er IV component locations. See Fig. 20 for EconoMi$er2 component locations. NOTE: These instructions are for installing the optional EconoMi$er IV and EconoMi$er2 only. Refer to the accessory EconoMi$er IV or EconoMi$er2 installation instructions when field installing an EconoMi$er IV or EconoMi$er2 accessory. - Page 19 6. Insert the hood divider between the hood sides. See Fig. 24 and 25. Secure hood divider with 2 screws on each hood side. The hood divider is also used as the bot- tom filter rack for the aluminum filter. 7.
- Page 20 500 OHM RESISTOR NOTE 1 NOTE 3 50HJ540573 ACTUATOR ASSEMBLY DIRECT DRIVE ACTUATOR NOTES: 1. Switch on actuator must be in run position for economizer to operate. 2. PremierLink™ control requires that the standard 50HJ540569 outside-air sensor be replaced by either the CROASENR001A00 dry bulb sensor or HH57A077 enthalpy sensor.
-
Page 21: Economi$Er Iv Standard Sensors
ECONOMI$ER IV STANDARD SENSORS Outdoor Air Temperature (OAT) Sensor — The outdoor air temperature sensor (HH57AC074) is a 10 to 20 mA device used to measure the outdoor-air temperature. The outdoor-air temperature is used to determine when the EconoMi$er IV can be used for free cooling. - Page 22 Fig. 32 — EconoMi$er IV Controller Potentiometer and LED Locations LED ON LED ON LED OFF LED ON LED OFF LED OFF DEGREES FAHRENHEIT Fig. 33 — Outside Air Temperature Changeover Set Points Differential Dry Bulb Control — For differential dry bulb control the standard outdoor dry bulb sensor is used in conjunc- tion with an additional accessory dry bulb sensor (part number CRTEMPSN002A00).
- Page 23 CONTROL CONTROL POINT CURVE APPROX. °F (°C) AT 50% RH 73 (23) 70 (21) 67 (19) 63 (17) (10) (10) APPROXIMATE DRY BULB TEMPERATURE— °F (°C) Fig. 35 — Enthalpy Changeover Set Points 24 Vac Open Free Cool Fig. 36 — EconoMi$er IV Control (29) (32) (35)
- Page 24 Exhaust Set Point Adjustment — The exhaust set point will determine when the exhaust fan runs based on damper position (if accessory power exhaust is installed). The set point is modi- fied with the Exhaust Fan Set Point (EXH SET) potentiometer. See Fig.
-
Page 25: Step 7 - Adjust Indoor-Fan Speed
See Table 8. Use setting 1 or 2 for Carrier equipment. See Table 8. 1. Press Clear and Mode buttons. Hold at least 5 seconds until the sensor enters the Edit mode. - Page 26 To align the fan and motor pulleys: 1. Loosen the fan pulley setscrews. 2. Slide the fan pulley along the fan shaft. 3. Make angular alignment by loosening the motor from the mounting plate. To adjust belt tension: 1. Loosen the fan motor mounting nuts. 2.
- Page 27 *The static pressure must be added to external static pressure. The sum and the evaporator entering-air cfm should then be used in conjunction with the Fan Performance tables to deter- mine blower rpm and watts. Table 11B — EconoMi$er IV and EconoMi$er2 Static Pressure* (in. wg) — 50TFQ008-012 COMPONENT Vertical EconoMi$er IV and EconoMi$er2 Horizontal EconoMi$er IV and EconoMi$er2 *The static pressure must be added to external static pressure.
- Page 28 Table 12 — Fan Performance, 50TFQ008 — Vertical Discharge Units; Standard Motor and Drive* AIRFLOW (Cfm) Watts 2250 0.58 2300 0.61 2400 0.68 2500 0.75 2550 0.79 2600 0.83 2700 0.91 2800 1.00 2900 1.09 1020 3000 1.20 1115 3100 1.30 1217 3200...
- Page 29 Table 13 — Fan Performance, 50TFQ008 — Vertical Discharge Units; Alternate Motor and Drive* AIRFLOW (Cfm) Watts 2250 0.58 2300 0.61 2400 0.68 2500 0.75 2550 0.79 2600 0.83 2700 0.91 2800 1.00 2900 1.09 1020 3000 1.20 1115 3100 1.30 1217 3200...
- Page 30 Table 14 — Fan Performance, 50TFQ008 — Vertical Discharge Units; High-Static Motor and Drive* AIRFLOW (Cfm) Watts 2250 0.58 2300 0.61 2400 0.68 2500 0.75 2550 0.79 2600 0.83 2700 0.91 2800 1.00 2900 1.09 1020 3000 1.20 1115 3100 1.30 1217 3200...
- Page 31 Table 15 — Fan Performance, 50TFQ009 — Vertical Discharge Units; Standard Motor and Drive* AIRFLOW (Cfm) Watts 2550 0.79 2600 0.83 2700 0.91 2800 1.00 2900 1.09 1020 3000 1.20 1115 3100 1.30 1217 3200 1.42 1324 3300 1.54 1438 3400 1.67 1558...
- Page 32 Table 16 — Fan Performance, 50TFQ009 — Vertical Discharge Units; High-Static Motor and Drive* AIRFLOW (Cfm) Watts 2550 0.79 2600 0.83 2700 0.91 2800 1.00 2900 1.09 1020 3000 1.20 1115 3100 1.30 1217 3200 1.42 1324 3300 1.54 1438 3400 1.67 1558...
- Page 33 Table 17 — Fan Performance, 50TFQ012 — Vertical Discharge Units; Standard Motor and Drive* AIRFLOW (Cfm) Watts 3000 0.65 3100 0.70 3200 0.76 3300 0.83 3400 0.89 3500 0.96 3600 1.04 3700 1.11 1040 3800 1.20 1116 3900 1.28 1197 4000 1.37 1281...
- Page 34 Table 18 — Fan Performance, 50TFQ012 — Vertical Discharge Units; Alternate Motor and Drive* AIRFLOW (Cfm) Watts 3000 0.65 3100 0.70 3200 0.76 3300 0.83 3400 0.89 3500 0.96 3600 1.04 3700 1.11 1040 3800 1.20 1116 3900 1.28 1197 4000 1.37 1281...
- Page 35 Table 19 — Fan Performance, 50TFQ012 — Vertical Discharge Units; High-Static Motor and Drive* AIRFLOW (Cfm) Watts 3000 0.65 3100 0.70 3200 0.76 3300 0.83 3400 0.89 3500 0.96 3600 1.04 3700 1.11 1040 3800 1.20 1116 3900 1.28 1197 4000 1.37 1281...
- Page 36 Table 20 — Fan Performance, 50TFQ008 — Horizontal Discharge Units; Standard Motor and Drive* AIRFLOW (Cfm) Watts 2250 0.49 2300 0.52 2400 0.57 2500 0.63 2550 0.66 2600 0.69 2700 0.76 2800 0.83 2900 0.91 3000 0.99 3100 1.07 1002 3200 1.17 1087...
- Page 37 Table 21 — Fan Performance, 50TFQ008 — Horizontal Discharge Units; Alternate Motor and Drive* AIRFLOW (Cfm) Watts 2250 0.49 2300 0.52 2400 0.57 2500 0.63 2550 0.66 2600 0.69 2700 0.76 2800 0.83 2900 0.91 3000 0.99 3100 1.07 1002 3200 1.17 1087...
- Page 38 Table 22 — Fan Performance, 50TFQ008 — Horizontal Discharge Units; High-Static Motor and Drive* AIRFLOW (Cfm) Watts 2250 0.49 2300 0.52 2400 0.57 2500 0.63 2550 0.66 2600 0.69 2700 0.76 2800 0.83 2900 0.91 3000 0.99 3100 1.07 1002 3200 1.17 1087...
- Page 39 Table 23 — Fan Performance, 50TFQ009 — Horizontal Discharge Units; Standard Motor and Drive* AIRFLOW (Cfm) Watts 2550 0.66 2600 0.69 2700 0.76 2800 0.83 2900 0.91 3000 0.99 3100 1.07 1002 3200 1.17 1087 3300 1.26 1177 3400 1.36 1271 3500 1.47...
- Page 40 Table 24 — Fan Performance, 50TFQ009 — Horizontal Discharge Units; High-Static Motor and Drive* AIRFLOW (Cfm) Watts 2550 0.66 2600 0.69 2700 0.76 2800 0.83 2900 0.91 3000 0.99 3100 1.07 1002 3200 1.17 1087 3300 1.26 1177 3400 1.36 1271 3500 1.47...
- Page 41 Table 25 — Fan Performance, 50TFQ012 — Horizontal Discharge Units; Standard Motor and Drive* AIRFLOW (Cfm) Watts 3000 0.58 3100 0.63 3200 0.68 3300 0.74 3400 0.80 3500 0.86 3600 0.93 3700 1.00 3800 1.07 3900 1.15 1069 4000 1.23 1144 4100 1.31...
- Page 42 Table 26 — Fan Performance, 50TFQ012 — Horizontal Discharge Units; Alternate Motor and Drive* AIRFLOW (Cfm) Watts 3000 0.58 3100 0.63 3200 0.68 3300 0.74 3400 0.80 3500 0.86 3600 0.93 3700 1.00 3800 1.07 3900 1.15 1069 4000 1.23 1144 4100 1.31...
- Page 43 3. Values include losses for filters, unit casing, and wet coils. See Tables 11A and 11B for static pressure information. 4. Use of a field-supplied motor may affect wire sizing. Contact your Carrier representative for details. 5. Interpolation is permissible. Do not extrapolate. Watts Watts 1.05...
-
Page 44: Pre-Start-Up
PRE-START-UP Failure to observe the following warnings could result in serious personal injury: 1. Follow recognized safety practices and wear protec- tive goggles when checking or servicing refrigerant system. 2. Do not operate the compressor or provide any electric power to the unit unless the compressor terminal cover is in place and secured. -
Page 45: Safety Relief
Heating — To start the unit, turn on the main power supply. Set the thermostat at HEAT position at a setting above room temperature, the fan at AUTO position. The first stage of the thermostat energizes the indoor-fan motor, compressor, and outdoor fan; the second stage energizes electric heater elements, if installed. -
Page 46: Temperature Control
• If SAT > SASP + 5 and economizer position >80%, economizer will go to minimum position for 3 minutes or until SAT > 68 F. • If compressor no. 1 is on then second stage of mechani- cal cooling will be energized. Otherwise the first stage will be energized. -
Page 47: Indoor Coil
HEATING, UNIT WITH ECONOMI$ER2, PREMIERLINK™ CONTROL AND A ROOM SENSOR — Every 40 seconds the controller will calculate the required heat stages (maximum of 3) to maintain supply air temperature (SAT) if the following qualifying conditions are met: • Indoor fan has been on for at least 30 seconds. •... - Page 48 Replacement Parts — A complete list of replacement parts can be obtained from any Carrier distributor. Fig. 47 — Cooling Charging Chart, 50TFQ008...
-
Page 49: Troubleshooting
A functional view of the EconoMi$er IV is shown in Fig. 51. Typical settings, sensor ranges, and jumper positions are also shown. An EconoMi$er IV simulator program is avail- able from Carrier to help with EconoMi$er IV training and troubleshooting. ECONOMI$ER IV PREPARATION — This procedure is used to prepare the EconoMi$er IV for troubleshooting. - Page 50 5. Turn the DCV set point potentiometer CW until the DCV LED turns off. The DCV LED should turn off when the potentiometer is approximately 9 v. The actuator should drive fully closed. 6. Turn the DCV and Exhaust potentiometers CCW until the Exhaust LED turns on.
- Page 51 — Contactor, Compressor — Capacitor — Circuit Breaker — Compressor Lockout COMP — Compressor Motor — Defrost Board — Defrost Thermostat EQUIP — Equipment — Freeze Protection Thermostat — Heater Contactor — High-Pressure Switch — Heater Relay — Indoor-Fan Contactor —...
- Page 52 Table 28 — Heating and Cooling Troubleshooting PROBLEM Compressor and Outdoor Fan Power failure. Will Not Start. Fuse blown or circuit breaker tripped. Defective thermostat, contactor, transformer, or control relay. Insufficient line voltage. Incorrect or faulty wiring. Thermostat setting too high. High-pressure switch tripped.
- Page 53 Table 29 — EconoMi$er IV Input/Output Logic INPUTS Enthalpy* Demand Control Ventilation (DCV) Outdoor Below set High (DCV LED Off) (Free Cooling LED Off) (Free Cooling LED On) Above set High (DCV LED On) (Free Cooling LED Off) (Free Cooling LED On) *For single enthalpy control, the module compares outdoor enthalpy to the ABCD set point.
-
Page 54: Index
Manual outdoor air damper Mounting Compressor Unit Novar controls Copyright 2005 Carrier Corporation Manufacturer reserves the right to discontinue, or change at any time, specifications or designs without notice and without incurring obligations. Book 1 Catalog No. 04-53500019-01 5a 5a... -
Page 56: Preliminary Information
GENERAL SET ECONOMIZER MINIMUM VENT AND CHANGEOVER SETTINGS TO MATCH JOB REQUIREMENTS (IF EQUIPPED) Copyright 2005 Carrier Corporation Manufacturer reserves the right to discontinue, or change at any time, specifications or designs without notice and without incurring obligations. Book Catalog No. 04-53500019-01...
Need help?
Do you have a question about the 50TFQ008-012 and is the answer not in the manual?
Questions and answers