Table of Contents
Advertisement
Quick Links
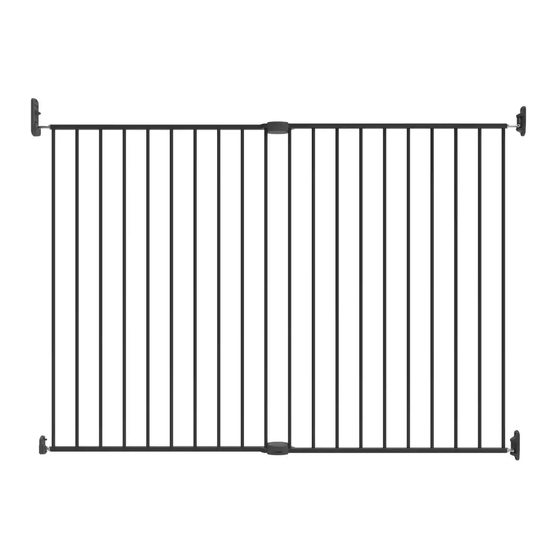
Extra Tall & Wide
Superior Swing Gate
INSTRUCTION MANUAL
IMPORTANT! READ AND FOLLOW
THESE INSTRUCTIONS
CAREFULLY AND KEEP
FOR FUTURE REFERENCE.
This product complies with safety standard ASTM F1004-21 & EN1930:2011
82cm - 142cm
(32.3" - 55.9")
FITS OPENINGS
#2769 Warm Black
91cm
(36")
TALL
INSTALLATION VIDEO
#2742 White
Advertisement
Table of Contents

Related Manuals for Perma child safety 2742

Summary of Contents for Perma child safety 2742
- Page 1 INSTALLATION VIDEO Extra Tall & Wide Superior Swing Gate INSTRUCTION MANUAL #2742 White #2769 Warm Black 82cm - 142cm 91cm (32.3” - 55.9”) (36”) FITS OPENINGS TALL IMPORTANT! READ AND FOLLOW THESE INSTRUCTIONS CAREFULLY AND KEEP FOR FUTURE REFERENCE. This product complies with safety standard ASTM F1004-21 & EN1930:2011...
-
Page 2: Table Of Contents
TABLE OF CONTENTS SAFETY INFORMATION General Maintenance Warnings 04-05 Mountings / Tools Required 06-07 WHAT’S IN THE BOX Parts 08-09 INSTALLATION Gate Placement Assembling Gate Panels 11-13 Hinge Side Mounting Locking Side Mounting 15-16 Hinge Assembly 16-17 Gate Adjustment 18 -19 OPERATION How to Operate Cleaning Instructions... -
Page 3: Safety Information
SAFETY INFORMATION GENERAL Read this instruction manual carefully and keep it in a safe place for future reference. The correct use and maintenance of this product is essential. MAINTENANCE Regularly check that the product is functioning correctly, lubricate hinges and moving components. Tighten and adjust mounts to ensure secure smooth operation. -
Page 4: Warnings
WARNING • Adult assembly required. • This gate is for domestic use only. • The gate must not be fitted across windows. • Always check that the gate is correctly closed. • Danger to older children if climbing over the product. •... - Page 5 WARNING • Use only with the locking/ latching mechanism securely engaged. • Make sure the product is installed as per the installation guides placement. • Regularly check that the gate is properly installed and secure. • Any additional or replacement parts should be obtained from after sales support.
-
Page 6: Mountings / Tools Required
SAFETY INFORMATION MOUNTINGS Gate must be installed in a structurally sound opening. Ensure mounting surface (wall, door, stair posts, etc.) is strong, rigid and has an even surface. Note: If the safety barrier is used at the top of the stairs, it should not be positioned below the top level. - Page 7 SAFETY INFORMATION Select the appropriate fixing method from the list below. HARD WALL MOUNTING BRICK / CONCRETE FOR INSTALLATION Wood Screws Anchor 2. Clear Hole 3. Insert Anchor & Tap 4. Tighten slowly 1. Drill 5mm (3/16”) Pilot Hole WOOD MOUNTING FOR INSTALLATION Wood Screws 2.
-
Page 8: What's In The Box
WHAT’S IN THE BOX PARTS 2 x Gate Panels 1 x Stop Pin (Pre-installed) 1 x Top Catch Bracket 1 x Bottom Catch Bracket 2 x Top Gate Connectors 2 x Bottom Gate Connectors... - Page 9 WHAT’S IN THE BOX HINGE ASSEMBLY 2 x Hinge Cap 2 x Spring Cover 2 x Springs 2 x Hinge Bolt 2 x Hinge Bottom 1 x Hinge Side Installation Guide 1 x Locking Side Installation Guide 8 x Screws 1 x Wrench 2 x Adjustable Catch Bolt...
-
Page 10: Installation
INSTALLATION Swing Gate Placement Suitable placement of Swing Gate. Bottom of Stairs If the gate must be installed on stairs, position it towards the front of the lowest step. Top of Stairs The gate must be installed on the top step or landing and only open away from the stairs (see page 15 for Swing DO NOT... -
Page 11: Assembling Gate Panels
INSTALLATION Step 1. Assembling Gate Panels 1. Adjust panels until gate is approximately the correct width. Panels should fit without any distance between rails or bars. Correct Incorrect... - Page 12 INSTALLATION 2. Secure Gate Panels together using Top and Bottom gate connectors. “CLICK” “CLICK”...
- Page 13 INSTALLATION 3. Screw Hinge Bolts into 4. Screw Adjustable Catch top and bottom rail of Bolts into top and bottom one gate panel. rails of second gate panel. Extend bolts equally. Extend bolts equally. Final Bolt adjustments NOTE: will be made later.
-
Page 14: Hinge Side Mounting
INSTALLATION Step 2. Hinge Side Mounting 1. Align template against mounting surface with the end marked “FLOOR” even with the floor. Mark screw hole positions. 2. Mount Upper and Lower Hinge Bottoms, secure in place with only bottom Screw. BOTTOM... -
Page 15: Locking Side Mounting
INSTALLATION Step 3. Locking Side Mounting 1. Align template against mounting surface with the end marked “FLOOR” even with the floor. Mark screw hole positions. 2. Determine which direction gate should open. For the top of stairways, gate should never open out over stairs. Insert Stop Pin from behind in holes of Bottom Catch Bracket opposite desired opening direction. -
Page 16: Hinge Assembly
INSTALLATION 3. Using the Screws provided mount Top and Bottom Catch Brackets in screw hole positions. Step 5. Hinge Assembly 1. Center gate in opening. Adjust Upper and Lower Hinge Bolts, so post fits into bolt eyelet. Place Spring and Spring Cover on upper and lower hinge posts. - Page 17 INSTALLATION IMPORTANT Leave at least 3cm (1.2”) to maximum 6cm (2”) gap on bolts for the locking side. Minimum 2.5cm (1”) to maximum 6cm (2”) gap on bolts for the hinge side. Make sure bolts extended equally on both sides. Locking Side Hinge Side Min.
-
Page 18: Gate Adjustment
INSTALLATION Step 6. Gate Adjustment 1. Adjust Catch Bolts until secure in both Top and Bottom Catch Brackets. Top Bolt must lock under locking latch when in the closed position. If gate is not at correct width, it may NOTE: be necessary to remove gate and readjust the panels. - Page 19 INSTALLATION 2. When satisfied with gate width, tighten all Screws with a Phillips head screw driver. With the Wrench, tighten all lock nuts towards the gate. Do not over-tighten lock nuts, CAUTION: over-tightening may damage thread.
-
Page 20: Operation
OPERATION HOW TO OPERATE Opening & Closing To open gate, press down on Top Catch Bracket with thumb. Lift gate out of brackets. To close and lock gate, Top Adjustable Catch Bolt must rest in Top Catch Bracket and Bottom Adjustable Catch Bolt must rest in Bottom Catch Bracket. -
Page 21: Cleaning Instructions
CLEANING INSTRUCTIONS Simply use a soft damp cloth to wipe Swing Gate, dry after cleaning. Do not use chemical or abrasive cleaners. -
Page 22: Support
SUPPORT WARRANTY CERTIFICATE Congratulations! You have made an excellent choice of this quality product. Our commitment to quality also includes our service. Should you, contrary to expectations, experience defects due to manufacturing faults, we will provide you with a warranty against defects as follows: WARRANTY The product is guaranteed to be free from from defects in workmanship and parts for a period of 12 months from the date of purchase. -
Page 23: Warranty Card
SUPPORT WARRANTY CARD DETAILS: Extra Tall & Wide Superior Swing Gate PRODUCT NAME: White 2742 / Warm Black 2769 (Please circle) PRODUCT NUMBER: YOUR NAME: ADDRESS: PHONE: EMAIL: DATE OF PURCHASE: LOCATION OF PURCHASE: We recommend that you keep a copy of your receipt, showing the date of purchase, with this warranty certificate and keep for your reference. - Page 24 Scan the QR code for Live Chat Support or visit: permachildsafety.com/contact-us Perma Child Safety @permachildsafety...
Need help?
Do you have a question about the 2742 and is the answer not in the manual?
Questions and answers