Table of Contents
Advertisement
Quick Links
Advertisement
Table of Contents

Related Manuals for HydroMatik FlexLine FLE05


Summary of Contents for HydroMatik FlexLine FLE05
- Page 1 FlexLine Electrode Steam Humidifiers Manual ÁFLE.ENBÈ FLE.EN E-8881162...
- Page 2 Certain computer programs contained in this product [or device] were developed by HygroMatik GmbH ("the Work(s)"). Copyright © HygroMatik GmbH [09.12.2021] FLE 05/10/15/20/25/30/40/50/65/80/100/130 EN All Rights reserved. Current version of this manual can be found at: www.hygromatik.co.uk HygroMatik GmbH grants the legal user of this product [or device] the right to use the Work(s) solely within the scope of the legitimate operation of the product [or device].
-
Page 3: Table Of Contents
1. Introduction ........................5 1.1 Typographic Distinctions ....................5 1.2 Documentation ........................5 1.3 Symbols in Use ......................... 5 1.3.1 Specific Symbols related to Safety Instructions ............. 5 1.3.2 General Symbols ......................5 1.4 Intended Use ........................6 2. Safety Instructions ......................7 2.1 Guidelines for Safe Operation ................... - Page 4 7.2 Cable connections ......................28 7.3 Safety interlock ........................28 7.4 Connection diagram ......................29 7.5 Electrical installation check list ..................29 8. Commissioning ......................... 30 9. Maintenance ........................31 9.1 General ..........................31 9.1.1 Service messages ......................31 9.1.2 Service messages for preventive maintenance .............. 31 9.1.3 Safety instructions for maintenance ................
-
Page 5: Introduction
1. Introduction Retention Please retain these operating instructions in Dear Customer, a secure, always accessible location. If the Thank you for choosing a HygroMatik steam product is resold, turn the documentation humidifier. over to the new operator. If the documenta- tion is lost, please contact HygroMatik. -
Page 6: Intended Use
1.4 Intended Use Only qualified and authorised personnel may operate the unit. Persons transporting or HygroMatik electrode steam humidifiers working on the unit must have read and serve for steam production based on tap understood the corresponding parts of the water or partially softened water. -
Page 7: Safety Instructions
2. Safety Instructions 2.1.3 Unit Operation These safety instructions are required by law. WARNING They promote workplace safety and accident prevention. Risk of scalding! Uncontrolled hot steam escape in case of 2.1 Guidelines for Safe Opera- leaking or defective components possible. tion Switch off unit immediately. -
Page 8: Mounting, Dismantling, Maintenance And Repair Of The Unit
2.1.4 Mounting, dismantling, mainte- After electrical installation or repair work, test nance and repair of the unit all safety mechanisms (such as grounding resistance). The HygroMatik steam humidifier is IP20 pro- tected. Make sure that the unit is not object to Use only original fuses with the appropriate dripping water in the mounting location. -
Page 9: Transport
3. Transport Time limits for filing freight claims with ship- ping companies are*: Please note After receipt of Shipping company goods Proceed carefully when transporting the steam humidifier in order to prevent damage Carriers no later than 4 days due to stress or careless loading and unload- ing. -
Page 10: Functional Description And Device Composition
4. Functional Description and 4.2 Mechanical Construction Device Composition The FlexLine humidifiers are designed for wall mounting. For maintainance purposes, 4.1 Mode of Action the steam cylinders are separable in the mid- dle. Making use of the frictional heat caused by current flow in a water tank Please note The HygroMatik humidifier utilizes the con-... -
Page 11: Operating Sequence
4.3 Operating sequence With normal water quality the blow-down loss rate lies between 7 and 15 % of the amount of steam produced. Depending on water By pressing the control switch („Pos. I”) the quality, a full steam cylinder blow-down is run humidifier is turned on. -
Page 12: Mechanical Installation
5. Mechanical installation • Installation in a closed room requires aeration and, eventually, temperature conditioning in order to meet the a.m. WARNING environmental conditions Risk of foot injuries! • steam humidifier should Prevent unit from dropping during installation! installed as close as possible to the Helping hand of a second person is advis- steam manifold. -
Page 13: Dimensions And Mounting Directions
5.1.1 Dimensions and Mounting Directions Table of dimensions Model X [mm/inch] Y [mm/inch] Z [mm/inch] A [mm/inch] B [mm/inch] FLE05-FLE10* 460/~21.3 535/~21 320/~12.6 310/~15.4 400/~15.7 FLE15-FLE25 540/~21.3 695/~27.4 320/~12.6 390/~15.4 560/~22 FLE30-FLE40 580/~22.8 750/~29.5 355/~14 425/~16.7 620/~24.4 FLE50-FLE65 640/~25 785/~30.9 420/~16.5 490/~19.3 650/~25.6... - Page 14 Mounting principle Please note • To function properly, the steam humidi- fier must hang level and plumb. • When choosing the installation loca- tion, consider the necessary distance between the unit and existing desig- nated paths. This should be at least 60 •...
-
Page 15: Unit Installation Check
5.2 Unit Installation Check Before start-up, pls. check proper unit instal- lation following the list below: Unit perpendicularly aligned in both the vertical and horizontal axis ? All clearances obeyed? Steam hose installed with a 5 - 10 % minimum incline/decline (see chap- ter "Steam line“) ? ... -
Page 16: Absorption Distance Bn
5.3 Absorption Distance B 5.3.1 Determining the Absorption Distance The "absorption distance" (B ) is defined as To determine the absorption distance, the fol- the distance from the steam feed to where lowing parameters are required: the steam is completely absorbed in the treated air. -
Page 17: Absorption Distance Nomogram
5.3.2 Absorption Distance Nomogram Source: Henne, Erich: Luftbefeuchtung (Air Humidification), 3 Edition 1984 (Page 101), Olden- bourg Industrieverlag, Munich Page 17... -
Page 18: Steam Manifold
5.4 Steam Manifold Water drain • We point out that according to the Ger- 5.4.1 General installation guidelines man Association of engineers (VDI) guideline VDI 6022, a water drain must When installing steam manifolds, pls. follow be provided within the absorption these guidelines: distance inside the air duct When increased airflow speed is encoun-... - Page 19 Minimum distance for condensation Air flow avoidance: direction = 210mm/8.3 inch: „Steam manifold - Next steam manifold“ distance = 120mm/4.7 inch: „Lowest steam manifold - Duct bottom plane“ distance = 120mm/4.7 inch: „Highest steam manifold - Duct ceiling plane“ distance Steam manifold arrangement for special air duct shapings flat...
- Page 20 Vertical steam manifold installation Steam manifold arrangement Air flow direction Steam supply Horizontal installation of the steam mani- folds is preferable. However, vertical installation into the air duct from below is also possible. Standard manifold dimensions [mm]/ [inch]***: 220/ 400/ 600/ 900/ 1200/...
-
Page 21: Steam Line And Condensate Hose Layout
5.5 Steam line and condensate 5.5.2 Condensate hose layout hose layout (only for electrode steam humidifiers) The condensate hose may be run from the Please note steam manifold back to the steam cylinder, as depicted in the schematic drawing below Because of the high requirements on hose with concern to installation type 1. -
Page 22: Steam Line And Condensate Hose Installation Types
5.5.3 Steam line and condensate Installation type 2 hose installation types Steam manifold is positioned less than 500 mm above or below device upper Installation type 1 edge: Steam manifold is positioned more than 500 mm above device upper edge: Please note »... -
Page 23: Water Connection
6. Water connection The following applies to electrode steam humidifiers: • Use feed water without chemical addi- WARNING tives and with a conductivity between Risk of scalding! 200 and 800 µS/cm only. Beyond con- Very hot water to be found in and around the ductivity levels of 800µS/cm up to a steam humidifier during and after operation. -
Page 24: Operation Of Electrode Steam Humidifier With Softened Water
6.1 Operation of electrode steam 6.2 Water supply humidifier with softened water Foreign material in water supply pipe may cause premature wear of the solenoid Do not use softened water unless special valve. measures are taken! Flush the water supply pipe before making connection to the solenoid valve. -
Page 25: Water Discharge
6.3 Water discharge WARNING Risk of scalding! During blow down, up to 0.3 l/sec (08 gal./ sec) are being drained with a temperature of about 95 °C (203°F). Ensure that the drain hose is reliably fas- tened and wastewater can drain freely and pressureless. -
Page 26: Water Connections Final Check
6.4 Water connections final check Drain hose from Go down the following water installation checklist: Drain stub on All screws and clamps properly housng tightened? Grounding clips Water supply line flushed before making connections? Water connection properly installed? ... -
Page 27: Electrical Connection
7. Electrical connection 7.1 Electrical installation approach » Provide fuses with a contact gap of WARNING at least 3mm per pole. » Install a separate main connection Risk of electrical shock! for each steam cylinder including Hazardous electrical voltage. main circuit breaker, main switch All work related to electrical installation to be etc. -
Page 28: Cable Connections
7.2 Cable connections 7.3 Safety interlock The table below shows the number and WARNING dimensioning of the cable connections pro- vided by the various FlexLine housing types. Risk of electrical shock! Hazardous electrical voltage. Blind When standard wiring was made, terminal 1 Model with plug... -
Page 29: Connection Diagram
7.4 Connection diagram The device-specific wiring diagrams are included in the scope of delivery. Please use them for the installation and keep them in a safe place. 7.5 Electrical installation check list Check electrical installation with respect to customer-site requirements and local power supply regulations. -
Page 30: Commissioning
8. Commissioning Step 4: Trigger steam demand » Set control to 1-step operation, i.e. permanent steam demand, and WARNING close safety interlock. Risk of operating error! » Allow all electrical functions to termi- Start-up of the unit is restricted to expert staff nate in their programmed order. -
Page 31: Maintenance
9. Maintenance After a „Steam_amount_counter“ message, maintenance work mainly encompasses 9.1 General checking and cleaning all of the unit parts For the achievement of a long unit life span, including the steam cylinder inside, and a unit regular maintenance is a must. Maintenance test run. -
Page 32: Safety Instructions For Maintenance
9.1.3 Safety instructions for mainte- nance Risk of electrical shock! Hazardous electrical voltage. Unit must be switched off and protected against restart by expert staff (electricians or expert personnel with equivalent training) before any mainte- nance work is commenced. Risk of skin burning! Hot steam cylinder during operation and for some time afterwards. -
Page 33: Maintenance Frame Work
9.2 Maintenance frame work Mineral deposits precipitate and crystallize Very seldomly, water pretreatment may be very differently in different types of water, necessary (softening by dilution to approx. 4 - even when two types have the same conduc- 8 °gH; decarbonization/partial desalination to tivity and hardness levels (the various constit- achieve target reductions in carbonate hard- uents in the water interact differently). -
Page 34: Removal And Reinstallation Of The Steam Cylinder
9.3 Removal and reinstallation of If the steam hose is not to be disconnected, the steam hose adapter with the steam hose the steam cylinder still attached may be detached from the steam cylinder as shown in the next figures. 9.3.1 Removal of the steam cylinder »... -
Page 35: Cylinder Cleaning / O-Ring Replacement
» Lift steam the cylinder from the cylin- » Separate cylinder halves. der base. » Remove the used O-rings between the cylinder halves, in the base and in the steam hose adapter. 9.3.2 Cylinder cleaning O-ring replacement For cleaning, mechanical removal of the deposits is usually sufficient. - Page 36 » Clean the strainer. » Replace the O-rings of the elec- trodes. » Install new electrodes (48). Make sure that the electrodes are posi- tioned correctly (see exploded view). The deposits in the upper part of the cylinder can be conductive and lead to unwanted cur- rents between the electrode connections and the sensor electrode and thus to the mes- sage "cylinder full".
-
Page 37: Cleaning The Connecting Hoses, Base Connections, Fine Filter And Drain Pump
» Put the cylinder halves together and reconnect them with the flange clamps. When operating with partially softened water or tap water, scale may be discharged with the steam flow and may settle in the nozzle positioned in steam hose adapter. Therefore, this nozzle should be inspected regularly as part of the general maintenance review and cleaned if necessary. -
Page 38: Reinstallation Of The Steam Cylinder
9.3.5 Reinstallation of the steam cyl- inder Risk of functional disruption! » Place the cylinder vertically in cylin- Risk of material damage! der base. Loose cable connections may result in increased transition resistance and contact area overheating. » Reattach Super Flush solenoid hose (if applicable) to steam cylinder bot- tom stub. -
Page 39: Removal And Installation Of Unit Components
9.4 Removal and installation of Reinstallation unit components » Moisten the new O-ring (33) and insert into cylinder base (37) hori- zontal stub. 9.4.1 Blow-down pump (removal, cleaning, reinstallation) » Push pump back into cylinder base and bolt to bottom plate encorporat- Removal and cleaning ing the vibration buffer (42) and washers saved during removal. -
Page 40: Solenoid Valve (Removal, Reinstallation)
9.4.2 Solenoid valve (removal, rein- 9.4.3 Electrode replacement stallation) » Remove the cylinder and open it Removal (see also chapter Removal of the steam cylinder). » Shut off water supply and disconnect tap water hose cap screw connection. Please note »... - Page 41 Electrode wear Eelctrode wear depends on: O-ring • composition and conductivity of the supply water hidden • the amount of steam produced O-ring electrode Two-fold sealing of the electrodes for the steam cylinder CY45/2 (FLE50/65/100/130) » Hand tighten the nuts. »...
-
Page 42: Leak Test
9.5 Leak test 9.6 Functional check » Run the system with maximum out- put for a couple of minutes Risk of electrical shock! » Check hose connections and seals Hazardous electrical voltage! for leakage. Follow safety instruction for work on live com- ponents. -
Page 43: Dismantling
Dismantling Once the steam humidifier will no longer be used, dismantle (demolish or scrap) it by fol- lowing the installation procedures in reverse order. WARNING Dismantling of the unit may only be per- formed by qualified personnel. Electrical dis- mantling may only be performed by trained electricians. -
Page 44: Declaration Of Conformity
11. Declaration of Conformity Page 44... -
Page 45: Spare Parts
12. Spare Parts FLE05 FLE15 FLE20 FLE25 FLE30 FLE40 FLE50 FLE65 FLE80 FLE100 FLE130 Article No. Description FLE10 Steam generation B-3204029 Sensor electrode B-2204073 Sensor electrode E-2204202 Hand nut M6, grey, for sensor electrode B-3216021 CYlinder flange clamps, set=24pc E-3220000 CYlinder base E-2206086 CYlinder base... - Page 46 Spare Parts (continued) FLE05 FLE15 FLE20 FLE25 FLE30 FLE40 FLE50 FLE65 FLE80 FLE100 FLE130 Article No. Description FLE10 Water feed WF-03-00010 Solenoid valve, 1,1l/min, 220-240V, 0,2 - 10bar, with mounting set WF-04-00010 Solenoid valve, 2,3l/min, 220-240V, 0,2 - 10bar, with mounting set WF-06-00010 Solenoid valve, 3,4l/min, 220-240V, 0,2 - 10bar, with mounting set E-2604002 Connecting hose solenoid valve - CYlinder base [m]...
- Page 47 Spare Parts (continued) FLE05 FLE15 FLE20 FLE25 FLE30 FLE40 FLE50 FLE65 FLE80 FLE100 FLE130 Article No. Description FLE10 Accessories SP-07-26000 Steam hose DN25, per m SP-07-26001 Steam hose DN40, per m E-2420423 Drain hose 1 1/4", per m E-2604002 Condensate hose DN12, per m E-2404004 Steam hose clamp DN25 E-2604016...
-
Page 48: Technical Specifications
13. Technical specifications FLE Steam Humidifier Climate Technical specifications FlexLine electrodes Unit type FLE05 FLE10 FLE15 FLE20 FLE25 FLE30 Steam output [kg/h] 10,0 15,0 20,0 25,0 30,0 4,7 - - 5,2 9,5 - - 10,4 14,2 - - 15,5 19,0 - - 20,8 23,8 - - 26,0... - Page 49 FLE Steam Humidifier Spa Technical specifications FlexLine electrodes Unit type FLE05 FLE10 FLE15 FLE20 FLE25 FLE30 Steam output [kg/h] 10,0 15,0 20,0 25,0 30,0 4,7 - - 5,2 9,5 - - 10,4 14,2 - - 15,5 19,0 - - 20,8 23,8 - - 26,0 28,5 -...
-
Page 50: Exploded View
14. Exploded view Page 50... -
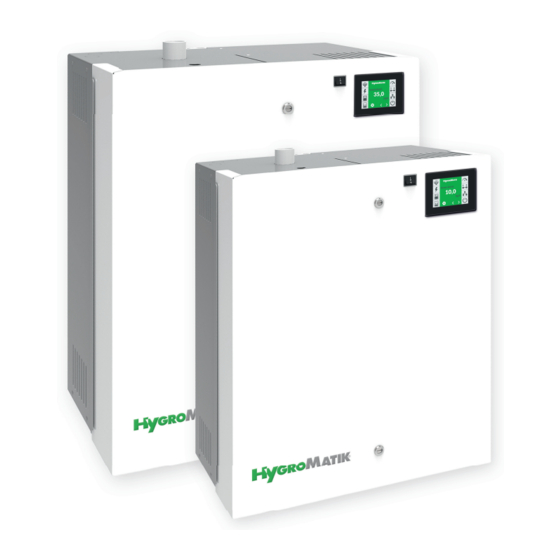
Page 51: View Of Housing
15. View of housing FLE05 - FLE30 FLE80 FLE40 FLE100, FLE130 FLE50, FLE65 Page 51... - Page 52 Lise-Meitner-Str.3 • D-24558 Henstedt-Ulzburg Phone +49(0)4193/ 895-0 • Fax -33 eMail hy@hygromatik.de • www.hygromatik.com member of CAREL Group Ein Unternehmen der Gruppe 100%...
Need help?
Do you have a question about the FlexLine FLE05 and is the answer not in the manual?
Questions and answers