
Related Manuals for FujiFilm 4700


Summary of Contents for FujiFilm 4700
- Page 1 This manual will show you how to use your FUJIFILM DIGITAL CAMERA BB10959-200 ( 1 ) FinePix4700 ZOOM correctly. Please follow the instructions carefully.
- Page 2 Warning To prevent fire or shock hazard, do not expose the unit to rain or moisture. CAUTION: TO REDUCE THE RISK OF ELECTRIC SHOCK. DO NOT REMOVE COVER (OR BACK). NO USER-SERVICEABLE PARTS INSIDE. REFER SERVICING TO QUALIFIED SERVICE PERSONNEL. For customers in the U.S.A.
-
Page 3: Table Of Contents
Contents 3 Advanced Features Preface Camera Features and Accessories ADVANCED FEATURES PHOTOGRAPHY ... 41 Nomenclature Photography mode specifications ... 41 PHOTOGRAPHY MODE 1 Getting Ready 7 PORTRAIT ... 42 ATTACHING THE STRAP ... 15 SELECTING THE POWER SUPPLY ... 16 Using Batteries ... -
Page 4: Preface
Notes on Copyright camera to impacts or shocks while an image is being recorded. Images recorded using your digital camera system cannot be Trademark Information used in ways that infringe copyright laws without the consent of IBM PC/AT is a registered trademark of International Business the owner, unless intended only for personal use. -
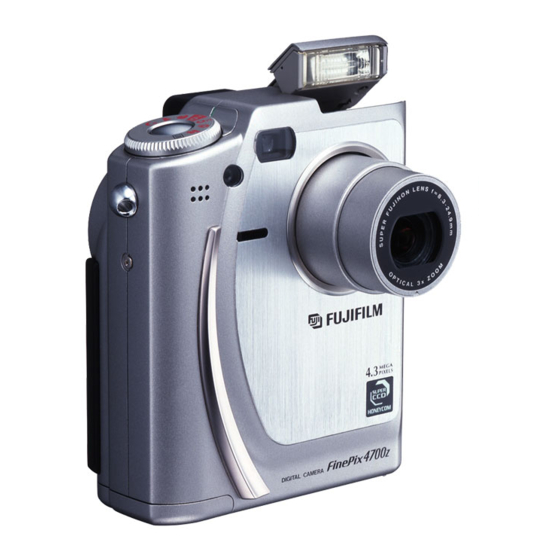
Page 5: Nomenclature
Nomenclature Refer to the pages in parentheses for more details. Viewfinder window Shutter button Photography Mode dial(P.12) Strap mount(P.15) Microphone(P.47) Flash control sensor Self-timer lamp(P.65) Lens/Lens Cover Viewfinder(P.26) Mode switch(P.12) Flash(P.59) POWER button(P.12) SHIFT/r button Flash pop-up button(P.59) DISP button(P.32·37) Speaker(P.99) SmartMedia slot cover release button(P.19) - Page 6 Nomenclature LCD panel Icons are displayed on the LCD panel to help with different camera operations. Use these icons as a guide to using the 4-direction button. Mode display 4-direction button setting display ( No. of remaining shots /Remaining time This panel allows you to check and modify camera settings such as the photography or playback mode, the number of remaining shots or remaining time, the quality setting, resolution, flash setting, macro setting and self-timer setting.
- Page 7 Nomenclature Mode switch Mode switch Power button Photography Mode dial Continuous shooting Manual Auto Portrait Landscape Photography Mode dial Setup ( P.92) Photography mode Movie ( P.47) Continuous shooting ( P.45) Playback mode Manual ( P.44) Auto Movie ( P.24·42) Setup Portrait ( P.42) Landscape ( P.42)
-
Page 8: Getting Ready
Nomenclature Example of LCD Monitor Text Display • Shooting Photography Mode YMacro photography icon bSelf-Timer photography icon Zoom bar Date Example of LCD Monitor Text Display • Playback Playback mode Date *The above screen shows the NTSC model. The date order differs in the PAL model (day. month. year). Some items are displayed depending on the camera mode and photography conditions. -
Page 9: Selecting The Power Supply
13 hours, but the power lamp remains lit. AA-size Ni-MH batteries Unplug the battery charger from the power outlet Fujifilm HR-3UF : 2 (supplied with the camera or sold separately) when it is not in use. AA-size Ni-Cd batteries... -
Page 10: Using The Ac Power Adapter
Operation of this camera is only guaranteed when it off to protect the SmartMedia. is used with Fujifilm SmartMedia. The SmartMedia will not slide fully into the slot if it is Some 3.3V SmartMedia are labelled as “3V ” cards. -
Page 11: Switching On And Off
LOADING AND REMOVEING THE SmartMedia Removing the SmartMedia Push the SmartMedia into the slot slightly and allow it to pop back out. It can then be pulled out Check that the indicator in the viewfinder is easily. green and then switch the camera off. Release the SmartMedia cover lock as shown in the figure. -
Page 12: Setting The Date And Time
SETTING THE DATE AND TIME Set the Mode switch to “ 0 ” Set the Press “ Photography Mode dial to“ ”.The SET–UP “DATE/TIME”. screen appears on the LCD monitor. See P.92 for more information on the items in the “... -
Page 13: Basic Photography
Basic TAKING PICTURES (AUTO MODE) Photography Set the Mode switch to “ 0 ” Set the Photography Mode dial to “ 3 ” Loop the strap over your wrist, brace your To take pictures using the LCD monitor, press DISP button to switch the LCD monitor on. - Page 14 TAKING PICTURES (AUTO MODE) AF frame LCD monitor When you are using the viewfinder to take a picture at a distance of 0.8 to 1.5 meters (2.6 to 4.8 ft.), only the shaded area in the figure is photographed. AF frame Viewfinder Using the viewfinder or LCD monitor, frame your shot so that the subject fills the entire AF (Auto...
-
Page 15: Number Of Available Frames
TAKING PICTURES (AUTO MODE) Viewfinder Lamp Display Though the FinePix4700 ZOOM uses an Color Status Meaning accurate autofocus mechanism, it may have difficulty focusing or not be able to Ready to shoot focus at all for the types of subject and AF/AE in progress or camera shake situation listed below. -
Page 16: Using Af/Ae Lock
USING AF/AE LOCK In a shot with this type of composition, the Move the camera slightly so that one of the subjects (two people in this case) are not in the subjects in the AF frame. AF frame. If the shot is taken at this point, the subjects will not be in focus. -
Page 17: Framing Guideline Function
FRAMING GUIDELINE FUNCTION LCD monitor OFF LCD monitor ON Framing Guideline displayed During shooting, when the Photography Mode You can select an framing guideline by holding dial is set to “ ”, “ ”, “ ” or “ ”, the display down the “SHIFT/ r ”... -
Page 18: Viewing Your Images (Playback)
Images That Can be Viewed on the FinePix4700 ZOOM You can use this camera to view images recorded on an FinePix4700 ZOOM or images recorded onto a 3.3V SmartMedia using a Fujifilm MX series and DX series digital camera. FAST FORWARDING IMAGES... -
Page 19: Playback Zoom
PLAYBACK ZOOM After you have zoomed an image, move around the image by holding down the “SHIFT/ r ” button, and “ Pressing “ ” and “ ” on the 4-direction button during playback zooms in and out on (enlarges and reduces) the still image respectively. -
Page 20: Erasing Single Frame
ERASING SINGLE FRAME “ ” Select “FRAME” in the ERASE menu and Set the mode switch to “ ”, and press the press the “MENU/EXE” button. “MENU/EXE” button to display the Menu screen on the LCD monitor. See P.71 for more information on the Playback mode menu. -
Page 21: Using A Tv Monitor
USING A TV MONITOR A/V OUT socket Switch off the camera and TV. Plug the A/V Plug the other end of the cable into the cable (accessory) into the A/V OUT (audio-visual audio/video input socket on the TV. Then switch output) socket on the camera. -
Page 22: Auto
AUTO 7 PORTRAIT 6 LANDSCAPE PHOTOGRAPHY MODE This is the simplest mode to use and has a wide range of applications. ( P.24) 7 Portrait This mode is for shots of people. It shows skin tones beautifully and gives a softer image. Macro photography cannot be used in this mode. -
Page 23: Manual
MANUAL PHOTOGRAPHY MODE If you take a picture using the factory default Manual settings, a preview screen (showing the Manual mode allows you to take pictures using a photographed image) is displayed on the LCD particular set of desired menu settings. monitor. -
Page 24: Movie
CONTINUOUS SHOOTING PHOTOGRAPHY MODE After the shooting is done, the preview pictures will be displayed on the monitor in the order that they are shot, is first, is second, is third. To record the images, press the “MENU/EXE” button. The “STORING” message appears on the LCD monitor while the images are being recorded onto the SmartMedia. - Page 25 9 MOVIE PHOTOGRAPHY MODE Shooting begins when you press the shutter button down fully. In movie photography, the lens is fixed at the wide-angle setting. Only digital zooming can be used. The “ ” and “ ” keys on the 4-direction button control the digital zoom.
-
Page 26: Photography Menu
PHOTOGRAPHY MENU To move to another menu page, press “ “ the menu (“ Press the “ MENU/EXE” button to display the menu on the LCD monitor. Use “ ” and “ ” on the 4-direction button to select the menu setting. Use “... -
Page 27: Mflash Brightness Adjustment
PHOTOGRAPHY MENU PHOTOGRAPHY MENU FLASH BRIGHTNESS ADJUSTMENT You can set the flash brightness when the You can set the white balance when the photography mode is set to “ ”. photography mode is set to “ Set the Flash Power setting to achieve the Change the white balance setting when you optimum flash brightness when the subject in want to take a picture with the white balance... -
Page 28: Setting The Manual Focus
SETTING THE MANUAL FOCUS PHOTOGRAPHY MENU Press “ focus closer ( further ( the LCD monitor. You can select manual focus when the photography mode is set to “ ”, “ ” or “ ”. Use manual focus when the AF function does not focus the camera or for subjects that are not Because the macro and flash settings cannot be suited to AF ( P.28). -
Page 29: Sharpness
SHARPNESS PHOTOGRAPHY MENU Three levels of sharpness are available. You can set the sharpness when the photography mode is set to “ ”. Use this setting to soften or emphasize outlines or to adjust the image quality. The sharpness can be set to ±1 level. PHOTOGRAPHY MENU :Emphasizes the outlines. -
Page 30: Auto Bracketing
AUTO BRACKETING PHOTOGRAPHY MENU Auto Bracketing can only be specified when the When you take the picture, the preview screen photography mode is set to “ ”. Use this appears. feature to photograph the same image with normal image, and different exposure settings. -
Page 31: Auto Flash Mode
FLASH PHOTOGRAPHY Z Red-Eye Reduction Auto flash mode Use this mode for ordinary photography. The Use this mode to ensure that the subject's eyes flash fires automatically as required by the appear natural when photographing people in shooting conditions. low-light conditions. The flash fires a pre-flash just before the picture is taken and then fires again to take the actual picture. -
Page 32: Suppressed Flash
FLASH PHOTOGRAPHY Press the flash unit down to suppress flash Suppressed Flash operation. The “ a” icon appears on the LCD Pressing the flash unit down suppresses flash panel. operation. In this mode, the flash never fires. Use this mode when you are taking pictures in indoor lighting at distances too great for the flash to have any effect, such as theater performances or indoor sporting events. -
Page 33: Self-Timer Photography
b SELF-TIMER PHOTOGRAPHY In the “ ”, “ ”, “ ”, “ ”, “ ” and “ ” modes, holding down the “SHIFT/ r ”button button and pressing “ ” on the 4-direction button switches the mode to self-timer photography. Position the AF frame over the subject and Repeat the operation to cancel self-timer mode. -
Page 34: Digital Zoom
DIGITAL ZOOM When the file size setting is “1280 960” or A "zoom bar" is displayed on the LCD monitor, “640 480”, you can use the optical 3 zoom but the length of the bar varies depending on the and then the digital zoom by repeatedly pressing file size setting. -
Page 35: Movie Playback
MOVIE PLAYBACK Distinguishing between still images and movies The “ ” icon displayed in the middle of the LCD panel indicates a still image, while the “ ” icon indicates a movie. Use “ select the movie file. The screen used for movie appears on the LCD monitor. -
Page 36: Playback Menu
MOVIE PLAYBACK Press “ ” to pause movie playback. Press “ ” again to resume playback.To stop playback altogether, press “ ”. You can advance frames in a movie by pressing “ Hold down the button to advance rapidly through the frames. You can also view the movie in reverse by holding down the “SHIFT/r ”... -
Page 37: Playback ( Automatic Playback )
ALL FRAMES / FORMATTING ERASING SINGLE • PLAYBACK MENU Press “ ” or “ ” to select “ ERASE”. A confirmation screen appears. If you are erasing all the frames or formatting the Use the “ ” and “ ” buttons to select card, press the “MENU/EXE”... -
Page 38: Resize
RESIZE PLAYBACK MENU When you resize an image, a new file is created containing a smaller amount of data. Only still images with a size of 2400 1800 or 1280 960 can be resized. The resize menu option cannot be selected for images with a size other than 2400 1800 or 1280... -
Page 39: Setting And Removing Single-Frame Protection
SETTING AND REMOVING SINGLE-FRAME PROTECTION PLAYBACK MENU Press the “MENU/EXE” button to display the Use “ menu on the LCD monitor. Press “ Press “MENU/EXE”. Protection: A setting that prevents images from being inadvertently erased ( P.71). Multi-frame playback is an easy way to select images to be protected ( P.37). -
Page 40: Setting And Removing Protection For All Frames
SETTING AND REMOVING PROTECTION FOR ALL FRAMES PLAYBACK MENU Press the “MENU/EXE” button to display the Use “ menu on the LCD monitor. Press “ “UNPROTECT ALL”. Press “MENU/EXE”. Formatting erases all images, including protected images ( P.71). ” or “ ”... -
Page 41: How To Specify Print Options
HOW TO SPECIFY PRINT OPTIONS With the FinePix4700 ZOOM, you can order prints using the Digital Print Order Format (DPOF). You can use the DPOF to specify the following: The frames to be printed and the number of prints for each frame Imprinting of the date and time This section gives a detailed description of how to order your prints with the FinePix4700 ZOOM. -
Page 42: Dpof Set Frame
DPOF SET FRAME PLAYBACK MENU Use “ ” or “ ” to select “FRAME”. Use “ Press the “MENU/EXE” button. specified. Use “ If you are not specifying cropping, proceed to step Always specify the date setting before proceeding to Up to 99 prints can be specified for each frame, and other settings. - Page 43 DPOF SET FRAME PLAYBACK MENU To specify prints for another frame, use the “ and “ specify the number of prints. Check the trimming settings on the LCD monitor and then press the “MENU/EXE” button to confirm the settings. To Continue ”...
-
Page 44: Dpof Review/Cancel
DPOF REVIEW / CANCEL PLAYBACK MENU Use “ ” or “ ” to select “REVIEW/CANCEL”. You can confirm the settings for only those frames with a specified number of prints by Press the “MENU/EXE” button. pressing “ are displayed on the right of the screen. Multi-frame playback is an easy way to select images ( P.37). -
Page 45: Dpof Set All/Cancel All
DPOF SET ALL / CANCEL ALL PLAYBACK MENU Use “ ” or “ ” to select “SET ALL/CANCEL Use “ ALL”. “CANCEL ALL”. Press the “MENU/EXE” button. Press sthe “MENU/EXE” button to set the selected option. “SET ALL” specifies 1 print for all the images. The SET FRAME specifications and cropping settings are cancelled. -
Page 46: Create Index
CREATE INDEX PLAYBACK MENU Index creation can only be specified when there are image files selected. This feature creates index images which allow you to view the content of a movie file without playing it back. To create the index, the function selects 25 image frames from the movie file at regular intervals and then saves them in rows as a single image (2400... -
Page 47: Setting
SET-UP MODE Setting Settings Display Factory default Sets the compression ratio for recording. Can be set as QUALITY FINE/NORMAL/BASIC NORMAL described on P.94. 2400 1800/ Sets the number of pixels recorded (image file size). 1280 960/ FILE SIZE 2400 1800 Can be set as described on P.95. -
Page 48: Setting The Image Quality
SETTING THE IMAGE QUALITY You can select any of 3 image quality (recorded image compression ratio) settings as required. The number of shots available varies depending on the image quality. See P.29 for information on the number of shots available for each type of SmartMedia. -
Page 49: Frame No.memory
FRAME NO.MEMORY Formatted SmartMedia used for both A and B. You can check the file number by viewing the image. The last 4 digits of the 7-digit number in Setting this function to “CONT” makes file the top right corner of the screen are the file management easier as it ensures that file names numbers, while the first 3 digits show the are not duplicated when images are downloaded to... -
Page 50: Adjusting The Lcd Monitor Brightness And The Speaker Volume
STARTUP SCREEN If you set “STARTUP SCREEN” in the SET-UP S E T ? menu to ON, the registered image is displayed when you switch the camera on. A registration confirmation screen appears. To register the current selection, press the “MENU/EXE”... -
Page 51: System Expansion Options
System Expansion Options By using the FinePix4700 ZOOM together with other optional Fujifilm products, your system can be expanded to fill a wide range of uses. See P.101 to 104 for details. FinePix4700 ZOOM Digital Camera SmartMedia Audio/Visual output (Floppy disk drive) -
Page 52: Optional Accessories Guide
Fujifilm Rechargeable Battery 4KR-3UF The 4KR-3UF includes 4 pieces of high-capacity AA-size Ni-Cd batteries. Fujifilm Battery charger with Battery BK-NH (AC 220V only) The BK-NH includes the quick battery charger BCH-NH and 2 Ni-MH batteries. The BCH-NH can charge 2 Ni-MH batteries in approximately 110 minutes. -
Page 53: Explanation Of Terms
DPOF is a format used for recording information on a storage media (image memory card, etc.) that allows you to specify which of the frames shot using a digital camera are printed and how many prints are made of each image. -
Page 54: Notes On Using Your Camera Correctly
LCD surface and then wipe lightly with a soft, dry cloth. If any soiling remains, apply a small amount of lens cleaning liquid to a piece of Fujifilm lens cleaning paper and wipe gently. Do not scratch hard objects against the lens, LCD... -
Page 55: Notes On Using The Battery Charger
This is normal and does not indicate batteries a fault. Do not use the battery charger to recharge batteries other than Fujifilm HR-AA NiMH batteries or Fujifilm KR- Charging AA Ni-Cd batteries. time The battery charger could cause interference if placed close to a radio during charging. -
Page 56: Notes On The Smartmedia
™ Notes on the SmartMedia SmartMedia SmartMedia removed and the camera is then switched off during data recording, during data SmartMedia card supplied with your erasing (SmartMedia formatting) or during frame FinePix4700 ZOOM camera is a new image recording medium developed especially for use in digital advance when images are being played back. -
Page 57: Warning Displays
Warning Displays The table below lists the warnings that are displayed on the LCD monitor. Explanation Warning Displayed LCD Monitor LCD Panel The camera battery is low on charge. No SmartMedia is loaded, or it is loaded incorrectly. The SmartMedia is not formatted. •... -
Page 58: Troubleshooting
Warning Displays Explanation Warning Displayed LCD Monitor LCD Panel The image you tried to erase has D P O F S P E C I F I E D . — a DPOF print setting. E R A S E O K ? The DPOF file contains an error. - Page 59 Troubleshooting Problem Cause I can’t use the flash to take • The Mode switch and Photography mode pictures. dial has been moved to another setting. • The flash is set to Suppressed Flash mode(The flash is closed). • You pressed the shutter button while the flash was charging.
-
Page 60: Specifications
Approx. 310g / 10.9oz. (including batteries and SmartMedia) Accessories:See P.7 Optional Accessories:See P.101-104 These specifications are subject to change without notice. The LCD monitor on your digital camera is manufactured using advanced high-precision technology. Even so, small LCD monitor LCD monitor bright points and anomalous colors (particularly around text) may appear on the monitor. -
Page 61: Safety Notes
Safety Notes To ensure that you use your FinePix4700 ZOOM camera correctly, read these Safety Notes and your Owner’s Manual carefully beforehand. When a fault arises, switch the After reading these Safety Notes, store them in a safe camera off and then remove the place. -
Page 62: Ec Declaration Of Conformity
2 years. Fuji Photo Film ( Europe ) G.m.b.H. Heesenstrasse 31 40549 Dusseldorf, Germany DIGITAL CAMERA FUJIFILM FinePix4700 ZOOM Fuji Photo Film Co., Ltd. 26 - 30, Nishiazabu 2 - chome, Minato - ku, Tokyo 106-8620, Japan... - Page 63 26 - 30, Nishiazabu 2 - chome, Minato - ku, Tokyo 106 - 8620, Japan Printed on recycled paper. Printed in Japan FGS-002102-FG...
Need help?
Do you have a question about the 4700 and is the answer not in the manual?
Questions and answers