Table of Contents
Advertisement
Quick Links
8588103000
(479095)
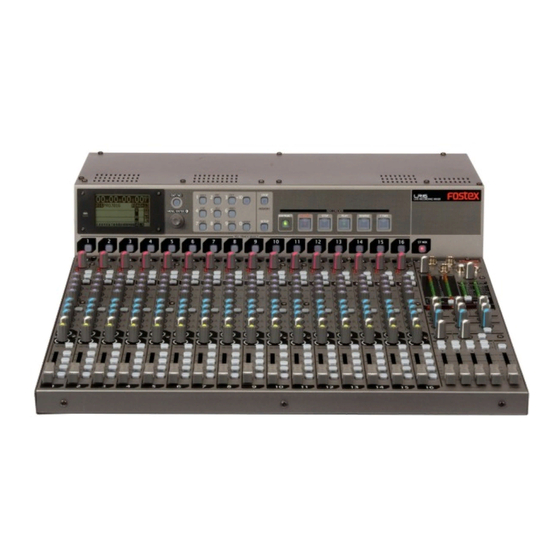
LR16
Model
LIVE RECORDING MIXER
Ownerʼs manual
<Note>:
The LR16 will be upgraded to a new version for feature en-
hancement or improvement. Check the information about the latest
software version from the Fostex website (http://www.fostexinterna-
tional.com/), Fostex service station or your local Fostex dealer.
You can upgrade the software yourself. See page 80 for details about
how to upgrade the software.
Advertisement
Table of Contents

Related Manuals for Fostex LIVE RECORDING MIXER LR16


Summary of Contents for Fostex LIVE RECORDING MIXER LR16
- Page 1 Check the information about the latest software version from the Fostex website (http://www.fostexinterna- tional.com/), Fostex service station or your local Fostex dealer. You can upgrade the software yourself. See page 80 for details about how to upgrade the software.
-
Page 2: Safety Instructions
Model LR16 CAUTION RISK OF ELECTRIC SHOCK DO NOT OPEN CAUTION: TO REDUCE THE RISK OF ELECTRIC SHOCK, DO NOT REMOVE COVER (OR BACK). NO USER - SERVICEABLE PARTS INSIDE. REFER SERVICING TO QUALIFIED SERVICE PERSONNEL. "WARNING" "TO REDUCE THE RISK OF FIRE OR ELECTRIC SHOCK, DO NOT EXPOSE THIS APPLIANCE TO RAIN OR MOISTURE."... -
Page 3: Important Safety Instructions
Important Safety Instructions Read these instructions. Keep these instructions. Heed all warnings. Follow all instructions. Do not use this apparatus near water. Clean only with dry cloth. Do not block any ventilation openings. Install in accordance with the manufacturer's instructions. Do not install near any heat sources such as radiators, heat registers, stoves, or other apparatus (including amplifiers) -
Page 4: Table Of Contents
Model LR16 Table of contents Safety instructions ...2 Introduction ...9 About power supply ...9 Precautions in installation ...9 Notes on handling the internal hard disk drive ...9 About version upgrade ...10 Condensation ...10 Cleaning the exterior ...10 About copyrights ...10 About damage ...10 Overview ...11 Main features ...11... - Page 5 Connection to external devices ...18 Connection example (live recording) ...18 Connection example (home recording) ...19 Balanced and unbalanced inputs/outputs ...20 Names and functions ...21 Control unit (input channel 1 through 16) ...22 Control unit (master channel) ...24 Control unit (rear panel) ...27 Main unit (front panel) ...27 Main unit (rear panel) ...29 Display details ...30...
- Page 6 Model LR16 Using an external effect processor ...37 Using AUX 1, 2 and 3 ...37 Using Insert ...38 Using the internal effects processor ...38 Applying the internal effects ...38 About the effect types ...39 Monitoring ...39 Solo monitor ...40 Channel grouping ...40 Using SUB IN ...41 Block diagram ...42 Recorder functions (Recording/Playback) ...43...
- Page 7 Recorder functions (Memory play) ...57 Setting on the memory play setup screen ...58 Assigning stereo mix files ...58 Selecting a channel pair for memory play ...59 Selecting the memory play mode ...59 Performing memory play ...60 Recorder functions (Mark function) ...61 Adding a mark ...61 Adding a mark on-the-fly ...61 Adding a mark via the mark list screen ...61...
- Page 8 Software version upgrade ...80 MIDI synchronization ...82 Setting frame rate ...82 Setting FS/Bit of project ...83 Specifications ...84 Inputs/Outputs ...84 Recording/Playback ...84 General ...85 Physical dimensions ...85 MIDI Implementation Chart ...86 Declaration of EC Directive ...87 FOSTEX AMERICA LIMITED WARRANTY ...88 INDEX ...90...
-
Page 9: Introduction
Should water enter the inside of the LR16, remove the power plug from AC outlet, and consult your dealer or the nearest Fostex service station. Model LR16 [Introduction/Overview] • To prevent damage to the LR16, be sure to power on the connected devices first, then turn on the power to the LR16. -
Page 10: About Version Upgrade
About damage • Fostex is not responsible for any “direct damage” or “indirect damage” caused by using the LR16. About CAT-5 cable • Use only a CAT-5 STP cable for connection between the main unit and the control unit. -
Page 11: Overview
Digitally controlled trim on each input channel, allowing optimum input level adjustment for each mic/line input. • Fostex originally-developed digital effect unit (reverb/delay) is built in, allowing selection from 12 effect types. • Provides 16 input faders, four group faders and stereo master fader, allowing analog like operation. - Page 12 Model LR16 [Introduction/Overview] • 3-band (High/Mid/Low) input equalizer on each input channel. • Insertion point on input channel 1 through 8, allowing connection to an external comp/limiter, etc. • XLR-phone combo type connector provided on each input channel, allowing mic or line connection.
-
Page 13: Before Using The Unit
Unpack the carton and inspect the contents for damage or shortages. The following contents should be found in the carton. If you find any damage or shortages, contact your Fostex dealer. Main unit (including recorder section and I/O connector sections) x 1... -
Page 14: Usage Examples Of Lr16
Model LR16 [Before using the unit] The control unit and main unit of the LR16 are separated. You can set these units flexibly. <Usage example 1> Integrating the main unit and control unit. You can integrate the main unit and con- trol unit. -
Page 15: Integrating The Control Unit And Main Unit
Integrating the control unit and main unit Follow the procedure below to integrate the control unit and main unit. <Note>: Work on a flat and stable surface. It is recommended to put the units on a soft cloth (or blanket) to protect the units. <Necessary items>... - Page 16 Model LR16 [Before using the unit] Using the rack mount adaptors removed from the control unit, fix the control unit and main unit. Attach the rack mount adaptors to the both left and right sides in the direction shown below. Use four screws for each side. Put the CAT-5 cable into the space between the rubber feet and mounting bracket (indicated by arrows below).
-
Page 17: Recorder Section (Main Unit) Features
Connecting the power cord Using the supplied power cord, con- nect the [AC IN] connector on the rear panel of the main unit and the AC outlet. <Note>: Use only the supplied power cord. Turning on the power Press down the [POWER] switch on the rear panel of the main unit to turn on the power. -
Page 18: Connection To External Devices
Model LR16 [Connection to external devices] Connection to external devices Connection example (live recording) Before making connection between the LR16 and external devices, make sure <Note>: that all devices including the LR16 are turned off, as well as all faders and level controls are down. -
Page 19: Connection Example (Home Recording)
Connection example (home recording) Before making connection between the LR16 and external devices, make sure <Note>: that all devices including the LR16 are turned off, as well as all faders and level controls are down. Personal computer Microphones Drum machine GROUP (+4dBu) EFF SEND (-2dBu) R STEREO OUT (+4dBu) L... -
Page 20: Balanced And Unbalanced Inputs/Outputs
Model LR16 [Connection to external devices] Balanced and unbalanced inputs/outputs For connection between a recording mixer such as the LR16 and external devices (such as a microphone, keyboard, recorder, etc), shielded cables are used. There are two types of cables - balanced and unbalanced. -
Page 21: Names And Functions
Model LR16 [Names and functions] Names and functions INPUT EFF SEND (-2dBu) AUX SEND (-2dBu) INSERT INSERT INSERT INSERT INSERT INSERT INSERT INSERT GROUP (+4dBu) FOOT SW CONTROLLER PANEL LOCK R STEREO OUT (+4dBu) L ST MIX OUT (-10dBV) MIDI OUT LOCK PHANTOM POWER... -
Page 22: Control Unit (Input Channel 1 Through 16)
Model LR16 [Names and functions] Control unit (input channel 1 through 16) (1) [TRIM] control Adjusts the gain of each input signal. Set this control appropriately so that the [PEAK] indicator lights at the maximum input level. By adjusting this control appropriately, the LR16 can accept a signal within -60dBu and -12dBu for mic input, while it can accept a signal within -40dBu and +8dBu for line input. - Page 23 (7) [POST/PRE] switch Selects post-fader or pre-fader feed of the AUX 1 buss (each press of the switch alternates the selection). When the switch is set to the up ( selected. When the switch is set to the down ( pre-fader is selected.
-
Page 24: Control Unit (Master Channel)
Model LR16 [Names and functions] Control unit (Master channel) (17) [SUB IN] jacks and control You can connect a CD player, MD player, etc to the jacks and adjust the input level using the control. By default, the input signals from the [SUB IN] jacks are assigned to input channel 15 and 16, however, you can change the assignment to any desired channel pairs using the "Input"... - Page 25 Model LR16 [Names and functions] (19) [PHANTOM (1-8, 9-16)] indicators Each indicator illuminates when the corresponding [PHANTOM] switch ([1-8] or [9-16]) is set to ON. The phantom power is supplied to the XLR connectors in eight input groups. (20) Internal effects section (a) [EFFECT] indicator The current effect type selected by the [SELECT] up/ down switches illuminates.
- Page 26 Model LR16 [Names and functions] (22) [EFFECT TO GROUP] controls Each control adjusts the output level from the internal effects to the corresponding group buss pairs (1-2 or 3-4). (23) [EFFECT TO STEREO] control Adjusts the output level from the internal effects to the stereo busses.
-
Page 27: Control Unit (Rear Panel)
(1) [TO CONTROLLER] connector Used to connect to the [CONTROLLER] connector of the main unit using the supplied (or a different) CAT5 cable. (1) Display Displays the input/output level of audio signals or project information. (2) [EXIT/NO] key Used to exit the MENU mode or cancel the setting in the MENU mode. - Page 28 Model LR16 [Names and functions] (8) [NEW PROJECT] key Toggles the new project mode on and off. When the new project mode is set to on, the key illuminates. In this mode, if you press the [PLAY] key while holding down the [RECORD] key, the LR16 automatically creates a new project onto the hard disk drive and starts recording.
-
Page 29: Main Unit (Rear Panel)
GROUP (+4dBu) EFF SEND (-2dBu) R STEREO OUT (+4dBu) L ST MIX OUT (-10dBV) (1) [INPUT (1 through 16)] connectors Each connector accepts a mic or line level analog audio signal. The connector is a combo type - a combined XLR connector and phone jack in one. -
Page 30: Display Details
Model LR16 [Names and functions] (11) [EFF SEND] jack This unbalanced phone jack outputs the EFFECT buss signal at -2dBu nominal level. You can connect to the input jack of an effects processor, etc. (12) [USB HOST] port By connecting a FAT16 or FAT32 USB memory stick to this port, you can copy project data (or stereo mix file) to the memory stick and then transfer it to a computer. -
Page 31: Menu Mode Screen
c) Time display The current ABS time of the current project is displayed in "hour:minite:second:frame" format. If no recording has been made to the internal hard disk, the time display shows "--H--M--S--F". During recording or playback, the current recorder status icon is shown in the frame digit, as below. - Page 32 Model LR16 [Names and functions]...
-
Page 33: Mixer Functions
Model LR16 [Mixer functions] Mixer functions... -
Page 34: Mixer Functions (Mixer Basics)
Model LR16 [Mixer functions] Mixer basics A mixer accepts audio signals and modifies them, then mixes them. The following diagram shows how the input signals flow through the mixer section of the LR16. As the diagram indicates, an analog signal from the [INPUT] connector is level-adjusted by the [TRIM] control and converted to digital, then sent to the channel fader via the EQ. -
Page 35: Connecting Sources
Connecting sources • Connecting sources to the input connectors Each of mixer channels 1 through 16 provides a combo type -- a combined XLR connector and phone jack in one. You can connect a microphone to the XLR connector or connect a line signal to the phone jack. -
Page 36: Low-Cut Filter
Model LR16 [Mixer functions] <Gain adjustment while monitoring> To adjust the gain while monitoring an in- put signal, connect headphones to the [PHONES] jack (or connect a powered moni- tor speaker to the [MONITOR OUT] jacks) and rotate the [PHONES] control (or [MONITOR] control) little to the right from the leftmost position. -
Page 37: Eq High
EQ HIGH The EQ HIGH is a shelving type EQ which pro- vides up to 18 dB of boost or cut above 12 kHz. The center detent position of the control is the flat position. You can emphasize a cymbal or sharpen a vocal, keyboard or guitar by boost- ing the EQ HIGH. -
Page 38: Using Insert
Model LR16 [Mixer functions] • Using Insert The [INSERT] jack, as well as the AUX post send, is used for connecting to an external processor. Unlike the AUX send, you can ap- ply effects to a single channel signal. The LR16 provides the [INSERT] jacks for mixer channels 1 through 8. -
Page 39: About The Effect Types
Adjust the effected (wet) signal level sent to the stereo L/R buss using the control in the [EFFECT TO STEREO] section Adjust the effected signal level while monitoring the stereo buss signal using headphones or monitor speakers. <Memo>: To send the effected signal to the group or AUX busses, use the controls in the [EFFECT TO GROUP] or [EFFECT TO GROUP] section. -
Page 40: Solo Monitor
Model LR16 [Mixer functions] • Solo monitor By setting the [SOLO] switch(es) to ON ( ), you can solo monitor the corresponding chan- nel signal(s). If at least one of the [SOLO] switches is set to ON, the [SOLO] indicator slowly flashes. [SOLO] indicator You can find the [SOLO] switches on chan- nels 1 through 16, the effect send, and AUX... -
Page 41: Using Sub In
Using SUB IN You can connect a stereo audio source such as a CD player, MD player, etc., to the [SUB IN (L, R)] jacks and output it directly from the control unit. Therefore, you can connect a BGM source and play it back during a break in the show, etc. -
Page 42: Block Diagram
Model LR16 [Mixer functions] Block diagram LIMITER SOLO LIMITER PEAK PEAK... -
Page 43: Recorder Functions (Recording/Playback)
Model LR16 [Recorder functions / Recording/playback] Recorder functions... -
Page 44: The Basics Of The Recorder
Model LR16 [Recorder functions / Recording/playback] Recording/playback Before starting recording, understand the basics of the recorder of the LR16. Recording format The recorder section of the main unit is equipped with the 3.5 inch hard disk drive. You can record a linear 16 or 24 bit audio file at 44.1kHz or 48 kHz Fs. INPUT TRIM Ch Fader... -
Page 45: Recording Modes
Recording mode The LR16 recorder provides two recording modes: the new project mode and insert mode. The LR16 automatically creates a new project and starts recording from the beginning of the project. To perform recording in new project mode, press the [PLAY] key while holding down the New project [RECORD] key when the [NEW PROJECT] key is set to "ON", or press the [NEW PRJ.REC] mode... -
Page 46: Live Recording
Model LR16 [Recorder functions / Recording/playback] The following shows the setting example of live recording in which the LR16 is used as a PA mixer. Microphones (for vocals) Bass processor Bass STEREO OUT ST MIX OUT Recorder Power amplifier Main speakers TRIM TRIM TRIM... - Page 47 You can perform live recording while you use the LR16 as a PA mixer on live stage. <Recording to tracks 1 through 16> Each channel input signal is directly routed to the correspond- ing recorder track (shown by the heavy line in the diagram on the right).
-
Page 48: Preparation Of Recording
Model LR16 [Recorder functions / Recording/playback] The following shows the procedure for rehears- ing recording to tracks 1 through 16 as well as to the stereo mix track simultaneously in new project mode during live performance. In the following description, it is assumed that no project is created to the internal hard disk ("No project"... -
Page 49: Adjusting Output Level Of The Stereo L/R Bus
<Memo>: You can monitor an input sig- nal via headphones or monitor speakers when the solo function is engaged. The monitor level can be controlled by using the [MONITOR] and [PHONES] controls (the latter only affects headphone moni- toring). Adjusting the channel output levels sent to the stereo buss After adjusting the input level of each channel, you can tailor the channel signal and send it to... -
Page 50: Playback Of The Project
Model LR16 [Recorder functions / Recording/playback] <Note>: To record to an existing project already created, do not start recording using the [NEW PRJ.REC] key. This op- eration creates a new project and starts recording to it. The LR16 automatically creates a new project (PROJ001) and starts recording to tracks 1 through 16 and the stereo mix track simultaneously. -
Page 51: Multitrack Recording
<Memo>: You can transfer a project (or a stereo mix file) to a personal computer by directly connecting the computer to the LR16 or via a USB memory stick. (See page 74 for details about how to transfer to a computer. -
Page 52: Mixdown
Model LR16 [Recorder functions / Recording/playback] After adjusting the input level of channel 3, stop the recorder by pressing the [STOP] key in the recorder or mixer section. If you press the [STOP] key in the recorder section, the recorder stops at the current position. - Page 53 Preparation Set the [SOURCE] switch on each of mixer channels 1 through 16 to "TRK" ( The corresponding recorder track output is selected as the channel source of each channel. Turn off the [NEW PROJECT] key in the recorder section. Change the destination channels of Sub In from “15/16”...
-
Page 54: Punch In/Out
Model LR16 [Recorder functions / Recording/playback] Punch in/out The punch in/out function allows replacing the desired part of the desired track already recorded, instead of re-recording the entire track. While a project is playing, the recorder switches from play- back to recording at the "punch in" point, and switches from recording to playback at the "punch out" point. -
Page 55: Punch In/Out Using The Footswitch
At the punch in point, press the [RECORD] key while holding down the [PLAY] key. Track 3 is punched in (switches from playback to recording). <Note>: To perform punch in, do not for- get to hold down the [PLAY] key when pressing the [RECORD] key. - Page 56 Model LR16 [Recorder functions / Recording/playback] Set the [ST] switches on mixer channels 1 through 8 to "ON" ( <Note>: Make sure that all the [SOLO] switches on the mixer channel to "OFF" and the [MONITOR SELECT] switch is set to "ST".
-
Page 57: Recorder Functions (Memory Play)
Memory play The LR16 provides the memory play function. This function allows you to perform instant start playback of a stereo mix file which is assigned to any of the numeric keys (0 through 9). The assigned file can be a file recorded by the LR16 or a file copied from a computer, etc. Before performing the memory play function, use the Memory play setup screen to assign a stereo mix file to a numeric key, assign the destination channels of playback audio and set the play mode. -
Page 58: Setting On The Memory Play Setup Screen
Model LR16 [Recorder functions / Memory play] Setting on the memory play setup screen While the recorder is stopped, press the [MEMORY SETUP] key in the recorder section of the main unit. The display shows the memory play setup screen. On this screen, you can assign ste- reo mix files to the numeric keys, assign the channel pair to which the memory play signal is output, and set the play mode. -
Page 59: Selecting A Channel Pair For Memory Play
After you complete assignment, press the [EXIT/NO] key. The display returns to the memory play setup screen, where "Sound file" is highlighted. • Selecting a channel pair for memory play Using the "Assign/MemPlay" menu item, you can select a mixer channel pair to which the memory play signal is assigned. -
Page 60: Performing Memory Play
Model LR16 [Recorder functions / Memory play] The LR16 plays back a stereo mix ONCE file once and stops. The LR16 plays back a stereo mix REPEAT file repeatedly until the [MEMORY STOP] key is pressed. Use the [MENU] dial to select a desired memory play mode and press the [ENTER] key. -
Page 61: Recorder Functions (Mark Function)
Mark function The recorder of the LR16 features the mark function. You can add a mark to a desired position in a song and can quickly locate to the mark position. You can edit the position or label of a mark, as well as delete a mark. -
Page 62: Locating To A Mark Point
Model LR16 [Recorder functions / Mark function] Locating to a mark point You can locate to a mark point while stopped or during playback. The recorder can skip to any mark point from the current position (ABS 0 in the example above). Press the [ENTER] key to bring up the MENU screen. -
Page 63: Editing A Mark Position
Use the [MENU] dial to highlight a desired mark point and press the [ENTER] key. The display now shows the edit screen for the selected mark. Use the [MENU] dial to highlight "Label" and press the [ENTER] key. The rightmost character of the label starts flashing. -
Page 64: Deleting A Mark
Model LR16 [Recorder functions / Mark function] Use the [MENU] dial to highlight "<Position>" and press the [ENTER] key. The flame digit of the time data for the selected mark starts flashing. Edit the time data in the following manner. Use the [REWIND] or [F FWD] key to move the cursor (flashing point) to the desired digit to be edited. -
Page 65: Recorder Functions (Project Management)
Project management Selecting a project You can select the desired project by the fol- lowing procedure. <Note>: If you select a project which does not match the setting of the "Default FS" menu item in the "System" menu of the MENU mode, the "FS/Bit"... -
Page 66: Editing A Project Name
Model LR16 [Recorder functions / Project management] Use the [MENU] dial to select "<New project>" and press the [ENTER] key. The display now shows the Home screen for the new project (see the next page). If "<New project>" is hidden on the screen, scroll down the list. -
Page 67: Rolling Back A Project
numeric keys [MENU] dial <Name editing example> The following shows the procedure of com- pletely deleting "PROJ001", the current project name, and entering "Live3" as the new name. (1) Rotate the [MENU] dial counterclockwise to move the cursor to the leftmost position. (2) Press the [CLEAR] key repeatedly until all characters of the current name are deleted. -
Page 68: Saving A Project To An External Medium
Model LR16 [Recorder functions / Project management] Use the [MENU] dial to highlight "Roll back" press the [ENTER] key. The display now shows the list of ADL files stored in the LOG folder. The screen example below shows TAKE001 (blank), TAKE002 (after the first recording), TAKE003 (after the first editing). - Page 69 Use the [MENU] dial to highlight "Export" press the [ENTER] key. After the LR16 checks the USB memory, the display shows the export screen. For details about the information shown on this screen, see "Export screen details" de- scribed below. If you simply execute step (4) on the next page without changing any parameter, data of full length (from ABS 0 to REC END) of...
-
Page 70: Copying A Stereo Mix File To An External Medium
Model LR16 [Recorder functions / Project management] Use the [MENU] dial to highlight "[EXECUTE]" and press the [ENTER] key. <Note>: If the data of a project with the same name exists on the USB memory stick when you attempt to execute ex- porting the project data by pressing the [ENTER] key, the following popup ap- pears. - Page 71 Use the [MENU] dial to highlight "Export ST mix" press the [ENTER] key. After the LR16 checks the USB memory, the display shows the "export 2 mix" screen. On this screen, stereo mix files in the "2 mix" folder of the current project are listed up.
-
Page 72: Protecting A Project
Model LR16 [Recorder functions / Project management] After completing exporting data, the follow- ing popup appears. Press any operation key. The LR16 exit the MENU mode and the display returns to the Home screen. Protecting a project You can protect the current project. You cannot execute punch in/out <Note>: or additional recording to a protected... - Page 73 Use the [MENU] dial to highlight "Delete" and press the [ENTER] key. The display now shows the project list screen. Use the [MENU] dial to select the project you want to delete and press the [ENTER] key. For example, if you select project 003 ("PROJ003"), the confirmation screen as below is shown.
-
Page 74: Recorder Functions (File Transfer To/From A Computer)
Model LR16 [Recorder function / File transfer to/from a computer] File transfer to/from a computer By connecting the [USB PC] port of the main unit to your personal computer, you can transfer audio files between the LR16 and the personal computer. You can copy audio data recorded by the LR16 to the hard disk of your computer and import to a computer software application such as Digidesign Pro Tools. - Page 75 While "USB to PC" is highlighted, press the [ENTER] key. The display now shows the screen below, in which "?" is flashing. <Memo>: To cancel USB connection, press the [EXIT/NO] key. The display returns to show the previous screen. You can exit the MENU mode by pressing the [EXIT/NO] key repeatedly.
-
Page 76: Copying Data From The Lr16 To A Computer
Model LR16 [Recorder function / File transfer to/from a computer] Copying data from the LR16 to a computer You can copy data from the internal hard disk of the LR16 to the hard disk of a personal computer. INPUT GROUP (+4dBu) EFF SEND (-2dBu) AUX SEND (-2dBu) INSERT... -
Page 77: Recorder Functions (Other Functions)
Other functions Adjusting the display contrast If the display is difficult to see, you can adjust the display contrast by rotating the [MENU] dial while the LR16 is turned on. Rotating the [MENU] dial counterclockwise increases the contrast. Rotating the [MENU] dial clockwise decreases the contrast. -
Page 78: Formatting The Internal Hard Disk
Model LR16 [Recorder function / Other functions] Formatting the internal hard disk You can format the internal hard disk of the main unit. Formatting the internal hard disk erases all the data on the disk. <Note>: Formatting the internal hard disk erases all the data on the disk. -
Page 79: Assigning The Destinations Of Sub In And The Memory Play Signals
The display now shows the system menu screen. Use the [MENU] dial to highlight "Sys default memory" and press the [ENTER] key. The confirmation screen as below is shown. <Memo>: To cancel system initialization, press the [STOP] key. While holding down the [RECORD] key, press the [ENTER] key. -
Page 80: To Assign The Destination Channels Of Memory Play
Use either of the methods below to upgrade the software. The downloaded software file has the ".mot" extension. See the Fostex website for details about how to download the file. <Note>: If you cannot download the file from the Fostex website, consult the Fostex ser- vice station or your nearest dealer. - Page 81 In the following procedure, it is assumed the fol- lowing. The upgrade file is transfered to the inter- nal hard disk of the LR16 or the USB memory stick to which the upgrade file is copied from a personal computer is connected to the [USB HOST] port of the LR16, The LR16 is turned off.
-
Page 82: Midi Synchronization
Model LR16 [Recorder function / Other functions] MIDI synchronization MIDI (Musical Instrument Digital Interface) is an industry-standard protocol which en- ables electronic musical instruments, comput- ers, and other equipment to communicate, control, and synchronize with each other. <MIDI connection> To send MIDI message from the LR16 to exter- nal MIDI equipment, connect the [MIDI OUT] port of the LR16 to the [MIDI IN] port of exter- nal MIDI equipment using a MIDI cable. -
Page 83: Setting Fs/Bit Of Project
Setting FS/Bit of project You can select the FS (sampling frequency) and Bit length combination of a newly cre- ated project. By default, it is set to 44 kHz/16 bits. <Note>: The FS/Bit setting here does not af- fect to existing projects. The setting affects to a project recorded by the new project mode or a project newly created via the "Project"... -
Page 84: Specifications
Model LR16 [Specifications] Specifications Inputs/Outputs 0dBV = 1.0 Vrms, 0dBu = 0.775 Vrms Reference level: -20dBfs Input and Output (Main unit) [MIC INPUT (1 - 16)] Connectors: XLR3-31, balanced (combo) Nominal input level: -60dBu ~ -12dBu Input impedance: more than 1.5k Phantom Power: P48V (1-8ch &... -
Page 85: General
Recording time: approx. 16 hours (80GB HD, 16bit/44.1kHz, 16 tracks) Frequency response: 20Hz - 20kHz +1dB, -2dB (44.1/48kHz) S/N: Line (Trim Min) 95dB or more (typical) Mic (Trim Max) 90dB or more (typical) Dynamic range: 100dB or more (Trim Min)(Typical) T.H.D.: Mic (Trim Max) ->... -
Page 86: Midi Implementation Chart
Model LR16 [Specifications] [LIVE RECORDING MIXER] Model LR16 Function... Basic Default Channel Changed Default Mode Message Altered Note True Voice Number: Velocity Note ON Note OFF After Key’s Touch Channel’s Pitch Bend Control Change Program Change True # System Exclusive : Quarter Frame : Song Position Common... -
Page 87: Declaration Of Ec Directive
In the electrical fast transient/burst requirements, surge, conducted disturbances by radio-frequency fields, power frequency magnetic field, radiate electromagnetic field requirements and static electricity discharging environment, this could be affected by generation of noise in some cases. FOSTEX DISTRIBUTORS LIST IN EUROPE * Including non-EU countries (as of March 2007) <AUSTRIA>... -
Page 88: Fostex America Limited Warranty
(180) days. Fostex America will repair and / or replace parts during the term of this warranty. Labor costs are also covered by Fostex America for one (1) year from the date of original purchase. Except as specified below, this warranty covers all defects in material and workmanship in this product. - Page 89 Fostex America's liability for any defect product is expressly limited to repair or replacement of the product, at the sole discretion and / or option of Fostex America. Fostex America shall not under any circumstances be liable for: Damaged based on inconvenience, loss of use of the product, loss of time, interrupted operation or commercial loss, OR;...
-
Page 90: Index
Model LR16 [Specifications] <A> Assign channel ...59, 79 ADL file ...45, 52, 66 <B> Balanced type ...20 Bus ...34 Block diagram ...42 <C> CAT-5 cable ...13 Condensation ...10 Connector ...20 Contrast ...77 Control unit ...15, 24 Connection ...18, 35 <D> Display ...30 <E>... - Page 92 FOSTEX CO. 3-2-35 Musashino, Akishima-shi, Tokyo Japan 196-0021 479095 © PRINTED IN JAPAN DEC. 2008 8588103000...
Need help?
Do you have a question about the LIVE RECORDING MIXER LR16 and is the answer not in the manual?
Questions and answers