
Related Manuals for Seada SD-MV-CM61


Summary of Contents for Seada SD-MV-CM61
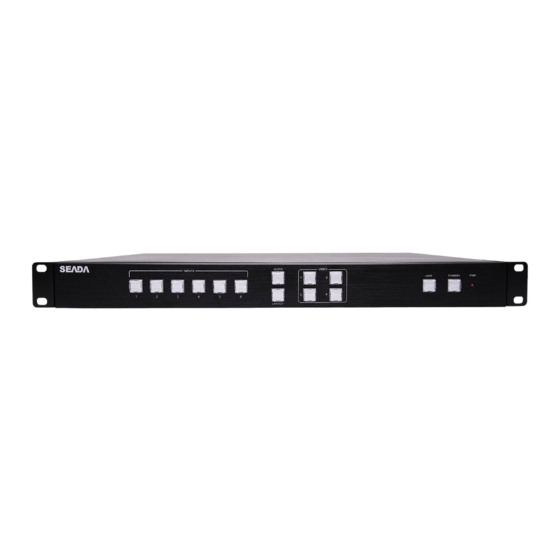
- Page 1 S h o w i n g t h e W o r l d SD-MV-CM61 4K@60 6X1 Multiviewer with Audio Switching All Rights Reserved Version: 02...
-
Page 2: Table Of Contents
SD-MV-CM61 4K@60 6X1 Multiviewer Catalogue Introduction ......................2 Feature ........................2 Specifications ......................3 Operation Controls and Functions ................4 4.1 Front Panel ......................4 4.2 Rear Panel ......................5 Setup ........................6 Wiring Diagram ..................6 Operating .......................7 6.1 Standby Mode and Work Mode .................7 6.2 Screen layout Configuration ................8 6.2.1 Single Window .................. -
Page 3: Introduction
SD-MV-CM61 4K@60 6X1 Multiviewer 1. Introduction SD-MV-CM61 is a standard alone Multiview controller, which could accept up to 6 inputs and combine any 4 onto a multiple-window layout display at the same time. It supports HDCP, up to 4K@60 input and 4K@60 output. -
Page 4: Specifications
SD-MV-CM61 4K@60 6X1 Multiviewer 3. Specifications Video Input Interface 4 × HDMI IN, 2 x DP IN HDMI:HDMI 2.0a Input Specification DisplayPort: DP1.2a HDCP: HDMI 2.0, DP 1.4 Input Resolution Up to 3840 x 2160@60Hz Input Electrical Level 0.5-1.0 V peak to peak value... -
Page 5: Operation Controls And Functions
SD-MV-CM61 4K@60 6X1 Multiviewer 4. Operation Controls and Functions 4.1 Front Panel Name Description Press the buttons 1~6 to select the corresponding Input Buttons and video or audio input. The indicators mean the Indicators corresponding status of the video or audio input. -
Page 6: Rear Panel
SD-MV-CM61 4K@60 6X1 Multiviewer 4.2 Rear Panel Name Description Turn the power ON or OFF using this switch. Connect Power Socket to an 110/220 AC Power electrical outlet. Connect the optical output port to the digital audio Optical output input port of your amplifier 2 channel analog audio output. -
Page 7: Setup
Connect an RS-232 cable from the RS-232 port on SD-MV-CM61to the RS-232 connector on the serial controller for controlling if needed. Connect an Ethernet cable from the LAN port on the SD-MV-CM61 to a Local Area Network (LAN) for controlling if needed. -
Page 8: Operating
The “PWR” LED next to the Standby button, on the front panel, indicates the power state of the SD-MV-CM61. This indicator will be red and remain illuminated if the power is being supplied to the SD-MV-CM61. If this indicator does not illuminate, check the connection between the power receptacle on the SD-MV-CM61 and the AC outlet. -
Page 9: Screen Layout Configuration
Windows, and Single Window. The screen configuration is shown as follows. Press the combination key (LAYOUT + Input 1~6) in the Key Button of the SD-MV-CM61, corresponding to the four modes above. For example, if you want to use the mode of... - Page 10 SD-MV-CM61 4K@60 6X1 Multiviewer SD-MV-CM61 can display up to four sources. When multiple sources are displayed on the screen, each source is regarded as a single window, and each window is defined as an input. However, we want to define the operation in the single window to introduce the basic operation before introduction to the operation in multiple windows.
-
Page 11: Single Window
SD-MV-CM61 4K@60 6X1 Multiviewer 6.2.1 Single Window Use the LAYOUT + input 1 button on the front panel to set to the single window mode, Video 1 button indicator lights up, input 1 indicator lights up. HDMI output configures the HDMI1 input, the window is shown as follows. -
Page 12: Double Windows
SD-MV-CM61 4K@60 6X1 Multiviewer blinking, it means the source which can be selected), press the INPUTS 5 button on the front panel. The input 5 button indicator lights up, the panel status is shown as follows. HDMI output picture is changed to the signal of DisplayPort5. - Page 13 SD-MV-CM61 4K@60 6X1 Multiviewer For example, if you want to switch INPUT 5 to Window 1. Method 1: directly press the INPUTS 5 button on the front panel, the Video 1 and 2 button indicators blink (indicates that the two buttons can be selected), press the Video 1 button on the front panel to select Window 1.
-
Page 14: Triple Windows
SD-MV-CM61 4K@60 6X1 Multiviewer 6.2.3 Triple Windows Use the LAYOUT + input 3 button on the front panel to set to the mode of triple windows, Video 1, 2 and 3 button indicators on the front panel light up. HDMI output port outputs the mode of triple windows. Window 1 is configured to HDMI1 input (HDMI1 is the factory default. -
Page 15: Quadruple Windows
SD-MV-CM61 4K@60 6X1 Multiviewer HDMI output picture is changed to the following status. 6.2.4 Quadruple Windows Use the LAYOUT + input 4 button on the front panel to set to the mode of quadruple windows, Video 1, 2, 3 and 4 button indicators on the front panel light up. - Page 16 SD-MV-CM61 4K@60 6X1 Multiviewer For example, if you want to switch to Window 1, and if you want to switch the signal of DisplayPort5. Method 1: directly press the INPUTS 5 button on the front panel, the Video 1 and 2 button indicators blink (indicates the two buttons can be selected), press the Video 1 button on the front panel to select Window 1.
-
Page 17: Output Resolution
SD-MV-CM61 4K@60 6X1 Multiviewer 6.3 Output Resolution HDMI output resolutions support multiple modes with the indicator indication. Auto 3840 x 2160 @60Hz 3840 x 2160 @30Hz 3840 x 2160 @24Hz 1920 x 1200 @60Hz 1920 x 1080 @ 60Hz 1920 x 1080 @ 50Hz... -
Page 18: Audio Setting
SD-MV-CM61 4K@60 6X1 Multiviewer Audio Setting 6.4.1 Audio Input Select When selecting the video input, the audio also has six inputs. When the video input is selected as HDMI or DisplayPort, the audio input will be from either HDMI digital audio or analog stereo audio via the 3.5mm earphone jack of the audio input, according to the... -
Page 19: Audio Outputs
SD-MV-CM61 4K@60 6X1 Multiviewer Operations for audio switching: Method 1: (1). Press “Audio Button” (in front buttons), the corresponding button backlit indicator lights up, which means the audio output is selected. The Inputs indicator of the corresponding audio source turns solid on, the other indicators blink. -
Page 20: Advanced Settings
For more information about serial command lines, see the chapter of commands. 6.5.2 IP Obtain SD-MV-CM61 supports IP control, WEB GUI、TCP and so on. The default IP address is 192.168.1.200, port:23. If users have modified the IP address and lost it. users can obtain the IP address and port number via the information from the on-screen display (OSD). -
Page 21: Web Control
SD-MV-CM61 can be controlled via Web browser, which contains home screen, general settings, layout, EDID, Network, Advance, Update. After the LAN cables are connected, the IP address is obtained, and the SD-MV-CM61 can be controlled via browser this IP address. - Page 22 SD-MV-CM61 4K@60 6X1 Multiviewer General Page | 21 Website: www.seada.co.uk E-mail: sales@seada.co.uk...
- Page 23 SD-MV-CM61 4K@60 6X1 Multiviewer Contain the following options. Video Input Name Video Input Selection Aspect Ratio Output Timing Crop Input Setting Audio Input Audio Volume Audio Input Config 1. Video Input Name Input signal name can be changed in this section. The default name of the inputs is HDMI1, HDMI2, HDMI3, HDMI4, DP5, DP6.
- Page 24 SD-MV-CM61 4K@60 6X1 Multiviewer selection ranges from 1 to 6, corresponding to the six video inputs. Select the related parameters and click Save to save the changes. 3. Aspect Ratio Normal: Set the picture in the window as the original aspect ratio ⚫...
- Page 25 SD-MV-CM61 4K@60 6X1 Multiviewer HDMI output resolution selection: AUTO (auto adjustment of the output resolution based on the EDID of the display device) 3840x2160@60Hz , 3840x2160@30Hz , 3840x2160@24Hz , 1920x1200@60Hz , 1920x1080@60Hz , 1920x1080@50Hz , 1600x1200@60Hz , 1680x1050@60Hz , 1600x900@60Hz_R ,1400x1050@60Hz , 1400x900@60Hz , 1360x768@60Hz ,...
- Page 26 SD-MV-CM61 4K@60 6X1 Multiviewer 6. Audio Input Audio input selection ranges from 1 to 6, corresponding to the different audio inputs. Select the related parameters and click Save to make the changes take effect. 7. Audio Volume Output volume ranges from 0 to 10. 0 is mute, and 10 is the maximum volume.
- Page 27 SD-MV-CM61 4K@60 6X1 Multiviewer Layouts Contain the following options. Layout customization Layout Recall 1. Layout customization On layout customization table, a main layout window is provided for user to drag-and-drop to form a new layout. By default, it shows a quad-viewer layout.
- Page 28 SD-MV-CM61 4K@60 6X1 Multiviewer 2. Layout Recall 16 fixed layouts 16 custom layouts 3. Layout Button Configuration There are six input buttons at front panel for layout configuration, and each button can select one of 32 layouts, which is the shortcut to switch layout very quickly.
- Page 29 SD-MV-CM61 4K@60 6X1 Multiviewer EDID Contain the following options. EDID Copy EDID Upload EDID Download 1. EDID Copy User could select one EDID from the preset EDIDs to the certain input port, including Page | 28 Website: www.seada.co.uk E-mail: sales@seada.co.uk...
- Page 30 SD-MV-CM61 4K@60 6X1 Multiviewer three default EDIDs as below Internal_4K_2K_60Hz_2_ch Internal_1080P_2_ch Internal_DP_4K_2K_60Hz_2_ch And six custom EDIDs, including Custom 1, Custom 2, Custom 3, Custom 4, Custom 5, Custom 6. And one output EDIDs Click” Save” to save the changes. 2. EDID Upload User could click “Choose File”...
- Page 31 SD-MV-CM61 4K@60 6X1 Multiviewer Network Contain the following options. Network Socket 1. Network User could select the DHCP Enable or DHCP Disable (Static IP). DHCP Switch: ON/OFF When DHCP is on, it does not need to enter the IP address, Subnet Mask and Gateway.
- Page 32 SD-MV-CM61 4K@60 6X1 Multiviewer Advanced Contain the following options. Power Auto Layout Audio Mute OSD Control Input Label Serial Port Authentication Other 1. Power ON: Wake up the device OFF: Set the device to stand by. 2. Auto Layout ON: Enable the Auto Layout function.
- Page 33 SD-MV-CM61 4K@60 6X1 Multiviewer 3. Audio Mute Audio output mute setting. OFF is turning off mute, outputting the audio normally. On is enabling the mute without outputting the audio. At the same time, OSD prompts the related icons. Audio Delay Selection Audio output time-delay selection: 0~160ms.
- Page 34 SD-MV-CM61 4K@60 6X1 Multiviewer 5. Input Label OFF: Disable the Source Label. ON: Enable the Source Label. Change the window label font color and save it to be effect. 6. Serial Port Serial baud-rate setting, including 9600, 14400, 19200, 38400, 57600, 115200.
- Page 35 SD-MV-CM61 4K@60 6X1 Multiviewer 7. Authentication Change the login password. After changing it, click Change to save the changes . 8. Other Click button to reset to factory setting. Page | 34 Website: www.seada.co.uk E-mail: sales@seada.co.uk...
- Page 36 SD-MV-CM61 4K@60 6X1 Multiviewer Update User can update the firmware in this section. The firmware updating instruction is Click “Choose File “to select the firmware, which is going to be updated to Click “update” button to start upgrading When it finishes, the unit will re-start automatically, and return to this web-GUI again.
-
Page 37: Firmware Update
1. Connect the SD-MV-CM61 to a display device. 2. Copy the “update.bin” in the PC. 3. Enter the webpage of SD-MV-CM61 and select the Update page to select the stored “update.bin” to start the upgrading. 5. The device will re-start automatically after completing the whole upgrading progress. -
Page 38: Auto Layout
SD-MV-CM61 4K@60 6X1 Multiviewer 6.7 Auto Layout “Auto Layouts” feature provides a way to auto switch the multi-viewer layouts based on the status of four HDMI inputs. In this way, the multi-viewer will detect the plug/unplug of HDMI input signals and auto switch to the optimal layouts automatically. - Page 39 SD-MV-CM61 4K@60 6X1 Multiviewer After unit is powered on, if user plug or unplug HDMI inputs cable on the back panel, the layouts will change automatically. For example, the operation rules are as the below: Single windows Single windows to double windows, and...
-
Page 40: Command List
SD-MV-CM61 4K@60 6X1 Multiviewer 7. Command List The device can send commands via RS23 or IP to control the operation Command format: Description Setting Head: ATM Baud rate 115200 Length: 08~FF Data bits Command: XXX_XXX (7 characters) Parity None Read/Write: W/R... - Page 41 SD-MV-CM61 4K@60 6X1 Multiviewer Video input select Read ATM 08 VDO_IPT R Read inputs of window Select input #1 ATM 0A VDO_IPT W 1 1 Video input of Window 1 is set to 1. Select input #2 ATM 0A VDO_IPT W 1 2 Video input of Window 1 is set to 2.
- Page 42 SD-MV-CM61 4K@60 6X1 Multiviewer Select input #4 ATM 09 ADO_IPT W 4 Audio output is set to audio input 4 Select input #5 ATM 09 ADO_IPT W 5 Audio output is set to audio input 5 Select input #6 ATM 09 ADO_IPT W 6...
- Page 43 SD-MV-CM61 4K@60 6X1 Multiviewer volume increase ATM 0A AUD_MOD W 5 1 Set external audio on input No. 5 volume decrease ATM 0A AUD_MOD W 6 1 Set external audio on input No. 6 Ratio 1: NORMAL 2: FULL Read...
- Page 44 SD-MV-CM61 4K@60 6X1 Multiviewer resolutions based on the EDID information of the display device. Sets the HDMI output resolution as Res_3840X2160_60 ATM 0A OPT_TIM W 02 Res_3840X2160_60 Sets the HDMI output resolution as Res_3840X2160_30 ATM 0A OPT_TIM W 03 Res_3840X2160_30...
- Page 45 SD-MV-CM61 4K@60 6X1 Multiviewer Res_1280X720_50 ATM 0A OPT_TIM W 18 Sets the HDMI output resolution as Res_1280X720_50 Res_1024X768_60 ATM 0A OPT_TIM W 19 Sets the HDMI output resolution as Res_1024X768_60 Res_800X600_60 ATM 0A OPT_TIM W 20 Sets the HDMI output resolution as Res_800X600_60...
- Page 46 SD-MV-CM61 4K@60 6X1 Multiviewer Read ATM 08 CBL_DAL R Read Auto Layout function status Auto layout ATM 09 CBL_DAL W 1 Enable Auto Layout function. control ATM 09 CBL_DAL W 0 Disable Auto Layout function. Read ATM 08 AUD_MUT R...
- Page 47 SD-MV-CM61 4K@60 6X1 Multiviewer length=09, X: 09+09=0x12) Read ATM 08 OSD_TRA R X: 0~5 ATM 09 OSD_TRA W 0 Set OSD Transparency as 0 ATM 09 OSD_TRA W 1 Set OSD Transparency as 1 ATM 09 OSD_TRA W 2 Set OSD Transparency as 2...
- Page 48 SD-MV-CM61 4K@60 6X1 Multiviewer Read ATM 08 BAU_RAT R Read baud rate X: 1~5 ATM 09 BAU_RAT W 1 Set the rs-232 com baud rate as 9600 ATM 09 BAU_RAT W 2 Set the rs-232 com baud rate as 19200...
- Page 49 SD-MV-CM61 4K@60 6X1 Multiviewer Option 5 (Custom_2) of the EDID selection lists copy ATM 0B EDI_CPY W 05 1 to input 1. Option 6 (Custom_3) of the EDID selection lists copy ATM 0B EDI_CPY W 06 1 to input 1.
- Page 50 SD-MV-CM61 4K@60 6X1 Multiviewer Option 1 (Internal_4K_2K_60Hz_2_ch) of the EDID ATM 0B EDI_CPY W 01 3 selection lists copy to input 3. Option 2 (Internal_1080P_2_ch) of the EDID selection ATM 0B EDI_CPY W 02 3 lists copy to input 3.
- Page 51 SD-MV-CM61 4K@60 6X1 Multiviewer to input 4. Option 7 (Custom_4) of the EDID selection lists copy ATM 0B EDI_CPY W 07 4 to input 4. Option 8 (Custom_5) of the EDID selection lists copy ATM 0B EDI_CPY W 08 4 to input 4.
- Page 52 SD-MV-CM61 4K@60 6X1 Multiviewer lists copy to input 6. Option 3 (Internal_DP_4K_2K_60Hz_2_ch) of the EDID ATM 0B EDI_CPY W 03 6 selection lists copy to input 6. Option 4 (Custom_1) of the EDID selection lists copy ATM 0B EDI_CPY W 04 6 to input 6.
Need help?
Do you have a question about the SD-MV-CM61 and is the answer not in the manual?
Questions and answers