Advertisement
Quick Links
SERVICE MANUAL
COMPACT COMPONENT SYSTEM
6
2004
MB263
1
PRECAUTION. . . . . . . . . . . . . . . . . . . . . . . . . . . . . . . . . . . . . . . . . . . . . . . . . . . . . . . . . . . . . . . . . . . . . . . . . 1-3
2
SPECIFIC SERVICE INSTRUCTIONS . . . . . . . . . . . . . . . . . . . . . . . . . . . . . . . . . . . . . . . . . . . . . . . . . . . . . . 1-6
3
DISASSEMBLY . . . . . . . . . . . . . . . . . . . . . . . . . . . . . . . . . . . . . . . . . . . . . . . . . . . . . . . . . . . . . . . . . . . . . . . 1-7
4
ADJUSTMENT . . . . . . . . . . . . . . . . . . . . . . . . . . . . . . . . . . . . . . . . . . . . . . . . . . . . . . . . . . . . . . . . . . . . . . . 1-33
5
TROUBLESHOOTING . . . . . . . . . . . . . . . . . . . . . . . . . . . . . . . . . . . . . . . . . . . . . . . . . . . . . . . . . . . . . . . . . 1-40
All manuals and user guides at all-guides.com
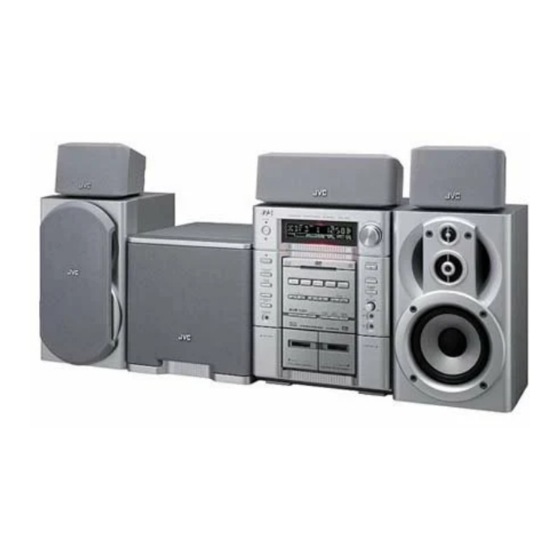
MX-JD5
CA-MXJD5
TABLE OF CONTENTS
COPYRIGHT © 2004 Victor Company of Japan, Limited
Area suffix
US ------------------------ Singapore
UW ----------- Brazil,Mexico,Peru
UX -------------------- Saudi Arabia
UE -----------------------------Turkey
UN ----------------------------- Asean
No.MB263
2004/6
Advertisement

Subscribe to Our Youtube Channel
Related Manuals for JVC MX-JD5


Summary of Contents for JVC MX-JD5
-
Page 1: Table Of Contents
All manuals and user guides at all-guides.com SERVICE MANUAL COMPACT COMPONENT SYSTEM MB263 2004 MX-JD5 Area suffix US ------------------------ Singapore UW ----------- Brazil,Mexico,Peru UX -------------------- Saudi Arabia UE -----------------------------Turkey UN ----------------------------- Asean CA-MXJD5 TABLE OF CONTENTS PRECAUTION............... . . 1-3 SPECIFIC SERVICE INSTRUCTIONS . - Page 2 All manuals and user guides at all-guides.com SPECIFICATION 40 W per channel, min. RMS, driven into 6 Ω at 1 kHz with Amplifier Output Power FRONT MAIN SPEAKERS section no more than 10% total harmonic distortion. 80 W per channel, min. RMS, driven into 6 Ω at 63 Hz with FRONT SUBWOOFERS no more than 10% total harmonic distortion.
-
Page 3: Precaution
All manuals and user guides at all-guides.com SECTION 1 PRECAUTION Safety Precautions (1) This design of this product contains special hardware and voltmeter. many circuits and components specially for safety purpos- Move the resistor connection to each exposed metal es. For continued protection, no changes should be made part, particularly any exposed metal part having a return to the original design unless authorized in writing by the path to the chassis, and measure the AC voltage across... - Page 4 All manuals and user guides at all-guides.com Preventing static electricity Electrostatic discharge (ESD), which occurs when static electricity stored in the body, fabric, etc. is discharged, can destroy the laser diode in the traverse unit (optical pickup). Take care to prevent this when performing repairs. 1.5.1 Grounding to prevent damage by static electricity Static electricity in the work area can destroy the optical pickup (laser diode) in devices such as laser products.
- Page 5 All manuals and user guides at all-guides.com Important for laser products 5.CAUTION : If safety switches malfunction, the laser is able 1.CLASS 1 LASER PRODUCT to function. 2.DANGER : Invisible laser radiation when open and inter 6.CAUTION : Use of controls, adjustments or performance of lock failed or defeated.
-
Page 6: Specific Service Instructions
All manuals and user guides at all-guides.com SECTION 2 SPECIFIC SERVICE INSTRUCTIONS This service manual does not describe SPECIFIC SERVICE INSTRUCTIONS. 1-6 (No.MB263) -
Page 7: Disassembly
All manuals and user guides at all-guides.com SECTION 3 DISASSEMBLY Main body section 3.1.1 Removing the metal cover (See Figs.1 to 3) (1) From the both sides of the main body, remove the two screws A attaching the metal cover. (See Figs.1 and 2.) Metal cover (2) From the back side of the main body, remove the six screws B attaching the metal cover. - Page 8 All manuals and user guides at all-guides.com 3.1.2 Removing the front panel assembly (See Figs.4 to 7) • Prior to performing the following procedures, remove the metal Plastic rivet cover. CN860 CN880 Main board (1) From the right side of the main body, remove the screw C attaching the earth wires on the reverse side of the main board.
- Page 9 All manuals and user guides at all-guides.com Front panel assembly Fig.6 Front panel assembly Fig.7 (No.MB263)1-9...
- Page 10 All manuals and user guides at all-guides.com 3.1.3 Removing the tuner (See Figs.8 and 9.) • Prior to performing the following procedures, remove the metal Tuner cover. CN410 CN21 Main board (1) From the top side of the main body, disconnect the card wire from the connector CN21 on the main board.
- Page 11 All manuals and user guides at all-guides.com 3.1.5 Removing the rear panel (See Figs.8 to 11) • Prior to performing the following procedures, remove the metal cover. (1) From the back side of the main body, remove the screw J attaching the rear cover.
- Page 12 All manuals and user guides at all-guides.com 3.1.6 Removing the DVD mechanism assembly (See Figs.12 and 13) • Prior to performing the following procedures, remove the metal cover, tuner and video board. DVD mechanism assembly Center chassis (1) From the top side of the main body, remove the three screws M attaching the DVD mechanism assembly on the center chassis.
- Page 13 All manuals and user guides at all-guides.com 3.1.7 Removing the main board (See Figs.14 and 15) • Prior to performing the following procedures, remove the metal Main board cover, tuner, video board and rear panel. CN880 CN11 CN522 (1) From the right side of the main body, remove the screw N CN531 attaching the earth wires on the reverse side of the main board.
- Page 14 All manuals and user guides at all-guides.com 3.1.8 Removing the center chassis assembly (See Fig.16) • Prior to performing the following procedures, remove the metal Main board cover, tuner, video board and rear panel. (1) From the top side of the main body, disconnect the card CN523 CN524 wires from the connectors (CN11, CN522, CN523, CN524)
- Page 15 All manuals and user guides at all-guides.com 3.1.10 Removing the transformer board (See Fig.18) • Prior to performing the following procedure, remove the metal cover, tuner, video board, rear panel and center chassis as- sembly. (1) From the top side of the main body, disconnect the wire and power cord from the connectors (CN119, CN250) on the transformer board.
- Page 16 All manuals and user guides at all-guides.com 3.1.12 Removing the regulator & surround amplifier board and main & subwoofer amplifier board (See Figs.20 and 21) • Prior to performing the following procedure, remove the metal Main & subwoofer cover, tuner, video board, rear panel, main board, center chas- amplifier board sis assembly and speaker terminal board.
- Page 17 All manuals and user guides at all-guides.com 3.1.13 Removing the primary board (See Fig.22) • Prior to performing the following procedure, remove the metal Primary board Bottom chassis cover, tuner, video board, rear panel, main board, center chas- sis assembly, speaker terminal board and regulator & sur- round amplifier board and main &...
- Page 18 All manuals and user guides at all-guides.com 3.1.14 Removing the FL board (See Figs.23 and 24) • Prior to performing the following procedures, remove the metal Front panel assembly cover and front panel assembly. (1) From the front side of the front panel assembly, pull the vol- Volume knob ume knob out of the front panel assembly.
- Page 19 All manuals and user guides at all-guides.com 3.1.15 Removing the switch board Switch board Front panel assembly (See Figs.23 to 25) • Prior to performing the following procedures, remove the metal cover and front panel assembly. (1) From the front side of the front panel assembly, pull the mi- crophone knob out of the front panel assembly.
- Page 20 All manuals and user guides at all-guides.com DVD mechanism section • Remove the DVD mechanism assembly from the main body. (See "3.1.6 Removing the DVD mechanism assembly".) 3.2.1 Removing the tray assembly (See Figs.1 to 3) (1) From the right side of the DVD mechanism assembly, push Tray assembly DVD mechanism assembly the slide cam and pull the tray assembly out of the DVD...
- Page 21 All manuals and user guides at all-guides.com 3.2.2 Removing the traverse mechanism assembly (See Figs.4) (1) From the bottom side of the DVD mechanism assembly, re- DVD mechanism assembly move the four screws B attaching the traverse mechanism assembly and take out the DVD traverse mechanism as- DVD servo board sembly with the DVD servo board.
- Page 22 All manuals and user guides at all-guides.com 3.2.4 Removing the pickup (See Figs.5,7 to 9) • Remove the traverse mechanism assembly. Thrust spring Plate (1) From the side of the traverse mechanism assembly, solder the short land sections c on the pickup. (See Fig.5.) (2) Release the lock of the connector on the pickup in the di- rection of the arrow and disconnect the card wire.
- Page 23 All manuals and user guides at all-guides.com 3.2.5 Attaching the pickup (See Figs.5,7 to 10) • See "3.3.4 Removing the pickup". Feed gear M (1) Attach the shaft, SW actuator and LEAD spring to the pick- up. (See Fig.9.) (2) Align the pickup to the section j of the traverse mechanism assembly first, and set the both ends of the shaft of the pickup in the sections g and i of the traverse mechanism assembly.
- Page 24 All manuals and user guides at all-guides.com 3.2.7 Removing the spindle motor board (See Figs.11 and 13) • Remove the traverse mechanism assembly. Traverse mechanism assembly • Remove the DVD servo board. (1) From the top side of the traverse mechanism assembly, re- move the wires from the soldered section k on the spindle motor board.
- Page 25 All manuals and user guides at all-guides.com Cassette mechanism assembly section • Prior to performing the following procedures, remove the cassette mechanism assembly. (See "3.1.16 Removing the cassette mechanism assembly".) 3.3.1 Removing the main motor and replacing the main belts (See Figs.1 and 2) (1) From the front side of the cassette mechanism assembly, Cassette mechanism assembly...
- Page 26 All manuals and user guides at all-guides.com 3.3.3 Removing the clutch assemblies (See Figs.4 to 7) • Prior to performing the following procedures, remove the main Cassette mechanism assembly motor, main belts and F/R belts. • Remove the wires of the main motor as required. (1) From the front side of the cassette mechanism assembly, remove the three slit washers attaching the flywheel 1, fly- wheel 2 and flywheel 3.
- Page 27 All manuals and user guides at all-guides.com 3.3.4 Removing the leaf switches (See Fig.8) (1) From the back side of the cassette mechanism assembly, Switch board remove the solders from the soldered sections e attaching the leaf switches on the switch board. Wire (Black) (2) From the front side of the cassette mechanism assembly, Wire (Red)
- Page 28 All manuals and user guides at all-guides.com 3.3.7 Removing the R/P head block (See Fig.10) (1) From the front side of the cassette mechanism assembly, Cassette mechanism assembly release the claw m in the direction of the arrow 1 and pull R/P head out the pinch roller L in an upward direction.
- Page 29 All manuals and user guides at all-guides.com Subwoofer section 3.4.1 Removing the net assembly (See Fig.1) (1) From the front side of the subwoofer main body, remove Net assembly the sections a of the net assembly toward this side. Fig.1 3.4.2 Removing the front panel assembly (See Figs.2 and 3) •...
- Page 30 All manuals and user guides at all-guides.com 3.4.3 Removing the woofer (See Figs.4 and 5) • Prior to performing the following procedures, remove the front Woofer panel assembly. (1) From the front side of the subwoofer main body, remove the four screws A attaching the woofer. (See Fig.4.) (2) Take out the woofer from the subwoofer main body and disconnect the wires (red and black wires) from the termi- nals of the woofer.
- Page 31 All manuals and user guides at all-guides.com Speaker section 3.5.1 Removing the net assembly (See Fig.1) From the front side of the speaker main body, remove the sec- Net assembly tions a of the net assembly toward this side. Fig.1 3.5.2 Removing the front panel assembly (See Figs.2 and 3) •...
- Page 32 All manuals and user guides at all-guides.com 3.5.4 Removing the speaker (See Figs.4 and 5) • Prior to performing the following procedures, remove the front Speaker panel assembly. (1) From the front side of the speaker main body, remove the four screws B attaching the speaker.
-
Page 33: Adjustment
All manuals and user guides at all-guides.com SECTION 4 ADJUSTMENT Adjustment method 4.1.1 Measurement Instruments Required for Adjustment 4.1.4 Tuner section (1) Low frequency oscillator FM Band cover 87.5~108.0MHz This oscillator should have a capacity to output 0dBs to AM Band cover 531~1,602kHz (at 9kHz) 600Ω... - Page 34 All manuals and user guides at all-guides.com Arrangement of adjusting positions PB Head REC/PB Head Cassette mechanism assembly (Deck-A) (Deck-B) (Front side) Head azimuth screw Head azimuth screw (Forward side) (Forward side) Head azimuth screw Head azimuth screw (Reverse side) (Reverse side) 4.2.1 Tape recorder section Measurement...
- Page 35 All manuals and user guides at all-guides.com Service mode 4.3.1 Confirming contents (1) System micon reset (2) System micon cold start (3) FL display check (4) Micon version check (5) DVD region check (6) DVD test mode 4.3.2 Confirming methods 1.
- Page 36 You can confirm DVD region number. Press the STANDBY/ON and DVD LEVEL buttons on the main unit at standby. DVD region number is indicated on the on screen display. FL indication (Example) "4U ver.0116 MX-JD5 / FMU-DE3-1" REGION DVD unit number Firmware model Firmware version DVD destination 1-36 (No.MB263)
- Page 37 All manuals and user guides at all-guides.com 6. DVD test mode Insert the power cord in an outlet while pressing the SET and buttons on the main unit simultaneously. TEST FL indication TEST FE LEANING CONDITION REGION VERSION VERSION LIST: JC / 1U / D / E / 2U / 3U / UB / UT / 4U / UY / EE / UF INITIALIZE EEPROM Press the "PAUSE"...
- Page 38 All manuals and user guides at all-guides.com Press the "1" button on the remote controller. START PLAYBACK Press the "2" button on the remote controller. WOBBLE Press the "4" button on the remote controller. LIGHT UP CD_LD and DISPLAY LASER CURRENT Press the "5"...
- Page 39 All manuals and user guides at all-guides.com 4.3.3 Indicating check for FL display Function FL display Note DVD TEST MODE TEST START By AC cord on with holding SET and (Version info) : VERSION @: FE learning condition #: REGION By pressing PAUSE (Front) A.
-
Page 40: Troubleshooting
All manuals and user guides at all-guides.com SECTION 5 TROUBLESHOOTING This service manual does not describe TROUBLESHOOTING. 1-40 (No.MB263) - Page 41 All manuals and user guides at all-guides.com In regard with component parts appearing on the silk-screen printed side (parts side) of the PWB diagrams, the parts that are printed over with black such as the resistor ( ), diode ( ) and ICP ( ) or identified by the "...
- Page 42 All manuals and user guides at all-guides.com Block diagram EXADT0 to 15, EXADR16 to 20 DVD control section DC regulator section Primary section IC509 NEXWE, /FL_RST FLASH ROM A, B, C, D, E, F, RF+, PD(CD), PD(DVD) MA0 to 10 AC IN DVD pickup Q2010...
- Page 43 All manuals and user guides at all-guides.com Standard schematic diagrams Primary board with main transformer section F104 T3.15AL D2011 D2010 1N5402M-20 1N5402M-20 T001 S500 D2012 D2013 QSW0812-001 1N5402M-20 1N5402M-20 CTS4 F003 F103 T2AL F101 T6.3AL F001 CN250 QGA7901F2-02 F102 T6.3AL R2014 C2017 C2018...
- Page 44 D726 R778 10/35V C605 C606 C705 C706 220P 220P 220P 220P Q194 D703 D704 KRA111M-T Q713 R190 Q190 KTC1027/OY/-T 4.7K 2SC3576-JVC-T D622 MTZJ9.1B-T2 C722 Q612 KTA1267/YG/-T R191 R668 Q191 10/35 2SC3576-JVC-T 4.7K R602 C622 R676 10/35V C721 R192 R775 Q192 2SC3576-JVC-T 4.7K...
- Page 45 All manuals and user guides at all-guides.com External input / Source selector switch / System control section (SHEET 4) (SHEET 4) (SHEET 4) CN410 CN800 CN21 CN860 CN880 QGF1205C1-12 QGF1205C1-11 QGF1205F1-07 QGF1205C1-17 QGF1205C1-12 CN522 QGF1036C1-09 COUT VGND YOUT CrOUT D815 R412 CbOUT 1.2K...
- Page 46 R994 S961 S942 R974 Q987 C970 SBLED 100P C975 AUXLED C973 TUNERLED S950 S943 S962 R970 0.01 0.01 DVDLED TAPEALED 2SC3576-JVC-T TAPEBLED R959 R957 VCC5V DGND S963 S944 S951 J970 KEY2 KEY3 QNS0236-001 C959 R996 KEY1 HPSW 220P 4.7K ECHO1...
- Page 47 All manuals and user guides at all-guides.com Tape circuit / Mechanism control section Q360 KRC103M-T R335 RECL R337 R362 2.2K Q362 KRA111M-T C355 C356 0.01 220p R363 Q363 2SC3576-JVC-T 4.7K R333 R364 Q364 C354 2SC3576-JVC-T 47/50V 4.7K CN303 R332 QGF1205C1-13 C353 R365 Q365 100K 1/50V...
- Page 48 All manuals and user guides at all-guides.com DVD control system section (1/2) IC302 LM1117MP-ADJ-X P3.3V D1.2V C307 0.1/16 MDQ9 MDQ5 C101 0.1/16 VREFH MDQ10 K101 DGND TP325 C102 MDQ4 R330 ADCRST 0.1/16 R331 DAC1CS R332 DAC2CS MDQ11 R333 DEMP MDQ3 TP320 R307 MDQ12...
- Page 49 All manuals and user guides at all-guides.com DVD control system section (2/2) S3.3V IC711 IC505 SDMODE K591 C793 R793 K4S643232F-TC60 SDCD K592 C552 0.1/16 SDWP K593 IC509 R794 AT49BV322AT70TI IC512 C551 0.1/16 SDCMD K594 SN74LVC373APW-X LADD15 EXADR16 MDQ0 MDQ15 R792 LADD14 R531 K595...
- Page 50 All manuals and user guides at all-guides.com Printed circuit boards (Primary board) Power board FW109 (Main & Subwoofer amplifier board) (Regulator & Surround amplifier board) C203 PP201 Q728 Q727 D104 Q726 D103 D102 R108 D290 R109 C291 CN213 D212 D214 R727 R728 D728...
- Page 51 All manuals and user guides at all-guides.com Input board (Main board) R366 Q363 Q364 R365 Q362 Q360 R326 R368 R325 R361 CN301 C300 R304 C368 C324 R301 Q365 CN302 C359 R882 R316 R359 L317 C357 CN880 C375 C338 R337 Q316 C321 C353 C334...
- Page 52 All manuals and user guides at all-guides.com Front board (Switch board) (FL board) Q2010 R2011 Q2011 D2020 D2019 C2014 C2017 D2018 C2011 CN101 FT111 C2012 FT112 C2018 T001 FT532 FT531 FT131 FT132 FT512 FT511 FT521 FT522 FT151 FT152 (Transformer board) 2-11...
- Page 53 All manuals and user guides at all-guides.com DVD servo board Reverse side Forward side R356 K599 R457 IC508 TP310 IC453 TP31 TP32 R368 R535 TP33 TP34 C329 TP35 R792 TP37 IC301 C328 TP38 TP36 C310 C455 R793 R530 R531 R309 K595 R794 K561...
- Page 54 All manuals and user guides at all-guides.com PARTS LIST [ MX-JD5 ] * All printed circuit boards and its assemblies are not available as service parts. Area suffix US ---------------------- Singapore UW ---------- Brazil,Mexico,Peru UX ------------------- Saudi Arabia UE-----------------------------Turkey UN ----------------------------Asean...
- Page 55 All manuals and user guides at all-guides.com Exploded view of general assembly and parts list Block No. FL board This parts include in No.1. DVD servo control boa Switch board This parts include in No.1. Transformer boar F103 F104 F102...
- Page 56 All manuals and user guides at all-guides.com Video board 43 44 Speaker terminal board DVD servo control board Regulator & Surround amprifier board Main & Subwoofer amprifier board Transformer board F001 F003 Primary board F103 F101 F104 F102 Main board...
- Page 57 All manuals and user guides at all-guides.com General Assembly Block No. [M][1][M][M] Symbol No. Part No. Part Name Description Local GV10220-004A FRONT PANEL ASSY JD5UE,JD5UW GV10220-002A FRONT PANEL ASSY JD5UN,JD5US,JD5UX GV30576-002A FL LENS GV20277-004A FRONT COVER GV30577-001A FUNC.INDICATOR GV40485-002A REMOTE LENS GV40486-002A INDICATOR LENS...
- Page 58 All manuals and user guides at all-guides.com Symbol No. Part No. Part Name Description Local QYSBSGY3008E TAP SCREW M3 x 8mm QYSBSGY3008E TAP SCREW M3 x 8mm QYSBSGY3008E TAP SCREW M3 x 8mm(x2) QYSBSGY3008E TAP SCREW M3 x 8mm(x2) QYSBSGY3008E TAP SCREW M3 x 8mm...
- Page 59 All manuals and user guides at all-guides.com DVD mechanism assembly and parts list Block No. FTU-DE3-2M Grease =JVG-31N =CFD-4007ZY2 =PG-641 =1401C < Back side > ± 63.3mm 0.1mm ± 10.5mm 0.1mm...
- Page 60 All manuals and user guides at all-guides.com DVD mechanism Block No. [M][J][M][M] Symbol No. Part No. Part Name Description Local LE20725-001A MECHA BASE LE20699-002A SPINDLE BASE QYSDST2605M TAP SCREW M2.6 x 5mm(x2) LE40931-001A SHAFT LV33991-001A ADJUST SPRING QYSPSFU2040M TAP SCREW M2 x 4mm LE20698-004A FEED HOLDER...
- Page 61 All manuals and user guides at all-guides.com DVD loading base assembly and parts list Block No. FMU-DE3-2M Grease JVG-31N JVS-1003 (All circumference) Backside Switch Board...
- Page 62 All manuals and user guides at all-guides.com DVD loading base Block No. [M][N][M][M] Symbol No. Part No. Part Name Description Local LE10275-006A LOADING BASE LE31043-001A PULLEY GEAR LE31042-001A MIDDLE GEAR LE31044-001A IDLE GEAR LE20665-005A SLIDE CAM LE20666-003A ELEVATOR LE10276-002A TRAY LE31045-001A BUSHING...
- Page 63 DIGI TRANSISTOR C123 QCBB1HK-221Y C CAPACITOR 220pF 50V K Q181 KTC3203/OY/-T TRANSISTOR C124 QETN1HM-105Z E CAPACITOR 1uF 50V M Q190 2SC3576-JVC-T TRANSISTOR C125 QCBB1HK-221Y C CAPACITOR 220pF 50V K Q191 2SC3576-JVC-T TRANSISTOR C126 QETN1HM-105Z E CAPACITOR 1uF 50V M Q192...
- Page 64 All manuals and user guides at all-guides.com Symbol No. Part No. Part Name Description Local Symbol No. Part No. Part Name Description Local C270 QETN1HM-106Z E CAPACITOR 10uF 50V M R109 QRE141J-332Y C RESISTOR 3.3kΩ 1/4W J C271 QETN1HM-106Z E CAPACITOR 10uF 50V M...
- Page 65 All manuals and user guides at all-guides.com Symbol No. Part No. Part Name Description Local Symbol No. Part No. Part Name Description Local R236 QRL01DJ-181X OMF RESISTOR 180Ω 1W J R778 QRE141J-103Y C RESISTOR 10kΩ 1/4W J ...
- Page 66 JD5U C302 NCB31HK-102X C CAPACITOR 1000pF 50V K Q362 KRA111M-T DIGI TRANSISTOR C303 QFLC1HJ-104Z M CAPACITOR 0.1uF 50V J Q363 2SC3576-JVC-T TRANSISTOR C306 QETN1HM-226Z E CAPACITOR 22uF 50V M Q364 2SC3576-JVC-T TRANSISTOR C307 QETN1HM-475Z E CAPACITOR 4.7uF 50V M Q365...
- Page 67 All manuals and user guides at all-guides.com Symbol No. Part No. Part Name Description Local Symbol No. Part No. Part Name Description Local C359 QETN1HM-475Z E CAPACITOR 4.7uF 50V M C473 NCB31HK-272X C CAPACITOR 2700pF 50V K JD5U C474 NCB31CK-104X C CAPACITOR...
- Page 68 All manuals and user guides at all-guides.com Symbol No. Part No. Part Name Description Local Symbol No. Part No. Part Name Description Local C544 NCB31CK-224X C CAPACITOR 0.22uF 16V K R333 QRE141J-223Y C RESISTOR 22kΩ 1/4W J C545 NCB31CK-273X C CAPACITOR 0.027uF 16V K...
- Page 69 All manuals and user guides at all-guides.com Symbol No. Part No. Part Name Description Local Symbol No. Part No. Part Name Description Local R482 NRSA63J-203X MG RESISTOR 20kΩ 1/16W J JD5U N,JD5 R483 NRSA63J-203X MG RESISTOR 20kΩ 1/16W J R531 NRSA63J-103X MG RESISTOR...
- Page 70 All manuals and user guides at all-guides.com Symbol No. Part No. Part Name Description Local Symbol No. Part No. Part Name Description Local R805 NRSA63J-331X MG RESISTOR 330Ω 1/16W J R884 NRSA63J-102X MG RESISTOR 1kΩ 1/16W J R806 NRSA63J-221X MG RESISTOR 220Ω...
- Page 71 JD5U N,JD5 Q982 KRA111M-T DIGI TRANSISTOR N,JD5 US,JD C975 QDYB1CM-103Y C CAPACITOR 0.01uF 16V M US,JD JD5U JD5U N,JD5 Q987 2SC3576-JVC-T TRANSISTOR N,JD5 US,JD C976 QEKC1CM-226Z E CAPACITOR 22uF 16V M US,JD Q2010 KTC2026/OY/ TRANSISTOR JD5U Q2011 KTC3199/GL/-T TRANSISTOR...
- Page 72 All manuals and user guides at all-guides.com Symbol No. Part No. Part Name Description Local Symbol No. Part No. Part Name Description Local JD5U R943 QRE141J-151Y C RESISTOR 150Ω 1/4W J N,JD5 R944 QRE141J-221Y C RESISTOR 220Ω 1/4W J C985 QCBB1HK-151Y C CAPACITOR...
- Page 73 All manuals and user guides at all-guides.com Symbol No. Part No. Part Name Description Local Symbol No. Part No. Part Name Description Local JD5U FT111 QNG0003-001Z FUSE CLIP N,JD5 FT112 QNG0003-001Z FUSE CLIP R984 QRE141J-153Y C RESISTOR 15kΩ 1/4W J US,JD FT131 QNG0003-001Z...
- Page 74 All manuals and user guides at all-guides.com Block No. [0][5] Symbol No. Part No. Part Name Description Local Symbol No. Part No. Part Name Description Local C331 NCB31CK-333X C CAPACITOR 0.033uF 16V K C332 NCB31CK-104X C CAPACITOR 0.1uF 16V K IC201 LA6502-X C333...
- Page 75 All manuals and user guides at all-guides.com Symbol No. Part No. Part Name Description Local Symbol No. Part No. Part Name Description Local R205 NRSA63J-273X MG RESISTOR 27kΩ 1/16W J R703 NRSA63J-471X MG RESISTOR 470Ω 1/16W J R206 NRSA63J-303X MG RESISTOR 30kΩ...
- Page 76 All manuals and user guides at all-guides.com Packing materials and accessories parts list Block No. Surround x2 Center A1, A2, A3, A4, A5, A6, A7, A8, A9, A10, A17, A18 Front x2 Subwoofer 3-24...
- Page 77 All manuals and user guides at all-guides.com Packing and Accessories Block No. [M][3][M][M] Symbol No. Part No. Part Name Description Local QAL0014-001 AM LOOP ANT QAL0457-001 ANT.WIRE QAM0112-002 PLUG ADAPTOR JD5UE,JD5UN,JD5US,JD5UW QAM0216-001 SIGNAL CORD RM-SMXJD5A REMOCON JD5UE,JD5UW RM-SMXJD5U REMOCON JD5UN,JD5US,JD5UX ------------...
Need help?
Do you have a question about the MX-JD5 and is the answer not in the manual?
Questions and answers