
Related Manuals for VENTOXX HARMONY


Summary of Contents for VENTOXX HARMONY
- Page 1 Translated from Ukrainian to English - www.onlinedoctranslator.com INSTRUCTIONS ON INSTALLATION AND OPERATION OF VENTILATION SYSTEM WITH HEAT RECOVERY VENTOXX HARMONY Vital air 2021...
-
Page 3: Table Of Contents
5.3. Connecting recuperators to Ventoxx Twist control ......18 5.3.1. Wiring diagrams of fans and control Ventoxx Twist..19 5.3.2. Mounting the Ventoxx Twist control in the wall ............20 6. Completion of installation and commissioning ....... 21 6.1. Installing the inner cover ..............21 7. -
Page 4: Introduction
Leave feedback on the site: 1.1. Responsibility This manual is intended for installation and operation of the Ventoxx Harmony ventilation unit. The instruction is made with use of the data actual as of 01.07.2021. The content of the instructions may be updated and supplemented. -
Page 5: Safety Instructions
Ventoxx Harmony. Please note that there is a high risk of injury or damage to property and / or caution is required when working. -
Page 6: Ventilation Device
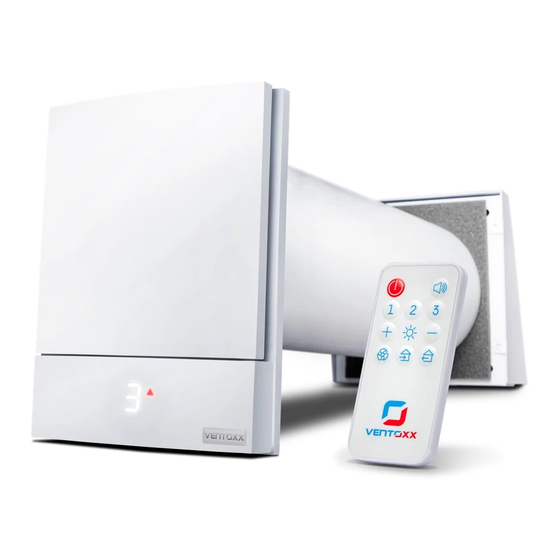
2. VENTILATION DEVICE 2.1. Purpose of the device Ventoxx Harmony ventilation device is a decentralized ventilation system with heat recovery (hereinafter - recuperator). Recuperators are installed in order to ensure autonomous air exchange in the premises and at the same time retain heat due to the effect of recovery. - Page 7 Ventoxx Twist control relay (according to a complete set) 13 - mounting plate of Ventoxx Twist control (according to a complete set) 14 - a box for installation of Ventoxx Twist control in a wall (according to a complete set) 15 - power...
-
Page 8: Technical Characteristics Of The Ventoxx Harmony Device
2.3. Technical characteristics of the Ventoxx Harmony device Number of operating modes Number of speeds Productivity of a recuperator, m³ / h 17 - 50 Recovery efficiency,% 74 - 86 12 - 22 Noise level at a distance of 3 m, dB... -
Page 9: Preparation For Insertion
3. PREPARATION FOR INSTALLATION 3.1. Location of devices Recuperator Ventoxx Harmony stationary general exchange ventilation. total productivity and efficiency depend on the correct placement of devices in the room, as well as qualified installation and proper use in accordance with the provisions of this instruction. -
Page 10: Safety At Work
• protection for the hearing organs; • head protection; • special work shoes. 4. INSTALLATION OF THE VENTOXX HARMONY DEVICE 4.1. Creating a hole in the wall To install the device, you must first make a round hole in the wall of the required diameter. - Page 11 metal cover pos. 8 and 9 in the picture of the complete set from the box, then add another 15 mm to this value. At a complete set with an external lattice pos.10 in drawing of a complete set from a box, it is not required to add anything to the measured thickness of a wall.
- Page 12 Step 4: Insert the ceramic heat accumulator into the air duct and push it in about half the length of the pipe. Align the air duct behind the center of the mounting hole with a slope of 0.6 to 2% toward the street. At the same time from the street the air duct should: - protrude from the wall by 10-15 mm, if you purchased a complete set with an external metal cover;...
- Page 13 Route the wires from the fan inside the room. Step 7 (optional): If your model comes with additional sound insulation in the form of a Ventoxx Star sound absorber, install it directly behind the fan - in the free space between the fan cartridge and the edge of the air duct.
- Page 14 Step 8: To prevent precipitation from entering the wall material or thermal insulation, the space between the hole in the wall and the air duct must be sealed on the outside of the building by applying a sealing mixture (plaster, mortar, sealant). Step 9: Attach the outer grille if your equipment involves closing the recuperator with a grille on the street side.
- Page 15 If the wall surface is rough or uneven, we recommend applying sealant to the inner surface of the plastic grille flange to eliminate the gap between the cover and the wall. Step 9-b: Attach the outer metal cover, if your equipment provides closing of the recuperator with a cover with protection against weather.
- Page 16 Step 10: Put the hood of the outer cover on top of the mounting plate, winding the lugs of the metal cover in the space between the wall and the mounting plate.
-
Page 17: Electrical Connection Of The Device
The main device - the only device that responds to signals remote control or Ventoxx Twist control. On this device, the user can enable the selected operating mode, as well as switch the connected slave device to the desired operating mode. -
Page 18: Connecting Recuperators To Ventoxx Twist Control
Wiring diagram of a pair of devices: 1 - active head unit; 2 - slave device. A three-core cable is used to control the slave devices. Depending on the length of the highway choose wires with the following cross-sectional area: •... - Page 19 Ventoxx Twist The Ventoxx Twist power supply has up to 4 ventilation devices. For swarms it is necessary to provide a larger forging device - 5 watts). I have Ventoxx Twist and Ventilation Devices to alternating current system with zik...
-
Page 20: Mounting The Ventoxx Twist Control In The Wall
5.3.2. Mounting the Ventoxx Twist control in the wall Step 1: Make a hole in the wall with a diameter of 70 mm and a depth of 120 mm. If the power supply is not installed in the mounting box, the extension cord can be removed. -
Page 21: Completion Of Installation And Commissioning
use a wire with a cross section of 3 × 0.75 mm². Step Mount the control box in the wall. Step 4: Apply 220 V to the power supply using a connector. Then connect the 12 V power supply to the Twist control. Step 5: Install the control in the mounting box so that the control knob moves clockwise. - Page 22 On the back of the inner cover is a mounting compartment, which contains connecting cables with connectors at the ends. To connect the appliance to the power supply, it is necessary to hook the cover of the mounting compartment with a screwdriver, as shown in the figure. Warning! Be careful not to damage the compartment lid electronics sealed with seals, their damage will lead to the removal of the device from the warranty.
-
Page 23: Operation
In recuperation mode, the ventilation unit can operate at the following speeds: 1 to 3 for remote control and 1 to 5 for Ventoxx Twist control. The choice of speed depends on the area of your room, the need for air exchange at a particular time and your wishes regarding the intensity of ventilation. - Page 24 always consistent: one device operates in the hood phase, the other - the air supply and vice versa. The selected speed is displayed as a number on the lid of the recuperator, and the arrow is blue or red: red means that the recuperator is operating in the extraction phase, blue - air supply.
-
Page 25: Automatic Ventilation
press the on / off button and the fan symbol button in sequence. The user can change the direction of air movement. This ventilation mode is required for rapid air renewal (for example, if the room has an unpleasant odor). 7.2. -
Page 26: Description Of The Indication Symbols On The Inner Cover
The indication on the screen shows the user-selected operating mode. The user can turn off the display using the remote control or Ventoxx Twist control - this does not affect the operation of the devices in any way. When switching operating modes, the indication briefly illuminates the selected mode and then goes out again. -
Page 27: Control With Ventoxx Twist Control
LEDs will light briefly (approx. 1 second) and switch off. To switch on the permanent display, press and hold the relay again for approx. 3 seconds. Warning! In a complete set of recuperators with management Ventoxx Twist indication on the inner covers of the Ventoxx Harmony recuperator is missing! - Page 28 arrow, to reduce - counterclockwise. Lower red LED on the left (off) A red LED on the bottom left indicates that the ventilation devices are off but power is on. Lower blue LED on the right (ventilation mode) The blue LED at the bottom right indicates that the recuperator is operating in ventilation mode without heat recovery.
-
Page 29: Maintenance Of The Device
To return to normal operation you need to turn the relay in any direction. To turn on the intensive ventilation mode: turn off the device turning the relay counterclockwise. The red LED lights up. Then press the button. A blue LED will light up at the bottom left and the recuperator will start to increase the ventilation power. -
Page 30: Cleaning The Heat Exchanger And Other Components
Step 3: Remove the Ventoxx Star sound absorber (if installed in the recuperator) and the fan cartridge from the air duct by pulling on the auxiliary cord. Remove the heat accumulator with the cord attached to it. - Page 31 Step 5c: To clean the Ventoxx Star sound absorber, vacuum, knock it out or rinse it under running water. Machine washing is not allowed! Be sure to dry it completely before reinstalling.
-
Page 32: Troubleshooting
8.3. Troubleshooting Error Possible solution: please check… Insufficient air flow • selected fan speed - if necessary, select a higher speed; • whether the removable panel on the inner cover is open, if it is closed - open it; • degree of contamination of the filter - if necessary, clean;... -
Page 33: Warranty Cards
9. WARRANTY COUPONS Buyer, full name: ___________________________________________________________________________ Address of installation of the ventilation device of TM "Ventox": ______________________________ _______________________________________________________________________________ Date of purchase: «___» ________ 20___ p. FAN № Installation date: «___» ________ 20___ p. place for «___» ________ 20___ p. Warranty to: gluing Warranty for battery heat up to:... -
Page 35: Quality And Guarantee
10. QUALITY AND WARRANTY Carefully read the instructions for installation and operation of the ventilation device TM "Ventox" before its installation and use. The warranty period for any Ventox TM product is 2 years from the date of purchase. The warranty on the heat accumulator is 10 years. Warranty obligations are to ensure the correct operation of the purchased device and related equipment, provided they are installed, started, used and maintained in accordance with the official manufacturer's instructions for a particular model... - Page 36 CONTACTS MANUFACTURER: www.ventoxx.ua/uk www.facebook.com/Ventoxx.ua Ukraine, 61060, Kharkiv, Moscow Avenue, 142 0 800 214 057 info@ventoxx.ua Technical support: +38 095 414 80 56...
Need help?
Do you have a question about the HARMONY and is the answer not in the manual?
Questions and answers