Table of Contents
Advertisement
Quick Links
Advertisement
Table of Contents

Subscribe to Our Youtube Channel
Related Manuals for Kogan SMARTERHOME KA2KVDBELA


Summary of Contents for Kogan SMARTERHOME KA2KVDBELA
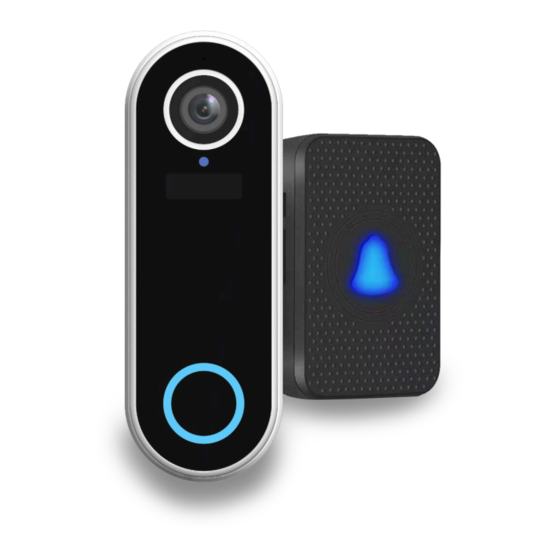
- Page 1 KOGAN SMARTERHOME™ 2K SMART DOORBELL WITH CHIME KA2KVDBELA...
-
Page 2: Table Of Contents
Components Overview Before First Use Connect to SmarterHome™ App App functions Installation Replacing a wired doorbell Google Home Control Amazon Alexa Control... -
Page 3: Components
COMPONENTS 1 Kogan 2K smart doorbell 5 Screws (x2) 9 Wire extensions (x2) 2 Bracket 6 Security screw 10 Allen key 3 Corner mount 7 Screws and plugs (x2) 11 USB charging cable 4 3M double sided tape 8 Wire nuts (x2) -
Page 4: Overview
OVERVIEW Doorbell and mount: Microphone microSD Lens card slot USB port Light Sensor Wiring Terminal Motion sensor (PIR) RCM label Ring button Magnetic metal... - Page 5 Chime: Volume Power Backward Forward Light Speaker Overview of details and functions: Component Description Lens Video capture Infrared LED Additional light in low-light conditions Light Sensor Sensor for the light Indicator light Indicator light shows the doorbell’s status Button to activate doorbell. A notification will be sent to the Ring button mobile app when ring button is pressed.
-
Page 6: Before First Use
BEFORE FIRST USE Fully charge the battery To charge the Smart Doorbell, lift the side cover and insert the Micro USB cable. Connect the other end of the cable to a 5V power adapter or a USB port to begin charging. Pair the Chime Before mounting the smart doorbell, ensure the device has been successfully paired to the chime. - Page 7 Local storage (optional) To use local storage (recording videos or screenshots), lift the cover on the side of the Smart Doorbell and insert a microSD card (maximum 128GB). When connected to the SmarterHome™ app while a compatible microSD card is installed, an additional menu will be present in the app settings.
-
Page 8: Connect To Smarterhome™ App
Install App Download the “Kogan SmarterHome” app from the Play Store (Android) or App Store (iOS). Register If you do not have a Kogan SmarterHome™ account, register or sign in with a verification code sent by SMS. To register: Tap to enter registration page. - Page 9 Set device in pairing mode When the device is first turned on, it may automatically enter pairing mode (the indicator light will be flashing red). If not automatically in pairing mode when powered on, you can manually set the device in pairing mode by press and hold the reset button the back for 3 seconds, until indicator light begins to flash red.
- Page 10 Calibrate the smart doorbell’s camera by holding your smartphone 15-20cm away from its camera lens until it successfully scans the QR code shown on the following screen of the setup. The device will make a Prompt sound to confirm, click “I heard a prompt”...
-
Page 11: App Functions
APP FUNCTIONS Microphone Mute or unmute the audio in the app Speaker Tap to talk to visitors Tap to take screenshots. These will be saved on the microSD Screenshot card memory. Tap to record videos. These will be saved on the microSD card Record memory. - Page 12 LED Indicator LED status Device status Fast blinking blue LED Trying to connect to Wi-Fi (5 times per second) Slow blinking red LED Ready or reset to successfully configure (2 times per 3 seconds) Slow blinking blue LED Connecting to service (1 time per 3 seconds) Blue and Red LED are off Sleep mode or offline...
-
Page 13: Installation
INSTALLATION Installing the Bracket or Corner Mount Follow the steps to place the Bracket or optional Corner Mount on your door, walls or frame. The optional Corner Mount offers a 25° angle for a better view of the smart doorbell, depending on the location. - Page 14 Installing with screw and plug set: Use the Bracket or Corner Mount as a template to mark the hole placement. If drilling into drywall or masonry, drill two holes for the plugs and insert them. Skip this step if installing on a wooden surface.
- Page 15 Mount the Bracket or Corner Mount with the screws set. If you choose to install with the Corner Mount, install it first, then place the bracket on the Corner Mount. Bracket Only Bracket + Corner Mount Installing with double-sided 3M tape: Simply peel one side of the tape and place to the Bracket or Corner Mount.
-
Page 16: Replacing A Wired Doorbell
REPLACING A WIRED DOORBELL Note: If your existing doorbell is not using a wired chime, it is not possible to connect the Smart Doorbell directly to the two wires. The Smart Doorbell can handle an alternative voltage of 12-24V. If you need help with this process or live in a region where it is illegal to work in the fuse box, hire a qualified electrician. - Page 17 Place the Kogan Smart Doorbell into the bracket Attach the Smart Doorbell to the bracket by inserting the top of the Smart Doorbell into the bracket and then pressing the button side into the bracket.
-
Page 18: Google Home Control
From the home page of the Google Home app, select the “+” icon to access the ‘Add and manage’ page. Select ‘Set up device’, then under the Works with Google banner, select ‘Have something already set up?’ Select the search bar and type ‘Smarter Home’ to locate the Kogan SmarterHome™ service. - Page 19 Tap ‘Authorise’ to grant Google permission to access the SmarterHome™ app and your devices. From here, you will be prompted to sign into your SmarterHome™ account using either your email or mobile phone number, depending on which method you used to register your account.
- Page 20 Tap on any of the devices to view a list of available commands. Note: Please note that Google Home can only control the base/core functions of any compatible SmarterHome™ devices. To make full use of this product’s smart functionality, please use the Kogan SmarterHome™ app.
-
Page 21: Amazon Alexa Control
AMAZON ALEXA CONTROL Note: You will need to have set up an Alexa account prior to linking your Kogan SmarterHome™ device. Adding “SmarterHome” to the Alexa app From the home page of the Alexa app, select the “ ” icon in the top-right and select Skills &... - Page 22 Tap ‘Enable to Use’ to add the Kogan SmarterHome™ skill to Alexa. From here, you will be prompted to sign into your SmarterHome™ account using either your email or mobile phone number, depending on which method you used to register your account.
- Page 23 SmarterHome™ account. When your devices have successfully connected to the Alexa app, you will be able to control your Kogan SmarterHome™ devices via Alexa’s voice commands. Note: Please note that Alexa can only control the base/core functions of any compatible SmarterHome™...
- Page 24 Need more information? We hope that this user guide has given you the assistance needed for a simple set-up. For the most up-to-date guide for your product, as well as any additional assistance you may require, head online to help.kogan.com...
Need help?
Do you have a question about the SMARTERHOME KA2KVDBELA and is the answer not in the manual?
Questions and answers