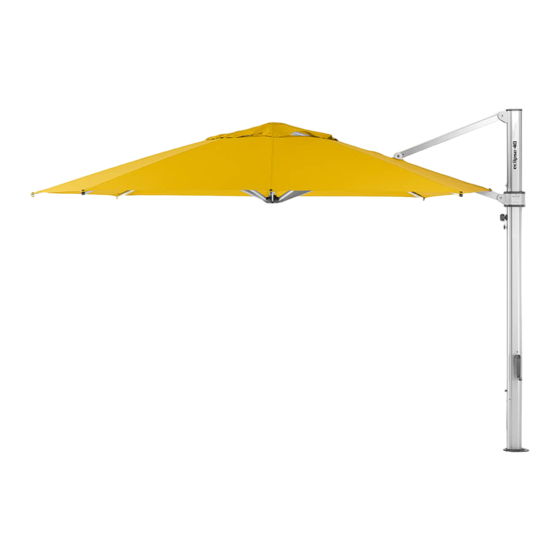
Summary of Contents for Frankford Umbrellas ECLIPSE
- Page 1 ECLIPSE ® OPERATION AND INSTALLATION MANUAL FRANKFORD UMBRELLAS NORTH AMERICAN HEADQUARTERS 110 Gaither Drive Mount Laurel, New Jersey 08054 856-222-4134 Info@frankfordumbrellas.com frankfordumbrellas.com...
-
Page 3: Table Of Contents
CASUAL / INTENSIVE FABRIC CARE & CLEANING UMBRELLA OPERATIONS OPENING ECLIPSE® CANTILEVER UMBRELLA CLOSING ECLIPSE® CANTILEVER UMBRELLA TABLE OF CONTENTS ROTATING THE ECLIPSE® CANTILEVER UMBRELLA INSTALLING THE WIND STABILIZER KIT ECLIPSE® PARTS KEY BASES & MOUNTING INSTALLATION IN-GROUND WOOD DECK SURFACE... -
Page 4: Before Installing
CORROSION RESISTANCE AND WILL RUST IF EXPOSED TO THE ELEMENTS. Wind ratings do NOT form part of, nor fall under, any Frankford Umbrellas’ warranties. Wind ratings are intended as a guide to the relative strength of the umbrellas only and tested at their optimal 90° and non- tilted positions. -
Page 5: Hardware And Corresponding Bases
DOUBLE GALVANIZED PLATE STACK CONFIGURATIONS AND OR MOUNTS. • NOT FOR USE WITH ANY ECLIPSE CANTILEVER BASE OPTIONS You may receive additional mounting hardware with your umbrella that is not needed for specific mounting selection. Please see the specific mounting installation pages in this manual for your specific hardware needed, and detailed mounting instructions. - Page 6 If the umbrella is not to be used for an extended period of time (winter months), you may remove the • Make sure your Eclipse® is dry and clean prior to storing away for extended periods of time to prevent umbrella from the Spigot (35), place in storage and then remove the Spigot as it can be a tripping mold from developing on dirt and directly onto the fabric.
- Page 7 FABRIC CARE CASUAL CARE & CLEANING • Brush off dust and dirt with a soft brush. NEVER brush with stiff brushes since this can damage the fabric Recacril® Marine Grade Acrylic Fabric Infinity Process is a highly technological finish, providing Recacril with finish.
-
Page 8: Guidelines To Consider Before Installing
ALIGNMENT CHECK THE SPACE Your Eclipse® Cantilever Umbrella can rotate 360° and be locked in 16 different locations. This means that Where possible, we recommend the umbrella is every 22.5° of rotation there is provision to lock the umbrella. In most situations there will be a preferred stood up in the desired installation location, and fully area over which you will predominantly want shade. -
Page 9: Opening Eclipse® Cantilever Umbrella
® ® OPENING ECLIPSE CANTILEVER UMBRELLA CLOSING ECLIPSE CANTILEVER UMBRELLA Remove the protective cover by unzipping Loosen the Slider Car Knob (26) and unlock the from the front. There will be two rods inserted 90° Locking Pin (27) if engaged. Your Slider Car... -
Page 10: Rotating The Eclipse Cantilever Umbrella
® ROTATING THE ECLIPSE CANTILEVER UMBRELLA INSTALLING THE WIND STABILIZER KIT IMPORTANT: • NOTE: There are 16 rotational-locking holes in the spigot. These location holes are found at • The Wind Stabilizer Kit can ONLY be used every 22.5° intervals around the spigot plate while the umbrella is at it’s optimal 90°... -
Page 11: Eclipse® Parts Key
MAST TOP BRACKET When the Eclipse® canopy is closed, the stainless steel cable pulley (30), are near the top of the most. When Eclipse canopy is open, the pulley (30) are lower down the mast towards the mid point. TOP HUB... -
Page 12: In-Ground
). Once your Spigot is FIGURE 4 secure to the mount, begin to lift the Eclipse® onto the Spigot until you hear an audible “click” indicating your umbrella is secure. INCLUDED IN-GROUND SPECIFIC MOUNTING HARDWARE 8MM ALLEN WRENCH (MOUNTING HARDWARE) - Page 13 ). Once your FIGURE 5 SPIGOT Spigot is secure to the Deck Plate, begin to lift the Eclipse® onto the Spigot until you hear an audible “click” indicating your umbrella is secure. FIGURE 5 INCLUDED DECK PLATE SPECIFIC MOUNTING HARDWARE...
- Page 14 ). Once your Spigot is FIGURE 4 FIGURE 4 secure to the Deck Plate, begin to lift the Eclipse® onto the Spigot until you hear an audible “click” indicating your umbrella is secure. FIGURE 3 DECK PLATE INCLUDED DECK PLATE SPECIFIC MOUNTING HARDWARE...
-
Page 15: 40Gx3 Round Galvanized Plate Stack
Once the second plate is set, remove the piece of foam used to protect your fingers and repeat steps 3 & 4 for the third 40G-Plate. Once all three plates are stacked, and over the Guide Pins, retrieve and remove the Spigot from the mast of your Eclipse® umbrella. -
Page 16: 36Gx3 Square Galvanized Plate Stack
FIGURE 2 third plate to complete the stack. Once all three plates are stacked, and over the Guide Pins, retrieve and remove the Spigot from the mast of your Eclipse® umbrella. Place the Spigot over the Guide Pins ( ) then remove the Guide Pins and you will have a clear visible path to the bottom FIGURE 3 plate’s threaded holes. -
Page 17: Ecu-480 Residential Rolling Base
BEFORE THE INSTALLATION OF ANY UMBRELLA. ECU-480 RESIDENTIAL ROLLING BASE Your Eclipse® comes with the Spigot (35) already inserted in the mast of your umbrella. Once you have properly leveled your base (If FIGURE 1 adjustable feet used) or have installed the caster wheels and have them in the locked position, you can begin to mount your Spigot (35) and then umbrella. - Page 18 Hand truck or Dollies to move the NGU-550 into your desired position more easily. Once you have decided on the location of the Eclipse umbrella, make sure you have an area of at least 48”-50” in diameter for the base to rest, then place NGU-550 into position.
- Page 19 Frankford Umbrellas’ defect and is not covered under any Frankford Umbrellas’ This warranty does not cover damage caused by contact This warranty does not cover damage caused by contact warranties.
- Page 20 FRANKFORD UMBRELLAS NORTH AMERICAN HEADQUARTERS 110 Gaither Drive Mount Laurel, New Jersey 08054 856-222-4134 Info@frankfordumbrellas.com frankfordumbrellas.com...


Need help?
Do you have a question about the ECLIPSE and is the answer not in the manual?
Questions and answers