
Related Manuals for Toro LoRa TEMPUS AIR PS


Summary of Contents for Toro LoRa TEMPUS AIR PS
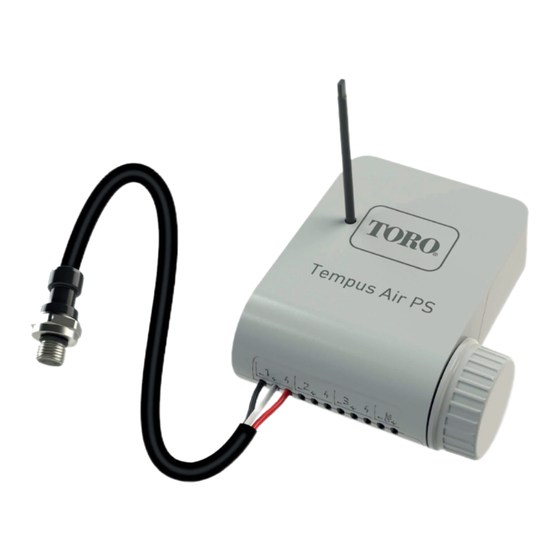
- Page 1 Toro Tempus Air PS Tempus Air PS 1 Pressure Sensor Input TEMPUS AIR PS Pressure Sensor module 1 Input USER'S GUIDE...
-
Page 2: Specification
Toro Tempus Air PS INTRODUCTION The Tempus Air PS is a sensor device powered by a 9V battery and used only for reading and controlling the pressure of your irrigation system. Thanks to the prewired pressure sensor, the Tempus Air PS will put the pressure under control and will alert if the tresholds are exceeded. -
Page 3: App Download
Step 1 APP DOWNLOAD 1. On your smartphone or tablet, go to the «App Store» or to the «Play Store» app 2. Search for «The Toro Company» in the search bar Developer The Toro Company 3. Once found, download the MyToroTempus App 4. - Page 4 Toro Tempus Air PS Step 2 ASSOCIATION 1. Unscrew the Tempus Air PS ’s cap 2. Plug the 9V 6LR61 ou 6AM6 battery and screw the cap 3. Launch MyToroTempus app from your smartphone and/or tablet. 4. Sign in with your MyToroTempus account 5.
-
Page 5: Sensor Installation
Toro Tempus Air PS Step 4 SENSOR INSTALLATION 1. Get closer than 10 meters from Tempus Air PS and make sure your smartphone's Bluetooth is turned on. 2. Launch MyToroTempus app from your smartphone or tablet. 3. Select the Tempus Air PS previously installed. (The smartphone and Tempus Air PS module, must be connected via Bluetooth) 4. -
Page 6: General Information
Toro Tempus Air PS GENERAL INFORMATION This symbol indicates that the product uses a LoRa technology radio. The symbol «CE» indicates that this device complies with the European standards on safety, health, environment and user protection. Devices with the symbol «CE» are intended for sale in Europe. - Page 7 Toro Tempus Air PS Tempus Air PS Modulo Sensore Pressione TEMPUS AIR PS Modulo sensore di pressione 1 ingresso GUIDA PER L’UTENTE...
-
Page 8: Linee Guida Per L'installazione
Toro Tempus Air PS INTRODUZIONE Tempus Air PS è un dispositivo con sensore alimentato da una batteria da 9V e utilizzato unicamente per leggere e controllare la pressione dell’impianto di irrigazione. Grazie al sensore di pressione precablato, Tempus Air PS terrà... - Page 9 Toro Tempus Air PS Passaggio 1 DOWNLOAD DELL’APP 1. Sul proprio smartphone o tablet, visitare “App Store” o “Play Store”. 2. Digitare “The Toro Company” nella barra di ricerca. Sviluppatore The Toro Company 3. Una volta trovata, scaricare l’ A pp MyToroTempus 4.
- Page 10 Toro Tempus Air PS Passaggio 2 ASSOCIAZIONE 1. Svitare il tappo di Tempus Air PS. 2. Inserire la batteria 6LR61 o 6AM6 da 9V e avvitare il tappo. 3. Avviare l’applicazione MyToroTempus dal proprio smartphone o tablet. 4. Accedere con il proprio account MyToroTempus.
-
Page 11: Installazione Del Sensore
Toro Tempus Air PS Passaggio 4 INSTALLAZIONE DEL SENSORE 1. Avvicinarsi a meno di 10 metri da Tempus Air PS e assicurarsi che il Bluetooth del proprio smartphone sia acceso. 2. Avviare l’app MyToroTempus dal proprio smartphone o tablet. 3. Selezionare il Tempus Air PS precedentemente installato. (Lo smartphone e il modulo Tempus Air PS devono essere collegati via Bluetooth). -
Page 12: Informazioni Generali
Toro Tempus Air PS Toro Tempus Air PS INFORMAZIONI GENERALI Questo simbolo indica che il prodotto utilizza una radio con tecnologia LoRa Il simbolo “CE” indica che questo dispositivo è conforme alle normative europee su sicurezza, salute, ambiente e protezione dell’utente. I dispositivi con il simbolo “CE” sono destinati alla vendita in Europa. - Page 13 Toro Tempus Air PS Tempus Air PS 1 entrée capteur de pression Tempus Air PS Module capteur de pression 1 entrée GUIDE DE L’UTILISATEUR...
-
Page 14: Spécifications
Toro Tempus Air PS INTRODUCTION Le Tempus Air PS est un module capteur alimenté par une pile 9V et utilisé uniquement pour la lecture et le contrôle de la pression du système. Grâce au capteur de pression déja installé, le Tempus Air PS met sous contrôle la pression et vous alerte en cas de dépassement de seuil. -
Page 15: Téléchargement De L'application
Toro Tempus Air PS Étape 1 TÉLÉCHARGEMENT DE L’APPLICATION 1. Sur votre smartphone ou tablette, accédez à «App Store» ou «Play Store» 2. Recherchez « The Toro Company » dans la barre de recherche. Concepteur The Toro Company 3. Une fois trouvée, téléchargez l’application MyToroTempus. - Page 16 Toro Tempus Air PS Étape 2 ASSOCIATION 1. Dévissez le bouchon du Tempus Air PS. 2. Insérez la pile 9 V 6LR61 ou 6AM6 et revissez le bouchon. 3. Démarrez l’application MyToroTempus depuis votre smartphone et/ou votre tablette. 4. Connectez-vous avec votre compte MyToroTempus.
- Page 17 Toro Tempus Air PS Étape 4 INSTALLATION DU MODULE CAPTEUR 1. Approchez-vous à moins de 10 mètres du Tempus Air PS et vérifiez que la fonction Bluetooth de votre smartphone est activée. 2. Lancez l’application MyToroTempus depuis votre smartphone ou votre tablette.
-
Page 18: Informations Générales
Toro Tempus Air PS INFORMATIONS GÉNÉRALES Ce symbole indique que le produit utilise une radio de la technologie LoRa Le symbole « CE » indique que cet appareil est conforme aux normes européennes en matière de sécurité, de santé, d’environnement et de protection des utilisateurs. Les appareils portant le symbole « CE »... - Page 19 Tempus Air PS 1 entrada sensor de presión Tempus Air PS Módulo sensor de presión 1 entrada GUÍA DEL USUARIO...
-
Page 20: Especificaciones
Toro Tempus Air PS INTRODUCCIÓN El Tempus Air PS es un módulo de sensor alimentado por una batería de 9V y utilizado solo para lectura y control de presión del sistema. Gracias al sensor de presión ya instalado, el Tempus Air PS pondra la presión bajo control y le avisará... -
Page 21: Descarga De La Aplicación
Paso 1 DESCARGA DE LA APLICACIÓN 1. En su smartphone o tableta, vaya a «App Store» o «Play Store». 2. Busque «The Toro Company» en la barra el buscador. Desarrollador The Toro Company 3. Cuando lo haya encontrado, descargue la aplicación MyToroTempus App 4. - Page 22 Toro Tempus Air PS Paso 2 SINCRONIZACION 1. Retire la tapa del compartimiento de la pila del Tempus Air PS 2. Conecte la pila de 9 V 6LR61 o 6AM6 y coloque la tapa. 3. Haga clic en el botón Añadir un nuevo programador o en el botón «+».
-
Page 23: Instalación Del Sensor
Toro Tempus Air PS PASO 3 INSTALACIÓN DEL SENSOR 1. Acérquese a menos de 10 metros del Tempus Air PS y compruebe que la función Bluetooth de su el teléfono está activado. 2. Inicie la aplicación MyToroTempus desde su smartphone o tabletaa. -
Page 24: Información General
Toro Tempus Air PS INFORMACIÓN GENERAL Este símbolo indica que el producto utiliza tecnología de radio LoRa El símbolo «CE» indica que este aparato cumple con las normas europeas de seguridad, salud, medio ambiente y protección del usuario. Los dispositivos con el símbolo «CE» están destinados a la venta en Europa. - Page 25 Toro Tempus Air PS Tempus Air PS 1 Drucksensor-Eingang TEMPUS AIR PS Drucksensor Modul 1 Eingang BEDIENUNGSANLEITUNG...
-
Page 26: Spezifikationen
Toro Tempus Air PS EINFÜHRUNG Der Tempus Air PS ist ein mit einer 9V-Batterie betriebenes Sensorgerät, das ausschließlich zum Ablesen und Steuern des Drucks Ihres Bewässerungssystems verwendet wird. Dank des vorverdrahteten Drucksensors kontrolliert der Tempus Air PS den Druck und warnt, wenn die Schwellenwerte überschritten werden. Die Schwellenwerte können über die MyToroTempus-Anwendung oder -Plattform eingestellt werden. - Page 27 Schritt 1 HERUNTERLADEN DER APP 1. Mit dem Smartphone oder Tablet zum „App Store“ oder „Play Store“ gehen. 2. In der Suchleiste nach „The Toro Company“ suchen. Entwickler The Toro Company 3. Sobald Sie sie gefunden haben, laden Sie die...
- Page 28 Toro Tempus Air PS Schritt 2 VERBINDUNG 1. Schrauben Sie den Deckel des Tempus Air PS ab. 2. Stecken Sie die 9V-Batterie 6LR61 oder 6AM6 ein und schrauben Sie den Deckel wieder auf. 3. Starten Sie die MyToroTempus-App von Ihrem Smartphone und/oder Tablet.
- Page 29 Toro Tempus Air PS Schritt 4 SENSORINSTALLATION 1. Gehen Sie näher als 10 Meter an Tempus Air PS heran und stellen Sie sicher, dass die Bluetooth-Funktion Ihres Smartphones eingeschaltet ist. 2. Starten Sie die MyToroTempus-App von Ihrem Smartphone oder Tablet.
-
Page 30: Allgemeine Informationen
Toro Tempus Air PS Toro Tempus Air PS ALLGEMEINE INFORMATIONEN Dieses Symbol zeigt an, dass das Produkt ein Funkgerät mit LoRa -Technologie verwendet. Das CE-Zeichen bedeutet, dass dieses Gerät den europäischen Normen für Sicherheit, Gesundheit, Umwelt und Anwenderschutz entspricht. Geräte mit dem CE-Zeichen sind für den Verkauf in Europa bestimmt. -
Page 31: Declaration Of Conformity
Toro Tempus Air PS DECLARATION OF CONFORMITY The Toro Company declares that TEMPUS AIR PS conforms to the following directives and standards: Directive 2014/53/UE (RED) Following standards: BLE standard : ETSI EN 300 328 v2.2.2 RADIO standard : ETSI EN 300 220-2 v3.1.1 & ETSI EN 300 220-1 v3.1.1... -
Page 32: Declaracion De Conformidad
5825 Jasmine Street Riverside,CA92504 USA Tel. +1 (951) 688-9221 DECLARACION DE CONFORMIDAD The Toro Company declara que TEMPUS AIR PS cumple con las siguientes directivas y estándares: Directiva 2014/53/UE (RED) Siguientes estándares: Norma BLE : ETSI EN 300 328 v2.2.2 Norma RADIO : ETSI EN 300 220-2 v3.1.1 &...