
Related Manuals for Panasonic Lumix FZ300K


Summary of Contents for Panasonic Lumix FZ300K
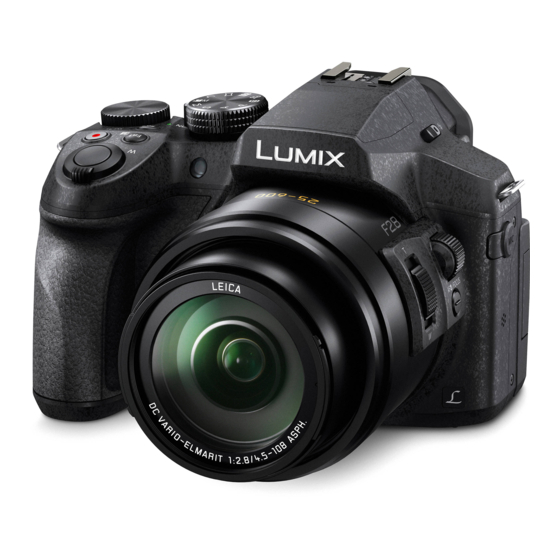
- Page 3 Panasonic Lumix FZ300k: A Beginner’s Guide Copyright © 2015. All are rights reserved. This book or any portion thereof may not be reproduced or used in any manner whatsoever without the express written permission of the publisher except for the use of brief quotations in a book review. Introduction Panasonic has released the attest in its line of auto focus systems. The Panasonic Lumix FZ300k or the DMC-FZ300k as it is also known continues the trend of versatility while maintaining the need to appeal to the high calibre photo enthusiasts. The new model is the updated version of the current FZ200 and though retaining a number of its features, boasts enhancements of its own. The FZ300k camera is equipped with a twelve (12) megapixel BSI-CMOS sensor, a three- inch OLED tilting display, a 2.3M dot OLED electronic viewfinder, a 25-600 millimetre equivalent F2.8 lens, 4K photo and video support, continuous shooting of up to twelve frames per second, weather sealing casing and built-in Wi-Fi connectivity. The aim of this piece is to introduce users to the features of the new Lumix FZ300K camera. We will also provide the necessary instructions needed to effectively use some of the camera’s basic features. It is hoped that at the end of the book, users of this new piece of technology will be sufficiently equipped with the requisite knowledge to enjoy the features available on the FZ300k camera. Facts/Features 1. Weight The FZ300k camera is compact in design. With the memory card and battery pack inserted, the device weighs in at approximately 1.52 pounds or 691 grams. Dimensions The camera measures 131.6 X 91.5 X 117.1 millimetres or approximately 5.2 X 3.6 X 4.6 inches (W X H X D). Physical Design The camera is designed for endurance and durability with splash-proof and dustproof material. Extra protection is offered against exposure to water, moisture,...
- Page 4 Accessories The device comes equipped with a standard set of accessories. These are the VFC4453 Shoulder strap, DE-A80A Battery charger, AC mains lead, DVD-ROM, USB Cable, Lens cap, Lens Hood, Lens cap string and the DMW-BLC12E rechargeable Lithium-ion battery pack, Additional Accessories Users of the new FZ300k camera are also able to purchase additional accessories to maximize the user experience. A few of these accessories are the DMW-LA7 Lens, DMW-AC10 AC Adapter, Wireless Flash, a PL Filter and the Panasonic Lumix FL580L Flash: Hybrid Flash System with Built-in Video LED. Power ON/OFF The lever to power on the device can be found to the top right of the camera. To turn the device on, move the switch up towards ‘ON’ and downwards to ‘OFF’ to power down as desired. Status indicator This feature is located to the right of the power switch and appears in the form of a light whenever the device is powered on and in use. Power Source The FZ300k camera is powered by a 7.2 VDC, 1200 mAh 1x DMW-BLC12E rechargeable Lithium-ion battery pack and AC adapter. Charging the Battery To charge your DMW-BLC12E battery, insert it into the charger, ensuring that the arrow is positioned on top and facing inwards. The AC mains lead should be used to connect the charger to an electrical outlet to commence charging. When charge is complete, immediately remove the battery from the charger. Charging Light This feature is designed to indicate the various states of charging. When the charge light is on it means charging is in progress. The charge light with be turned off when charge has been completed. If the charge light is flashing it usually indicates that the battery or charger may require cleaning. The flashing light on the charger could also suggest that the battery’s temperature is either too high or too low and must be adjusted. Charging Time ...
- Page 5 An exhausted DMW-BLC12E battery must be charged for approximately two hours and 15 minutes prior to being reinserted into your device. It is important to note that overall charging time will always depend on the frequency with which the battery pack is used or the environment in which the device is used and stored. Inserting the Battery The battery chamber is located to the lower right side of the camera. Open the chamber by sliding the door lock down towards ‘OPEN’. The battery should then be turned with the arrow facing up and in and the battery inserted into the designated slot until a locking sound is heard to confirm that the battery is securely in place. The user should check that the lever on the outside of the battery chamber is hooked securely over the battery. Close the chamber door thereafter before the device is powered on. Compatible Memory Cards Users of the Lumix GX8 camera are encouraged to use only SD (512MB to 2GB), SDHC (4GB to 32GB) and SDXC (48 GB to 128GB) memory cards in the device. Inserting the Memory Card The slot for the memory card can be found to the top of the battery chamber on the lower right side of the camera. To insert your card, open the chamber by sliding the door lock down towards ‘OPEN’. The card should then be rotated to ensure that the terminal is faced up and in towards the chamber then inserted into the designated slot. Close the chamber door thereafter before the device is powered on. Formatting the Memory Card Users of the Lumix FZ300k are asked to format the memory card of chosen prior to saving images or videos from the device. To correctly format your memory card, press the MENU/SET button located to rear right of the camera and enter the MENU option. From the options displayed, select the setup icon followed by the ‘Format’ option. Shutter Release Button The feature is located to the top right of the FZ300k and serves two primary functions. Press the shutter release button half way down to achieve focus for the intended shot as well as to display the current aperture value and shutter speed on the monitor. When the shutter button is pressed all the way down, the action is completed and the displayed images captured. Monitor The Lumix FZ300k camera comes equipped with a three-inch OLED free-angle touch panel. The monitor is designed with 1040k dot resolution and has the ability...
- Page 6 The monitor is designed to tilt and turn during use. To open the monitor, insert a finger into the cleft located to the right of the monitor and pull outwards. The monitor can then be turned up to 180 degrees for varied shooting angles. Users are reminded to return the monitor to the body of the camera when no longer in use. Using the Touch Screen The screen is capacitive and allows users to employ the use of Pinch, Touch or Drag to complete a number of tasks. Use the Pinch feature for zooming in or out on an image, the Touch for selecting features and icon and the Drag operation to move to another image while in playback mode without releasing the screen. 4K Technology This feature is designed to allow users of the FZ300K camera the opportunity to capture high resolution still shots at a speed of thirty frames per second with the 4K Ultra HD Video. The feature will allow the extraction and creation of eight megapixel images from the 4K Ultra HD Video sequence of up to QFHD (3840 x 2160 pixels) with 100 megabytes. 4K Photo Modes This feature of the new Panasonic camera is designed to allow users to capture high resolution still images at rapid speeds of approximately thirty frames per second with the 4K Ultra HD Video. The feature will allow the extraction and creation of eight megapixel images from the 4K Ultra HD Video sequence of up to QFHD (3840 x 2160 pixels) with 100 megabytes. Zoom The zoom feature of the FZ300k camera is available with two levers. The side lever is located to the left side of the lens, while the device zoom lever on the device can be found to the top right of the camera. The lever should be moved towards the ‘T’ to make the subject appear larger and ‘W’ when a wider area is required for the shot. The new camera is designed to also capture and store still shots in the RAW format. The device is also designed to develop these photos directly inside the device. Other File Formats The device is able to create still shots in both JPEG and RAW formats while videos are captured and stored in AVCHD (version 2.0) and MPA. Audio recordings made with the FZ300k camera are stored in AAC format. Attaching the Lens Hood...
- Page 7 Prior to attaching the lens hood to your camera, users are encouraged to power off the flash and the camera. The user should then align the mounting marks on both the lens and the hood and attach; rotating the hood in a clockwise direction until it clicks securely into place. When the hood clicks into place the mounting marks on both the hood and the bottom of your camera should be aligned. Attaching the Lens Cap This feature is designed to protect the lens when the camera is not in use. To securely attach the lens cap, take the string from the group of camera accessories and insert one end into the hole on the camera. The other end of the strip should then be passed through the lens cap and the lens cap passed through the loop of the string before being tightened. The lens cap can then be attached to the front of the lens. The Mode Dial The mode dial for the FZ300k can be found to top right of the camera. The feature is designed to allow a user to select the desired mode for use during photo shoots. Modes of Operation The modal options for the Lumix FZ300k camera are Intelligent Plus mode, Intelligent Auto Plus Mode, Program AE Mode, Aperture-Priority AE mode, Shutter-Priority AE Mode, Manual Exposure mode, Creative Video Mode, Custom Mode, Panorama Shot Mode, Creative Control Mode and Scene Guide Mode. Focus Mode Lever The feature can be found top rear of the camera beside the Electronic viewfinder. It is designed to set how focus will be achieved when the shutter release button is pressed half way down. There are three focus options available to users; MF, AFC and AFS/AFF. AFC is one form of auto focus on the device and repeatedly attempts focus for subjects that are in motion. AFS and AFF allow the camera to auto set the focus and adjust where necessary when the user presses the shutter release button half way down. MF speaks to a manual focus operation when the device for whatever reason is unable to achieve focus automatically. Side Dial This dial is located to the left side of the camera’s lens. It can be rotated to modify or adjust focus; both auto and manual. The auto focus adjustment can however only be modified with the side dial when the focus mode lever is set to ‘AFF/AFS’. The dial...
- Page 8 Switching the Role of the Side Dial To alter the function of the side dial, press the ‘MENU/SET’ button to the rear of the camera and enter the ‘MENU’ settings. From the available options, select the ‘Custom’ icon followed by the option for ‘Side Button Setting’ and the ‘F/SS’ option. The user should then press the side button and rotate the side dial to alternate function. Side Button This feature of the FZ300k camera is located to the right side of the lens, just below the side dial. When pressed, the button allows users to carry out one of two functions. It can alter the function of the side dial as well as requesting the focus operation during a photo shoot. Wi-Fi Connection Lamp This feature can be found to the top right of the camera. It will light up to confirm that the device is connected to a wireless network. Wi-Fi Control The camera is Wi-Fi certified and is designed to allow users to use the Panasonic Image App from a Wi-Fi activated device to remotely control the FZ300k. The user can enjoy viewing, transfer of photos right from the mobile device. The focus of an intended subject may be adjusted and the shutter button released to capture the image; all using the Wi-Fi connection. Activating Wi-Fi To enable the Wi-Fi function, press the function button to which the feature has been assigned and touch the icon. The Wi-Fi icon will be displayed thereafter. Electronic Viewfinder The Lumix FZ300k camera is outfitted with an OLED Viewfinder that boasts 1,440k dot of resolution, 0.7 times magnification capabilities and enhanced visibility due to the 10,000:1 ratio. The viewfinder is designed as a subject viewing option for the device and can be found to the top center rear of camera. LVF Button The button can be found on the top left of the device, next to the Viewfinder. It is...
- Page 9 The FZ300k camera is outfitted with a twelve megapixel ultra-sensitive MOS eye sensor. The feature allows for automatic switching between the viewfinder and the monitor for viewing by detecting when the user’s eye or an object comes close to the viewfinder. Diopter Adjustment Dial This feature is located to the left side of the Electronic Viewfinder to the top rear of the Lumix FZ300k camera. It is to be rotated to sharpen the appearance of images being viewed in the viewfinder until they appear as desired. Optical Image Stabilizer The device comes equipped with a five-axis HYBRID Optical Image Stabilizer Plus. The inclusion of this feature minimizes the presence of blur in videos being shot with one hand. This is done with the use of movement compensation. The Shot Function on the stabilizer will detect and maintain the imaginary horizon line, regardless of whether or not the camera shifts. DFD Technology This new technology from Panasonic is known as Depth-From-Defocus (DFD). The feature will auto ascertain the distance that exists between the background and front of the intended shot and rapidly attempt focus using a continuous motion. Using the Intelligent Auto Modes The mode dial to the top right of the camera should be rotated to activate the Auto Modes on the device. The user should then lift the camera to the face and point towards the intended subject. In Auto Mode, the camera will automatically identify the scene and setting most ideal; displaying the selected scene to the top left of the screen thereafter. Alternating Between Intelligent and Intelligent Plus Modes Users wishing to utilize the Auto modes feature of the FZ300k camera have the option of using either Intelligent Auto Plus Mode and Intelligent Auto Mode. To alternate between either of the options, first press the ‘MENU/SET’ button to the rear of the camera and then press the left arrow of the selector. The up and down arrows of the selector or the side dial should be used to choose or as the preference. Press the ‘MENU/SET’ button to confirm selection.
- Page 10 This feature is designed to allow users to create one photo from a combination of multiple images. The device will capture different exposures of a single subject and combine the best aspect of each shot to create the ideal shot in rich gradation. To activate the feature, go to the MENU and select the option for ‘Rec’ followed by ‘iHDR’ and then select ‘ON’ or ‘OFF’. Whenever the feature is activated, ‘HDR’ will be displayed on the monitor. Defocus Control The defocus control gives the user the ability to create images with blurred backgrounds. This feature can only be effectively used while the camera is set to Intelligent Mode or Intelligent Plus Mode and can be set during viewing of the intended subject. To utilize the feature first simply press on the Fn2 button. This will display the screen for adjusting the settings. The user should then rotate the rear dial located to the top of the camera to modify the defocusing as desired. Setting Exposure The brightness or exposure level of the intended image can be modified. To utilize the feature first ensure that the camera’s mode dial is set to Intelligent Auto Plus The user should then press the button and rotate the rear dial to modify as desired. To exit and return to the shooting screen, press the button a second time. Motion Picture Button This feature is designed for recording motion pictures and can be found on the top right side of the camera. The button should be pressed to commence a recording. When the recording is started, the user should remove the finger from the button and press it a second time when the recording is to be stopped. Reviewing Motion Pictures Motion pictures can also be reviewed by entering the Playback mode. To start playback, press the up arrow of the selector followed by the play button that will appear in the center of the screen. Motion pictures are indicated by the icon. To peruse the stored images and locate motion pictures, use the left and right arrow keys of the selector. Deleting an Image To remove a single image from the camera the user should press the button located to the lower rear right of the device. The up arrow of the selector should then be used to select the option to ‘Delete Single’ and the ‘MENU/SET’ button pressed thereafter. When the delete confirmation screen appears, tap on ‘Yes’ to remove the...
Need help?
Do you have a question about the Lumix FZ300K and is the answer not in the manual?
Questions and answers