Advertisement
Quick Links
Advertisement

Summary of Contents for Hi-Target iHand55
- Page 1 iHand55 Handheld Controller User Manual ...
-
Page 2: Manual Revision
iHand55 Handheld Controller User Manual Manual Revision Revision Date Revision Level Description iHand55 Handheld Controller November, 2021 User Guide A1 ... - Page 3 iHand55 Handheld Controller User Manual iHand55 Handheld Controller User Manual ...
- Page 4 Welcome to the Hi-Target iHand55 handheld controller. This introduction describes how to use this product. Experience Requirement In order to help you use Hi-Target series products better, Hi-Target suggests you carefully read the instructions. If you are unfamiliar with the products, please refer to http://www.hi-target.com.cn/. Tips for Safe Uses ...
-
Page 5: Relevant Information
iHand55 Handheld Controller User Manual Technology and Service If you have any technical issues, please call Hi-Target technology department for help, we will answer your question. Relevant Information You can obtain this introduction by: 1. After purchasing Hi-Target products, you will find this manual in the instrument container to guide you on operating the instrument. - Page 6 iHand55 Handheld Controller User Manual Chapter 1 iHand55 Handheld Controller This chapter contains: Introduction Appearance Controller accessories Operation Application ...
- Page 7 In order to improve the stability and usage cycle of the iHand55 hand-held controller, please avoid exposing it to extreme environments, such as humidity, high temperatures, low temperatures, corrosive liquids or gases, etc.
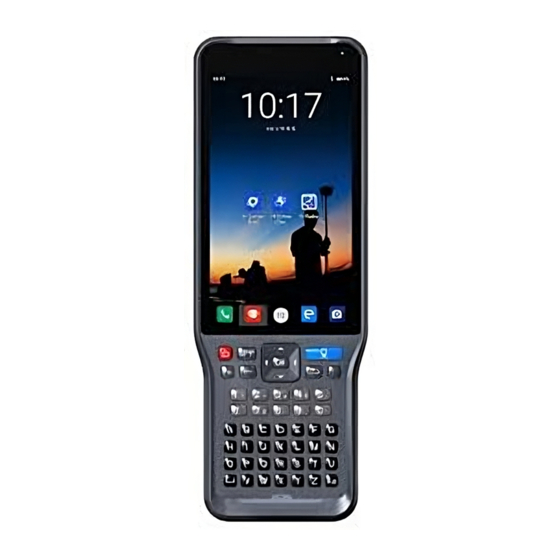
- Page 8 The iHand55 hand-held controller must be used within the temperature range from -20℃ to 60℃ 1.2 Appearance 1.2.1 Front of the controller The front of the iHand55 controller includes a touch screen, keyboard microphone and indictor light. Figure 1‐2‐1 iHand55 controller 1- Indictor light 2- Microphone...
- Page 9 iHand55 Handheld Controller User Manual 1.2.2 Reverse side of the controller There is a camera, belt, NFC, trumpet, etc. on the reverse of the controller. Figure 1‐2‐2 the backside of the iHand55 1- Camera 2- NFC 3-Trumpet 4- Belt hole ...
-
Page 10: Controller Accessories
iHand55 Handheld Controller User Manual 1.2.3 Side of the controller Figure 1‐2‐3 the port of iHand55 1- Waterproof & dustproof rubber cover 2- Type-C port - Type-C port: for connecting the USB data line and the controller. Notice: When not using Mini USB, please close the rubber cover to make it waterproof and dustproof. -
Page 11: Operation
1.4 Operation 1.4.1 Keyboard Most settings and operations of the iHand55 hand-held controller can be completed by the touch pen, and commonly used operations can be completed on the keyboard. Appearance and functions of the keyboard are as follows. - Page 12 Mobile phone storage→Pictures→ Screenshots. (note: iHand55 does not set the shortcuts screenshot function). Notice: When the iHand55 hand-held controller is not used, please turn off the backlight to save electricity and prolong working time. ...
- Page 13 1.4.3 Power system 1. The battery model of the iHand55 hand-held controller Table 1‐4‐1 the battery model Name Model...
- Page 14 3 hours. After that, the iHand55 supports fast charging with the original charger and the charge time is then less than 3 hours. If the battery is not used often, it must be charged once every two months.
- Page 15 PDAs. If you buy this, please note the difference to ordinary SD cards. The volume of the ordinary SD card is larger than the Micro SD card, and is not suitable for the iHand55 hand-held controller. Step1:remove the left side cover and expose the Micro SIM card slot..
- Page 16 iHand55 Handheld Controller User Manual Micro SD card slot Figure 1‐4‐7 Micro SD slot Figure 1‐4‐8 Installation of Micro SD card 1.4.6 Power on/off In the off state, long press the power button for 3 seconds, it will power on. Figure 1‐4‐9 The interface of the iHand55 screen In the power on state, long press the power button for 3 seconds, it will prompt to shut down and to confirm, click Power off.
- Page 17 iHand55 Handheld Controller User Manual Figure 1‐4‐10 Power off 1.5 Application 1.5.1 Connecting the controller to computer 1. Connect the controller to computer via the USB data cable. 2. Transfer files: pull down the notice column and click USB for charging.
- Page 18 iHand55 Handheld Controller User Manual Figure 1‐5‐2 Charging Figure 1‐5‐3 File transfers 3. Connect the PC version mobile phone assistant: open the hand-held controller, click Setting → System → Developer options → USB debugging. Figure 1‐5‐4 Settings Figure 1‐5‐5 Developer options ...
- Page 19 1.5.2 Upgrade method iHand55 controller supports two methods for upgrading, local upgrade and wireless upgrade. 1. Local upgrade of iHand55 controller (download the firmware from the Hi-Target official website first). Step1: copy the upgrade firmware to the SD directory. ...
- Page 20 iHand55 Handheld Controller User Manual Figure 1‐5‐8 Update App Step3: open the System Update App, as shown below. Figure 1‐5‐9 Interface of the update Step4: click the top right menu selection in the interface, and choose Local updates. Figure 1‐5‐10 Local updates Step5: enter the interface. ...
- Page 21 iHand55 Handheld Controller User Manual Figure 1‐5‐11 Local updates Step6: select the Internal storage file, then select the update firmware. Figure 1‐5‐12 Choose the firmware Step7: after selecting the upgrade firmware, click Install Now. ...
- Page 22 iHand55 Handheld Controller User Manual Figure 1‐5‐13 Install Step8: the system will restart and begin to update. Figure 1‐5‐14 Interface of upgrade 2. Wireless update Step1: select the System Update App. ...
- Page 23 iHand55 Handheld Controller User Manual Figure 1‐5‐15 Update App Step2: after entering the System update App, if there is a new version, the interface will show it and display the update. The complete update content will appear if you draw up the screen.
- Page 24 iHand55 Handheld Controller User Manual ...
Need help?
Do you have a question about the iHand55 and is the answer not in the manual?
Questions and answers