
Subscribe to Our Youtube Channel
Related Manuals for Prinetti IA5001


Summary of Contents for Prinetti IA5001
- Page 1 40cm DC PEDESTAL FAN IA5001 INSTRUCTION MANUAL Please read and save all instructions to ensure safe and effective use of this Appliance...
-
Page 2: Table Of Contents
Contents Important Safety and General Instructions Getting To Know Your DC Fan Parts List Diagram Before First Use Assembly Instructions Operating Instructions Cleaning, Care and Maintenance Warranty Information 02 AFTER SALES SUPPORT AU 1300 777 137 NZ 0800 824 556 service@unclebills.com.au... -
Page 3: Important Safety And General Instructions
1. Read all instructions before using the Prinetti® Pedestal Fan DC 40cm. 2. Close supervision is necessary when any appliance is used by or near children. 3. Do not use the Fan for other than its intended use. - Page 4 Important Safety and General Instructions (cont.) 14. Never force the adaptor plug into a power outlet. 15. To reduce the risk of electrocution, never operate this product with wet hands, submerge underwater or spill liquids into the product. 16. Do not leave the Fan unattended when in use. 17.
-
Page 5: Getting To Know Your Dc Fan
Getting To Know Your DC Fan More Power Efficient than a Normal Fan A typical 40cm Pedestal Fan will use up to 50 watts per hour, while a DC Fan can use as low as 3 watts per hour on the lowest setting. A DC Fan is also operated via the use of a Low Voltage AC Power Adaptor instead of using Mains Power to operate as per normal Fans. -
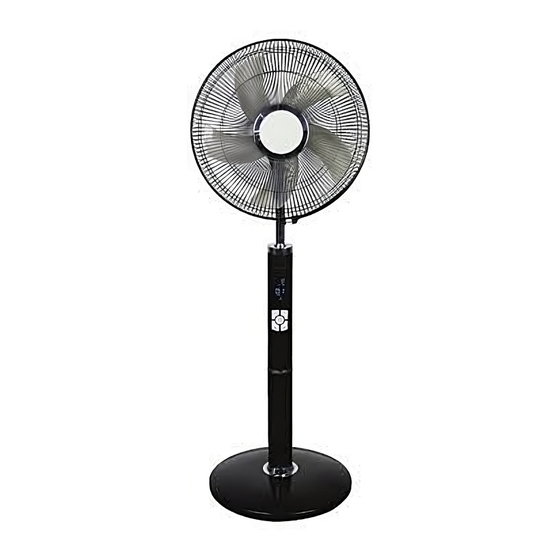
Page 6: Parts List Diagram
Parts List Diagram 1. Remote Control (2 x AAA batteries not included) 2. Front Grille 3. Grille Ring 4. Blade Locking Cap 5. Blade 6. Grille Locking Nut 7. Rear Grille 8. Motor Shaft 9. Motor Housing 10. Height Adjustable Screw (located on the rear) 11. - Page 7 Parts List Diagram (cont.) Remote Control 1. ON Button 5. Timer + Button 2. Mode Button 6. Timer – Button 3. Speed + Button 7. Swing Button 4. Speed – Button 8. OFF Button Control Panel Display Panel 1. Speed Button 1.
-
Page 8: Before First Use
Before First Use Prior to using your Fan, please read all safety and operating instructions thoroughly. Please ensure you follow the steps below before using this Fan. We recommend you keep the original packaging for storing your Fan when not in use. 1. -
Page 9: Assembly Instructions
Assembly Instructions NOTE: The Fan can be used only when completely and correctly assembled, that is complete with base, support, and protection grilles. Using Fig. 1 below, to help you assemble the fan as follows: Fig. 1 1. Remove all parts of the Fan from the gift box and lay out in front of you. 2. - Page 10 Assembly Instructions (cont.) 6. Attach the main body (13) with connected extension pole (15) to the weighted base (19) using the locking screw (20) at the underside of the weighted base (19), tightening it securely. 7. Tighten the height adjustment screw (10) to your desired height. Assembling the Fan Head Using Fig.
- Page 11 Assembly Instructions (cont.) 6. Test the fan by rotating the blade with your hands, ensuring there is no contact with the blade locking cap. The fan blade should rotate freely. 7. The front and rear grille are held together with a grille ring (3), which has two grooves, one for each of the grilles.
-
Page 12: Operating Instructions
Operating Instructions Remote Control The Fan has a remote control that allows for remote operation of the Fan functions. When using the remote control ensure that you are in eyesight of the Fan and are pointing the remote control directly at the Fan. NOTE: If the Fan is unresponsive, move closer to the Fan and ensure that there is nothing between the remote control and the Fan itself. - Page 13 Operating Instructions (cont.) 4. The Fan has 15 speed settings, 1 being lowest and 15 being highest. Press the SPEED+ button on the remote control or the SPEED- button on the remote control to increase or decrease the Fan speed, or the SPEED button on the control panel. Each time you press the button the selected speed will be shown on the LED display panel.
-
Page 14: Cleaning, Care And Maintenance
Cleaning, Care and Maintenance Always switch off and unplug the Fan from the power outlet before moving or cleaning. 1. To clean the exterior of the Fan, wipe over the surface with a soft, damp cloth and dry thoroughly. Do not use detergents or abrasive cleaners. 2. -
Page 15: Warranty Information
Warranty Information Congratulations on your purchase This Prinetti® Pedestal Fan DC 40cm is warranted to be free from defects in material and workmanship under normal use and service conditions for a period of 12 months from the date of purchase of this article. Evidence of unfair usage or incorrect adjustment by the owner will void this promise. - Page 16 9:00am – 3:00pm (AEST) Saturday This product is warranted and imported by: Uncle Bill’s (Australia) Pty Ltd 48B Egerton Street Silverwater NSW 2128, Australia Phone: 02 8799 3500 Item: IA5001 16 AFTER SALES SUPPORT AU 1300 777 137 NZ 0800 824 556 service@unclebills.com.au...
Need help?
Do you have a question about the IA5001 and is the answer not in the manual?
Questions and answers