Table of Contents
Advertisement
Quick Links
Advertisement
Table of Contents

Subscribe to Our Youtube Channel
Related Manuals for Cosmo JrTrack 2


Summary of Contents for Cosmo JrTrack 2
- Page 1 User Guide Click here to Open (This will open a PDF in a new tab)
-
Page 2: Table Of Contents
Contents Click a section to jump to it! WELCOME GETTING STARTED COSMO CONNECT APP DOWNLOAD & PAIRING MENU NAVIGATION ADD CONTACTS MESSAGING SAFEZONES LOCATION TRACKING & HISTORY CLASS MODE, PEDOMETER & ALARMS WATCH BASICS TROUBLESHOOTING ADD ANOTHER DEVICE... -
Page 3: Welcome
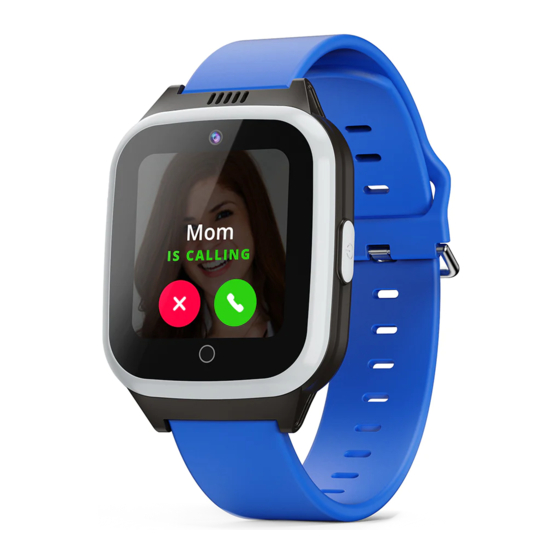
Welcome! Hello! And welcome to the COSMO family! We’re so excited that you’re here with your COSMO JrTrack 2 Smartwatch – we hope you love it! This user guide will give you step-by-step instructions to help you get your watch set up and customized in no time. If you have additional questions or run into any problems, please give us a call. - Page 4 Getting Started Get to Know your JrTrack 2 Camera Home/Back Button Charging Port On/Off Button SIM Card Tray SIM is Pre-Installed...
-
Page 5: Getting Started
Getting Started Get Started Turn on your JrTrack 2 Press and hold the On/Off button on for two seconds to turn the watch on. If the watch doesn't turn on, it likely needs to be charged. Charge the watch for a few... - Page 6 COSMO: Mission Control App The COSMO Connect Plan is your The Mission Control app is how you pass to all things COSMO. This is interact with and control JrTrack 2. necessary to be able to Use this app to call, message, check communicate with your JrTrack 2.
-
Page 7: Cosmo Connect
Getting Started Get a COSMO Connect Plan Scan the QR code on the Select Register. package insert for "App Download" or go to Note: You will only select "Sign In" if you are www.cosmotogether.com troubleshooting and re- In the main menu, in the... - Page 8 Getting Started Register Enter your name and Check your email and email, then tap Register. look for an email from COSMO Connect. Enter the provided 6-digit code here. Note: Be sure to check the spam folder or "Promotions" email tab if...
- Page 9 Getting Started Verify Your Watch Scan the QR code on the back of your JrTrack 2 watch, or manually enter the IMEI noted on the back of watch and the side of the box.
- Page 10 Getting Started Choose a Plan Review COSMO's Review plan details and click flexible connect plan "Purchase Subscription" options and select a below to select the plan. card to review all plan details. Tip: Pre-paying for a longer connect plan costs less per month.
- Page 11 Getting Started Complete your Purchase Copy your JrTrack 2's new phone number, so you can paste it during pairing. You will also get an email with this phone number. Note: If you are activating more than one device, tap the X on the top right, and...
-
Page 12: App Download & Pairing
Download the App Scan the QR code below for either Android or iOS. You can also go to the Apple App Store or Google Play Store and search “COSMO: Mission Control” Android Once you've downloaded the app, follow the steps to pair your watch, and you're all set! - Page 13 Getting Started Sign in to the App Create a COSMO: Confirm the email Mission Control you used to create account or sign in your COSMO: if you already Mission Control have one. account. Note: This is your After confirmation, COSMO Mission Control App account.
- Page 14 Getting Started Pair your Device Scan the QR code on On the watch, Go to your device's screen, Settings > Pair then paste the phone Device to open the number you copied QR code onscreen. earlier. If you don't see the QR code come up, you can manually type in the IMEI found on the...
- Page 15 Getting Started Finish Pairing Enter the 8-Digit You're all set! It may up to Code displayed on 24 hours for data to be your device, then fully activated. tap Next. Note: This is case- Tap "Start Using" to jump sensitive into the app! Note: Save the device to your contacts for easier...
-
Page 16: Menu Navigation
- Access & send Messages your starting point - Activity Center (for features to access all of the like Pedometer, School Mode, main features of the and setting reminders) COSMO: Mission - Account & App Settings Control App. - Support... - Page 17 Device Home Screen: To view & customize From the device home settings for each screen, you can select JrTrack 2 device, start from any of the quick by tapping on "My action tool bar options Devices" from the below (Send Message,...
- Page 18 Menu & Navigation Data & Settings (cont.) Device Data & Device Settings: Settings: Here you can set how This is the Data & often location is updated, Settings Menu for the when the tracking period selected device. Here is active, and unpair the you can access device.
-
Page 19: Add Contacts
App Functions Add Contacts Select All Contacts from the main menu. Tap the Plus button in the bottom right corner. - Page 20 App Functions Add Contact (cont.) There are two contact types: To add a Guardian, under Account Type, Contact: Can only make Select Guardian. Add and receive calls. the Guardian's Name, Phone #, and email. Guardian: Can make and +1 (000) 000-0000 receive calls, send and example@gmail.com Tap the check mark to...
- Page 21 Rachel Norman Invited you to be a Guardian to accept the Jacob Follow the invitation. instructions in the email by having the Now they're set up, Guardian download and can call, send the COSMO: Mission messages, check Control App, and location, and more! create an account.
-
Page 22: Messaging
App Functions Messaging Tap Messages from Send texts, voice the Main Menu. messages, and photos! Note: The JrTrack 2 can only send text messages that are preset in the Mission Control app. See the next page for adding preset messages! - Page 23 Add. These will automatically appear as Then, tap Preset options on your selected Messages from the Jrtrack 2 device! Device Data & Settings Tip: You can add as many Menu. present messages for your kid as you like! The JrTrack...
-
Page 24: Safezones
App Functions Add a Safezone In the Main Menu, tap Tap the Plus button in Safezones. the bottom right-hand corner to add a new Safezone. Any existing Safezones will be shown on this page. - Page 25 App Functions Define the Safezone 1) Locate Area: Find where you want the Safezone to be on the map, or search it in the search bar directly below the map. 2) Set the Zone: Long-press in the center of exactly where you'd like the Safezone to be on the map.
-
Page 26: Location Tracking & History
App Functions Location Tracking Tap Map View from Tap Refresh Location the Main Menu. to get the most up to date location. Tip: You can also access Tip: To save battery, the tracking by tapping My watch normally only Devices on the main refreshes location every menu and selecting the 30 mins. - Page 27 App Functions Location History In the Device This map shows Data & Settings timestamped locations Menu, tap on of the watch. You can Location History. go back further in time by tapping the calendar and selecting new dates.
-
Page 28: Class Mode, Pedometer & Alarms
App Functions Class Mode Tap Activity Center Select the Class Tap the Plus on the Menu. Mode icon. button. Name the distraction-free time and set the hours, and days of the week for it to be active. Tap the Check mark to save. - Page 29 App Functions Pedometer Tap Activity Center Tap the Tap the Plus on the Menu. Pedometer icon. button. This screen displays calorie burn and step 3,557 count for the 14,000 day, week & 37,000 month. Tap the 1500 Plus button to 1000 set a step goal!
- Page 30 App Functions Set a Reminder Select Activity Center Tap the Tap the Plus from the menu. Reminders icon. button below. Set the time and name of the reminder, and select the days of the week for it to be active.
-
Page 31: Watch Basics
Basics Watch Basics Wake and Unlock To preserve battery, the watch screen will go to sleep when inactive. To wake up your watch, hit the power button on the right side. To use the watch, swipe left. Keep swiping left to access all apps within the watch. - Page 32 Basics Watch Basics Return to home To get out of any watch app, hit the Home button (circle at the bottom of the watch face). It will take you “backwards.” Make calls To make calls, tap the phone icon. Select the contact you'd like to call.
- Page 33 Basics Watch Basics Adjust volume You can adjust either the ringtone volume or the alarm volume. On the watch, go to Settings, then tap Device. Scroll down below the brightness slider to the volume slider. Camera On the watch, scroll to Camera. The watch will take any front-facing picture.
- Page 34 Basics Watch Basics Alarm, Timer, and Stopwatch Set an alarm, timer, or stopwatch by selecting the Clock. Adjust as desired. SOS immediately calls the admin of the Mission Control app. To activate SOS mode on the watch, hit the power button twice while on the homescreen.
-
Page 35: Troubleshooting
Troubleshooting Troubleshooting Restart the Watch! As a general catch all- one of the first things to try that actually solves a surprising amount of issues is restarting the watch. Do this by holding down the power button until you see the option menu come up. -
Page 36: Add Another Device
Add another Device Index To add another device, sign in to Tap "Add Plan" in the your COSMO Connect portal at upper righthand corner. www.cosmo-connect.gigs.tel This time, tap Sign In. - Page 37 Add another Device Index Choose your new plan. Confirm your plan by tapping Connect your SIM.
- Page 38 Add another Device Index Scan the QR Code on Confirm your plan by the back of the watch. tapping Connect your SIM.
- Page 39 Add another Device Index From here, pairing is the Scan the QR code. Tap "Next" same as the first device.
- Page 40 Index Add another Device In the Main Menu, tap "My Rachel Norman Devices." Then tap "Add Device" Jacob's and enter basic info.
Need help?
Do you have a question about the JrTrack 2 and is the answer not in the manual?
Questions and answers